Cherries Time

Original tutorial can be found HERE
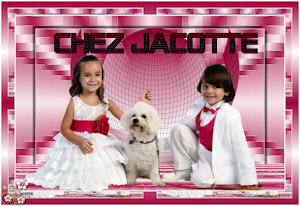

Material
tubes by Jacotte - 1 alpha layer - 1 decoration tube

Filters Used
Mehdi/Weaver
Mock/Windo
Simple/Blintz & Centre Tile
Mirror Rave/Quadrant Flip
Xera/Art Work
Vanderlee/Unplugged X/Vertical Tile & Defocus
AP01 [Innovations]/Lines Silverlining/Dotty Grid
Alien Skin Eye Candy 5 IMpact/Extrude
Filter Factory D/Inspirator
Colors
color 1 -> foreground color -> #ffffff
color 2 -> background color -> #d30d11

in the materails palette, prepare a linear gradient/ 45 / 2 /uncheck « invert »
open the tubes, the layer and the decortion
duplicate them and close the originals. Work with the copies

Use the pencil to follow the steps
left click to grab it
 |

Realization
Step 1
activate the alpha layer, fill with the gradient
adjust/blur/gaussian blur/25
Step 2
effects/plugins/Mehdi/Weaver
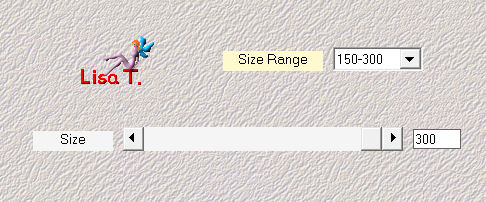
adjust/sharpness/sharpen more
Step 3
layers/duplicate
effects/plugins/Mock/Windo
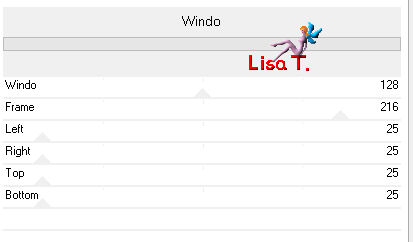
Step 4
effects/image effects/seamless tiling
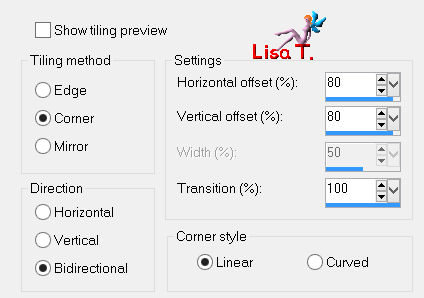
Step 5
layers/duplicate
image/flip
in the layers palette, set the opacity on 50%
layers/merge/merge down
Step 6
activate the tube « élément décor »
edit/copy - back to your work - edit/paste as new layer
Step 7
effects/plugins/Simple/Blintz
Step 8
effects/plugins/Mirror Rave/Quadrant Flip
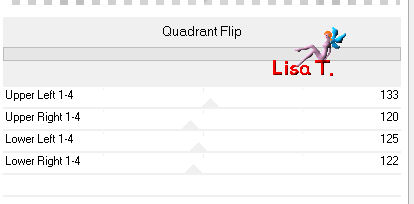
Step 9
selections/load-save selection/from alpha channel/selection #1
selections/promote selection to layer
selections/select none
effects/texture effects/blinds/color 2
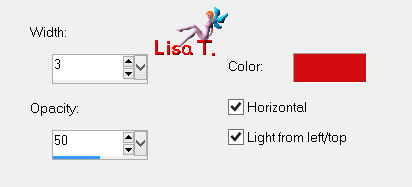
Step 10
layers/duplicate - image/mirror
layers/merge/merge down
Step 11
layers/duplicate - image/flip
layers/merge/merge down
Step 12
effects/3D effects/drop shadow/color 2
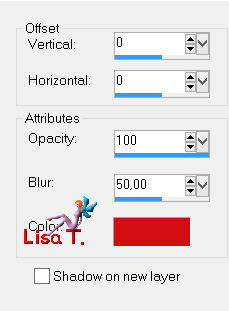
Step 13
layers/new raster layer
selections/load-save selection/from alpha channel/selection #2
fill the selection with the following sunburst gradient
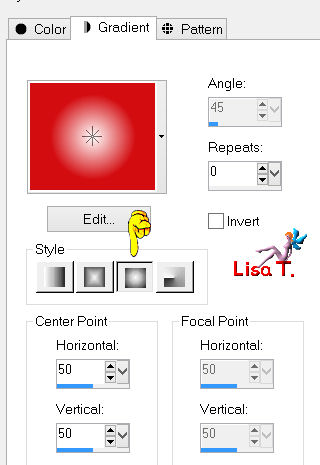
Step 14
effects/plugins/Xero/Artwork
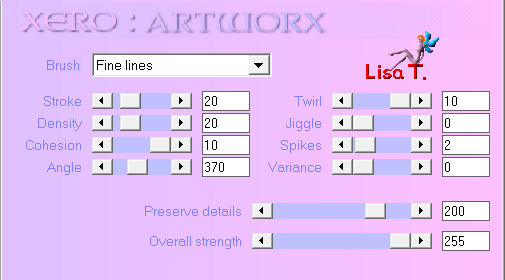
selections/select none
Step 15
effects/plugins/Vanderlee/Unplugged-X/Vertical Tile
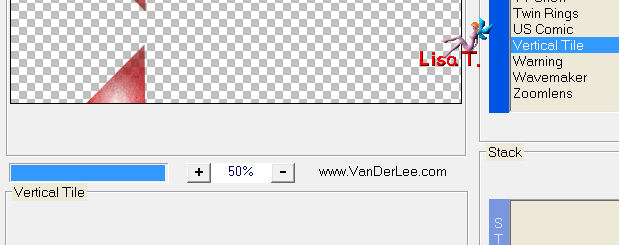
Step 16
layers/duplicate - image/mirror
layers/merge/merge down
effects/3D effects/drop shadow

your layers palette looks like this
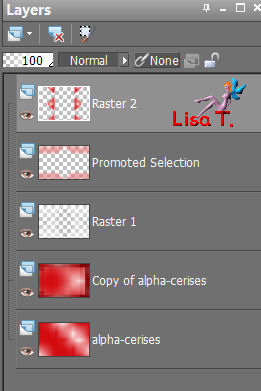
Step 17
in the layers palette, activate the bottom layer (Alpha layer)
selections/load-save selection/from alpha channel/selection #3
selections/promote selection to layer
selections/select none
layers/arrange/move under « Raster 2 »
Step 18
effects/plugins/Vanderlee/Unplugged-X/Defocus
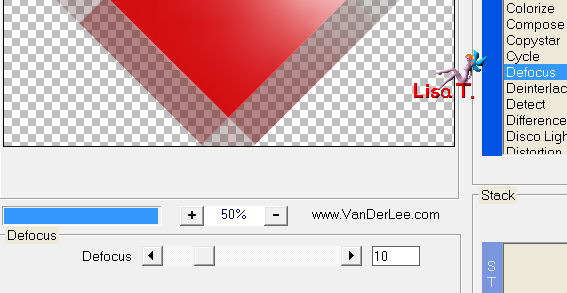
set the opacity on 45%
effects/edge effects/enhance
Step 19
in the layers palette, activate « copy of alpha-cerises » (second from the bottom)
selections/load-save selection/from alpha channel/selection #4
selections/promote selection to layer
effects/plugins/AP01 [Innovations]/Lines Silverlining/Dotty Grid
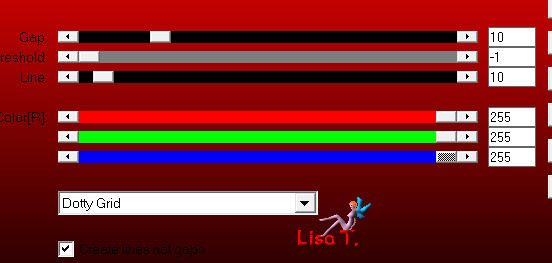
set the opacity on 55%
selections/select none
Step 20
layers/duplicate - image/mirror
layers/merge/merge down
Step 21
effects/3D effects/drop shadow/ 0 / 0 / 100 / 50 / color 2
Step 22
in the layers palette, activate the top layer
layers/new raster layer
selections/load-save selection/from alpha channel/selection #5
effects/3D effects/drop shadow/ 0 / 0 / 100 / 50 / black
selections/select none
Step 23
effects/Simple/Centre Tile
Step 24
in the layers palette, close the visibility of the bottom layer (Alpha layer)
activate the top layer
layers/merge/merge visible
Step 25
in the layers palette, the merged layer is activated
selections/load-save selection/from alpha channel/selection #6
selections/promote selection to layer
effects/plugins/Alien Skin Eye Candy 5 Impact/Extrude/color 2 as solid color
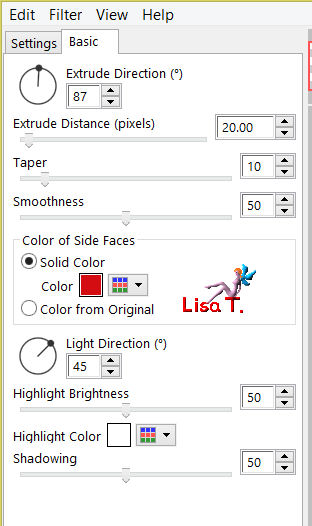
selections/select none
Step 26
effects/3D effects/drop shadow/ 0 / 0 / 100 / 50 / black
Step 27
activate the tube « tube-jacotte-panier de cerises »
edit/copy - back to your work - edit/paste as new layer
image/resize/uncheck « resize all layers »/75%
Step 28
effects/image effects/offset
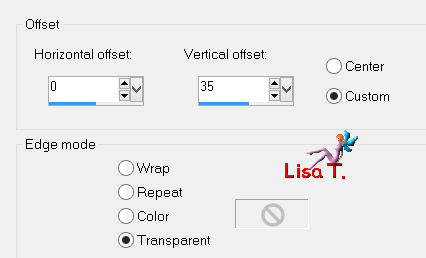
effects/3D effects/drop shadow/ 1 / 1 / 100 / 2 / black
Step 29
open the visibility of the bottom layer (alpha layer) and activate it
edit/copy
Step 30
layers/merge/merge all (flatten)
Step 31
layers/promote background layer
Step 32
image/canvas size
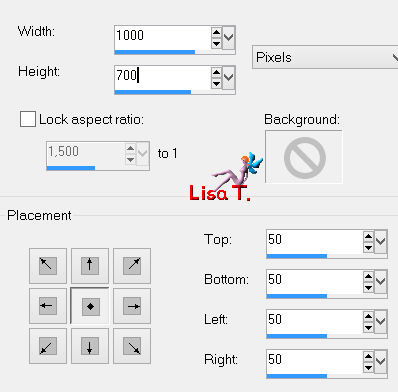
Step 33
layers/new raster layer
selections/select all
edit/paste into selection
Step 34
adjust/blur/gaussian blur/25
Step 35
selections/modify/contract/2 pixels
fill the selection with linear gradient/ 45 / 5 / uncheck « invert »
Step 36
effects/Filter Factory Gallery D/Inspirator
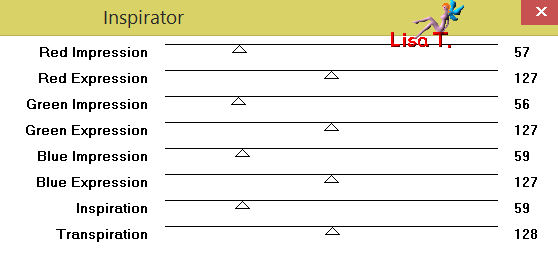
Step 37
layers/duplicate - image/mirror
in the layers palette, right click on the floating selection, and choose « defloat »
set the opacity on 50%
layers/merge/merge down
selections/invert, fill the selection in white and select none
Step 38
layers/arrange/move down
Step 39
in the layers palette, activate the top layer
selections/select all
selections/modify/contract/50 pixels
layers/new raster layer
fill the selection in white
selections/modify/contract/1 pixel
hit the Delete key of your keyboard
selections/select none
layers/merge/merge down
effects/3D effects/drop shadow/ 0 / 0 / 100 / 50 / black
Step 40
selections/select all
selections/modify/contract/50 pixels
selections/invert
layers/new raster layer
effects/3D effects/cutout
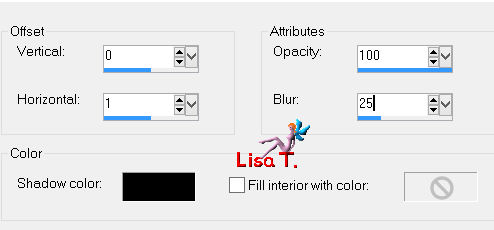
selections/select none
Step 41
image/add borders->
2 pixels/color 2
1 pixel black
Step 42
activate the tube of the character
edit/copy - back to your work - edit/paste as new layer
move it to the right (see final result)
effects/3D effects/drop shadow
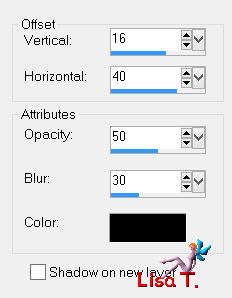
Step 43
activate the text tube
edit/copy - back to your work - edit/paste as new layer
image/resize/uncheck « resize all layers »/75%
move it as shown on the final result
effects/3D effects/drop shadow/ 1 / 1 / 100 / 2 / black
Step 44
activate the tube of the cherries
edit/copy - back to your work - edit/paste as new layer
move it to the left
effects/3D effects/drop shadow/ 1 / 1 / 100 / 2 / black
Step 45
layers/merge/merge all (flatten)
image/resize/width 900 pixels
adjustsharpness/unsharp mask
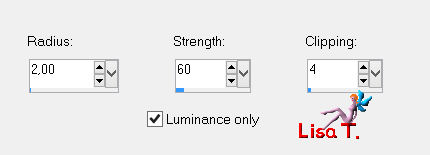
apply the same effect once more
Step 46
apply your signature
file/save as... type jpeg

Your tag is finished
Thank you to have realized it

You can write to Jacotte or to me if you have any trouble with this tutorial
you can send your creations to Jacotte, she will be very glad to see them

And to present them here


If you want to be informed about Jacotte’s new creations
join her newsletter (fill the box at the bottom of her home page)


Back to the boards of Jacotte's tutorials
borad 1  board 2 board 2 

|