Gipsy
I'm member of Tutorial Writers Inc

original can be found Here

Material
tubes and selections

The selections must be recorded in the corresponding files of My Psp Files
Thank you to the tubers : Danimage – Maryse - Chrispastel
Filters used
Mura’s Meister
ECWS Halftone
Vanderlee : Unplugged X
Simple
BKG Kaleidoscope
AP01
Innovations
Colors palette
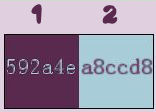
Use the paintbrush to follow the lines
Grab it with the left click of your mouse

|
Execution
choose 2 colors in your main tube and prepare a rectangular gradient
with the dark color (color 1) as foreground and the light color (color 2) as background
with the following settings
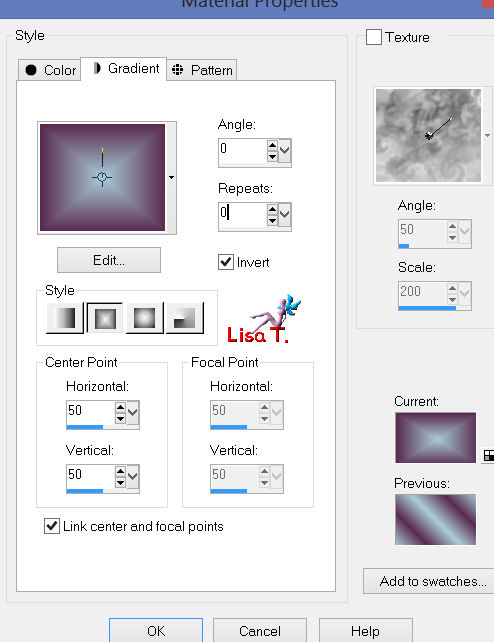
open a new transparent raster background 900 X 600 pixels and paint with the gradient
selections/select all
open the tube “chrispastel woman 07212013”, copy and paste into selection
selections/select none

important : to obtain good results,
you must use that precise tube to create the background of your tag
then you can colorize it with your personal colors using hue map.

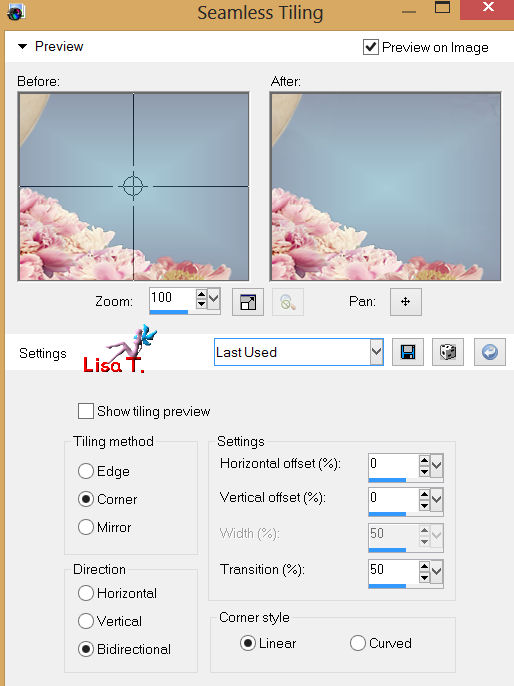
effects/image effects/seamless tiling (default settings)
adjust/blur/radial blur

layers/duplicate
image/mirror – image/flip
in the layers palette, adjust the blend mode on overlay, or hard light; opacity : 100%
layers/merge/merge visible
adjust/sharpness/sharpen more

adjust/hue and saturation/hue map
I show you my features.
You must “play” with the sliders to find the right tone that will match with your final character.
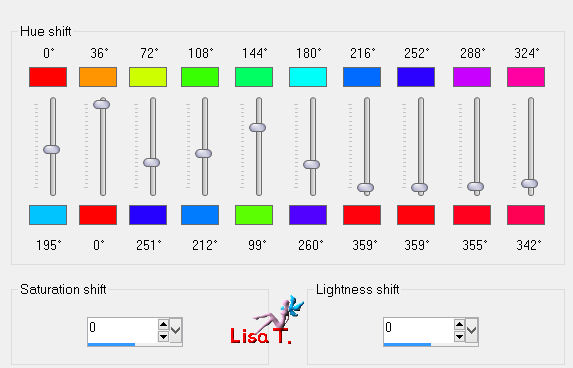
layers/duplicate
effects/plugins/ECWS Halftone/Diagonal 4x4

in the layers palette, adjust the blend mode on “darken” or “burn”; opacity : 100%
layers/merge/merge visible
layers/duplicate
effects/plugins/Simple/Blintz
image/resize : 85% (disable “resize all layers”)
effects/plugins/Vanderlee/Unplugged X/Vertical tile
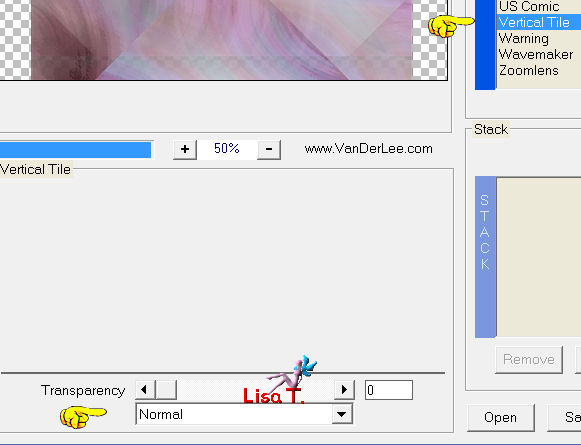
effects/image effects/seamless tiling (still in the clipboard)
layers/duplicate
effects/geometric effects/skew
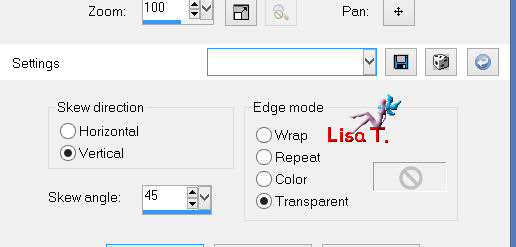
effects/plugins/BKG Kaleidoscope/4Q FlipZBottom L
rename this layer “side”
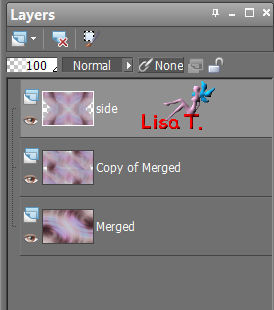
selections/load-save selection/load selection from disk/vivi 334
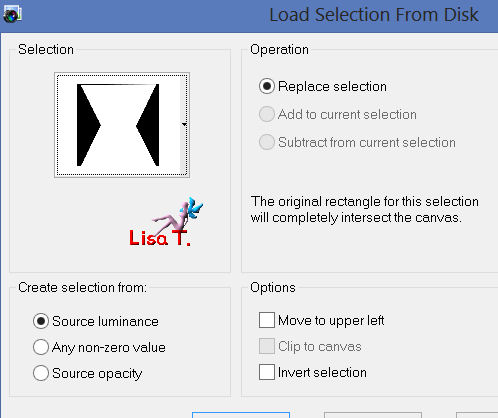
edit/cut
layers/new raster layer
edit/paste into selection
adjust/blur/gaussian blur : 30 and select none
effects/plugins/Vanderlee/Unplugged X/Vertical tile
effects/3D effects/drop shadow = 0 / 0 / 30 / 20 / black
in the layers palette, adjust the blend mode on “overlay” or “darken” (or soft light)
opacity : 100%

activate the layer “side”
effects/3D effects/drop shadow as before
effects/image effects/seamless tiling (default settings)
layers/duplicate
adjust/sharpness/sharpen more
effects/plugins/AP01 Innovations/Lines Silverlining/Line Pattern
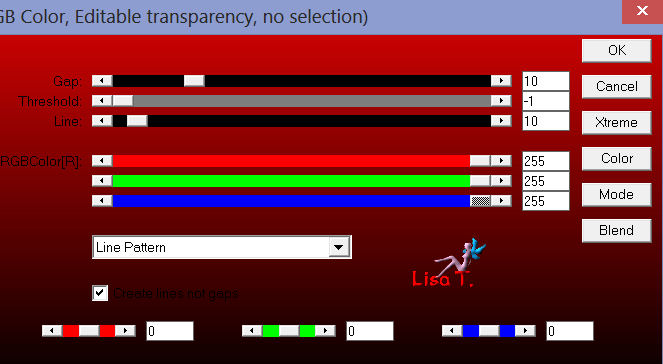
effects/distortion effects/warp
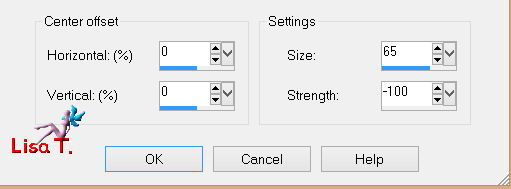
effects/3D effects/drop shadow as before
in the layers palette, activate the “side” layer
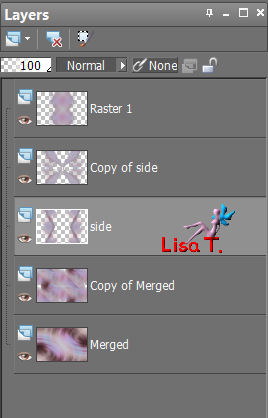
effects/plugins/Vanderlee/Unplugged X/Defocus
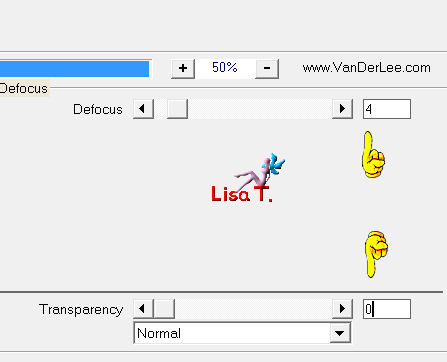
in the layers palette, adjust the blend mode on “hard light” or “screen”
and lower the opacity to 55% or 65% (according to your colors)
activate the layer underneath (copy of merged)
selections : load selection from disk : “vivi335”
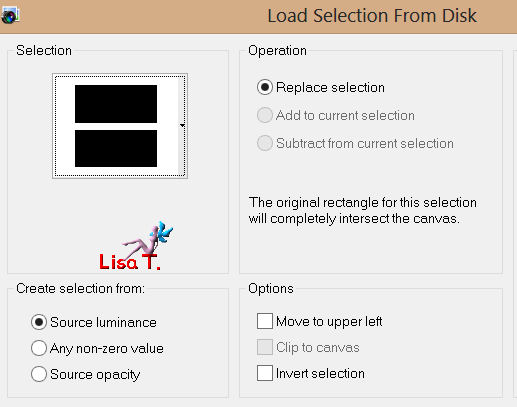
selections/promote selection to layer
effects/plugins/Vanderlee/Defocus as before and select none
effects/plugins/AP01/Innovations/Lines Silverlining/Line Pattern

effects/3D effects/drop shadow as before
effects/distortion effects/ripple

layers/duplicate – image/mirror
in the layers palette, adjust the blend mode on “luminance(legacy)”; opacity = 70%
activate the layer “copy of merged” (2nd from the bottom)
selections/load selection from disk : “Vivi 336”
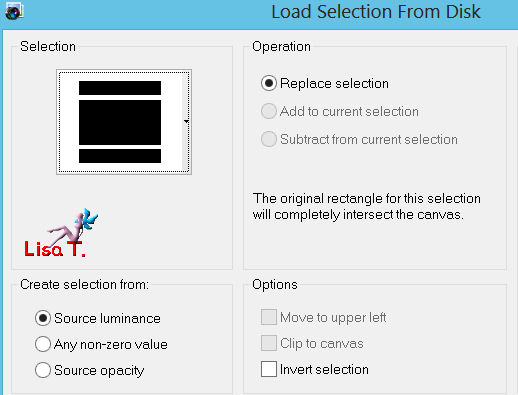
selections/promote selection to layer
effects/plugins/Vanderlee/Unplugged X/Interlace
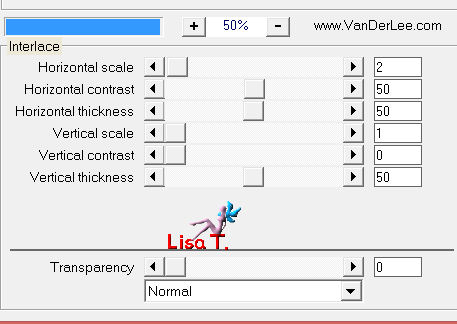
effects/3D effects/drop shadow = 0 / 0 / 40 / 25 / black and select none
layers/merge/merge all (flatten)
image/add borders/disable symmetric/dark color (color 1)
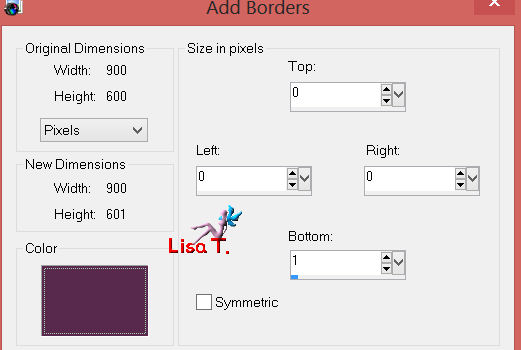
image/add borders/disable symmetric/100 pixels/choose a contrasting color
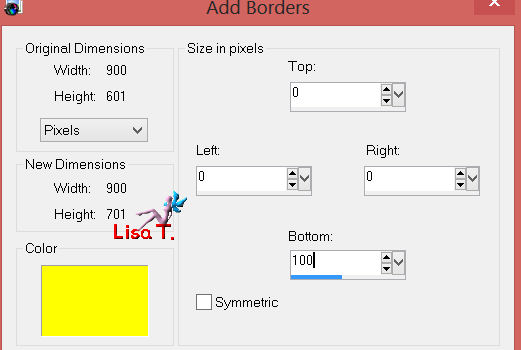
activate the magic wand tool (default settings) and select this border
selections/invert – edit/copy
selections/invert – edit/paste into selection
effects/plugins/Mura’s Meister/Perspective Tiling
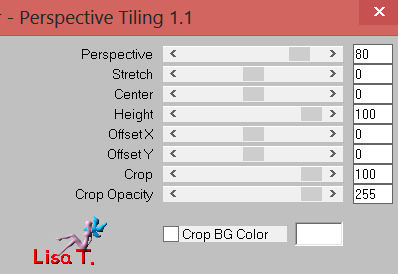
selections/promote selection to layer
adjust/blur/gaussian blur/4
selections/select none
effects/image effects/offset
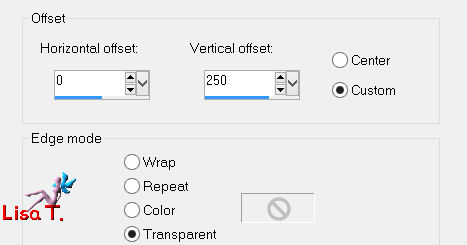
effects/geometric effects/circle
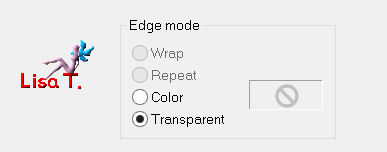
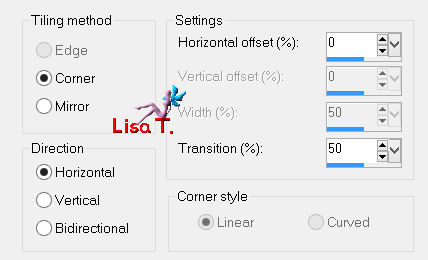
effects/image effects/seamless tiling
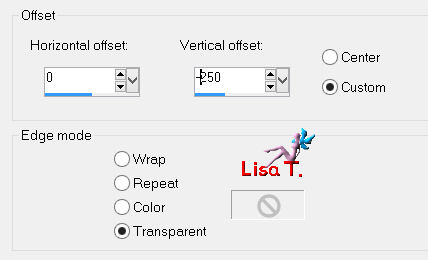
effects/image effects/offset
adjust/sharpness/sharpen
effects/3D effects/drop shadow = as before

activate the tube “Mr Lady Shimmery Fortune Teller”
resize (85%) and resize again (80%)
copy and paste as a new layer at the top of the stack of layers
move it as on the model
adjust/sharpness/sharpen
effects/3D effects/drop shadow = 9 / -34 / 40 / 30 / black

activate the tube “danimage livre magique”, resize (55%)
copy and paste as a new layer
move it on the “floor” opposite the character, colorize if necessary
duplicate this layer and merge down

in the layers palette, adjust the blend mode on “screen” (or other if you prefer)
layers/merge/merge all
image/add borders/2 pixels/symmetric/color 1
image/add borders/2 pixels/symmetric/color 2
image/add borders/50 pixels/symmetric/color 1
select this border with the magic wand and paint with a linear gradient
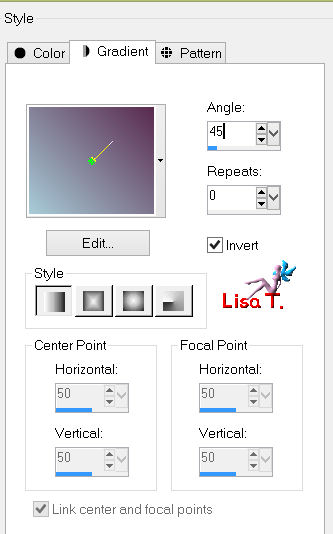
effects/plugins/Vanderlee/Unplugged X/Interlace

selections/invert
effects/3D effects/drop shadow = 0 / 0 / 85 / 45 / black

activate the tube “déco_viv_bohémienne”, copy and paste as a new layer
don’t touch it, it’s in the right place

new raster layer to place your watermark and merge all (flatten)
image/add borders/1 pixel/symmetric/black
resize if necessary, save as... type JPEG

You can send your creation to Vivi if you like
It will be her pleasure to present it in her gallery

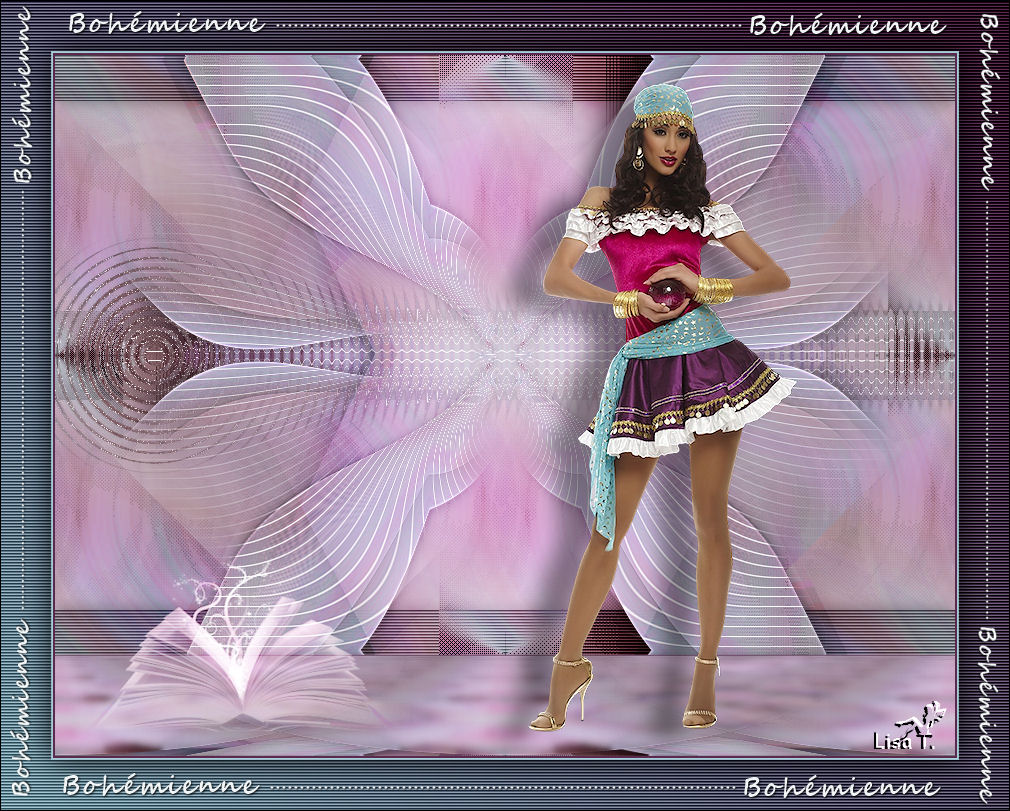
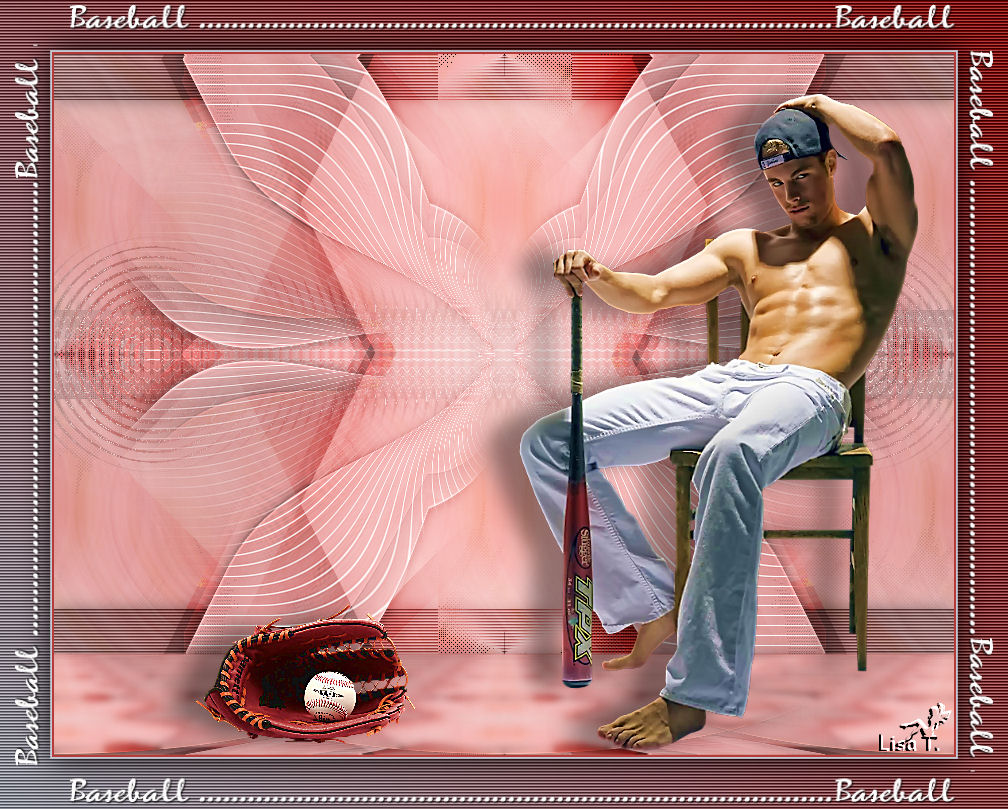
Here is my try with my tubes
Back to the boards of Vivi's tutorials
board 1  board 2 board 2 

|