

You will find the original tutorial here :

This tutorial is a personal creation.
Any resemblance with another one would be only pure
coincidence.
It is stricly forbidden to modify tubes, to change
their name or take off the matermarks,
To present them on your sites or blog,
To share them in groups,
to make a bank of images, or to use them on lucrative purposes.

Thank you to Alyciane who tests Garances’ tutorials
and is her valued advisor

Thank you to respect Garance’s work and the tubers
work.
Don’t hesitate to warn me if you have any trouble
with this translation,
and I’ll try to fix the problem as quickly as I can

Garances works with PSP2020 and I work with PSP 2020
you can follow this tutorial with another version
of PSP, but the result might be slightly different

Supplies
tubes – Word Art – mask – font - selections

open the tubes and duplicate. Work with the copies
to preserve original files
open all the tools provided and place into the dedicated
folders of My Corel PSP General folder
open the masks and minimize to tray
it is assumed you have some working knowledge of Paint
Shop Pro
TIP 1 -> if you don’t
want to install a font -->
open it in a software as « Nexus Font » (or
other font viewer software of you choice)
as long as both windows are opened (software and font),
your font will be available in your PSP
TIP 2 -> from PSPX4,
in the later versions of PSP the functions « Mirror » and « Flip » have
been replaced by -->
« Mirror »has become --> image => mirror => mirror
horizontal
« Flip » has become --> image => mirror => mirror
vertical

Plugins needed
Tramages (into Unlimited)
Medhi/Wavy Lab 1.1
BackgroundManiac/Native Illusions
Ulimited/Icnet Software/Paper textures
Transparency/Eliminate Black
Mura's Seamless/Emboss at alpha
Nick software/Tonal contrast

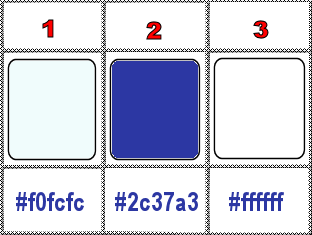
colors

Use the pencil to mark your place
along the way
hold down left click to grab and move it
 |

1
open a new image => transparent => 1000
* 700 px
choose 2 colors into your main tube / color 1 as FG color
=> light / color 2 as BG color => dark
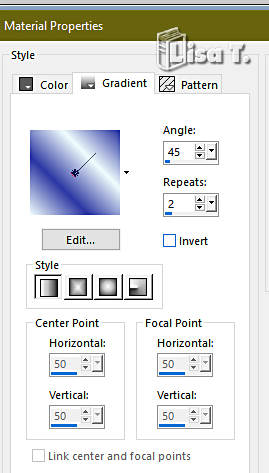
prepare a linear gradient in materials palette
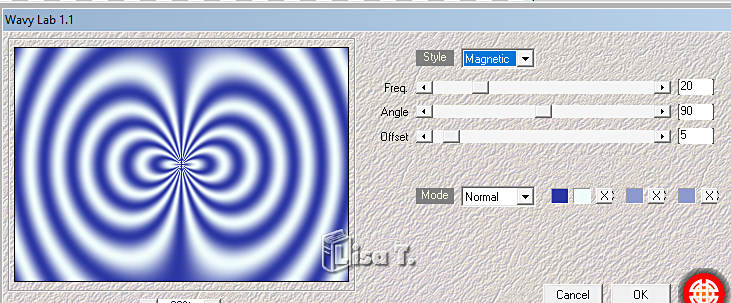
effects => plugins => Mehdi => Wavy Lab 1.1 => colors
2 / 1 / the last two colors are created by Mehdi
adjust => blur => gaussian blur => 50
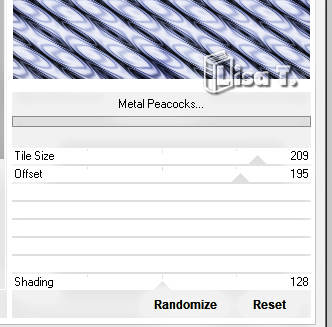
effects => plugins => Tramages / Metal Peacocks
layers => duplicate
image => mirror => mirror horizontal
opacity of the layer : 50%
layers => merge => merge down
effects => plugins => Background Maniac => Native
Illusions
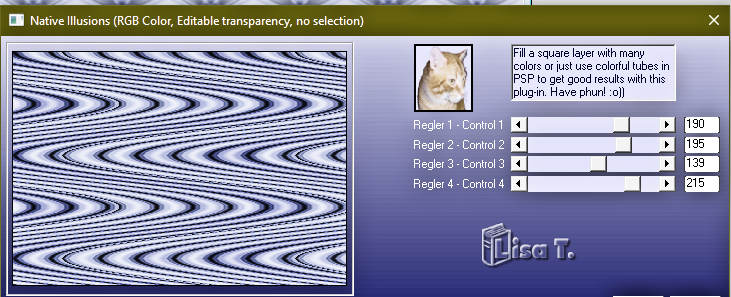
effects => User Defined Filter => Emboss 3
2
effects => image effects => seamless tiling => Mirror
Ghost
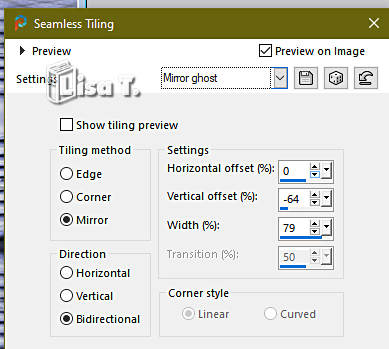
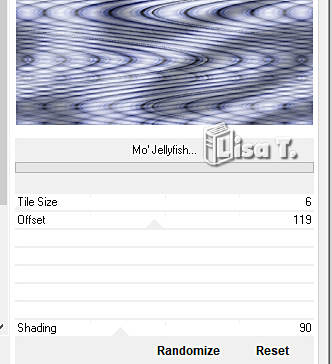
effects => plugins => Unlimited 2 => Tramages
=> Mo’ Jellyfish
3
layers => new raster layer
enable the Selection tool / custom selection
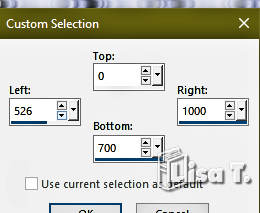
flood fill selection with color 2
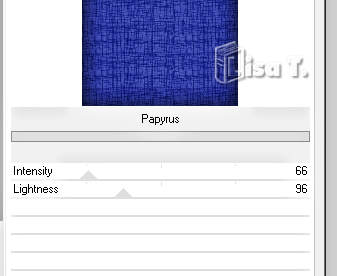
effects => plugins => Unlimited 2 => Paper Textures
/ Papyrus
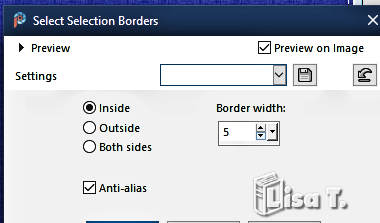
selections => modify = > select selection borders
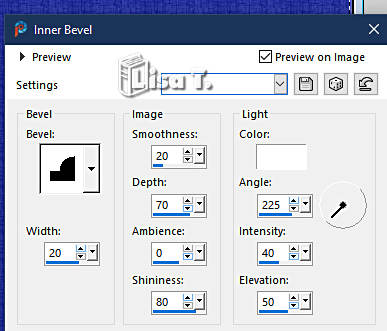
effects => 3D effects => Inner Bevel
selections => select none
effects => 3D effects => drop shadow => 0 / 0
/ 100 / 40 / black
4
enable the Selection tool / custom selection
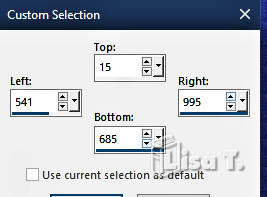
layers => new raster layer
open « sg/triple diamonds »
copy / paste into selection
effects => plugins => Transparency => Eliminate
Black
selections => float / selections => defloat
flood fill selection with color 1
selections => select none
5
layers => new raster layer
selections => load-save selection => from disk => selection
#1
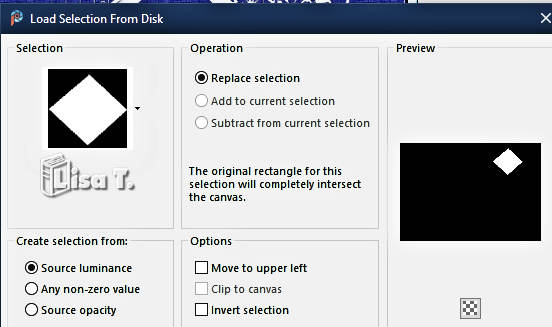
flood fill selection with the gradient
adjust => blur => gaussian blur => 25
effects => plugins => Tramages / Gradient / Spokes
Radio Maker
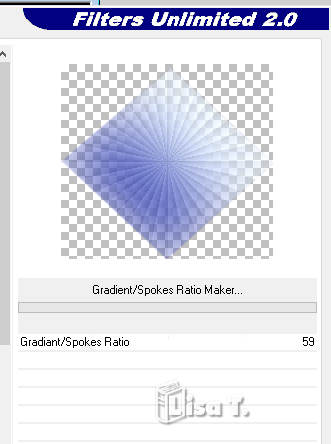
selections => select none
layers => arrange => move down
copy / paste the first tube as new layer
resize if necessary and place properly
effects => plugins => Mura’s Seamless => Emboss
at Alpha => default settings
effects => 3D effects => drop shadow => 1 / 1
/ 75 / 1 / WHITE (or black according to your colors and
tube)
layers => merge => merge down
6
highlight top layer
layers => new raster layer
selections => load-save selection => from disk => selection
#2
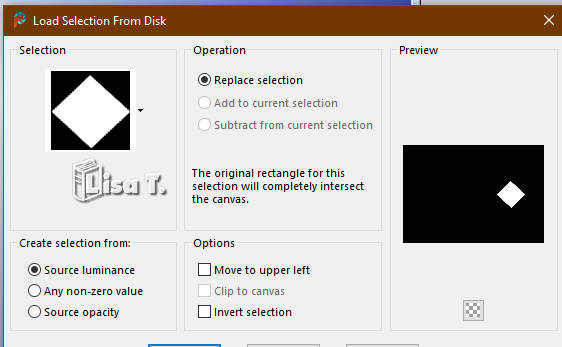
flood fill selection with the gradient
adjust => blur => gaussian blur => 25
effects => plugins => Tramages / The Stump 2 / default
settings
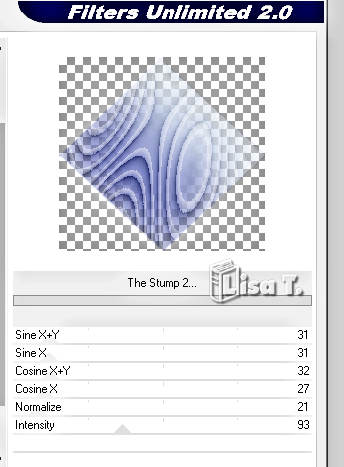
selections => select none
layers => arrange => move down
copy / paste the second tube as new layer
resize if necessary and place properly
effects => plugins => Mura’s Seamless => Emboss
at Alpha => default settings
effects => 3D effects => drop shadow => 1 / 1
/ 75 / 1 / WHITE
layers => merge => merge down
7
highlight top layer
layers => new raster layer
selections => load-save selection => from disk => selection
#3
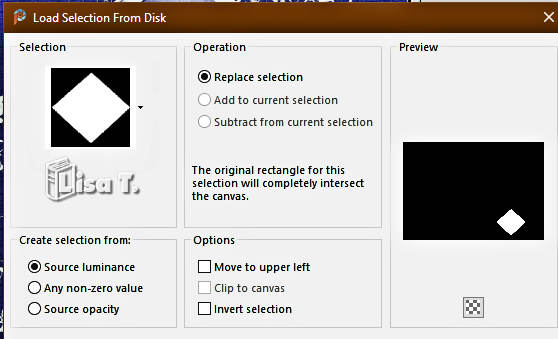
flood fill selection with the gradient
adjust => blur => gaussian blur => 25
effects => plugins => Tramages / Panel Stripes /
default settings
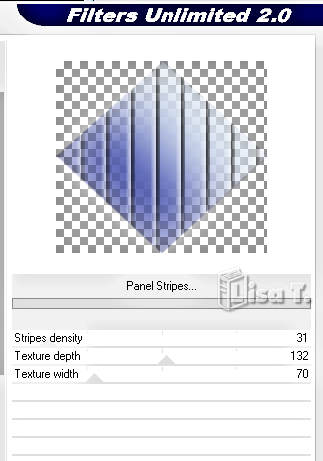
selections => select none
layers => arrange => move down
copy / paste the third tube as new layer
effects => plugins => Mura’s Seamless => Emboss
at Alpha => default settings
effects => 3D effects => drop shadow => 1 / 1
/ 75 / 1 / WHITE
layers => merge => merge down
8
close the eyes of Rasters 1 & 2 (two bottom layers)
and merge visible
effects => 3D effects => drop shadow => 1 / 1
/ 75 / 1 / BLACK
9
open the eye of Raster 2
layers => merge => merge visible
10
open the eye of Raster 1 and highlight this layer
edit => copy / paste as new image and minimize for a
later use
highlight top layer
copy / paste the main tube as new layer
resize if necessary and place properly
drop a shadow of your choice
11
image => add borders => tick « symmetric » => ...
2 px color 2
5 px color 1
2 px color 2
selections => select all
image => add borders => tick « symmetric » => 40
px white
selections => invert
copy / paste into selection the image set aside in step
10
adjust => blur => gaussian blur => 15
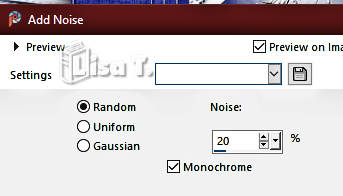
adjust => add-remove noise => add noise
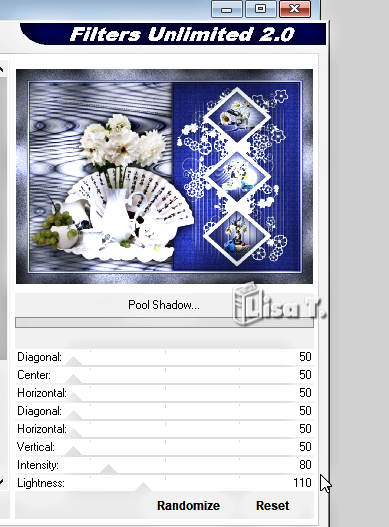
effects => plugins => Tramages / Pool Shadow
selections => invert
effects => 3D effects => drop shadow => 0 / 0
/ 75 / 50 / BLACK
selections => select none
12
image => add borders => tick « symmetric » => ...
2 px color 2
5 px color 1
2 px color 2
copy / paste the Word Art as new layer OR write you own
texte
The font Garances used is provided
drop a shadow of your choice
13
layers => merge => merge all (flatten)
apply your watermark or signature
write your licence number if you used a licenced tube
resize to 950 px width
save your work as... type .jpeg

My tag with my tubes

Don't hesitate to write to me if you have any trouble
with her tutorial
If you create a tag (using other tubes than those provided)
with this tutorial
and wish it to be shown, send it to Garances !
It will be a real pleasure for her to add it to the gallery
at the end of the tutorial


back to the boards of Garances’ tutorials
20 tutorials on each board
board 1 => 
at the bottom of each board you will find the arrows
allowing you to navigate from one board to another


|