

You will find the original tutorial here :
Thank you Garances for your permission to translate your work
This tutorial is a personal creation.
Any resemblance with another one would be only pure coincidence.
It is stricly forbidden to modify tubes, to change their name or take off the matermarks,
To present them on your sites or blog,
To share them in groups,
to make a bank of images, or to use them on lucrative purposes.

Thank you to respect Garance’s work and the tubers work.
Don’t hesitate to warn me if you have any trouble with this translation,
and I’ll try to fix the problem as quickly as I can

Garances and I work with PSP2020 Ultimate
you can follow this tutorial with another version of PSP, but the result might be slightly different
don’t hesitate to change blend modes and opacities of the layers to match your personal colors and tubes
place the tools and materials provided into the appropriate folders of My COREL PSP general folder
to import presets, double-click on them, or import
open the mask(s) and minimize to tray
duplicate all the tubes and decorations, and alpha layers, and work with the copies to preserve originals
install the plugins necessary
this tutorial is the property of Garances, and the translation is my property

Supplies
tubes image - mask - Word Art


Hints and Tips
TIP 1 -> if you don’t want to install a font -->
open it in a software as « Nexus Font » (or other font viewer software of you choice)
as long as both windows are opened (software and font), your font will be available in your PSP
TIP 2 -> from PSPX4, in the later versions of PSP the functions « Mirror » and « Flip » have been replaced by -->
« Mirror »has become --> image => mirror => mirror horizontal
« Flip » has become --> image => mirror => mirror vertical

Plugins needed
Simple - AP01 - Carolaine and Sensibility - AAA Frame - Flaming Pear

colors
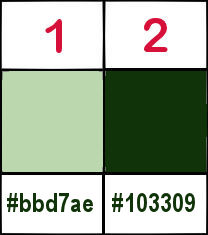
Garances chose these => FG => # bbd7ae / BG => #103309

Use the pencil to mark your place
along the way
hold down left click to grab and move it
 |

1
open a new image => transparent => 1000 * 700 px
choose a background image with « tonic » colors
choose 2 colors in this image
flood fill layer with color 1
2
layers => new raster layer
selections => select all
copy / paste the background image into selection
selections => select none
opacity of the layer : 60%
layers => merge => merge down
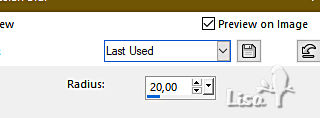
adjust => blur => gaussian blur => 20
3
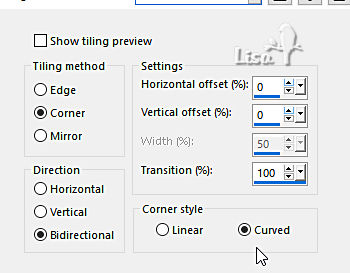
effects => image effects => seamless tiling
effects = > plugins => Simple => Pizza Slice Mirror
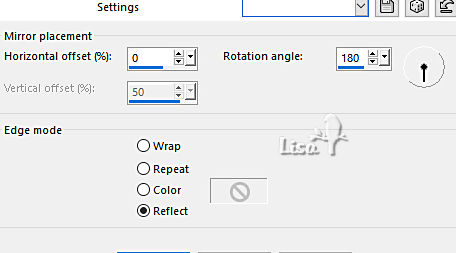
effects => reflection effects => rotating Mirror
4
layers => new raster layer
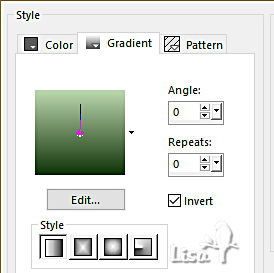
prepare a linear gradient in materials palette
selections => load-save selection => from disk => selection # 1
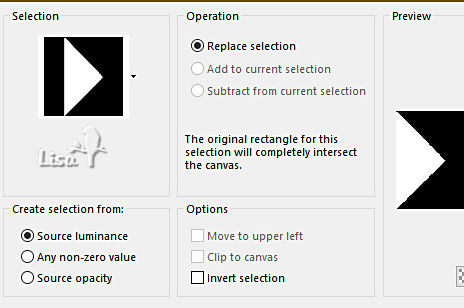
flood fill selection with the gradient
5
effects => plugins => Carolaine and Sensibility => cs-textures

effects => 3D effects => drop shadow => 5 / 5 / 75 / 5 / black
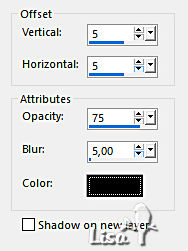
effects => 3D effects => drop shadow => -5 / -5 / 75 / 5 / black
selections => select none
6
layers => duplicate
image => mirror => mirror horizontal
layers => merge => merge down
layers => new raster layer
selections => load-save selection => from disk => selection # 2
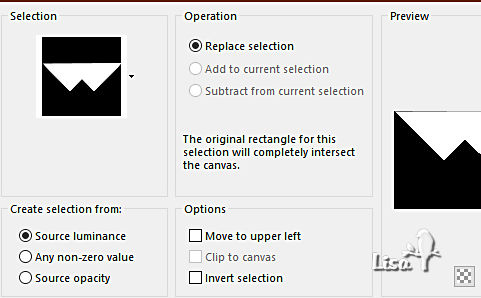
7
flood fill selection with the gradient
effects => plugins => AP01 => Lines / Lines Silverlining
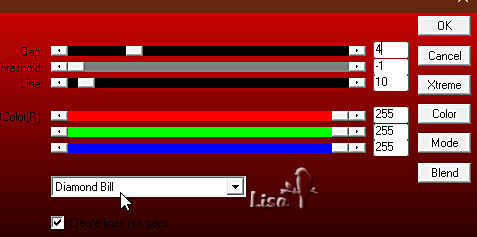
selections => select none
layers => duplicate
image => mirror => mirror vertical
layers => merge => merge down
layers => merge => merge visible
8
layers => new raster layer
flood fill white
layers => new mask layer => from image
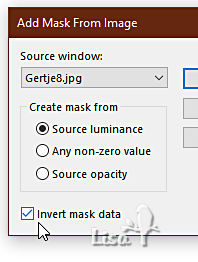
effects => edge effects => enhance
layers => merge => merge group
9
image => resize => untick « resize all layers » => 90%
effects => 3D effects => drop shadow => 5 / 5 / 75 / 5 / black
effects => 3D effects => drop shadow => -5 / -5 / 75 / 5 / black
selections => load-save selection => from disk => selection # 3
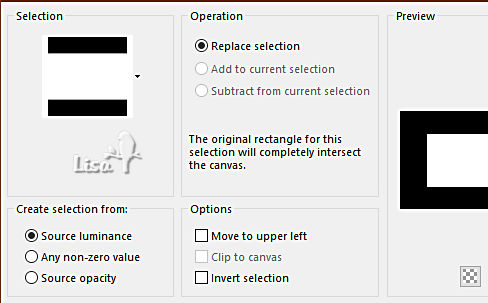
flood fill selection with the gradient
selections => modify = > select selection borders
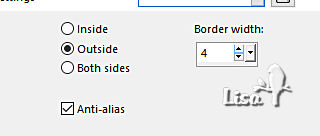
flood fill selection with color 2
effects => 3D effects => inner bevel
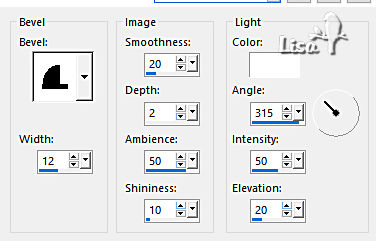
selections => select none
10
copy/paste your first misted image, resize if necessary and center in canvas
effects => 3D effects => drop shadow => 5 / 5 / 75 / 5 / black
layers => merge => merge down
11
layers => new raster layer
flood fill with color 2
effects => plugins => Flaming Pear => Flexify 2
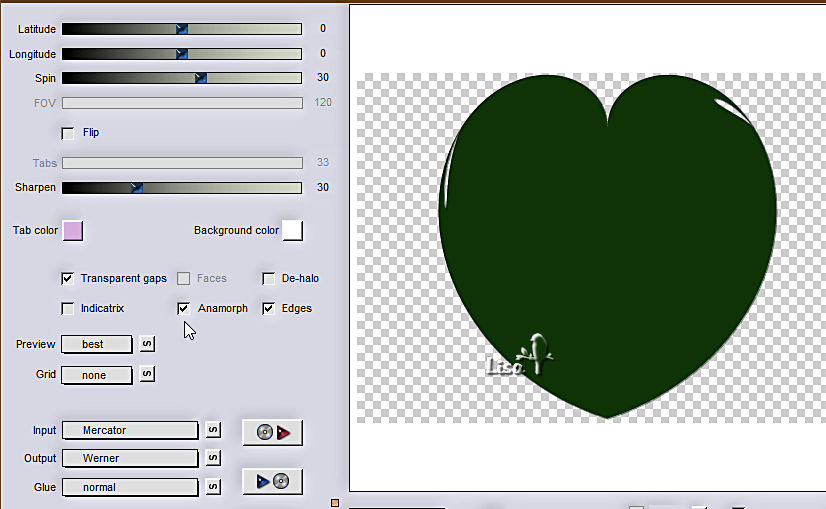
image => resize => untick « resize all layers » => 40%
enable the Pick tool with the following settings, to move the layer acurately => position X : 30 / position Y : 3
hit the « M » key of your keyboard to disable the tool
12
layers => duplicate
enable the Pick tool with the following settings, to move the layer acurately => position X : 698 / position Y : 404
hit the « M » key of your keyboard to disable the tool
highlight Raster 1
selections => select all / selections => float / selections => defloat
copy/paste your second misted image into selection
selections => select none
13
do the same thing on « Copy of Raster 1 »
layers => merge => merge down
effects => 3D effects => drop shadow => 5 / 5 / 75 / 5 / black
14
copy / paste the word Art tube as new layer
selections => select all / selections => float / selections => defloat
flood fill selection with color 1 or 2 (you choose)
effects => 3D effects => drop shadow => 7 / 11 / 75 / 5 / black
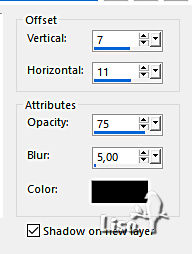
selections => select none
blend mode of the layer (shadow layer): Dissolve
highlight top layer and merge down
place where you like
15
image => add borders => tick « symmetric » => ...
2 px color 2
5 px color 1
2 px color 2
selections => select all
image => add borders => tick « symmetric » => 45 px color 2
selections => invert
effects => texture effects => weave / colors 1 and 2
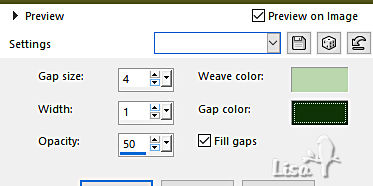
selections => invert
effects => 3D effects => drop shadow => 0 / 0 / 75 / 50 / black
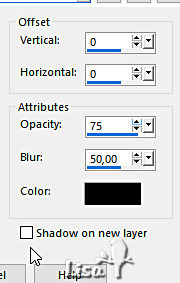
selections => select none
16
image => add borders => tick « symmetric » => ...
2 px color 2
5 px color 1
2 px color 2
selections => select all
image => add borders => tick « symmetric » => 30 px color 2
effects => 3D effects => drop shadow => 0 / 0 / 75 / 50 / black
selections => invert
effects => plugins => AAA Frames => Foto Frame
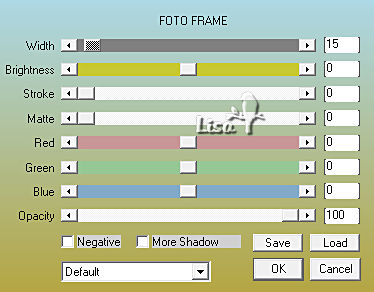
selections => select none
17
image => add borders => tick « symmetric » => 1 px color 1
apply your watermark or signature
write your licence number if you used a licensed tube
layers => merge => merge all (flatten)
image => resize => tick « resize all layers » => 1000 px width
save your work as... type .jpeg

My tag with my MISTS

Don't hesitate to write to me if you have any trouble with this tutorial
If you create a tag (using other tubes than those provided) with this tutorial
and wish it to be shown, send it to Garances !
It will be a real pleasure for her to add it to the gallery at the end of the tutorial


back to the boards of Garance’s tutorials
board 1


|