

You will find the original tutorial here
:
This tutorial is a personal creation.
Any resemblance with another one would be only pure coincidence.
It is stricly forbidden to modify tubes, to change their
name or take off the matermarks,
To present them on your sites or blog,
To share them in groups,
to make a bank of images, or to use them on lucrative purposes.

Thank you to Alyciane who tests my tutorials
for me and is my
valued advisor

Thank you to respect Garance’s work and the tubers
work.
Don’t hesitate to warn me if you have any trouble
with this translation,
and I’ll try to fix the problem as quickly as I can

Garances works with
PSP2019 and I work with PSP 2019
you can follow this tutorial with another version of PSP,
but the result might be slightly different

Supplies
alpha layer « au revoir les vacances » -
tubes - mask - pattern (tuile)
open the mask and minimize to tray
place the pattern into the appropriate folder of COREL
PSP general folder
TIP 1 -> if you don’t
want to install a font -->
open it in a software as « Nexus Font » (or
other font viewer software of you choice)
as long as both windows are opened (software and font),
your font will be available in your PSP
TIP 2 -> from PSPX4,
in the later versions of PSP the functions « Mirror » and « Flip » have
been replaced by -->
« Mirror »has become --> image => mirror => mirror
horizontal
« Flip » has become --> image => mirror => mirror
vertical

Plugins needed
Simple / Blintz
SandFlowers Special V (Unlimited 2)
Flaming Pear / Lacquer
AAA Frames / Texture Frame / Foto Frame

Use the pencil to mark your place
along the way
hold down left click to grab and move it
 |

Realization
open the alpha layer, duplicate, close the original and
work with the copy
rename this copy « raster 1 »
into your main tube, choose a dark color as FG color and
a light color as BG color
selections => select all
copy / paste into selection the image « DCD-Sats-Paper13 » ,
or another image of your choice
choose a colorful image
selections => select none
layers => duplicate
close the eye of the copy
highlight « raster 1 »
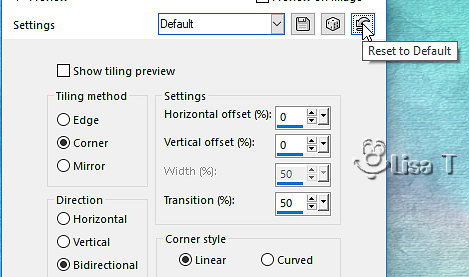
effects => image effects => seamless tiling => default
settings
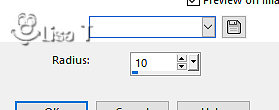
adjust => blur => gaussian blur
/ 10
adjust => blur => radial blur
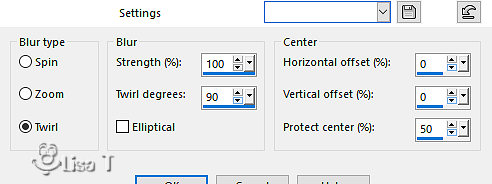
effects => edge effects => enhance more
repeat / effects => edge effects => enhance more
adjust => sharpness => sharpen more
layers => duplicate
effects = > plugins => Simple => Blintz
edit => repeat => Blintz
effects => reflection effects => rotating Mirror
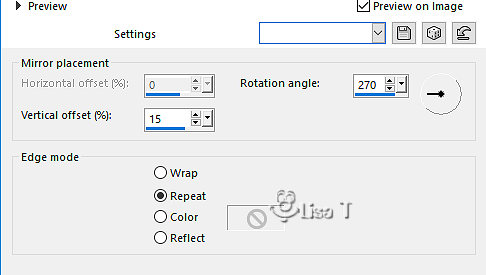
effects => reflection effects => rotating
Mirror
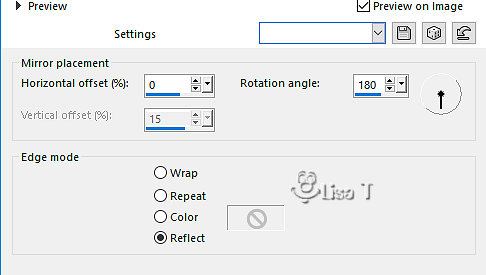
highlight « raster 1 »
selections => load-save selection => from alpha channel
=> selection # 1
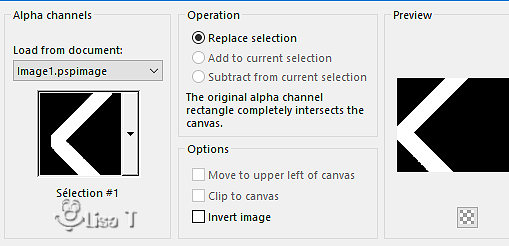
selections => promote selection to layer
selections => select none
move this layer above « copy of raster 1 »
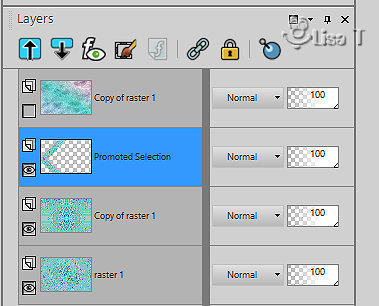
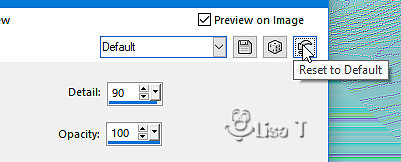
effects => Art Media Effects => Colored
Chalk
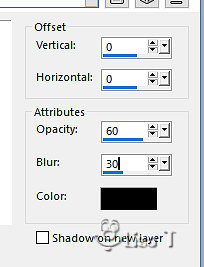
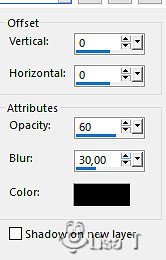
effects => 3D effects => drop shadow => 0
/ 0 / 60 / 30 / black
layers => duplicate
image => mirror => mirror horizontal
layers => merge => merge down
open the eye of the layer you closed at the begining and
highlight this layer
image => resize => untick « resize all layers » => 95%
enable the Selection tool / any mode / click on « layer
opaque » to select

layers => new raster layer
flood fill white
layers => new mask layer => from image
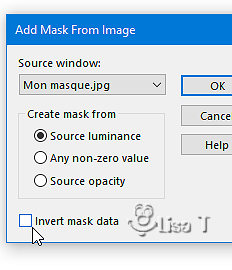
layers => merge => merge group
highlight layer below (copy of raster 1) (second from top)
and select none
selections => load-save selection => from alpha channel
=> selection # 2
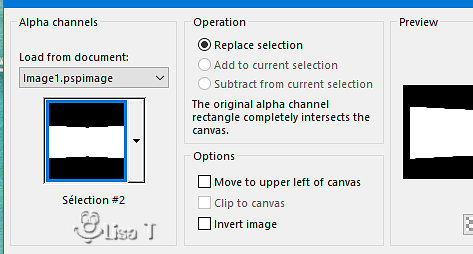
selections => invert
hit the DELETE key of your keyboard
selections => select none
layers => arrange => bring to top
effects => 3D effects => drop shadow => 5 / 5
/ 60 / 10 / black
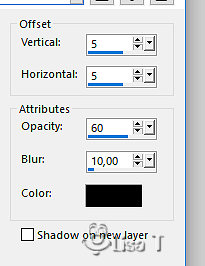
effects => 3D effects => drop shadow => (- 5)
/ (- 5) / 60 / 10 / black
layers => new raster layer
selections => load-save selection => from alpha channel
=> selection # 3
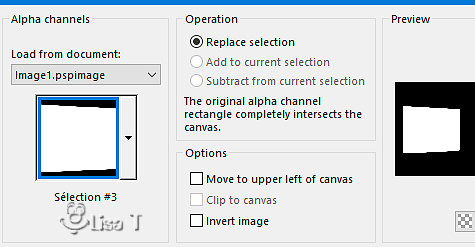
copy / paste into selection the misted
tube
selections => select none
copy / paste as new layer the character tube
adjust => sharpness => sharpen
layers => merge => merge down
adjust => blur => blur (holidays are finished !
memories are fading away... )
layers => new raster layer
selections => load-save selection => from alpha channel
=> selection # 4
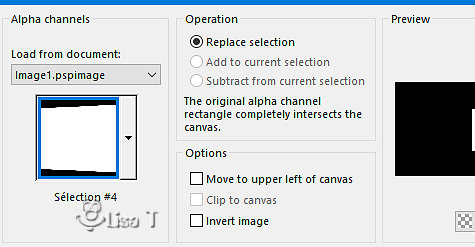
copy / paste into selection the misted
tube
selections => select none
copy / paste as new layer the character tube
adjust => sharpness => sharpen
layers => merge => merge down
highlight second layer from bottom (copy of raster 1)
selections => load-save selection => from alpha channel
=> selection # 5
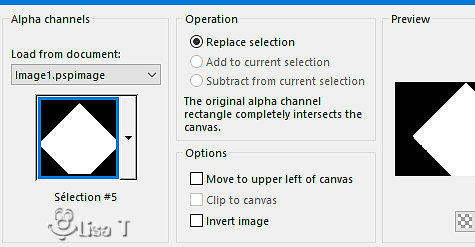
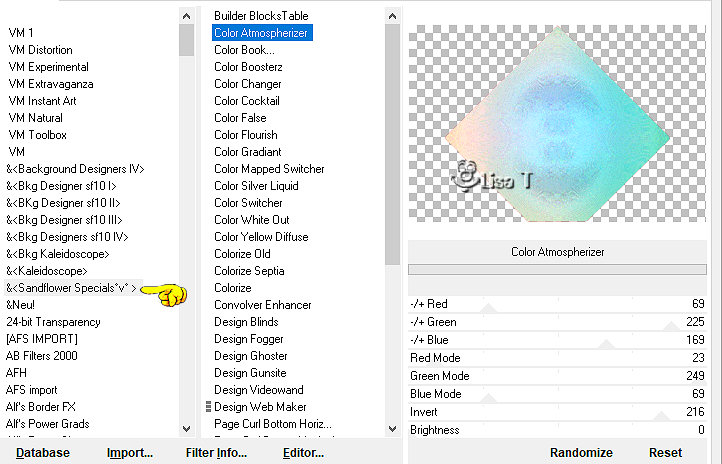
selections => promote selection to layer
selections => select none
effects => plugins => Unlimited 2 => &<Sandflower
Special°v°> / Colors Atmospherizer / default
settings
or match with you colors
Garances applied the plugin « DragonFly/SinedotII » and
she provides the result into the material
copy / paste as new layer the sinedot tube and colorize
if necesary
lower it slightly and erase what's sticking with the eraser
tool
a hint : Press the
Alt button and hold it down, then push
the left click of your mouse, hold it
down evenly, and then you can move your mouse to change
the size of the tool
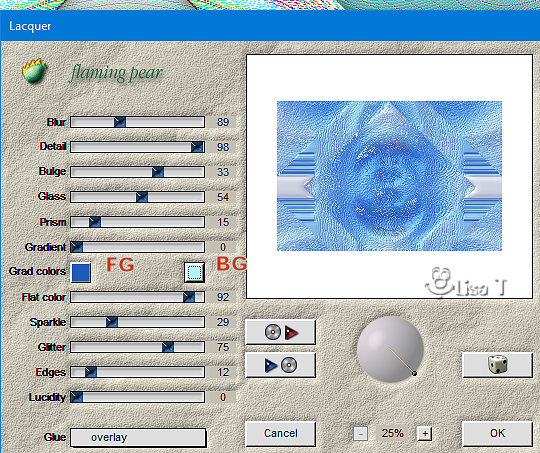
highlight copy of Raster 1 (second from bottom)
effects => plugins => Flaming Pear => Lacquer
complete the decoration as you like
copy / paste as new layer the word art tube
place where you like
copy / paste « copy of Raster 1 » (second
from bottom) as new image
set aside for a later use
layers => merge => merge visible
image => add borders => tick « symmetric » => ...
2 px dark color
4 px white
2 px dark color
selections => select all
image => add borders => tick « symmetric » => 20
px white
effects => 3D effects => drop shadow => 0 / 0
/ 60 / 30 / black
selections => invert
effects => texture effects => texture (choose the
texture provided)
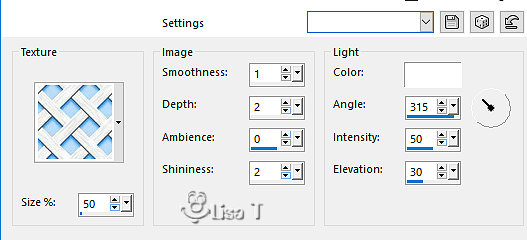
selections => select none
image => add borders => tick « symmetric » => ...
2 px dark color
4 px white
2 px dark color
selections => select all
image => add borders => tick « symmetric » => 40
px white
selections => invert
copy / paste into selection the image set aside
adjust => blur => gaussian blur / 10
selections => modify => contract => 5 px
effects => plugins => AAA Frames => Texture Frame

effects => plugins => AAA Frames => Foto
Frame
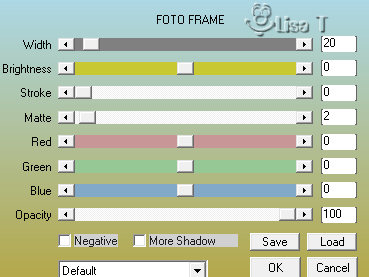
selections => select none
image => add borders => tick « symmetric » => 2
px dark color
apply your watermark or signature
write your licence number if you used a licenced tube
layers => merge => merge all (flatten)
image => resize => tick « resize all layers » => 950
px width

Don't hesitate to write to me if you have
any trouble with her tutorial
If you create a tag (using other tubes than those provided)
with this tutorial
and wish it to be shown, send it to Garances !
It will be a real pleasure for her to add it to the gallery
at the end of the tutorial


back
to the board of Garances’s tutorials
board 1

|