

You will find the original tutorial here
:

This tutorial is a personal creation.
Any resemblance with another one would be only pure coincidence.
It is stricly forbidden to modify tubes, to change their
name or take off the matermarks,
To present them on your sites or blog,
To share them in groups,
to make a bank of images, or to use them on lucrative purposes.

Thank you to Alyciane who tests my tutorials
for me and is my
valued advisor

Thank you to respect Garance’s work and the tubers
work.
Don’t hesitate to warn me if you have any trouble
with this translation,
and I’ll try to fix the problem as quickly as I can

Garances works with PSP2019 and I work with PSP 2019
you can follow this tutorial with another version of PSP,
but the result might be slightly different

Supplies
tubes - decoration

choose a landscape image and another character
tube if you like
TIP 1 -> if you don’t
want to install a font -->
open it in a software as « Nexus Font » (or
other font viewer software of you choice)
as long as both windows are opened (software and font),
your font will be available in your PSP
TIP 2 -> from PSPX4,
in the later versions of PSP the functions « Mirror » and « Flip » have
been replaced by -->
« Mirror »has become --> image => mirror => mirror
horizontal
« Flip » has become --> image => mirror => mirror
vertical

Plugins needed
Unlimited 2
Flaming Pear
Eye Candy 5 Impact
Simple
Dragon Fly
Graphic Plus
AAA Frames

colors
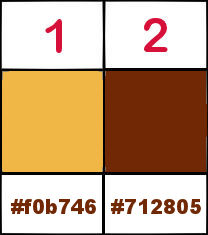
 
Use the pencil to mark your place
along the way
hold down left click to grab and move it
 |
 
Lesson
open a new transparent image 1000 * 700 px
in your landscape image choose 2 colors => ...
light color => FG color / Garances chose #f0b746
dark color => BG color / Garances chose #712805
open all tubes an dimages , duplicate, close the originals
and work with the copies
flood fill layer with the light color
open the lanscape image => duplicate 3 tiomes ;
minimize 2 copies, work with the third one
image => resize => tick « resize all layers » => 800
px width
layers => new mask layer => from disk / choose mask
20/20
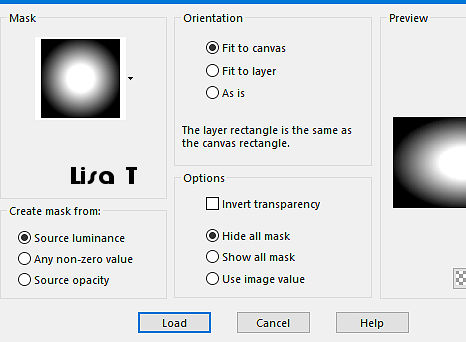
layers => duplicate
layers => merge => merge group
edit => copy
back to your main work
layers => new raster layer
paste as new layer / don’t move it
effects => image effects => seamless tiling => Side
by Side
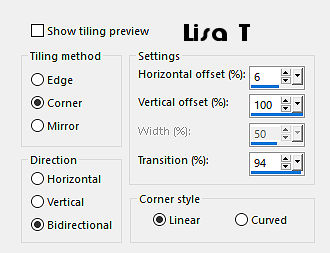
layers => merge => merge down
layers => merge => merge all (flatten)
adjust => blur => radial blur
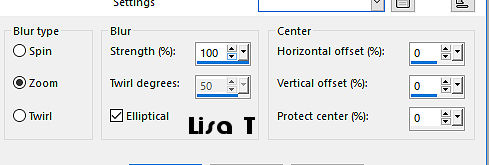
adjust => blur => gaussian blur
/ 10
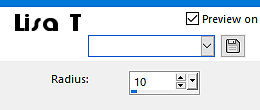
layers => duplicate image => resize => untick « resize
all layers » => 60 %
image => free rotate / 90° - right
blend mode of the layer : Overlay (or other)
adjust => blur => radial blur ( same settings as
previously )
layers => merge => merge down
layers => convert to raster layer
layers => duplicate
layers => duplicate image => resize => untick « resize
all layers » => 80 %
highlight bottom layer
effects => plugins => Unlimited 2 => Paper Textures
/ Japanese paper
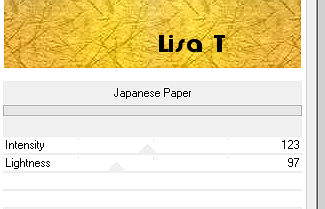
effects => edge effects => enhance
highlight « copy of Raster 1 »
select the transparent area with the magic wand tool /
selections => invert
effects => plugins => Flaming Pear => Super Blade
Pro
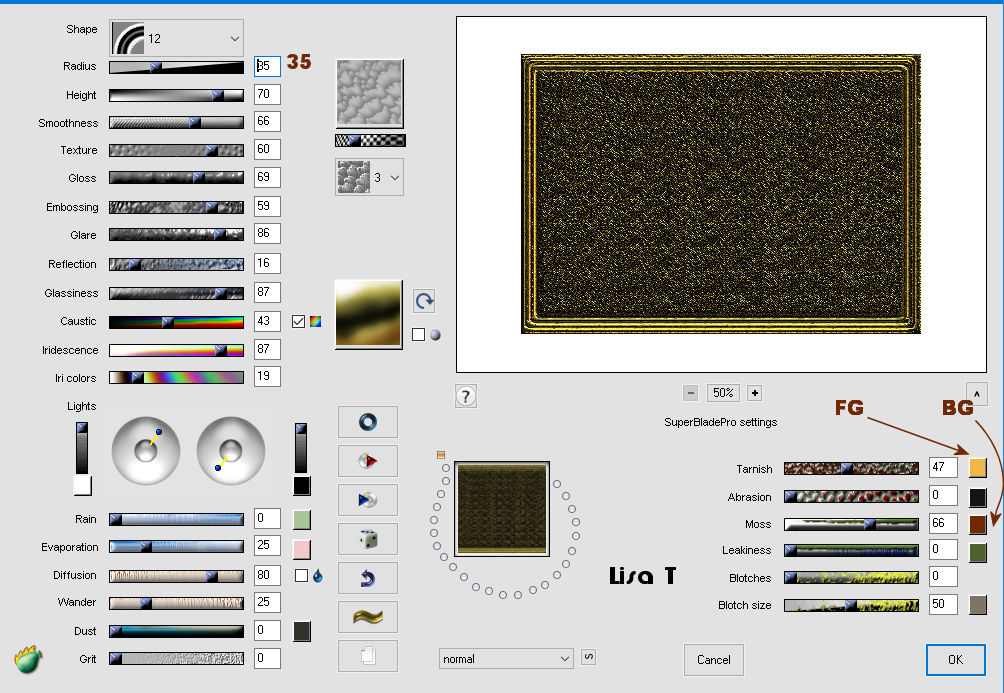
effects => 3D effects => drop shadow => 0
/ 0 / 60 / 30 / black
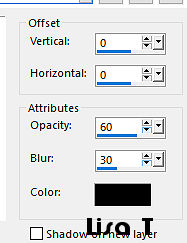
selections => modify => contract => 32
px
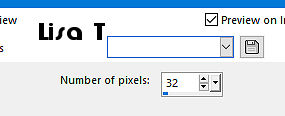
open the second copy of the landscape
edit => copy
back to your main work => paste into selection
effects => 3D effects => chisel / 10 / light color
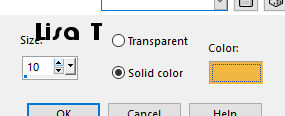
selections => select none
set aside and open the third copy of the landscape
layers => promote background layer
effects => plugins => Flaming Pear => / Flexify
2
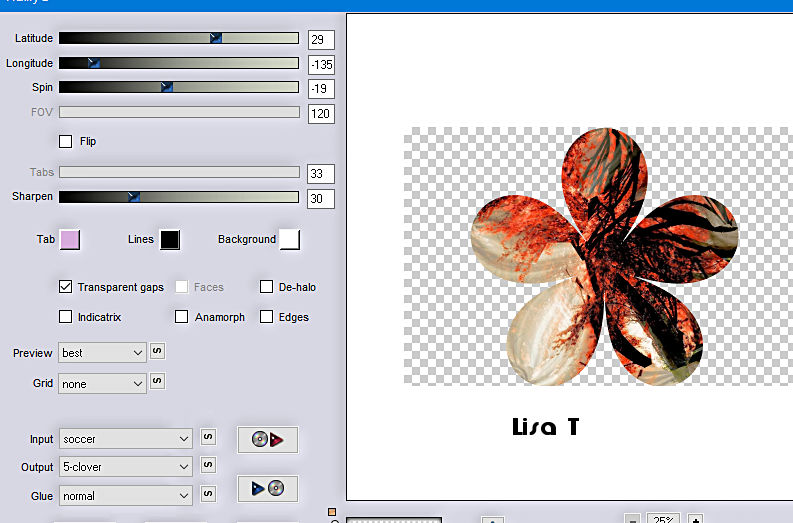
layers => duplicate image => resize => untick « resize
all layers » => 10 %
copy / paste as new layer on your main work
layers => duplicate image => resize => untick « resize
all layers » => 50 %
effects => image effects => offset => H : -
394 / V : 275 / tick « custom » and « transparent»
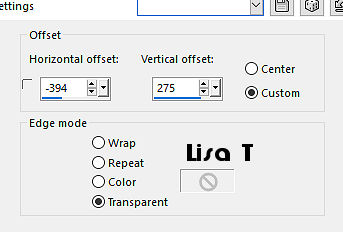
effects => plugins => Alien Skin
Eye Candy 5 Impact / Glass / preset Clear with reflection
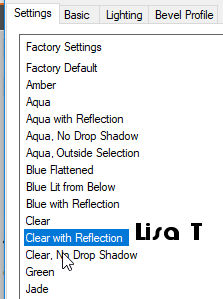
effects = > plugins => Simple => Top Left Mirror
copy / paste the decoration tube as new layer
don’t move it
layers => new raster layer
effects => plugins => DragonFly / Sinedots II
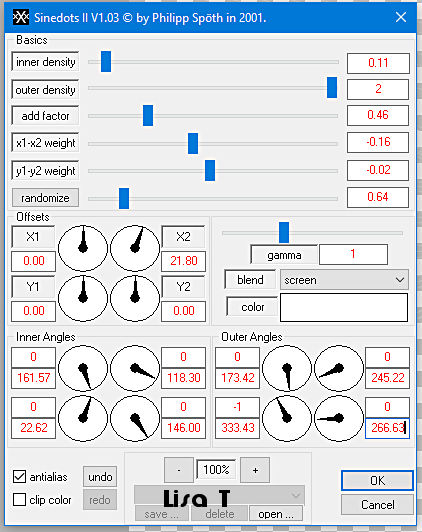
if you have trouble with this plugin,
you will find the corresponding layer into the material
zip
image => add borders => tick « symmetric » => ...
2 px dark color
4 px light color
2 px dark color
selections => select all
edit => copy
image => add borders => tick « symmetric » => 40
px white
selections => invert
edit => paste into selection
adjust => blur => gaussian blur / 10
effects => plugins => Graphic Plus => Weaver
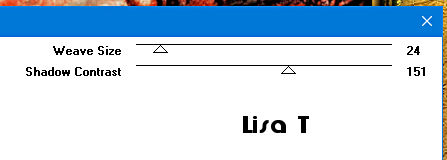
effects => plugins => Graphic Plus => Cross
Shadow / default settings
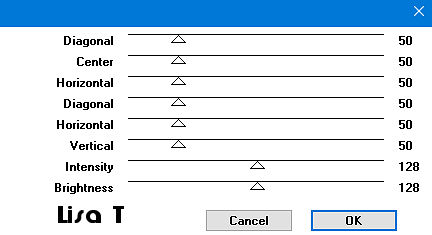
effects => 3D effects => drop shadow => 0 / 0
/ 60 / 30 / black
selections => select none
image => add borders => tick « symmetric » => ...
2 px dark color
4 px light color
2 px dark color
selections => select all
image => add borders => tick « symmetric » => 30
px white
selections => invert
edit => paste into selection
adjust => blur => gaussian blur / 10
effects
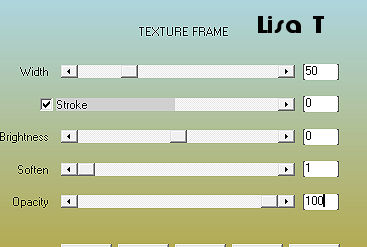
=> plugins => AAA Frames => Texture Frame
selections => invert
effects => 3D effects => drop shadow => 0 / 0
/ 60 / 30 / black
selections => select none
copy / paste the character tube as new layer
apply your watermark or signature
write your licence number if you used a licenced tube
layers => merge => merge all (flatten)
image => add borders => tick « symmetric » => 2
px dark color
image => resize => tick « resize all layers » => 950
px width
save your work as... type .jpeg
 
My tag with my tubes

Don't hesitate to write to me if you have
any trouble with her tutorial
If you create a tag (using other tubes than those provided)
with this tutorial
and wish it to be shown, send it to Garances !
It will be a real pleasure for her to add it to the gallery
at the end of the tutorial


back to the boards of Garances’ tutorials
board 1
|