

Original
can be found here

Franie works with PSPX9, and I use PSP 2020 Ultimate
But this tutorial can be realized with another version
of PSP
however, some differences might be noticed according to
the version you use

If you want to present
Franie’s tutorials on your
forums or sites
please ask her first
If you publish your creation on a site or a blog
please put a link towards the tutorial if you create a
tag
Thank you to understand and respect the rules.

The tubes Franie uses have
been sent by the authors on different groups
And she has their permission to use them
If you see a tube that might belong to you, contact Franie
or myself
And a link towards your site will be added if necessary
Please, don’t use tubes found on the web with no
watermark
all tubers apply their watermark without any exception !!!!!
no watermark ---> stolen tube

Hints and Tips
TIP 1-> if you don’t
want to install a font -->
open it in a software as « Nexus Font » (or
other font viewer software of you choice)
as long as both windows are opened (software and font),
your font will be available in your PSP
TIP 2 -> from PSPX4, in the later versions of PSP the functions « Mirror » and « Flip » have
been replaced by -->
image -> Mirror - has become ===> image
=> mirror => mirror horizontal
image -> Flip - has become ===> image
=> mirror => mirror vertical

Plugins
MuRa’s Meister – Cloud
VM Natural – Weave – Distortion
VanDerLee – UnPlugged – CD Shader
FM Tile Tools – Blend Emboss
Toadies – What Are You ?


Supplies
2 tubes « man »
2 misted landscapes
1 text - 1 font (in case you want to change the text)
1 color palette
2 selections

place
the selections into the appropriate folder of « My
Corel PSP »
Tubers’ authorizations


colors

place colors 1 & 2
as FG and BG colors into the materials palette
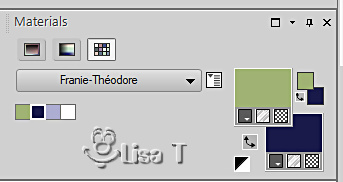

Use the pencil to mark your place
along the way
hold down left click to grab and move it
 |

Realization
1
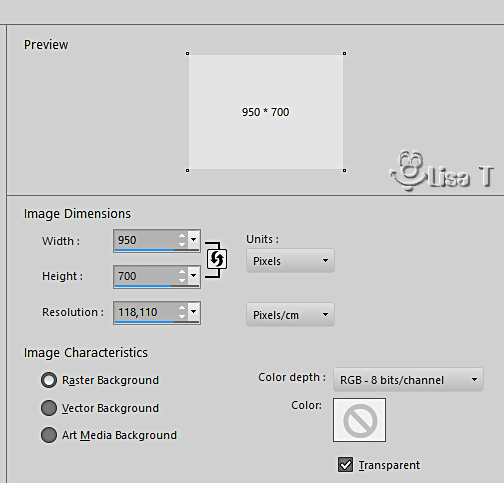
open a new transparent
image 950 * 700 px
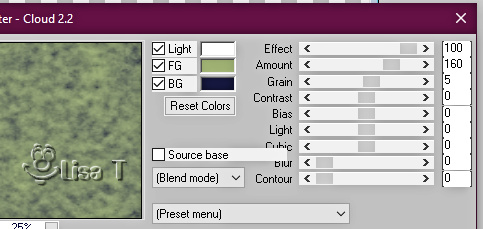
effects => plugins => Mura’s Meister => Cloud
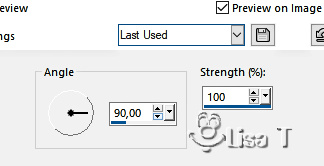
adjust = > blur => motion
blur
2
layers => new raster layer
flood fill white
effects => plugins => VM Natural / Weave / Distortion
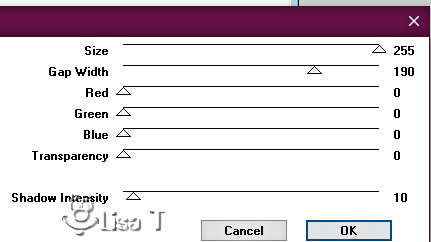
selections => load-save selection => from disk => selection
# 1
layers => new raster layer
flood fill selection with color 3
effects => texture effects => blinds / color 2
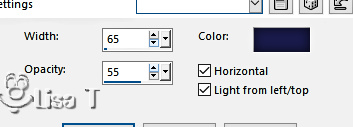
selections => modify = > select
selection borders
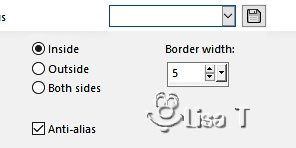
flood fill selection with
color 2
selections => select none
3
highlight middle layer (Raster 2)
enable the Selection tool / custom selection
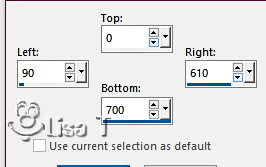
prepare a linear gradient
into the materials palette (colors 1 & 2)
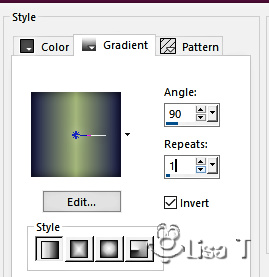
flood fill layer with the
gradient
layers => new raster layer
effects => plugins => VanDerLee => Unplugged-X
/ CD Shader
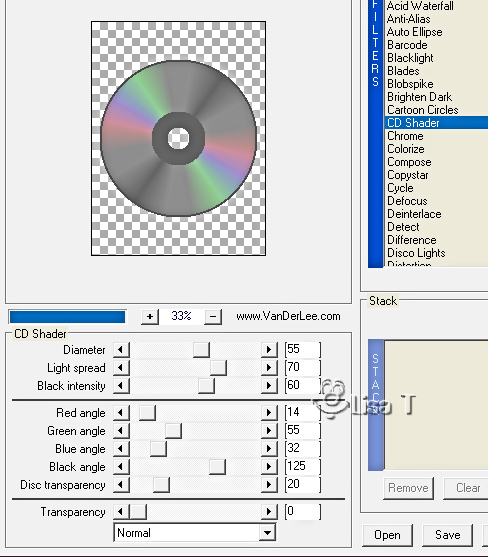
adjust => sharpness => sharpen
selections => select none
4
selections => select all / selections => float / selections
=> defloat
selections => modify => contract => 30 px
layers => new raster layer
copy / paste the landscape tube into selection
selections => select none
layers => merge => merge down
effects => 3D effects => drop shadow => 0 / 0
/ 100 / 35 / color 2
enable the Pick tool with the following settings, to move
the layer acurately => position X : 85 / position Y
: 30

hit the « M » key of your keyboard to disable
the tool
5
copy / paste the text tube as new layer
effects => 3D effects => drop shadow => 0 / 0
/ 100 / 5 / color 2
effects => plugins => FM Tile Tools / Blend Emboss
/ default settings
effects => 3D effects => drop shadow => 0 / 0
/ 100 / 5 / color 2
place properly
6
prepare a sunburst gradient into the materials palette
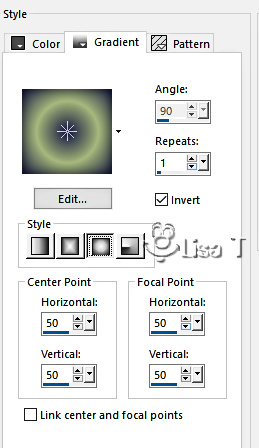
selections => load-save selection => from disk => selection
# 2
layers => new raster layer
flood fill layer with the gradient
selections => select none
7
highlight Raster 2
enable the Selection tool / custom selection
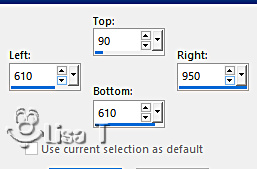
layers => new raster layer
flood fill selection with color 3
effects => texture effects => blinds ( same settings
as previously )
selections => modify = > select selection borders
( same settings as previously )
flood fill selection with color 2
selections => select none
layers => arrange => bring to top
8
image => add borders => tick « symmetric » => ...
5 px white
selections => select all
image => add borders => tick « symmetric » => 50
px color 1
selections => invert
effects => plugins => Toadies => What Are You
?... / 20 / 20
adjust => sharpness => sharpen
selections => invert
effects => 3D effects => drop shadow => 0 / 0
/ 100 / 30 / color 2
selections => select none
9
copy / paste the man tube as new layer / don’t forget
to erase the watermark
image => resize => untick « resize all layers » => 75
%
move on the right (see final result)
adjust => sharpness => sharpen
layers => duplicate
adjust => blur => gaussian blur / 10
adjust = > blur => motion blur ( same settings
as previously )
layers => arrange => move down
opacity of the layer : 60 %
10
apply your watermark or signature
write your licence number if you used a licenced tube
image => add borders => tick « symmetric » => 2
px color 2
save your work as... type .jpeg

My
tag with my tube and misted image

Thank you for following this tutorial
You can send your creations to Franie.

It will be a real pleasure for her to show it in the gallery
of the tutorial

If you have any trouble
with this translation, if you notice something wrong
don’t hesitate to contact me, I will do my best to
fix the problem


If you want to be informed
about Franie’s new tutorials
subscribe to her newsLetter
here
==> 

Back to the boards of Franie’s tutorials
board 1 board
2 board
2 board
3 board
3 board
4 board
4 board
5 board
5 board
6 board
6


|