

Original can be found here

Franie works with PSPX9, and I use PSP 2020 Ultimate
But this tutorial can be realized with another version of PSP
however, some differences might be noticed according to the version you use

If you want to present Franie’s tutorials on your forums or sites
please ask her first
If you publish your creation on a site or a blog
please put a link towards the tutorial if you create a tag
Thank you to understand and respect the rules.

The tubes Franie uses have been sent by the authors on different groups
And she has their permission to use them
she is a tuber herself
If you see a tube that might belong to you, contact Franie or myself
And a link towards your site will be added if necessary
Please, don’t use tubes found on the web with no watermark
all tubers apply their watermark without any exception !!!!!
no watermark ---> stolen tube

Hints and Tips
TIP 1-> if you don’t want to install a font -->
open it in a software as « Nexus Font » (or other font viewer software of you choice)
as long as both windows are opened (software and font), your font will be available in your PSP
TIP 2 -> from PSPX4, in the later versions of PSP the functions « Mirror » and « Flip » have been replaced by -->
image -> Mirror - has become ===> image => mirror => mirror horizontal
image -> Flip - has become ===> image => mirror => mirror vertical

Plugins
Alien Skin – Eye Candy 5 Impact – Extrude
Alien Skin – Eye Candy 5 Impact / Perspective Shadow
Mehdi / Wavy Lab 1.1
Bkg Kaleidoscope / @BlueBerry Pie
Toadies / Weaver
MuRa's Meister / Perspective Tiling 1.1
Andromeda / Perspective
AAA Frame / Texture frame
Graphics Plus / Cross Shadow

Thank you Renée Salon for your permission to use your plugins page

Supplies
Tubes – mask – texture – brush tip – selection – preset – font
Alpha layer => it contains the selection needed
1 color palette

place the supplies provided into the appropriate folders of « My Corel PSP »
double click on the preset and it will be installed automatically
open the mask and minimize to tray

colors
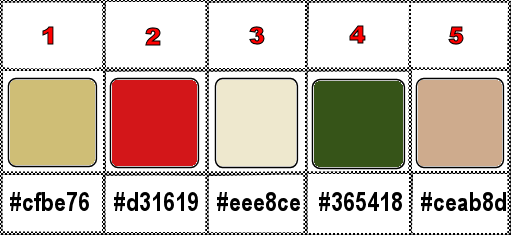
place colors 1 and 2 as FG and BG colors in the materials palette

Use the pencil to mark your place
along the way
hold down left click to grab and move it
 |

Instructions
1
open a new image => transparent => 550 * 650 px (Raster 1)
flood fill white
effects => texture effects => texture => choose the texture provided
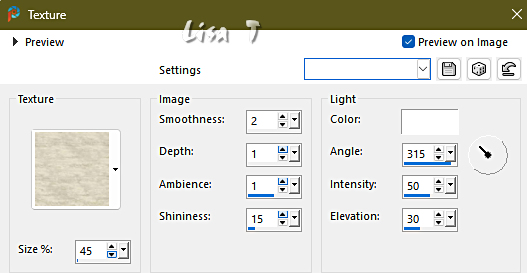
2
layers => new raster layer
flood fill with color 1
layers => new mask layer => from image
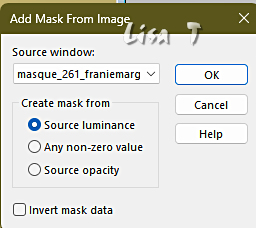
layers => merge => merge group
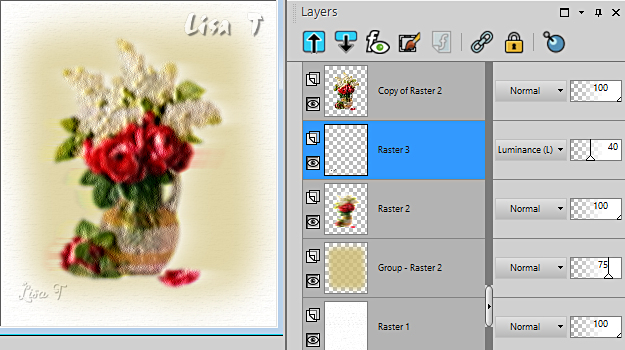
opacity of the layer : 75%
3
copy / paste « fleurs_218_franiemargot » (middle layer) as new layer
effects => Art Media Effects => brush strokes / color #f8fae2
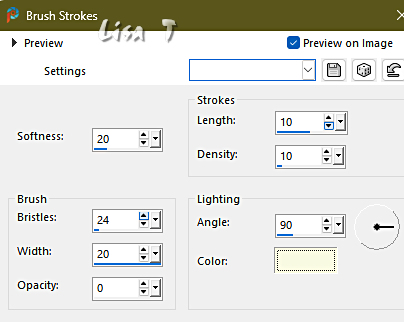
4
layers => duplicate
highlight layer just below
effects => distortion effects => Wind
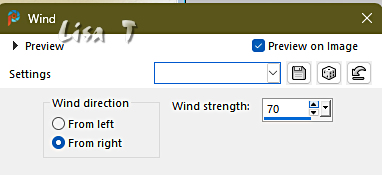
effects => distortion effects => Wind
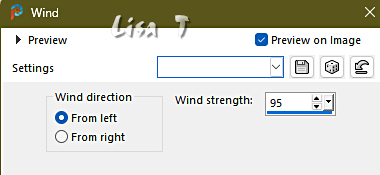
5
apply your watermark
Franie chose font « AR BERKELEY »

You can choose another font of course
opacity of the layer : 40%
6
your layers palette and tag look like this
7
layers => merge => merge visible
image => resize => untick « resize all layers » => 90%
effects => plugins => Alien Skin Eye Candy 5 Impact / Extrude (preset provided)
8
Your tag looks like this
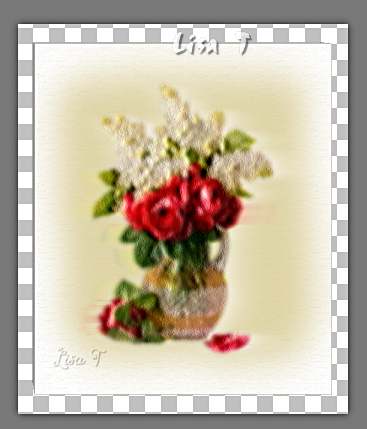
Save as … type .PSP (important)
set aside for a later use (minimize to tray is a good method to find this image when you need it)
9
Open the alpha layer => duplicate
work with the copy to preserve original file
10
set FG to color 3 and BG to color 4 in materials palette
effects => plugins => Mehdi => Wavy Lab 1.1 => colors 4 / 3 / 2 / 1
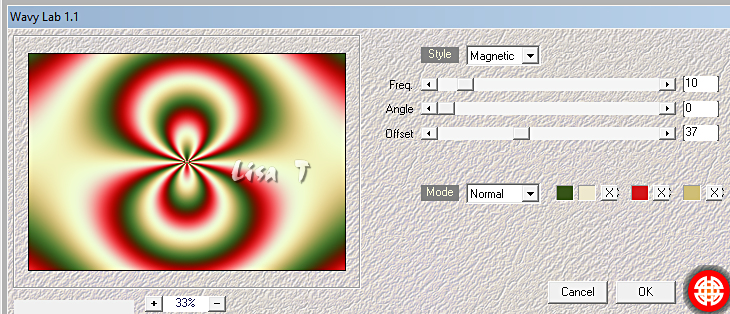
adjust => softness => soft focus
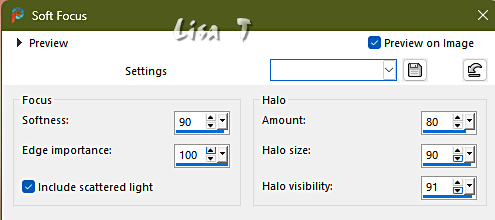
layers => duplicate
11
effects => plugins => Unlimited 2 => &<Bkg Kaleidoscope> / @BlueBerry Pie
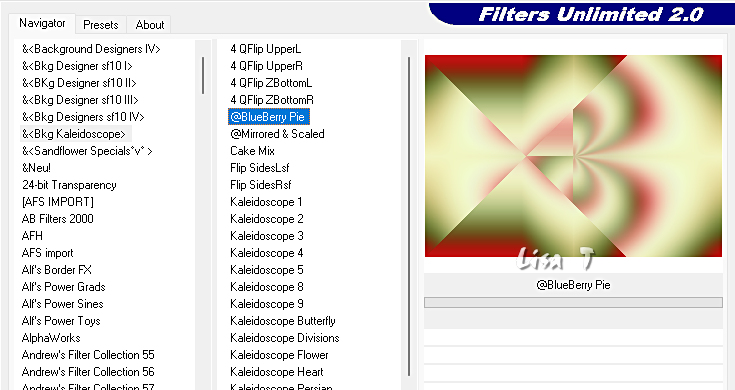
12
selections => load-save selection => from alpha channel => selection # 2
selections => promote selection to layer
selections => select none
effects => texture effect => Blinds / color 4
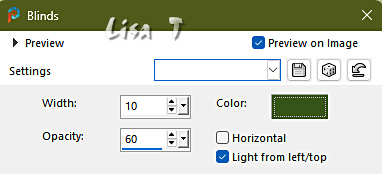
effects => 3D effects => drop shadow => 0 / 0 / 100 / 45 / black
13
Highlight layer below (copy of Raster 1)
selections => load-save selection => from alpha channel => selection # 4
selections => promote selection to layer
selections => select none
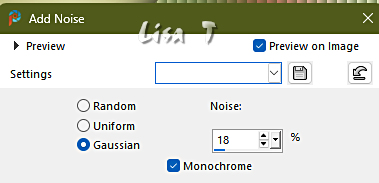
adjust => add-remove noise => add noise
adjust => sharpness => sharpen
effects => 3D effects => drop shadow => 0 / 0 / 100 / 45 / black
14
Highlight layer below again (Copy of Raster 1)
selections => load-save selection => from alpha channel => selection # 3
selections => promote selection to layer
selections => select none
effects => plugins => Toadies => Weaver

blend mode of the layer : Screen
effects => edge effects => enhance more
effects => 3D effects => drop shadow => 0 / 0 / 100 / 5 / black
layers => arrange => bring to top
15
copy / paste element 1 tube as new layer
effects => image effects => offset => H : -312 / V : 0 / tick « custom » and « transparent »
16
copy / paste element 2 tube as new layer
effects => image effects => offset => H : 97 / V : 0 / tick « custom » and « transparent »
17
Highlight « copy of Raster 1 »
effects = > plugins => Simple => Top Bottom Wrap
effects => edge effects => enhance more
selections => load-save selection => from alpha channel => selection # 5
effects => 3D effects => drop shadow => 0 / 0 / 70 / 40 / black
selections => select none
18
Close the eye of « Raster 1 »
layers => merge => merge visible
highlight Raster 1
open the eye
layers => duplicate
layers => arrange => bring to top
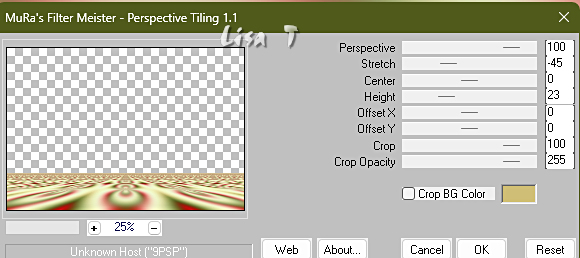
effects => plugins => Mura’s Meister => Perspective Tiling
19
Highlight merged layer
Enable the Pick tool
View => rulers
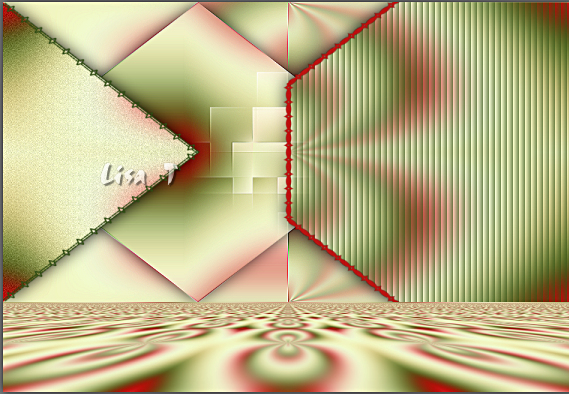
Push up the layer to 500
Your tag looks like this
Untick « rulers »
Highlight « copy of Raster 1 »
effects => 3D effects => drop shadow => 0 / 0 / 50 / 15 / black
20
copy / paste « objets_ 419 » as new layer (highlight middle layer)
copy / paste as new layer the image set aside in step 8
image => resize => untick « resize all layers » => 55%
effects => image effects => offset => H : 0 / V : 39 / tick « custom » and « transparent »
selections => load-save selection => from alpha channel => selection # 6
flood fill selection with color 5
selections => select none
layers => merge => merge down
21
effects => plugins => Andromeda => Perspective
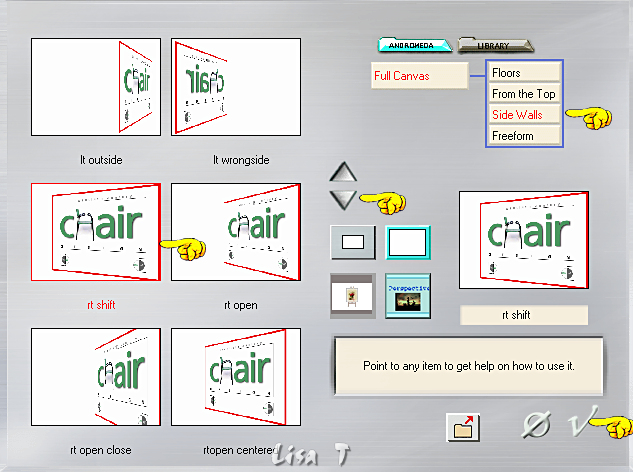
adjust => sharpness => sharpen more
move to right side (see final result)
effects => 3D effects => drop shadow => -12 / 29 / 50 / 24 / black
22
copy / paste « fleurs_218 » as new layer
image => resize => untick « resize all layers » => 75%
place as shown on final result
effects => plugins => Alien Skin Eye Candy 5 Impact / Perspective Shadow => preset « Reflect in Front »
effects => 3D effects => drop shadow => -12 / 29 / 50 / 24 / black
23
layers => new raster layer
open « CurlyLines_Brushes_by_markyfan_4 »
file => export => custom brush
give the name and save
back to your main work => apply (size 268 – rotation 340) 2 or three times without moving your mouse
Franie chose color 2

Move slightly if necessary
effects => 3D effects => drop shadow => 0 / 0 / 30 / 10 / black
24
image => add borders => tick « symmetric » => 5 px color 2
edit => copy
selections => select all
image => add borders => tick « symmetric » => 50 px any contrasting color
selections => invert
edit => paste into selection
adjust => blur => gaussian blur => 30
selections => promote selection to layer
effects => plugins => AAA Frames => Texture Frame
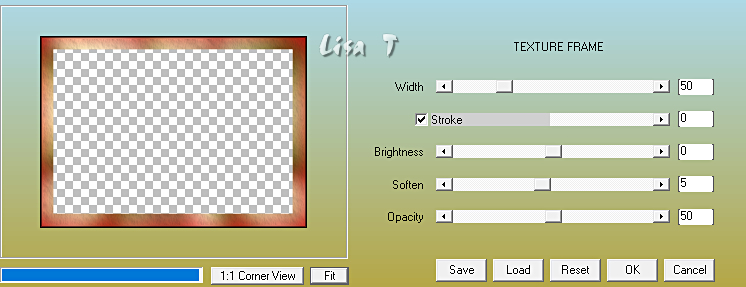
effects => edge effects => enhance more
layers => merge => merge down
selections => invert
effects => 3D effects => drop shadow => 0 / 0 / 100 / 50 / black
25
selections => select all
selections => modify => contract => 5 px
selections => invert
flood fill selection with color 4
effects => plugins => Graphics Plus => Cross Shadow / default settings
selections => select none
apply your watermark or signature on a new layer
write your licence number if you used a licenced tube
layers => merge => merge all (flatten)
file => save your work as... type .jpeg

My tag with one of my tubes

Thank you for following this tutorial
You can send your creation to me

It will be a real pleasure for me to present it in the gallery of the tutorial

If you have any trouble with this translation, if you notice something wrong
don’t hesitate to contact me, I will do my best to fix the problem

Back to the boards of Franie’s tutorials
20 tutorials on each board
board 7 =>
at the bottom of each board you will find arrows allowing you to navigate from one board to another


|