
riginal
can be found here

Franie works with PSPX9, and I use PSP 2019
But this tutorial can be realized with another version
of PSP
however, some differences might be noticed according to
the version you use

If you want to present
Franie’s tutorials on your
forums or sites
please ask her first
If you publish your creation on a site or a blog
please put a link towards the tutorial if you create a
tag
Thank you to understand and respect the rules.

The tubes Franie uses have
been sent by the authors on different groups
And she has their permission to use them
If you see a tube that might belong to you, contact Franie
or myself
And a link towards your site will be added if necessary
Please, don’t use tubes found on the web with no
watermark
all tubers apply their watermark without any exception !!!!!
no watermark ---> stolen tube

Hints and Tips
TIP 1-> if you don’t
want to install a font -->
open it in a software as « Nexus Font » (or
other font viewer software of you choice)
as long as both windows are opened (software and font),
your font will be available in your PSP
TIP 2 -> from PSPX4, in the later versions of PSP the functions « Mirror » and « Flip » have
been replaced by -->
image -> Mirror - has become ===> image
=> mirror => mirror horizontal
image -> Flip - has become ===> image
=> mirror => mirror vertical

Plugins
Simple – Half Wrap
Simple – Diamonds
AFS Import – Sqborder2
AAA Filters – Tweed Frame
MuRa's Seamless – Emboss at Alpha


Supplies
2 tubes flowers
1 mask
1 text - 1 font
2 selections => place into the appropriate folder of
Corel PSP general folder
1 texture => place into the appropriate folder of Corel
PSP general folder
1 color palette

open the mask and minimize
to tray
Tubers’ authorizations


Franie’s colors
Don’t hesitate to change colors and blend modes of
the layers
to match your tubes and images
color 1 => #dccfac
color 2=> #285105
color 3 => #a74e2b


Use the pencil to mark your place
along the way
hold down left click to grab and move it
 |

Realization
1
open a new transparent image 850 * 550 px

prepare colors 1 & 2
as FG and BG colors

flood fill layer with color
1
layers => new raster layer
flood fill layer with color 2
image => resize => untick « resize all
layers » => 85%
effects => plugins => Simple => Hals Warp
effects => image effects => seamless tiling

effects => edge effects => enhance more
2
layers => new raster layer
flood fill layer with color 3
image => resize => untick « resize all layers » => 85%
selections => select all
selections => float - selections => defloat
selections => modify => contract

hit the DELETE key of your
keyboard
selections => select none
effects => plugins => AFS Import / Sqborder2

effects => edge effects => enhance more
effects => image effects => seamless tiling

layers => duplicate
layers => merge => merge down
adjust => sharpness => sharpen
effects => 3D effects => drop shadow => 0 / 0
/ 100 / 10 / color 2 ==> TWICE
3
highlight Raster 2
selections => load-save selection => from disk => selection
1
selections => promote selection to layer
effects => texture effects => Texture => choose
the texture provided

selections => modify => select
selection borders

flood fill selection with
color 3
effects => 3D effects => inner bevel

selections => select none
effects => 3D effects => drop shadow => 0 / 0
/ 100 / 10 / black
4
highlight Raster 1
selections => load-save selection => from disk => selection
2
selections => promote selection to layer
effects => plugins => AAA Filters / Tweed Frame

adjust => hue and saturation => colorize

blend mode of the layer : Overlay
selections => select none
effects => 3D effects => drop shadow => 0 / 0
/ 100 / 10 / black
5
layers => duplicate
layers => arrange => bring to top
effects => distortion effects => twirl

layers => duplicate
image => mirror => mirror horizontal
layers => merge => merge down
blend mode of the layer : Overlay
layers => arrange => move down twice
6
highlight Raster 2
layers => duplicate
effects => plugins => Simple => Diamonds
blend mode of the layer : Hard Light - opacity ; 50%
(or other)
adjust => sharpness => sharpen
layers => arrange => move down
7
highlight top layer
layers => new raster layer
flood fill layer with color 1
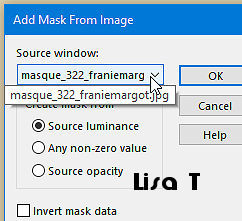
layers => new mask layer => from image

effects => edge effects => enhance more
layers => merge => merge group
8
layers => merge => merge visible
selections => select all
image => add borders => tick « symmetric » => color
3

selections => invert
selections => promote selection to layer
selections => select none
effects => plugins => AFS Import / Sqborder2 => saùe
settings as before
effects => edge effects => enhance more
layers => merge => merge down
9
image => add borders => tick « symmetric » => color
3 => 50 px
select this border with the magic wand tool
selections => modify => contract / 8px
layers => new raster layer
flood fill selection with color 2
effects => texture effects => Texture => choose
the texture provided / same settings as before
adjust => sharpness => sharpen
selections => modify => select selection borders

flood fill selection with
color 3
effects => 3D effects => outer bevel

selections => select none
10
copy / paste as new layer the flower tube
image => resize => untick « resize all layers » => 75%
enable the Pick tool with the following settings (to move
layer)

adjust => sharpness => high
pass sharpen

effects => 3D effects => drop shadow => 10 / 20
/ 50 / 10 / black
11
copy / paste as new layer the text tube
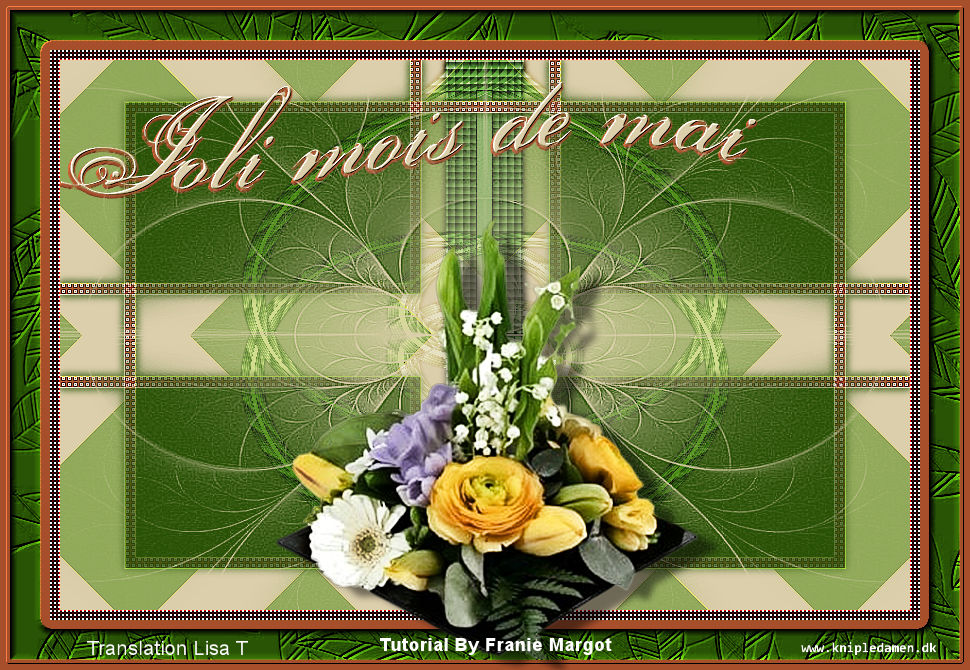
move as shown on the final result
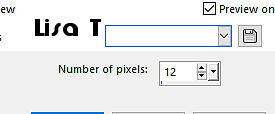
effects => plugins => Mura’s Seamless => Emboss
at Alpha (default settings)
effects => 3D effects => drop shadow => 1 / 1
/ 100 / 2 / color 3
12
apply your watermark (or signature)
save as... type .jpeg

write the copyright © license number if you worked
with a licensed tube
apply your watermark
layers => merge => merge all (flatten)
save as... type .jpeg

Thank you for following
this tutorial
You can send your creations to Franie.

It will be a real pleasure for her to show it in the gallery
of the tutorial
My creation with my tube

another variant created by Birte


If you have any trouble
with this translation, if you notice something wrong
don’t hesitate to contact me, I will do my best to
fix the problem


If you want to be informed
about Franie’s new tutorials
subscribe to her newsLetter


Back to the boards of Franie’s tutorials
board 1 board
2 board
2 board
3 board
3 board 4 board 4 board
5 board
5 board 6 board 6

|