Hubert

Original can be found here
Franie works with PSP 13, and I use PSP 17
But this tutorial can be realized with another version of PSP
If you want to present her tutorials on your forums or sites
please ask her first.
If you publish your creation on a site or a blog
please put a link towards the tutorial.
Thank you to understand and respect the rules.

The tubes Franie uses have been sent by the authors on different groups
And she has their permission to use them
Some of them have been found on the WEB,
If you see a tube that belongs to you, contact Franie or myself
And a link towards your site will be added.
Filters used
Simple / 4 Way Average
Simple / Zoom Out and Flip
VanDerLee / UnPlugged-X
Andromeda / Perspective
Unlimited 2 – Texturize / wood 2

Material
1 alpha layer - 2 tubes - 2 masks - 1 font - 1 filter (import in Unlimited 2) - 1 color palette

open the masks and minimize them
duplicate all tubes and work with the copies/close the originals
Tubers’ authorizations 
Franie’s colors
Don’t hesitate to change them and to change the blend modes of the layers
According to your tubes and images
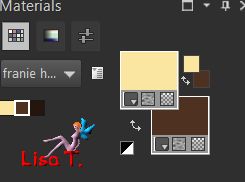
color 1 -> foreground color -> #fbe6a1
color 2 -> background color -> #4f3223
color 3 -> #27160d

Use the paintbrush to follow the steps
left click to grab it

Realization
Step 1
open the alpha layer / window /duplicate - close the original and work with the copy (Raster 1)
Step 2
prepare colors 1 and 2 in the materials palette
Step 3
fill the layer with color 1
layers/new raster layer
fill the layer with color 2
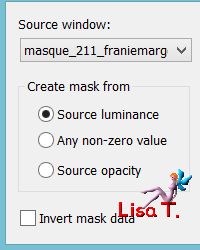
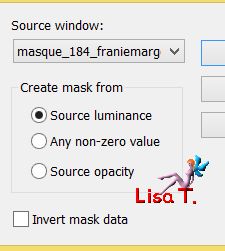
layers/new mask layer/from image
effects/edge effects/enhance
layers/merge/merge group
Step 4
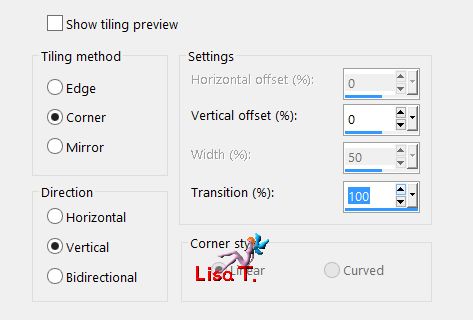
effects/image effects/seamless tiling
layers/duplicate - image mirror/mirror horizontal
layers/merge down
effects/plugins/Simple/4 Way Average
effects/plugins/Simple/Zoom Out and Flip
layers/merge down
Step 5
layers/duplicate
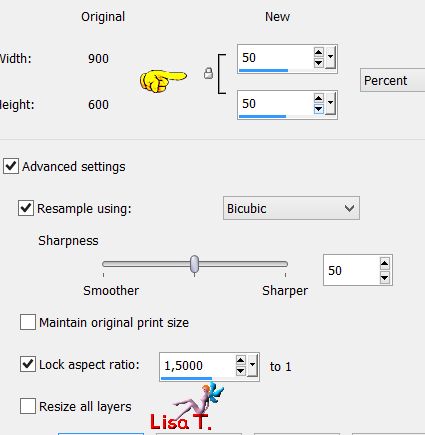
image/resize/uncheck « resize all layers »/50%
effects/plugins/VanDerLee/Unplugged X
effects/edge effects/enhance
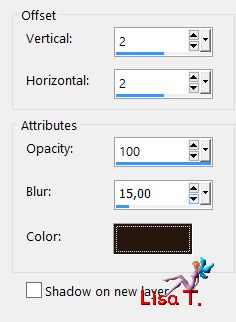
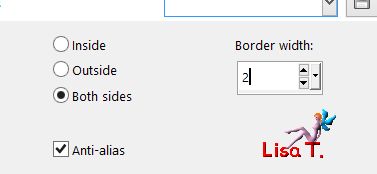
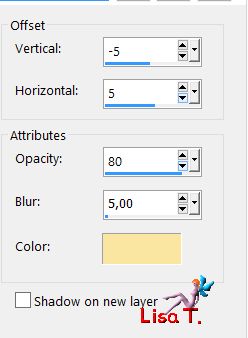
effects/3D effects/drop shadow/color 3
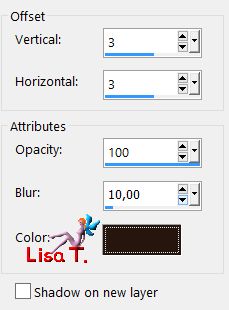
again drop shadow -3 / -3 / 100 / 10 /color 2
Step 6
layers/duplicate
effects/plugins/Andromeda/Perspective
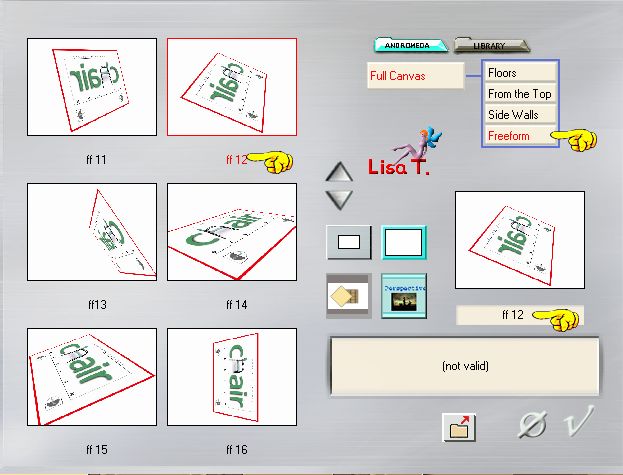
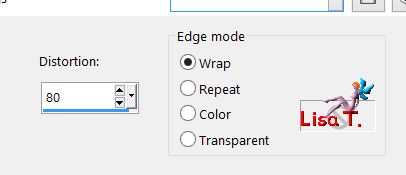
effects/geometric effects/perspective horizontal
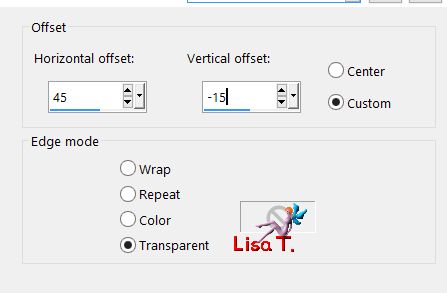
effects/image effects/offset
effects/3D effects/drop shadow *** 3 / 3 / 100 / 10 / *** -3 / -3 / 100 / 10 color 2
Step 7
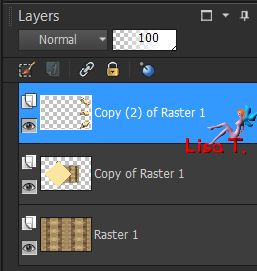
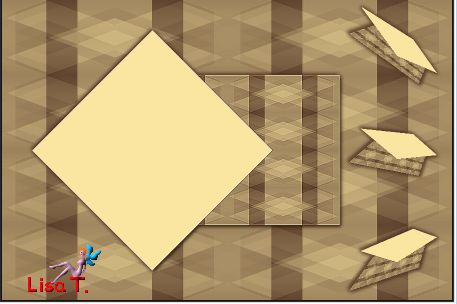
your layers palette looks like this
your tag looks like this
Step 8
layers/new raster layer (Raster 2)
selections/load selection from alpha channel/selection 1
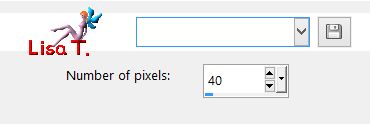
selections/contrast/5 pixels
fill with color 3
effects/3D effects/drop shadow as in step 6
keep the selection active
Step 9
layers/new raster layer (Raster 3)
in the materials palette, prepare a linear gradient
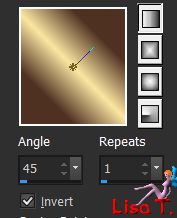
selections/contract/5 pixels
fill the selection with the gradient
adjust/blur/gaussian blur/10
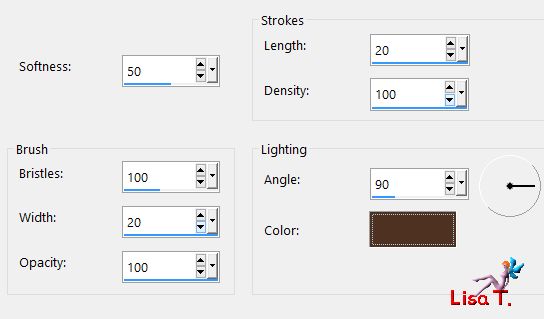
effects/Art Media effects/brush strokes/color 2
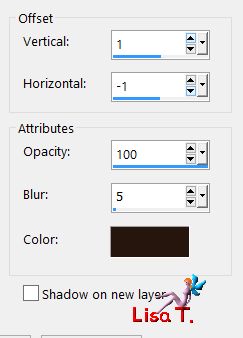
effects/3D effects/drop shadow/ 0 / 0 / 100 / 10 / color 3
selections/select none
Step 10
copy/paste the tube « parfum_homme 1 » as new layer (Raster 4)
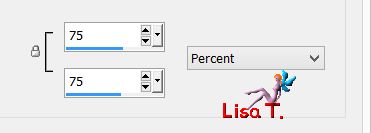
image/resize/uncheck « resize all layers »/45%
move it in the middle of the frame as shown
adjust/sharpness/sharpen more
effects/3D effects/drop shadow
again drop shadow/ -2 / -2 / 100 / 15 / clor 3
Step 11
activate the bottom layer (Raster 1)
layers/new raster layer/fill with color 1
layers/new mask layer/from image
effects/edge effects/enhance
layers/merge/merge group
blend mode : Screen - opacity : 50%
image/mirror/mirror vertical
effects/3D effects/drop shadow
Step 12
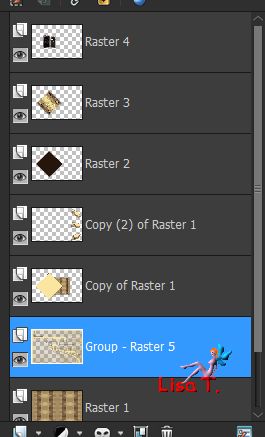
your layers palette looks like this
Step 13
activate the layer « Copy 2 of Raster 1 » (middle layer of the stack)
selections/load selection from alpha channel/selection 2
effects/Art Media Effects/brush strokes as in step 9
selections/modify/expand/3 pixels
selections/mofify/select selection borders
layers/new raster layer (Raster 5)
fill with color 2
effects/3D effects/drop shadow/ 0 / 0 / 100 / 10 / color 3
layers/merge down
selections/select none
Step 14
activate the bottom layer (Raster 1)
selections/select all
image/add borders/50 pixels color 1
selections/invert
selections/modify/contract/5 pixels
layers/new raster layer
fill with color 2
effects/3D effects as befor (in memory)
selections/modify/contract/5 pixels
layers/new raster layer - fill with the gradient
effects/art media effects/brush strokes as before
effects/edge effects/enhance
effects/3D effects/drop shadow as before
selections/select none
layers/merge visible
Step 15
selections/select all
selections/modify/contract
effects/3D effects/drop shadow
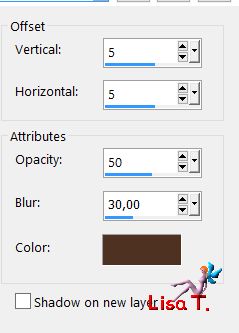
again, drop shadow/ -5 / -5 / 50 / 30 / color 3
selections/select none
Step 16
image/add borders/3 pixels color 2
selections/select all
image/add borders/100 pixels white
selections/invert
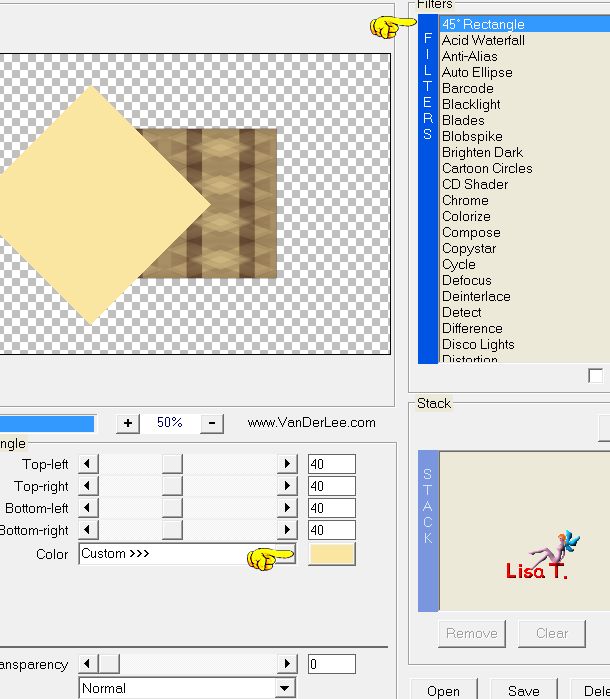
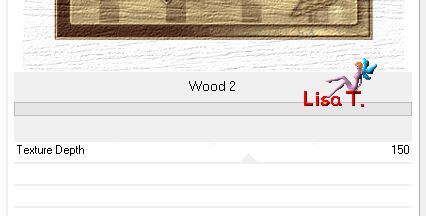
effects/plugins/Unlimited 2/Texturize/Wood 2 (provided)
adjust/sharpness/sharpen more
selections/invert
effects/3D effects/drop shadow/ 5 / 5 / 50 / 30 *** -5 / -5 / 50 / 30 / color 3
selections/select none
Step 17
write HUBERT with the font « Altea » (provided) color 2

layers/convert to raster layer
effects/3D effects/color 1
adjust/sharpness/sharpen more
Step 18
copy/paste the tube « man _169 » as new layer
image/resize/uncheck « resize all layers »/75%
move to the left
adjust/sharpness/sharpen more (twice)
effects/3D effects/drop shadow

image/add borders --->
2 pixels color 2
3 pixels color 1
2 pixels color 2
Step 19
apply your signature and save as... type jpeg
Your tag is finished
You can send your creations to Franie.
It will be her pleasure to show it in her site

If you have any trouble following this tutorial
don’t hesitate to Contact Franie
If you want to be informed about Franie’s new tutorials
Join her newsLetter

You will find your creations here

Back to the boards of Franie’s tutorials
board 1  board 2 board 2

|