Happy mother’s Day

Original can be found here

.gif)
Franie works with PSP 13, and I use PSP 18
But this tutorial can be realized with another version of PSP
.gif)
If you want to present Franie’s tutorials on your forums or sites
please ask her first.
If you publish your creation on a site or a blog
please put a link towards the tutorial.
Thank you to understand and respect the rules.
The tubes Franie uses have been sent by the authors in different sharing groups
And she has their permission to use them
she also creates her own tubes
If you see a tube that belongs to you, contact Franie or myself
And a link towards your site will be added.
Filters used
TRAMAGE – Gradient/Spokes Ratio Maker…
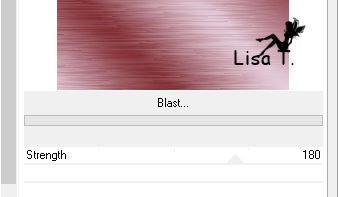
VM TOOLBOX - Blast
FM TILE TOOL – Blend Emboss
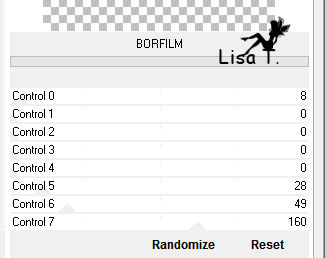
AFS IMPORT - Borfilm
PENTA.COM – Dot and Cross
TWO MOON – RotoBlades..

Material
1 tube by Franie - 1 tube by Lisa T
selections (install them into the folder « selections » of « My PSP Files »

Tubers’ authorizations 
Franie’s colors
Don’t hesitate to change them and to change the blend modes of the layers
According to your tubes and images
color 1 -> foreground color --> FG --> e9d4e2
color 2 -> background color --> BG -> 7d272d
color 3 -> ffffff
Use the pencil to follow the steps
left click to grab it

Realization
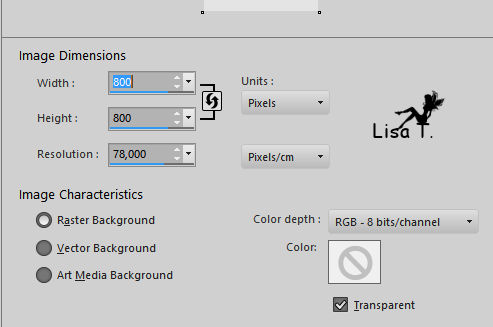
open a new transparent image 800 * 800 pixels
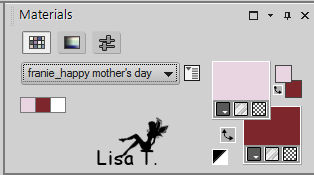
prepare the colors into the materials palette
if you change them, choose 2 colors in your main tube : FG color : light and BG color : dark
in the materials palette, prepare a linear gradient
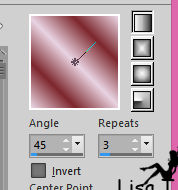
flood fill layer with this gradient
adjust -> blur -> gaussian blur / 20
selections -> load/save selection -> from disk -> sélection-franie
selections -> promote selection to layer
selections -> select none
adjust -> sharpness -> sharpen
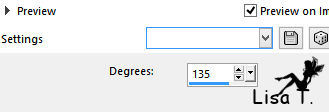
effects -> distortion effects -> twirl
layers -> duplicate
image -> mirror -> mirror vertical
image -> mirror -> mirror horizontal
layers -> merge -> merge down
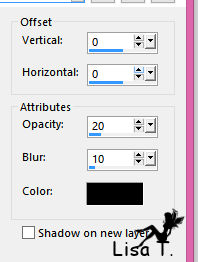
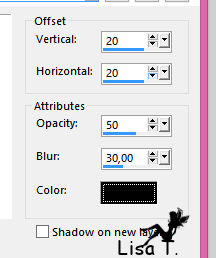
effects -> 3D effects -> drop shadow
effects -> plugins -> Unlimited 2 -> Tramages / Gradient / Spokes Ratio Maker

activate Raster 1
effects -> plugins -> Unlimited 2 -> VM Toolbox / Blast
keep Raster 1 active
selections -> load/save selection -> from disk -> sélection-franie 2
selections -> promote selection to layer
effects -> 3D effects -> drop shadow as before (don’t change the settings)
selections -> select none
effects -> plugins -> FM Tile Tool / Blend Emboss / default settings
effects -> plugins -> Unlimited 2 -> AFS IMPORT / Borfilm
selections -> load/save selection -> from disk -> sélection-franie 3
layers -> new raster layer
flood fill selection Swith color 2
selections -> modify -> contract -> 2 pixels
flood fill selection with color 1
selections -> modify -> select selection borders

effects -> 3D effects -> inner bevel

selections -> select none
copy / paste as new layer the flower tube
move it as shown on the final result
layers -> duplicate
image -> mirror -> mirror horizontal
layers -> merge -> merge down TWICE
adjust -> sharpness -> sharpen
effects -> 3D effects > drop shadow
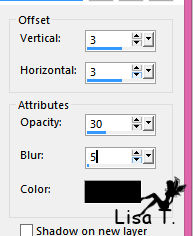
drop shadow again changing (3) by (-3)
layers -> merge -> merge down
selections -> load/save selection -> from disk -> sélection-franie 4
selections -> modify -> select selection borders
flood fill selection with color 2
effects -> 3D effects -> inner bevel as vbefore
selections -> select none
selections -> load/save selection -> from disk -> sélection-franie 5
activate « Raster 1 »
selections -> promote selection to layer
selections -> select none
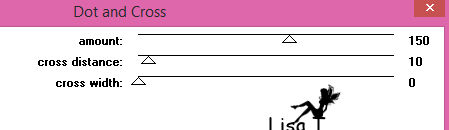
effects -> plugins -> PENTA.COM / Dot and Cross
selections -> select none
activate top layer
effects -> 3D effects > drop shadow -> color 2
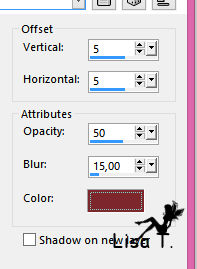
drop shadow again changing (5) by (-5)
selections -> load/save selection -> from disk -> sélection-franie 6
activate « Raster 1 »
selections -> promote selection to layer
selections -> select none
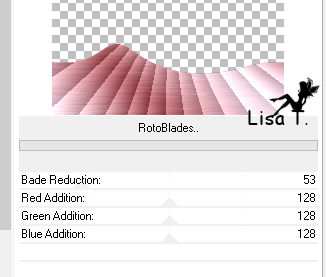
effects -> plugins -> Unlimited 2 -> TWO MOON / RotoBlades
effects -> 3D effects > drop shadow

activate top layer
copy / paste as new layer the character tube
move it to the right (see final result)
effects -> 3D effects > drop shadow
layers -> duplicate
image -> mirror -> mirror horizontal
move it to the left and set the opacity of the layer on 30%
in the materials palette, set color 1 as FG color, and color 2 as BG color
activate the Text tool (font provided)

write « Happy Mother’s Day » (or another text of your choice)
effects -> plugins -> Mura’s Seamless / Emboss at Alpha as before
image -> add borders -> ....
2 pixels color 2
2 pixels color 1
2 pixels color 2
don’t forget to apply your watermark
Your tag is finished
You can send your creations to Franie.
It will be her pleasure to show it in her site

If you have any trouble following this tutorial
don’t hesitate to Contact Franie
If you want to be informed about Franie’s new tutorials
Join her newsLetter

You will find your creations here

Back to the boards of Franie’s tutorials
board 3  board 4 board 4

|