

Original can be found here

Franie works with PSP 18, and I use PSP 19
But this tutorial can be realized with another version of
PSP

If you want to present her tutorials on your forums or sites
please ask Franie first
If you publish your creation on a site or a blog
please put a link towards the tutorial.
Thank you to understand and respect the rules.

The tubes Franie uses have been sent by the authors on different
groups
And she has their permission to use them
If you see a tube that belongs to you, contact Franie or
myself
And a link towards your site will be added.
Please, don’t use tubes found on the web with no watermark
all the tubers apply their watermark
no watermark ---> stolen tubes

Filters used
Filters Unlimited 2.0
Bkg Designer sf10II – Daggers Done
Two Moon – Venitian Blur
Alien Skin – Eye Candy 5 Impact – Glass
MuRa's Meister – Cloud
Alien Skin – Eye Candy 5 Impact – Textures


Material
alpha-layer - selection (copy/paste
into the folder « selections » of
Corel PSP folder) - tubes - images - mask
preset shape (copy / paste into the folder « preset
shapes » of your PSP folder) - color
palette

you can find other tubes here and here
Tubers’ authorizations


Franie’s
colors
Don’t hesitate to change them and
to change the blend modes of the layers
According to your tubes and images
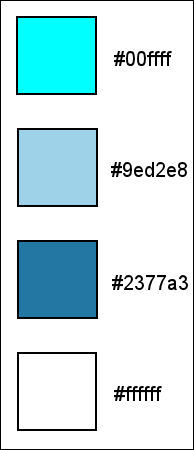
color 1 -> foreground color FG color -> #00ffff
color 2 -> background color BG color -> #9ed2e8
color 3 -> #2377a3
color 4 -> #ffffff

Use the paintbrush to follow the steps
hold down left click to grab it and move it


Realization
1
open the alpha layer
duplicate and close the original
work with the copy
2
selections -> select all
copy / paste into selection « ciborg1 »
selections -> select none
adjust -> blur -> gaussian blur

3
layers -> duplicate
effects -> plugins -> Unlimited 2 -> Bkg Designers
sf10II / Daggers Done
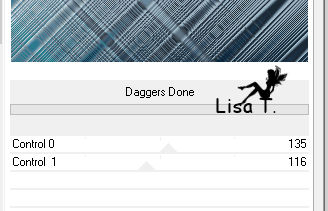
adjust -> sharpness -> sharpen
blend mode of the layer : soft light
4
in the materials palette, set color 1 as FG color
layers -> new raster layer -> flood fill with color
1
open « mask_137 » and minimize it
to tray
layers -> new mask layer -> from image
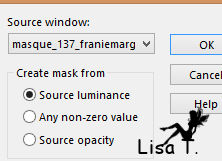
layers -> merge -> merge group
blend mode of the layer : Screen
5
layers -> duplicate
image -> resize -> uncheck « resize all
layers » -> 80%
effects -> plugins -> Two Moon / Venitian Blur
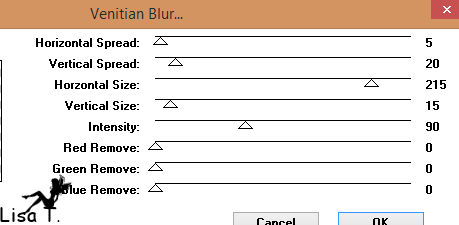
blend mode of the layer : soft light
effects -> 3D effects -> drop shadow
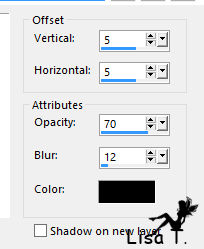
drop shadow again changing (5) by (-5)
6
layers -> new raster layer
selections -> load-save selection -> from alpha channel
-> selection #1
copy / paste into selection « ciborg1 »
layers -> arrange -> move down Twice
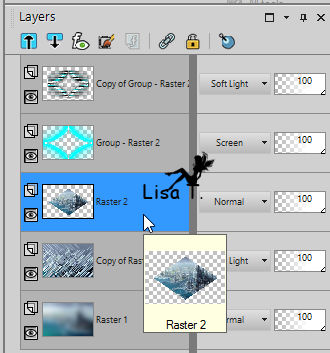
adjsut -> sharpness -> sharpen more
selections -> select none
7
highlight Raster 1
selections -> load-save selection -> from alpha channel
-> selection #2
selections -> promote selection to layer
layers -> arrange -> bring to top
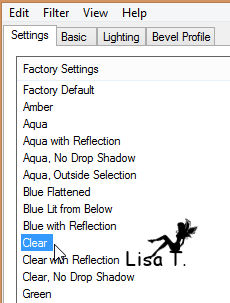
effects -> plugins -> Alien Skin Eye Candy 5-Impact
/ Glass - Clear
effects -> 3D effects -> drop shadow
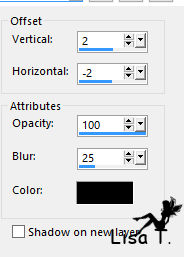
selections -> select none
8
highlight Raster 1
selections -> load-save selection -> from alpha channel
-> selection #3
selections -> promote selection to layer
layers -> arrange -> bring to topeffects -> plugins
-> Alien Skin Eye Candy 5-Impact / Glass - Clear
effects -> 3D effects -> drop shadow -> 2 / -2
/ 100 / 25 / black
selections -> select none
9
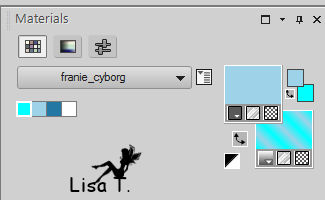
in the materials palette, set color 2 as FG color and color
1 as BG color
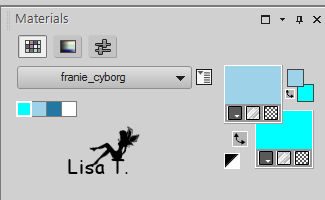
prepare a linear gradient as BG color
activate the Preset Shape Tool
find « Star 4 »

draw the shape
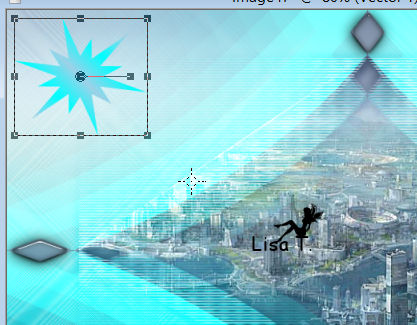
press the M key to disable the tool
adjust -> sharpness -> sharpen
effec ts -> 3D effects -> drop shadow TWICE -> 2
/ -2 / 100 / 25 / color 3
10
layers -> new raster layer
selection tool -> custom selection
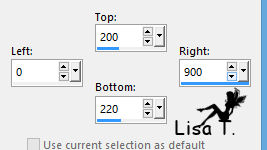
flood fill selection with color 3
selections -> select none
effects -> distortion effects -> polar coordinates
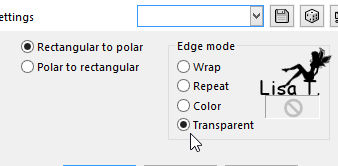
effects -> distortion effects -> punch -> strength :
100%
again -> effects -> distortion effects -> punch :
75%
effects -> image effects -> seamless tiling / default
settings
opacity of the layer : 60%
effects -> 3D effects -> drop shadow -> 2 / -2
/ 100 / 25 / color
11
in the materials palette, set Black as FG color and white
as BG color
layesr -> new raster layer
selections -> load-save selection -> from alpha channel
-> selection #4
effects -> plugins -> Mura’s Meister / Cloud
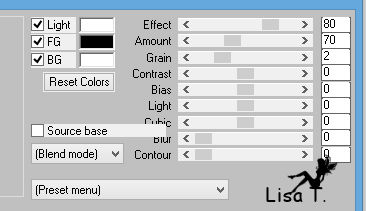
don’t worry if your result is slightly different
selections -> select none
12
selections -> load-save selection -> from alpha channel
-> selection #5
flood fill selection white
selections -> select none
opacity of the layer : 60%
13
your layers palette looks like this
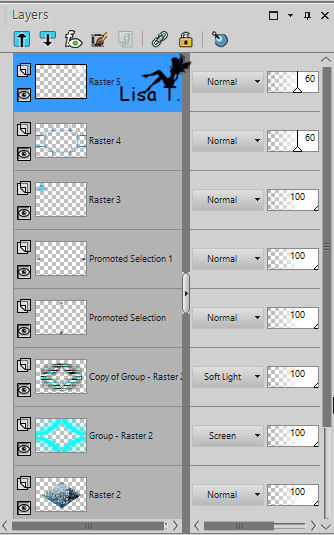
14
your work looks like this
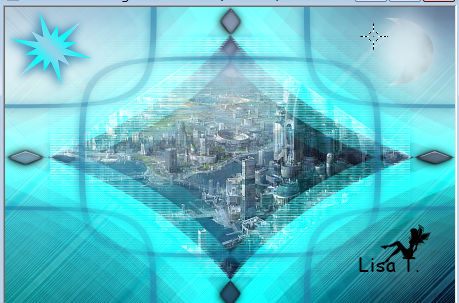
15
layers -> m erge -> merge visible
image -> add borders -> check « symmetric » ->...
2 pixels color 3
2 pixels color 1
2 pixels color 3
16
image -> add borders -> 50 pixels color 2
select this border with the magic wand tool
effects -> plugins -> Alien Skin Eye Candy 5-Impact
-> Textures / Swirl
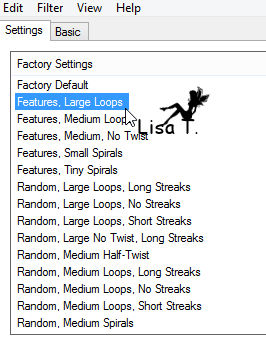
selections -> modify -> contract -> 15 pixels
effects -> 3D effects -> cutout -> color 3
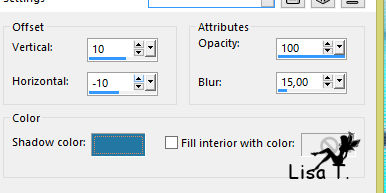
effects -> 3D effects -> drop shadow TWICE -> 2
/ -2 / 100 / 25 / color 3
selections -> select none
17
copy / paste as new layer « woman-1083 »
move it to the right (see final result)
adjsut -> sharpness -> sharpen
effects -> 3D effects -> drop shadow TWICE -> 2
/ -2 / 100 / 25 / color 3
18
layers -> new raster layer
selections -> load-save selection -> from disk -> tuto123_cyborg6
flood fill selection with color 3
effects -> 3D effects -> drop shaodw -> 2 / -2
/ 100 / 25 / color 4 (white)
selections -> select none
20
apply your watermark
merge all layers and save as... type .jpeg
Your tag is finished

You can send your creations to Franie.

It will be a real pleasure for her to show it in the gallery
of the tutorial


If you have any trouble following this translation, don’t
hesitate to write to me


If you want to be informed about Franie’s new tutorials
Subscribe to her NewsLetter


Back to the board of Franie’s
tutorials
board 1  board
2 board
2  board
3 board
3  board
4 board
4 

|