Christmas
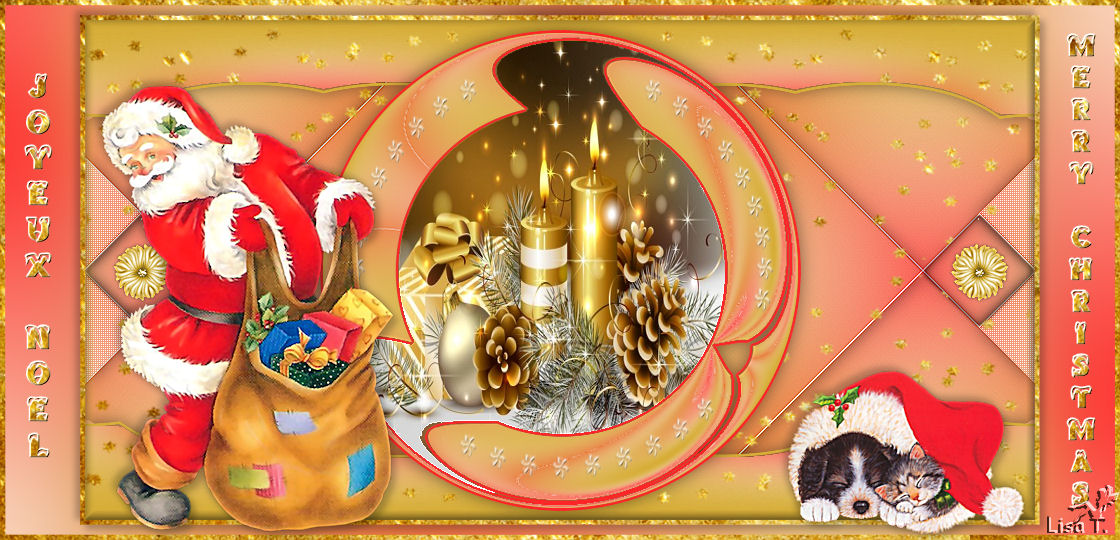
Original can be found here

I am member of TWInc
his translation is protected


Franie works with PSP 13, and I use PSP 12
But this tutorial can be realized with another version of PSP

If you want to present her tutorials on your forums or sites
please ask her first.
If you publish your creation on a site or a blog
please put a link towards the tutorial.
Thank you to understand and respect the rules.

The tubes Franie uses have been sent by the authors on different groups
And she has their permission to use them
Some of them have been found on the WEB,
If you see a tube that belongs to you, contact Franie or myself
And a link towards your site will be added.

Filters used
Mehdi/Wavy Lab 1.1
Simple/Diamonds
Simple/4 Way AVerage
Simple/Top Bottom Wrap
Flaming Pear/FLexify 2
AFS IMPORT/sqborder2
Alien Skin/Eye Candy 5 Impact/Glass


Material
1 alpha layer_selections
1 tube by Creanneke
1 mask
3 elements
1 picture
1 preset Flexify 2
1 preset glass -
double click on the preset, and it will be installed automatically in the plugin folder
1 tile
1 font
1 color palette


Tubers’ authorizations 
Franie’s colors

Don’t hesitate to change them and to change the blend modes of the layers
According to your tubes and images

Use the paint brush to follow the steps
Left click to grab it


Realization
Step 1
prepare the foregound and the background colors in the materials palette
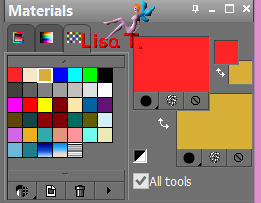
Step 2
activate the alpha layer_selections
window/duplicate
close the original, and work with the copy
Step 3
effects/plugins/Mehdi/Wavy Lab 1.1
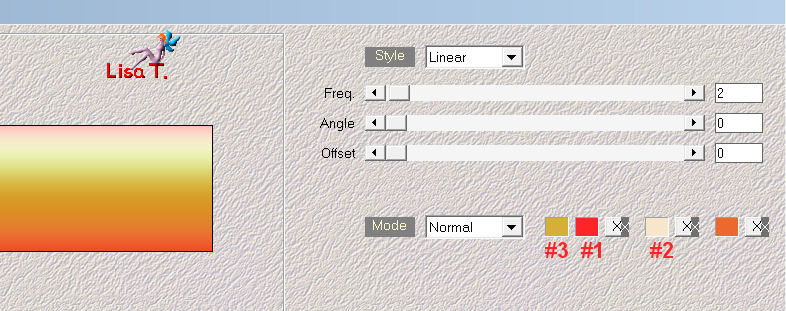
layers/duplicate
effects/plugins/Simple/Diamonds
effects/plugins/Simple/4 Way Average
effects/edge effects/enhance more
Step 4
layers/duplicate
image/resize/75% (uncheck “resize all layers”)
effects/geometric effects/perspective-vertical
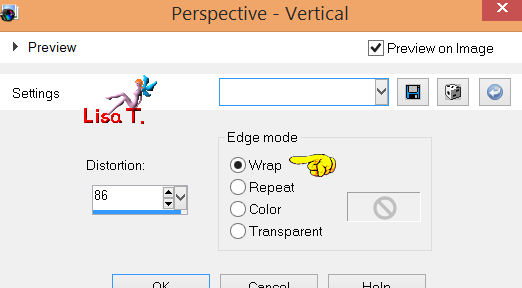
effects/plugins/Flaming Pear/Flexify 2
click on the red arrow to find the preset (provided)
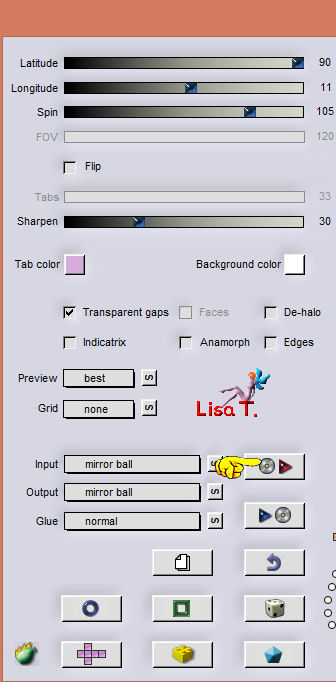
image/resize/95% (uncheck “resize all layers”)
selections/select all - selections/float - selections/defloat
selections/modify/select selection borders
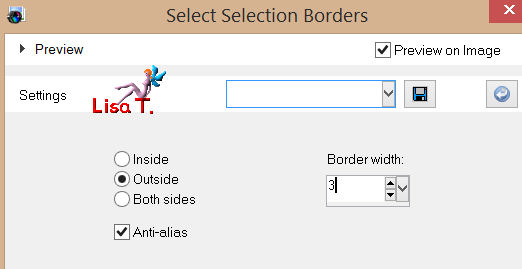
layers/new raster layer
fill the selections with color 1, flood fill tool settings as shown

selections/select none
Step 5
selections/load-save selection/from alpha channel/selection #1
layers/new raster layer
activate the image “bigth_246” - edit/copy - back to your work - edit/paste into selection
adjust/sharpness/sharpen
selections/select none
layers/merge/merge down (2 times)
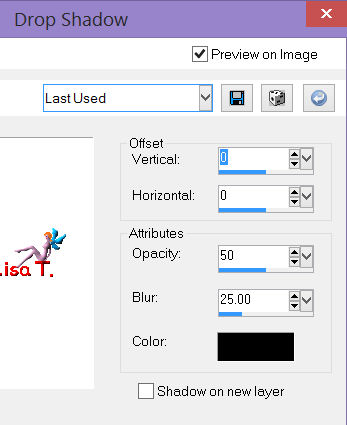
effects/3D effects/drop shadow
Step 6
in the layers palette, activate “copy of raster 1”
selections/load-save selections/from alpha channel/selection #2
effects/3D effects/drop shadow as before (step 5) 0 / 0 / 50 / 25 / black
selections/select none
Step 7
in the layers palette, keep “copy of raster 1” active
layers/duplicate
layers/arrange/bring to top
effects/distortion effects/polar coordinates
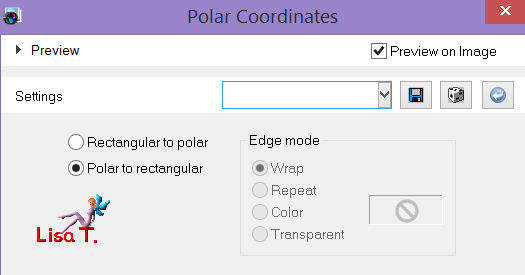
acitvate the Pick Tool (K), and move upwards to 100
selections/load-save selections/from alpha channel/selection #7
press the delete key of your keyboard
selections/select none
layers/duplicate - image/flip
layers/merge/merge down
selections/load-save selection-from alpha channel/selections #3
fill with color 3
selections/select none
effects/3D effects/drop shadow as before (step 5)
Step 8
in the layers palette, activate the layer “copy of raster 1”
selections/load-save selection/from alpha channel/selection #4
selections/promote selection to layer
effects/plugins/Simple/Top Bottom Wrap
effects/plugins/AFS IMPORT/sqborder2
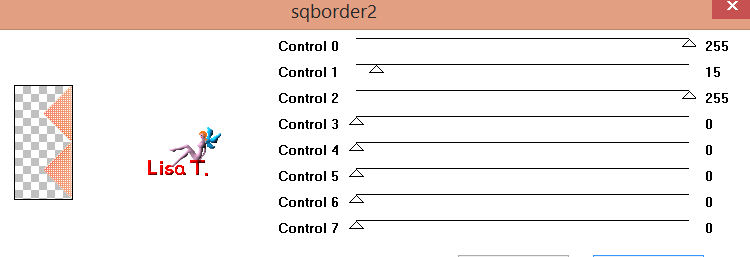
selections/select none
Step 9
selections/load-save selection/from alpha channel/selection #5
effects/plugins/Alien Skin/Eye Candy 5/Impact/Glass
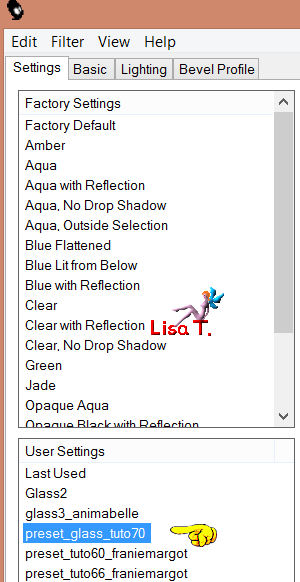
selections/select none
layers/duplicate - image/mirror
layers/merge/merge down
effects/3D effects/drop shadow as before
Step 10
activate “element 1” - edit/copy - back to your work - edit/paste as a new layer
effects/image effects/offset
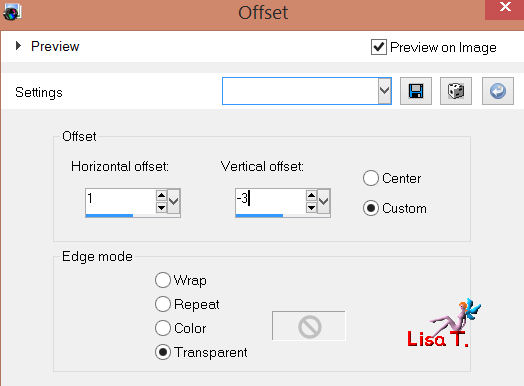
Step 11
in the layers palette, activate the layer on top of the stack
acitvate “element 2”, edit/copy - back to you work - edit/paste as a new layer
don’t move it
Step 12
open the tile “tuile_ or”, reduce it
in the materials palette, install your pattern with the following settings
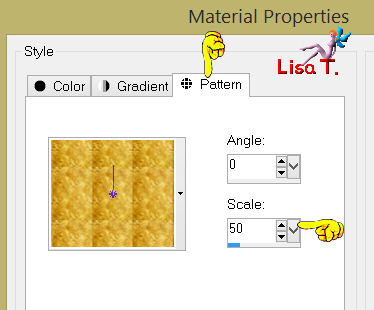
layers/new raster layer, fill with the pattern
activate the mask “masque-etoile_franiemargot” and reduce it
layers/new mask layer/from image
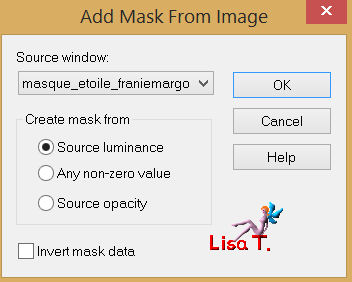
layers/merge/merge group
Step 13
selections/load-save selection/from alpha channel/selection #6
press the delete key of your keyboard
selections/select none
Step 14
selections/load-save selection/from alpha channel/selection #5
press the delete key of your keyboard
selections/edit selection (check)
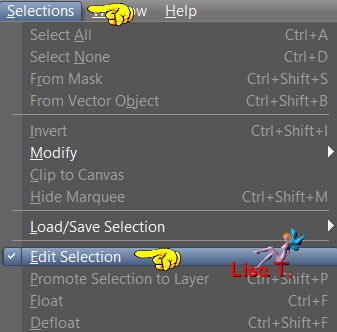
the selection turns red
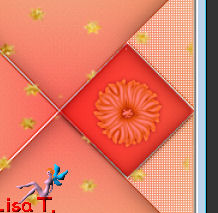
image/mirror, the selections is on the left, still red
selections/modify the selection/(uncheck)
press the delete key of your keyboard
selections/select none
Step 15
image/add borders/5 pixels/white
select this border with the magic wand tool
fill the selection with the pattern (still installed in the materials palette)
selections/invert
effects/3D effects/Buttonize/color 3
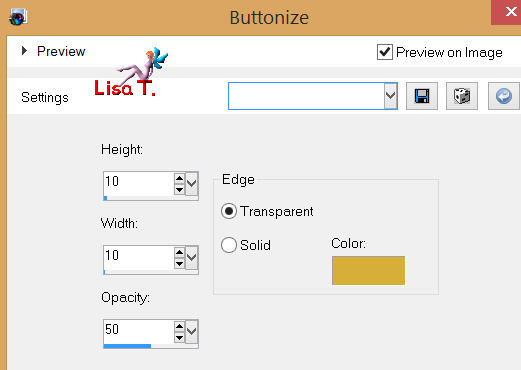
selections/select none
Step 16
in the materials palette, prepare a linear gradient with colors 1 and 2
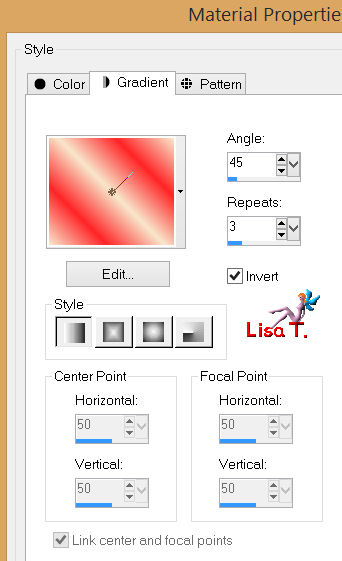
image/add borders/uncheck “symmetric”/white
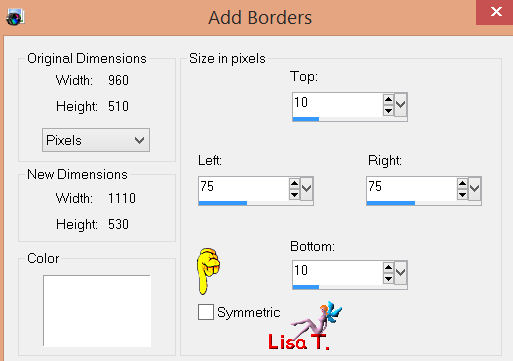
select this border with the magic wand tool
paint the selection with the gradient
adjust/blur/gaussian blur/50
selections/invert
effects/3D effects/drop shadow
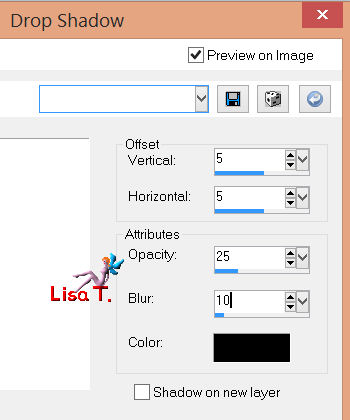
and again, changing (5) by (-5)
selections/select none
Step 17
activate “element3” - edit/copy - back to your work - edit/paste as a new layer
don’t move it
you can write your own text using the font provided (BrrrrRegular.ttf)
Step 18
image/add borders/check “symmetric”/5 pixels/white
select this border with the magic wand tool
paint the selection with the pattern
selections/select none
Step 19
activate the tube (An 376 de Creanneke)
edit/copy - back to your work - edit/paste as a new layer
image/resize/75% (uncheck “resize all layers”)
place it as shown on the final result
adjust/sharpness/sharpen more
effects/3D effects/drop shadow as on step 16
Step 20
activate the tube (puppkitty01)
edit/copy - back to your work - edit/paste as a new layer
image/resize/80% (uncheck “resize all layers”)
place it as shown on the final result
adjust/sharpness/sharpen more
effects/3D effects/drop shadow as before
Step 21
apply your signature and save as ... type jpeg

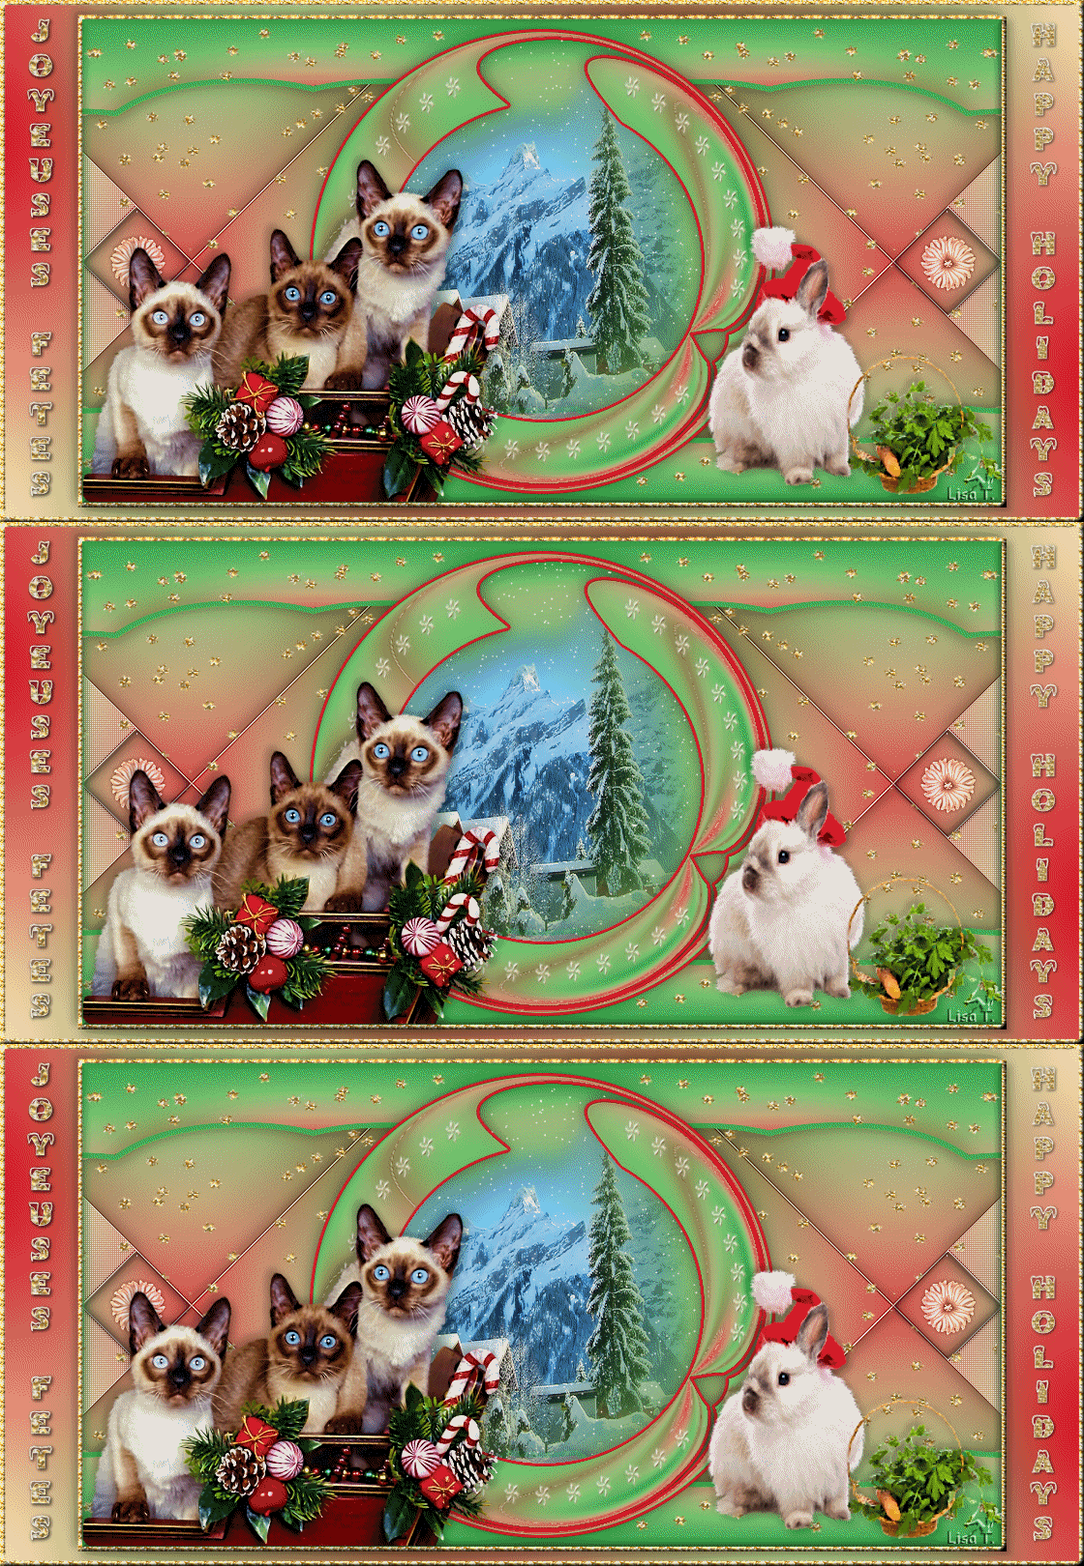
Your tag is now finished
Written on 2013/09/28

You can send your creation to Franie.
It will be her pleasure to show it in her site
 mail Franie mail Franie
If you have any trouble following this tutorial
Contact Franie or myself
 mail me mail me

If you want to be informed about Franie’s new tutorials
Join her newsLetter

You will find your creations here

My try with my tubes
Back to the boards of Franie's tutorials
board 1  board 2 board 2 

|