Eglantine
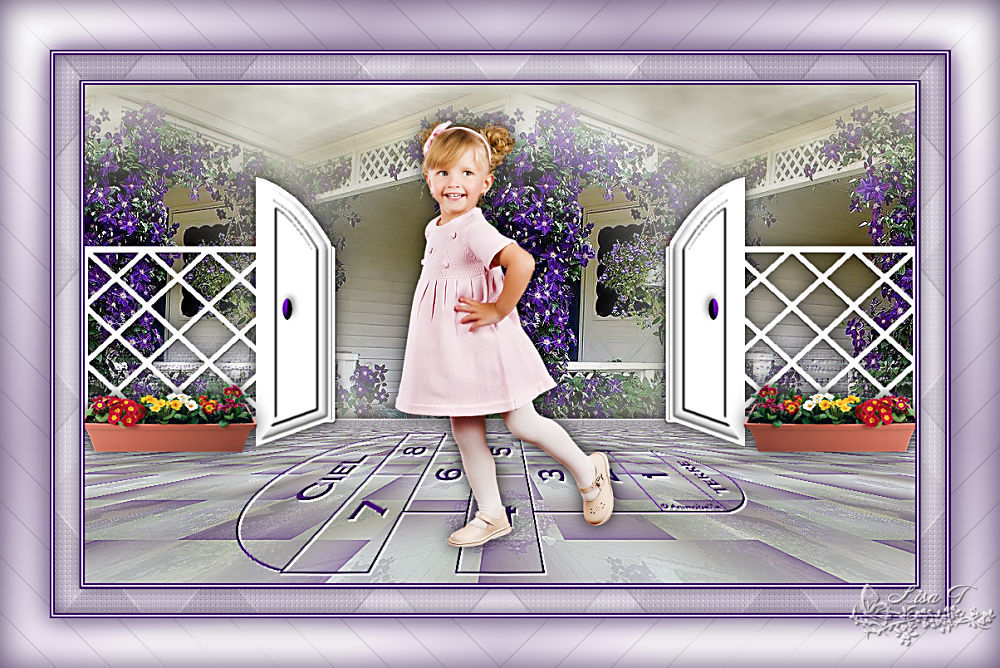
You will find the original tutorial here :


This tutorial is a personal creation.
Any resemblance with another one would be only pure coincidence.
It is stricly forbidden to modify images, to change their name or take off the matermarks,
To present them on your sites or blog,
To share them in groups,
to make a bank of images, or to use them on lucrative purposes.

Thank you to respect Animabelle’s work and the tubers work.
Don’t hesitate to warn her if you have any trouble with this tutorial.


Material
1 tube - Adrimar
1 tube – Luna
4 tubes – Animabelle
3 selections

Animabelle’s important note
Tubers have been warned that disrespectful and dishonest bloggers come steeling our tubes
they grab them into the folders of material we use to provide for our tutorials.
These people rename and convert the tubes to png type,
and then they offer them for download in their blogs, pretending they have done the work.

To protect my work, I am therefore forced to no longer provide my tubes with the material.
Honest people will understand my way of doing, I hope.
I thank them for their understanding.
Very important Tip:
never take your tubes on these blogs, because most of the time all of these tubes are stolen tubes.
Always make sure that the tubes you take have been signed by their authors.
Thank you.
|
Filters used
Mura’s Seamless
Mura’s Meister
Toadies
Carolaine and Sensibility
Graphic Plus

“Renée Graphisme” filters, with her kind permission


translator’s note : I use PSP17, but this tutorial can be realized with another version.
I translate exactly the indications of Animabelle
I use my own tubes and colors to create my tag

Colors used
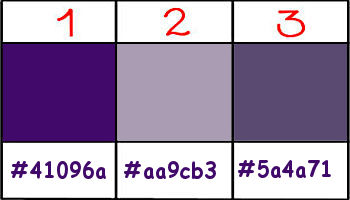
Don't hesitate to change the colors and the blend mode of the layers, and the shadows,
according to your tubes and images.

Important
Open all images in PSP, duplicate them and close the originals.
work with the copies

use the pencil to follow the steps
left click to grab it


Execution
Step 1
open a new transparent rasterlayer ** 1000 X 600 pixels
activate the selection tool/rectangle/custom selection

with the following settings
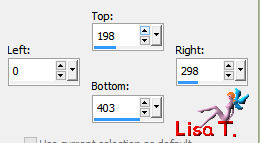
flood fill black
effects/plugins/Mura’s Seamless/Tile Frame Diagonal

selections/modify/select selection borders
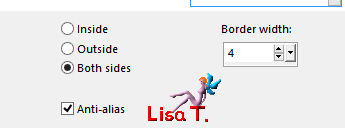
flood fill white
selections/select none
Step 2
activate the magic wand tool/tolerance and feather set on 0/check « outside »
select the white border - the little diamond-shaped will be selected too
selections/invert
hit the delete key of your keyboard
selections/modify/expand/1
hit 4 or 5 times the delete key of your keyboard
selections/select none
effects/3D effects/drop shadow/ 1 / 1 / 60 / 1 / black
Step 3
layers/new raster layer
selections/load-save selection/from disk
find selection « eglantine1_animabelle »
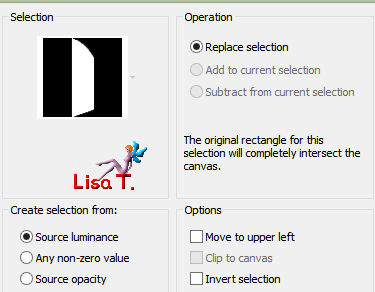
flood fill white
effects/3D effects/inner bevel
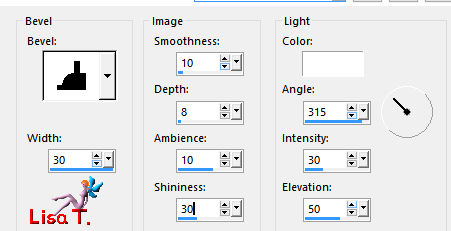
selections/select none
Step 4
layers/new raster layer
selections/load-save selection/from disk
find selection « eglantine3_animabelle »
flood fill with color 1
selections/select none
effects/3D effects/inner bevel
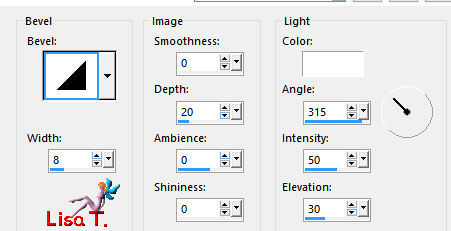
effects/3D effects/drop shadow
-3 / 3 / 50 / 10 / black
layers/merge/merge visible
effects/3D effects/drop shadow
0 / 0 / 70 / 25 / black
effects/reflection effects/rotating mirror
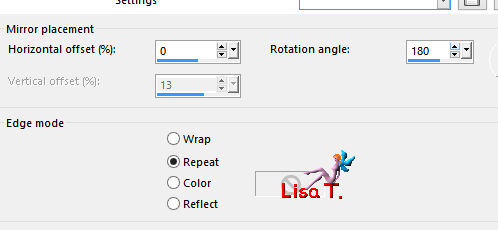
Step 5
layers/new raster layers
layers/arrange/move down
foreground color #969277 /background color : white
effects/Mura’s Meister/Cloud
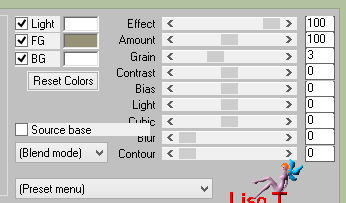
copy/paste as new layer the landscape tube « lunapaisagem6077 »
adjust/sharpness/sharpen
effects/image effects/offset
0 / 50 / custom / transparent
effects/image effects/seamless tiling
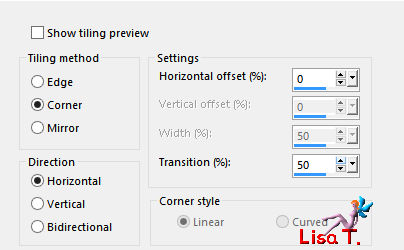
layers/merge/merge down
Step 6
layers/duplicate
effects/plugins/Graphic Plus/Kaleidoscope

effects/image effects/seamless tiling/default settings
adjust/softness/soft focus

effects/texture effects/weave/color #410969

effects/plugins/Mura’s 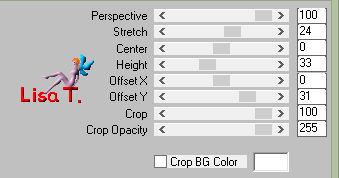 Meister/Perspective Tiling Meister/Perspective Tiling
adjust/sharpness/sharpen more
effects/3D effects/drop shadow
-3 / 0 / 50 / 20 / black
Step 7
layers/new raster layer
flood fill with color 1
layers/new mask layer/from image
mask « masque_marelle_animabelle » / check « invert »
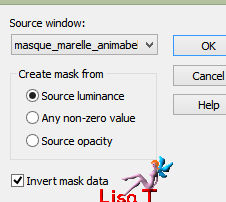
layers/merge/merge group
effects/Mura’s Meister/Perspective Tiling
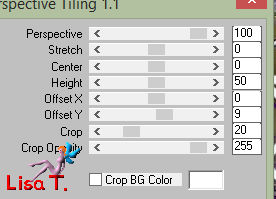
Step 8
selections/load-save selection/from disk
find selection « eglantine2_animabelle »
hit the delete key of your keyboard
selections/select none
effects/3D effects/drop shadow
2 / 2 / 100 / 0 / white
effects/User defined filter/emboss 3
Step 9
activate the upper layer (merged)
copy and paste the tube « jardinieres_animabelle » as a new layer
effects/image effects/offset
0 / -100 / custom / transparent
effects/3D effects/drop shadow
0 / 0 / 80 / 30 / black
Step 10
copy/paste as new layer the tube of the girl
image/resize/uncheck « resize all layers »/50%
adjust/sharpness/sharpen
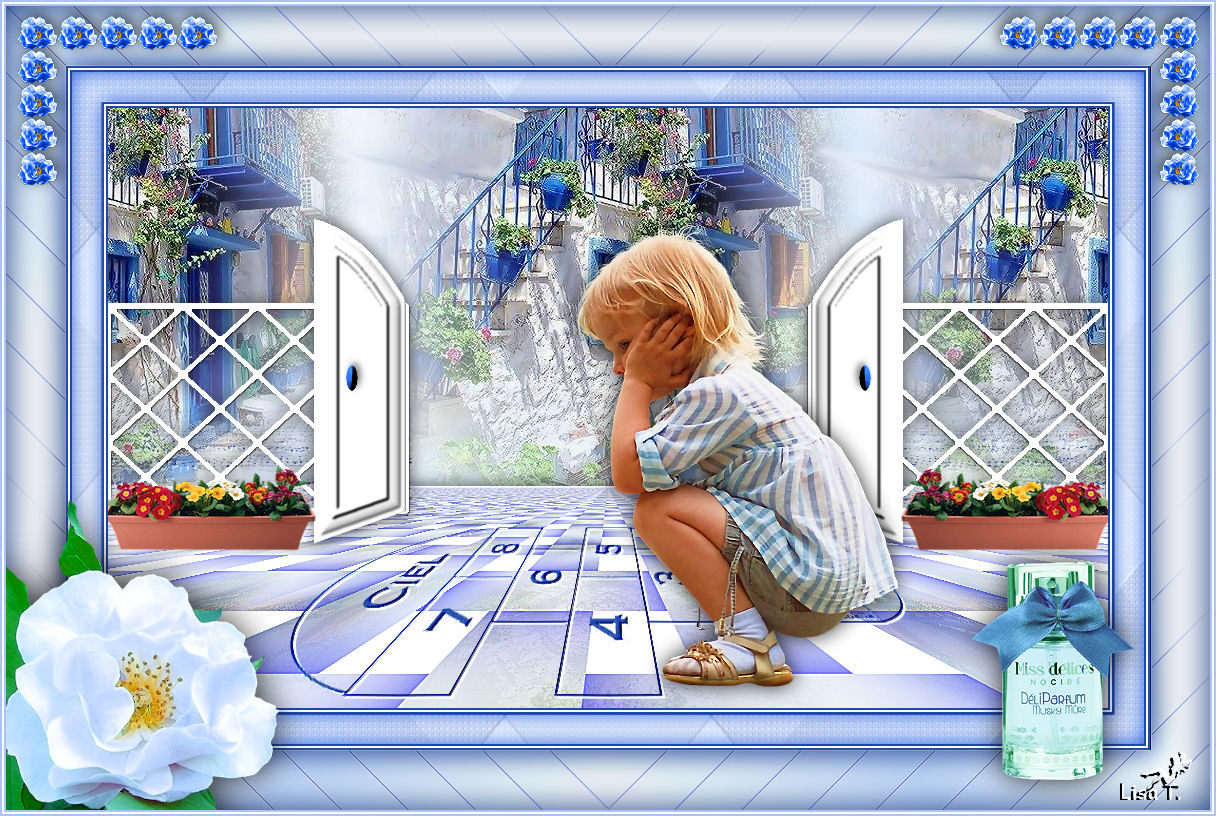
move the tube as shown on the final result
effects/3D effects/drop shadow
0 / 0 / 80 / 30 / black
Step 11
image/add borders/check symmetric -->
2 pixels color 1
2 pixels white
2 pixels color 1
30 pixels white
set color 2 as foreground and white as background
(change the colors according to your own choices)
select the large border with the magic wand/tolerance and feather : 0/check « inside »
flood fill with a linear gradient 130 / 3
effects/plugins/Toadies/Darwin
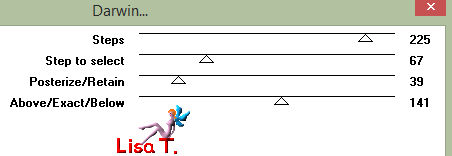
effects/plugins/Carolaine and Sensibility/CS-LDots
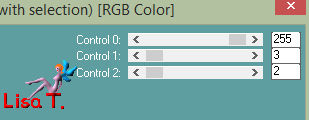
effects/user defined filter/emboss 3
effects/3D effects/cutout/color #5c496c
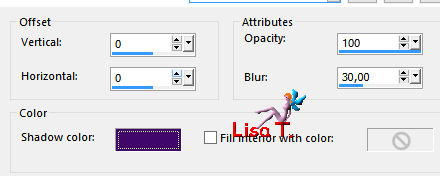
layers/duplicate – image/mirror/mirror horizontal
selections/select none
set the opacity of the layer on 50%
Step 12
image/add borders -->
2 pixels color 1
2 pixels white
2 pixels color 1
60 pixels white
in the material palette, click on « swap materials »
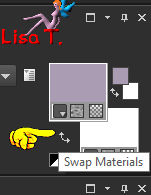
select the large white border with the magic wand
foreground color : white / background color :color 2
prepare a linear gradient 130/3
flood fill the selection with the gradient
adjust/blur/gaussian blur/10
effects/Carolaine and Sensibility/CS-DLines
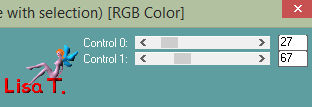
effects/reflection effects/rotating mirror (same settings as before)
effects/edge effects/enhance
effects/3D effects/cutout
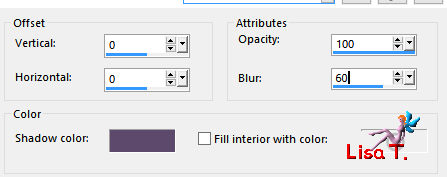
selections/select none
Step 13
copy/paste as new layer the tube « eglantine_animabelle »
image/mirror
image/resize/65%/ucheck « resize all layers »
adjust/sharpness/sharpen
move to the left as shown on the final result
effects/3D effects/drop shadow/ 0 / 0 / 80 / 60 / black
step 14
copy/paste as new layer the perfume tube
move to the right (see example)
effects/3D effects/drop shadow/ 0 / 0 / 80 / 40 / black
Step 15
copy/paste as new layer the tube of the corner
move as shown on the final result
effects/reflection effects/rotating mirror (as before)
image/add borders -->
2 pixels color 2
2 pixels white
2 pixels color 2
apply your watermark, save as... type JPEG, resize if necessary

Don't hesitate to write to Animabelle if you have any trouble with her tutorial
To be informed about her new tutorials, join her NewsLetter


If you created a tag with her tutorial and wish it to be shown,
send it to Animabelle !
It will be her pleasure to add it to the gallery at the end of the tutorial
don’t resize your tag under 800 pixels width if you want her to present your tag


My tag with my tubes
Back to the board of Animabelle's tutorials


|