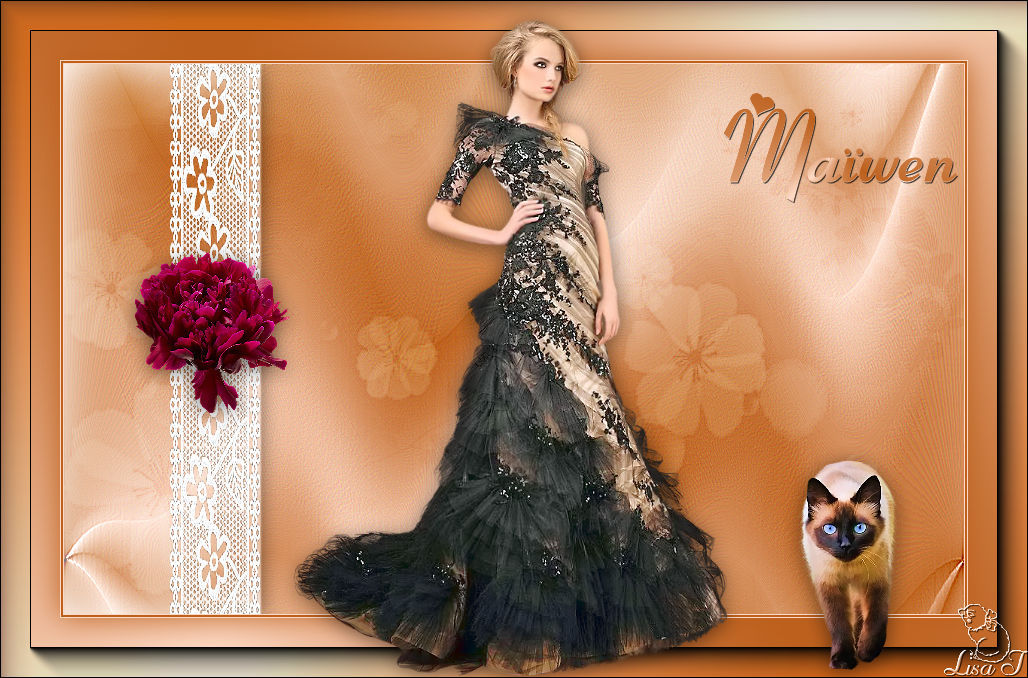
Maïwen

The original tutorial can be found HERE


Conditions of use of the material provided
It is forbidden to modifiy, change the name, take off the
watermarks or alter the tubes.
It is forbidden to share them in groups or offer them on
your site, blog or forum.
If you want to use them to create a tutorial, you must ask
the permission to the authors.

Material
1 mask - 2 selections - 1 scrap element
copy / paste selections into the special folder « selections » of
Corel PSP
open mask and minimize it to tray

you will need (not provided) : 1 character tube - 1
animal tube (cat or other) - 1 flower tube

Filters Used
BKG designer sf10 II
Effet personnalisé : Emboss3
AAAFrames/ foto frame


translator’s note
Belle de Nuit works with PSP X, I use PSPX9 to create
my tag and write my translation
but this tutorial can be realized with another version
according to the version of PSP you use, the results might
be slightly differents
don’t hesitate to change the blend modes of the layers
to match your tubes and colors
Colors

color 1 --> foreground color --> FG --> left click
--> #ffecdc
color 2 --> background color --> BG --> right click
--> #a63f2c
color 3 --> #ffffff

Use the pencil to follow the steps
hold down left click to grab it and move it


Realization
1
open a new transparent image 900 * 550
pixels
2
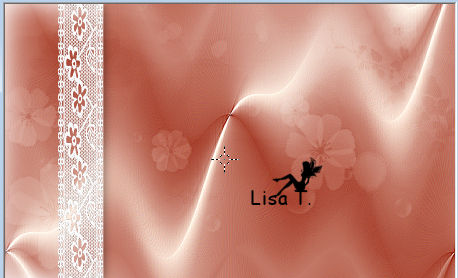
in the materials palette, prepare a radial gradient with
colors 1 and 2

3
flood fill layer with the gradient
effects - image effects -> seamless tiling / default
settings

4
effects -> edge effects -> enhance more
5
effects -> plugins -> Unlimited 2 -> Bkg Designers
sf10 II / Dis Wrap (Vertical)

6
effects -> user defined filter -> Emboss 3

7
layers -> new raster layer
flood fill with color 3
8
layers -> new mask layer -> from image

9
layers -> merge -> merge group
blend mode of the layer -> soft light
effects -> edge effects -> enhance
10
layers -> new raster layer
load-save selection -> from disk
11

12
effects -> 3D effects -> cutout / white

13
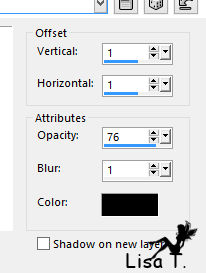
effects -> 3D effects -> drop shadow -> 3 / 0
/ 50 / 30 / black

14
selections -> select none
15
copy / paste as new layer lace tube
effects -> image effects -> offset

16
adjust -> sharpness -> sharpen
your tag looks like this

17
layers -> merge -> merge visible
set color 1 a FG color
18
image -> add borders -> check « symmetric » ->
1 pixel color 1
2 pixels color 2
1 pixel color 1
19
selections -> select all
image -> add borders -> 60 pixels color 2
selections -> invert
20
layers -> new raster layer
flood fill with gradient of step 2

adjsut -> blur -> gaussian blur / 15
21
effects -> plugins -> AAA Frames / Foto Frame

22
selections -> select none
23
copy / paste character tube
place it in the middle of your work
adjust -> sharpness -> sharpen
effects -> 3D effects -> drop shadow as before (don’t
change the settings)
24
copy / paste flower tube as new layer
effects -> image effects -> offset

25
adjust -> sharpness -> sharpen
effects -> 3D effects -> drop shadow as before (don’t
change the settings)
26
copy / paste cat tube as new layer and move it to the right
(see final result)
effects -> 3D effects -> drop shadow as before (don’t
change the settings)
27
layers -> new raster layer
selections -> load selection from disk

28
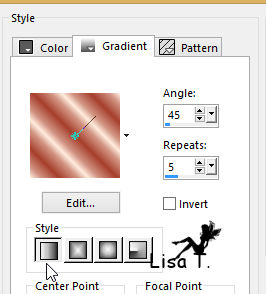
in material palette, prepare a linear gradient 45 / 5 /
colors 3 and 2

29
flood fill selection with the gradient
effects -> 3D effects -> drop shadow

30
selections -> select none
31
image -> add borders -> 1 pixel black
32
apply your watermark an,d save as.. . type .jpeg

Your tag is finished.
Thank you for following this tutorial
Don’t forget to sign (to avoid plagiarism) and save
file as… type JPEG

Don’t hesitate to send your creations
to Belle de Nuit

It will be a real pleasure for her to show them in the
gallery at the bottom of the tutorial page
Don’t forget to indicate her your name and the adress
of your blog or site if you have one

If you want to receive Belle de Nuit’s Newsletter,
sign up ...


ma version avec mes tubes

Back
to the boards of Tine’s
tutorials
Board 1 

|