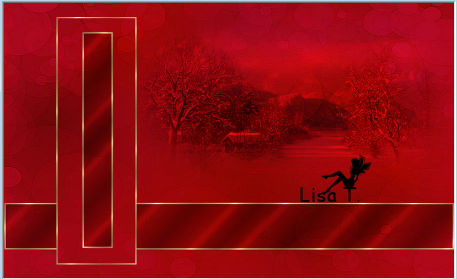
Christmas

The original tutorial can be found HERE

Conditions of use of the material provided
It is forbidden to modifiy, change the name, take off the
watermarks or alter the tubes.
It is forbidden to share them in groups or offer them on
your site, blog or forum.
If you want to use them to create a tutorial, you must ask
the permission to the authors.
Material
1 background « bdn_rouge »
4 Selections
1 Element « scrap boules 37 »
1 Element « scrap guirlande 17 »
1 Mist « bdn_paysage_noël »
1 pattern « fondor »
1 Tube « bdn_noeud »
1 Wordart « bdn_noel »
1 image « paper 11 »
1 Tube personnage (not provided)

place the pattern into the folder « patterns » of
My PSP Files
place selecitons into the selections folder of My PSP Files
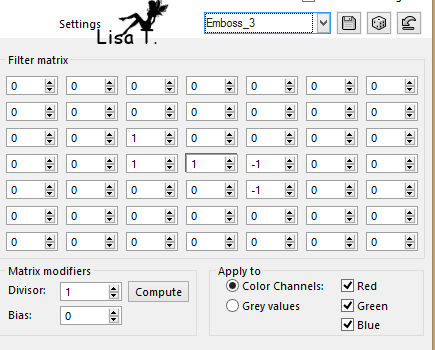
Filters Used
user defined filter : Emboss 3

translator’s note
Belle de Nuit works with PSP X, I use PSPX9 to create
my tag and write my translation
but this tutorial can be realized with another version
according to the version of PSP you use, the results might
be slightly differents
don’t hesitate to change the blend modes of the layers
to match your tubes and colors
Colors
color 1 --> foreground color --> FG --> left click
--> #b30a23 (red)
color 2 --> background color --> BG --> right click
--> #163412 (very dark color)
Use the pencil to follow the steps
hold down left click to grab it and move it

Realization
if you want to create your own Background, open a new transparent
raster layer 900 * 550 pixels
flood fill with color 1 (if color 1 is too lifhgt, choose
color 2)
selections -> select all
layers -> new raster layer -> copy / paste into selection
image « paper 11 »
blend mode : luminance (legacy) or overlay
effects -> user defined filter -> Emboss 3
layers -> merge -> merge down
1
open « fond_bdn_rouge »
window -> duplicate
minimize copy to tray for a later use (in step 32)
adjust -> sharpness -> sharpen
if your background is already « well » embossed by
Emboss 3, don’t sharpen
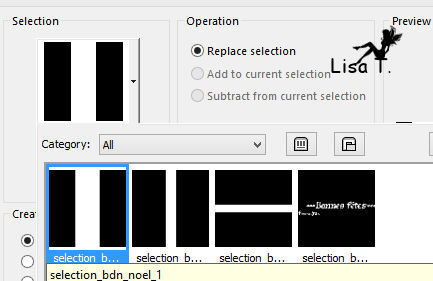
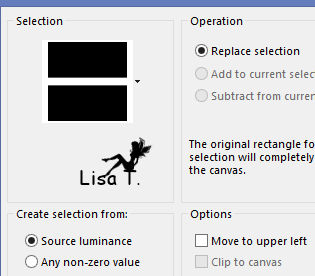
selections -> load-save selection -> from disk -> selection « bdn_noel_1 »
2
selections -> promote selection to layer
3
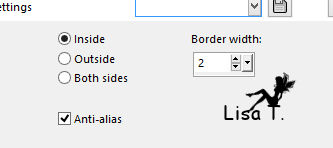
selections -> modify -> select selection borders
4
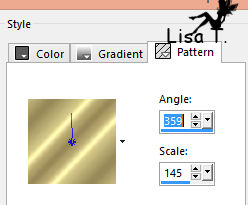
into materials palette, prepare »fondor » into
the FG box
5
layers -> new raster layer -> flood fill selection
with the pattern
selections -> select none
6
highlight Background layer
layers -> new raster layer
selections -> load-save selection -> from disk -> selection « bdn_noel_2 »

selections -> promote selection to layer
layers -> arrange -> move up
layers -> new raster layer
flood fill selection with the pattern
blend mode : Multiply or Luminance (Legacy) (match
with your colors)
7
selections -> modify -> select selection borders
layers -> new raster layer
8
flood fill selection with the pattern
9
selections -> select none
10
close the eye of Background layer
layers -> merge -> merge visible
open the eye of Background layer
11
iamge -> resize -> uncheck « resize all
layers » -> 90%
12
effects -> image effects -> offset
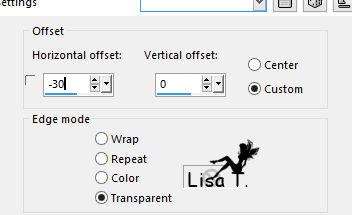
13
highrlight Background layer
14
selections -> load-save selection -> from disk -> selection « bdn_noel_3 »
15
layers -> new raster layer
selections ->promote selection to layer
16
flood fill selection with the pattern
17
blend mode : Multiply or Luminance (Legacy)
selections -> modify -> select selection borders
18
layers -> new raster layer
flood fill with the pattern
selections -> select none
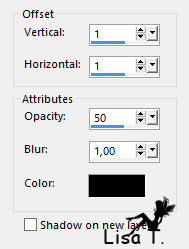
effects -> 3D effects -> drop shadow -> 1 / 1
/ 50 / 1 / black
19
copy / paste as new layer « Mist_bdn_payage_noel »
optional : resize your misted landscape to 710 pixles
(width)
effects -> image effecst -> offset
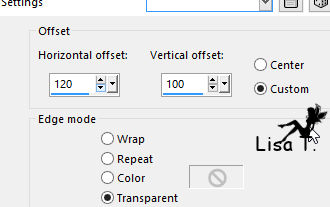
20
blend mode : Overlay or Luminance (Legacy)
layers -> arrange -> move down 3 times (above Background
layer)
your tag looks like this
21
copy / paste a character tube as new layer
adjsut -> sharpness -> sharpen more
effects -> 3D effects -> drop shadow -> 0 / 0
/ 50 / 25 / dark color
22
highlight top layer
23
copy / paste as new layer « scrap guirlande élément
37 »
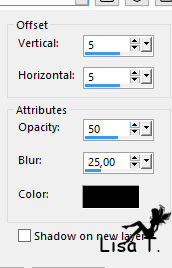
move it as shown and drop a shadow of 5 / 5 / 50 / 25 /
black
24
copy / paste as new layer « élément
scrap 17 scrap boules de noël »
move it as shown
25
adjust -> sharpness -> sharpen
26
copy / paste « wordart_bdn_noël » and
move it as shown
27
image -> add borders ->...
2 pixels color 2
2 pixels color 1
2 pixels color 2
28
selections -> select all
image -> add borders -> 10 pixels color 1
29
selections -> invert
in materials palette, set « fondor » pattern
in the FG box
layers -> new raster layer
flood fill selection with pattern
blend mode : Overlay or Luminance (Legacy)
30
selections -> select all
iamge -> add borders -> 40 pixels color2
31
selections -> invert
layers -> new raster layer
32
copy / paste into selection background created in step
1
33
effects -> user defined filter -> Emboss 3 (only
if you use the Background provided)
34
layers -> merge -> merge down
35
selections -> invert
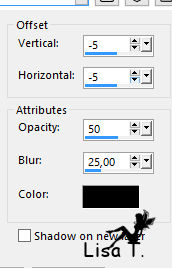
effects -> 3D effects -> drop shadow
36
drop shadow again
37
selections -> select none
image -> add borders -> 2 pixels color 2
38
copy /paste as new layer « bdn_noeud »
place it top left as shown
layers -> merge -> merge all (flatten)
apply your watermark ans save as... type .jpeg
Your tag is finished.
Thank you for following this tutorial
Don’t forget to sign (to avoid plagiarism) and save
file as… type JPEG
Don’t hesitate to send your creations
to Belle de Nuit

It will be a real pleasure for her to show them in the
gallery at the bottom of the tutorial page
Don’t forget to indicate her your name and the adress
of your blog or site if you have one
If you want to receive Belle de Nuit’s Newsletter,
sign up ...

My tag with my tubes

Back to the boards of Tine’s tutorials
Board 1 

|