

Original
can be found here

Cloclo
works with PSPXVIII, and I use PSP 2019 Ultimate
But this tutorial can be realized with another version
of PSP
however, some differences might be noticed according to
the version you use

If you want to present
Cloclo’s tutorials on your
forums or sites
please ask her first
If you publish your creation on a site or a blog
please put a link towards the tutorial if you create a
tag
Thank you to understand and respect the rules.

The tubes Cloclo uses have
been sent by the authors on different groups
And she has their permission to use them
If you see a tube that might belong to you, contact Cloclo
or myself
And a link towards your site will be added if necessary
Please, don’t use tubes found on the web with no
watermark
all tubers apply their watermark without any exception !!!!!
no watermark ---> stolen tube

Hints and Tips
TIP 1-> if you don’t
want to install a font -->
open it in a software as « Nexus Font » (or
other font viewer software of you choice)
as long as both windows are opened (software and font),
your font will be available in your PSP
TIP 2 -> from PSPX4, in the later versions of PSP the functions « Mirror » and « Flip » have
been replaced by -->
image -> Mirror - has become ===> image
=> mirror => mirror horizontal
image -> Flip - has become ===> image
=> mirror => mirror vertical

Plugins
I.C.Net / Software / Filters Unlimited 2.0 / Paper Textures
/ Papyrus
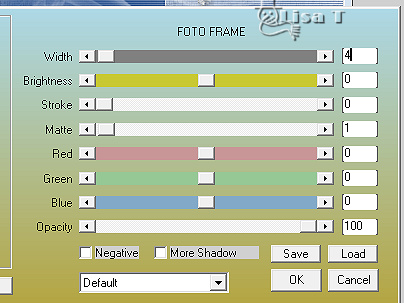
AAA Frames / FOTO FRAME

Supplies
Mask by Narah
landscape and decorations by Cloclo
character tube not provided - Cloclo used a paying licensed
tube
I used a tube created by
Ladybird HERE
place (or import) the supplies
provided into the appropriate folders of « My Corel PSP »
open the mask(s) and minimize to tray

colors

 
Use the pencil to mark your place
along the way
hold down left click to grab and move it
 |
 
Realization
1
set colors 1 & 2 as FG and BG colors
open the alpha layer, duplicate, close the original and
work with the copy
rename « Raster 1 »
2
prepare a linear gradient into the materials palette
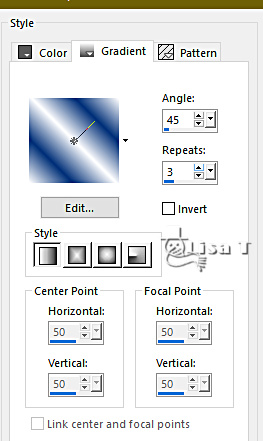
flood fill layer with the
gradient
adjust => blur => gaussian blur / 30
effects => image effects => seamless tiling => default
settings
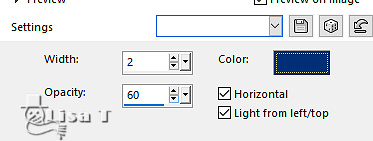
effects => texture effects => blinds / color 2
3
layers => new raster layer
flood fill white
layers => new mask layer => from image
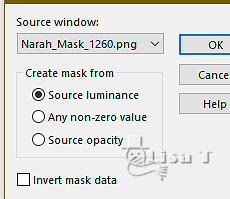
effects => edge effects => enhance
layers => merge => merge group
effects => plugins => Unlimited 2 => Paper Textures
/ Papyrus
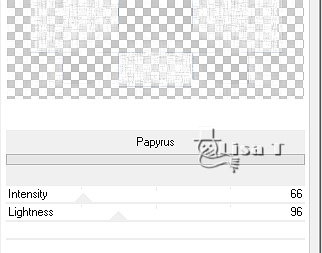
repeat => effects => plugins => Unlimited 2 => Paper
Textures / Papyrus
4
copy / paste « déco Cloclo » as
new layer
don’t move it
opacity of the layer : 65%
copy / paste the landscape as new layer
don’t move it
copy / paste « déco Cloclo 1 » as new
layer
don’t move it
highlight bottom layer
copy / paste as new image
work with this image
image => resize => tick « resize all layers » => 15%
adjust => blur => gaussian blur / 30
selections => select all
copy / paste « Paysage_Cloclo » into
selection
selections => select none
image => add borders => tick « symmetric » => 1
px white
effects => plugins => AAA Frames => Foto Frame
5
edit => copy
back to your main work
highlight top layer
edit => paste as new layer
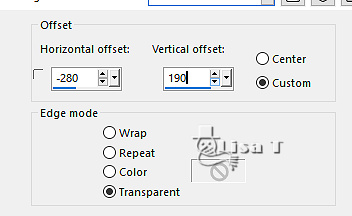
effects => image effects => offset => H : - 280/
V : 190 / tick « custom » and « transparent»
layers => duplicate
effects => image effects => offset => H : 560/
V : - 580 / tick « custom » and « transparent »
layers => merge => merge down
effects => 3D effects => drop shadow => 2 / 2
/ 50 / 10 / black
copy / paste « déco Cloclo 2 » into
selection
don’t move it
effects => 3D effects => drop shadow => 2 / 2
/ 50 / 10 / black
6
at this point of the tutorial, you can choose between using
the Script provided to create the frame
or create this frame manually
****************** manually - script begins ******************
image => add borders => tick « symmetric » => ...
2 px white
4 px color 2
2 px white
selections => select all
edit => copy
image => add borders => tick « symmetric » => 15
px white
selections => invert
edit => paste into selection
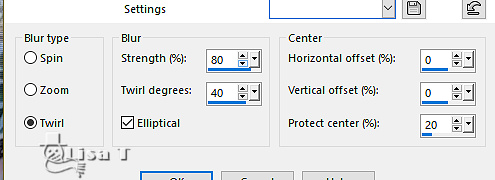
adjust => blur => radial blur
selections => select none
7
image => add borders => tick « symmetric » => ...
2 px white
4 px color 2
2 px white
selections => select all
image => add borders => tick « symmetric » => 30
px white
selections => invert
edit => paste into selection
adjust => blur => gaussian blur / 30
layers => promote background layer
effects => artistic effects => Topography
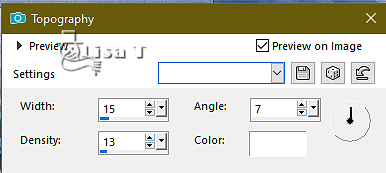
effects => plugins => AAA Frames => Foto
Frame

selections => select none
****************** script ends ******************
image => add borders => tick « symmetric » => 1
px black
copy / paste the birds tube as new layer
place as shown on final result
copy / paste the woman tube as new layer
place as shown on final result
copy / paste the cat tube as new layer
place as shown on final result
drop a shadow of your choice on each element
copy / paste « coin_Cloclo » as
new layer
apply your watermark or signature
layers => merge => merge all (flatten)
write your licence number if you used a licensed tube
save your work as... type .jpeg
 
Thank you for following this tutorial
You can send your creations to Franie.

It will be a real pleasure for her to show it in the gallery
of the tutorial

If you have any trouble
with this translation, if you notice something wrong
don’t hesitate to contact me, I will do my best to
fix the problem


Back
to the boards of Cloclo ’s tutorials
board 1 board 2 board 2


|