

You will find the original tutorial here :

This tutorial is a personal creation.
Any resemblance with another one would be only pure
coincidence.
It is stricly forbidden to modify tubes, to change
their name or take off the matermarks,
To present them on your sites or blog,
To share them in groups,
to make a bank of images, or to use them on lucrative purposes.

Thank you Sass for testing Cloclo’s tutorials

Thank you to respect Cloclo’s work and the tubers
work.
Don’t hesitate to warn me if you have any trouble
with this translation,
and I’ll try to fix the problem as quickly as I can


Material
tubes - mask (by Gabry) - alpha layer
The main tube is not provided
the tubes provided are licence free
Béa used as misted landscape by Daisy and a character
tube you can find HERE

open all the tubes into PSP and duplicate them. Work
with the copies to preserve orignals
open the mask and minimize it to tray
TIP 1 -> if you don’t
want to install a font -->
open it in a software as « Nexus Font » (or
other font viewer software of you choice)
as long as both windows are opened (software and font),
your font will be available in your PSP
TIP 2 -> from PSPX4,
in the later versions of PSP the functions « Mirror » and « Flip » have
been replaced by -->
« Mirror » --> image -> mirror -> mirror horizontal
« Flip » --> image -> mirror -> mirror vertical

Filters (plugins) used
Simple / Blintz
Simple / Diamond
Xero / Titanuium
Filters Unlimited 2.0 / VM Toolbox / Brightness Noise
AAA Frames / Foto Frame


Use the pencil to follow the steps
hold down left click to grab it and move it
 |

Important
Open all images with PSP, duplicate them and close
the originals.
Never work with original images.
don’t forget to save your work often

Colors
use the Dropper tool to pick up the colors into your
tubes
Cloclo chose these colors
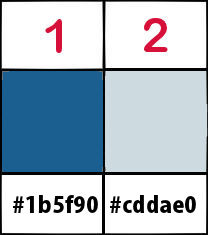
color 1 --> FG color --> #1b5f90
color 2 --> GB color --> #cddae0
prepare these two colors in your materials paletteDon't
hesitate to change the colors and the blend modes of the
layers,
according to your tubes and images

translator’s note
Cloclo created her tag with PSP XII
I used PSP2018 to create my tag and write my translation
but this tutorial can be realized with another version
according to the version of PSP you use, the results might
be slightly differents
don’t hesitate to change the blend modes and opacities
of the layers to match your tubes and colors
 
realization
1
prepare a linear gradient
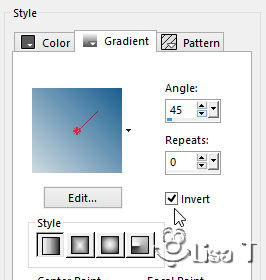
opan the alpha layer -> window -> duplicate
close the original and work with the copy
flood fill with the gradient
effects -> plugins -> Simple / Blintz
effects -> plugins -> Simple / Diamonds
effects -> edge effects -> enhance
2
layers -> new raster layer -> flood fill with color
1
layers -> new mask layer -> from image
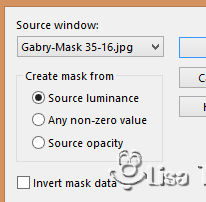
layers -> merge -> merge group
effects -> edge effects -> enhance
layers -> merge -> merge down
3
layers-> duplicate
image -> resize -> untick « resize all layers » -> 85%
effects -> 3D effects -> drop shadow -> 0 / 0
/ 60 / 10 / black
highlight layer underneath
adjust -> blur -> gaussian blur / 30
effects -> plugins -> Xero / Titanium
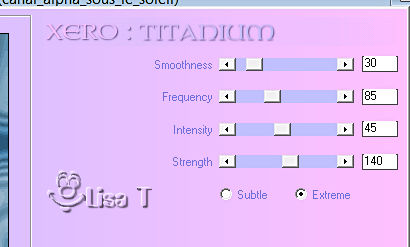
4
highlight to layer
copy / paste as new layer « deco cloclo »
don’t move it
copy / paste as new layer the landscape tube (resize if
necessary)
layers -> merge -> merge visible
selections -> load-save selection -> from alpha
channel -> selection « cloclo_sous_le_soleil»
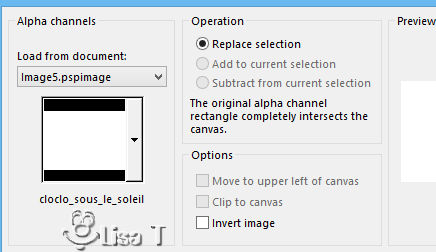
image -> crop to selection
5
selections -> select all
image -> add borders -> tick « symmetric » -> 20
pixels color 2
selections -> invert
flood fill selection with the gradient
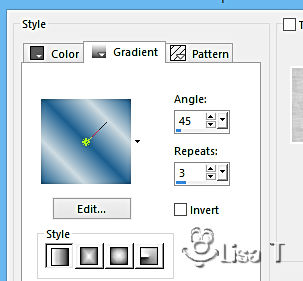
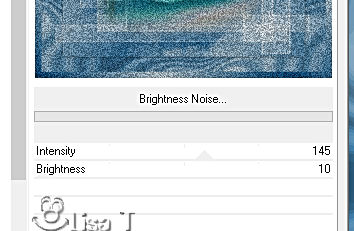
effects -> plugins -> Unlimited 2 -> VM Toolbox
/ Brightness Noise
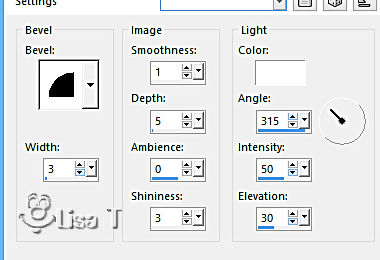
effects -> 3D effects -> inner bevel
selections -> select none
image -> add borders -> tick « symmetric » -> ...
2 pixels color 2
1 pixel color 1
20 pixels color 2
select this border with the magic wand tool
flood fill selection with the gradient created at the begining
effects -> plugins -> AAA Frames -> Foto Frame
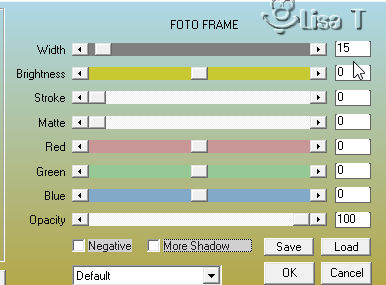
selections -> select none
image -> add borders -> tick « symmetric » -> 2
pixels color 2
6
enable the Pen tool

set color 1 as FG color
draw an horizontal line at the top of the tag (see final
result)
layers -> convert to raster layer
layers-> duplicate
image --> mirror --> mirror vertical
move it as shown on the final result
layers -> merge -> merge down
effects -> 3D effects -> inner bevel as before
effects -> 3D effects -> drop shadow -> 1 / 1
/ 45 / 10 / black
copy / paste « deco cloclo 1 »
move to the left
layers -> duplicate
image -> resize -> 90% -> move to the right
layers -> merge -> merge down
7
copy / paste as new layer the character tube
reisze if necessary
move it where you like
drop a shadow of your choice
copy / paste as new layer the bird tube and move it bottom
left
effects -> 3D effects -> drop shadow -> 1 / 1
/ 45 / 10 / black
copy / paste the flower tube as new layer and move it top
right (see final result)
layers -> duplicate
image --> mirror --> mirror horizontal
effects -> 3D effects -> drop shadow -> 1 / 1
/ 45 / 10 / black
copy / paste the text tube as new lyaer
move it where you like
layers -> merge -> merge all (flatten)
apply your watermark
file -> save as... type .jpeg
 
Another tag with my tubes
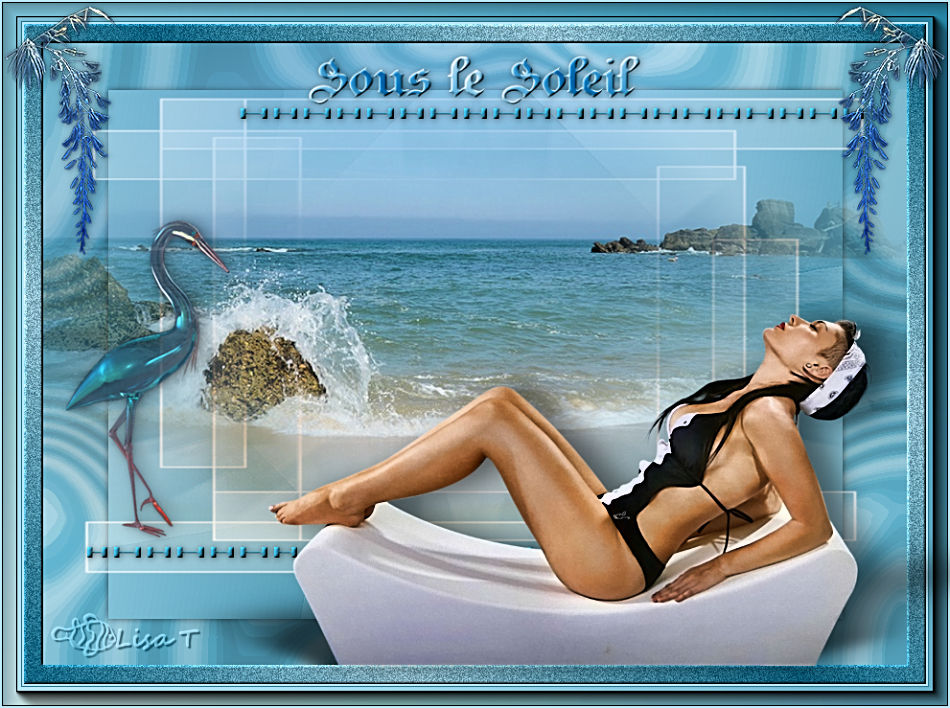
Don't hesitate to write to Cloclo if you have any trouble
with her tutorial
If you create a tag with this tutorial
and wish it to be shown, send it to Cloclo !
It will be a real pleasure for her to add it to the gallery
at the end of the tutorial


back to the boards of
Cloclo ’s tutorials
board 1 
|