

You will find the original tutorial here
:

This tutorial is a personal creation.
Any resemblance with another one would be only pure
coincidence.
It is stricly forbidden to modify tubes, to change
their name or take off the matermarks,
To present them on your sites or blog,
To share them in groups,
to make a bank of images, or to use them on lucrative purposes.

Thank you Sass for testing Cloclo’s
tutorials

Thank you to respect Cloclo’s work and the tubers
work.
Don’t hesitate to warn me if you have any trouble
with this translation,
and I’ll try to fix the problem as quickly as I can


Material

open all the tubes into PSP and duplicate
them. Work with the copies to preserve orignals
open (or import) the supplies provided into the appropriate
folders of My Corel PSP
open the mask(s) and minimize to tray
copy / paste selections into the folder « selections » of
Corel PSP General folder
double click on the preset to install ( or import )

HINTS AND TIPS
TIP 1 -> if you don’t want to install a
font -->
open it in a software as « Nexus Font » (or
other font viewer software of you choice)
as long as both windows are opened (software and font),
your font will be available in your PSP
TIP 2 -> from PSPX4, in the later versions of PSP the
functions « Mirror » and « Flip » have
been replaced by -->
« Mirror » --> image => mirror => mirror horizontal
« Flip » --> image => mirror => mirror vertical

Filters (plugins) used
Flaming Pear / Glitterato
Graphics plus / Cross Shadow
< I.C.NET Software > Filters Unlimited 2.0 / U2-Pattern Generators /
Organic Structures 1
I.C.NET Software > Filters Unlimited 2.0 / penta. com
/ color dot
AAA Frame / FRAME / WORKS
Cloclo's
page of => 

colors
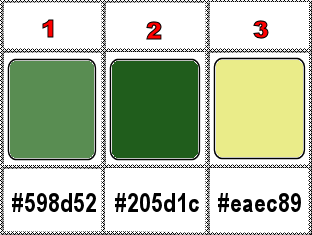
set colors 1 and 2 as FG & BG colors into the materials
palette

use the pencil to you follow the steps
hold down left click of your mouse to grab it and move
it


Important
Open all images with PSP, duplicate them and close
the originals.
Never work with original images.
Cloclo and I work with PSP2020
but you can follow the steps with another version
of PSP
don’t forget to save your work often

realization
1
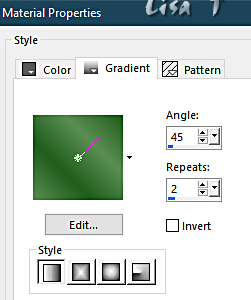
prepare a linear gradient in materials palette
2
open the alpha layer, duplicate and work with the copy
to preserve original file
selections => select all
copy / paste « Revelry_by_Beesknees67 » into
selection
selections => select none
layers => duplicate
image => mirror => mirror horizontal
image => mirror => mirror vertical
opacity of the layer : 50%
layers => merge => merge down
3
layers => new raster layer
flood fill with the gradient
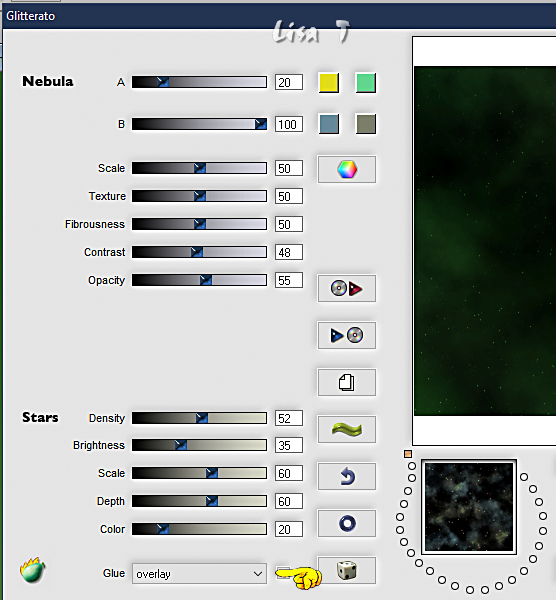
effects => plugins => Flaming Pear => Glitterato
4
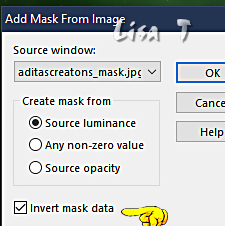
layers => new mask layer => from image
layers => merge => merge group
effects => edge effects => enhance more
effects => 3D effects => drop shadow => 3 / 3
/ 30 / 15 / black
5
layers => new raster layer
selections => load-save selection => from alpha channel
=> selection # 1
flood fill selection with the gradient
effects => texture
effect => Texture => Herbe
(provided)
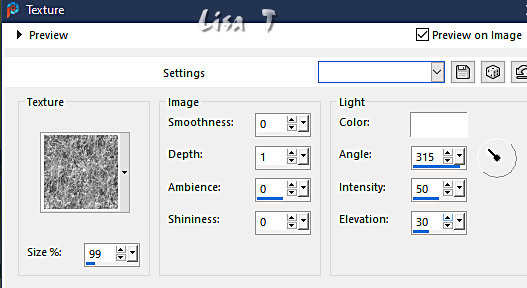
selections => select none
effects => edge effects => enhance
effects => 3D effects => drop shadow => 5 / 5
/ 50 / 15 / black
layers => duplicate
effects => geometric effects => Spherize
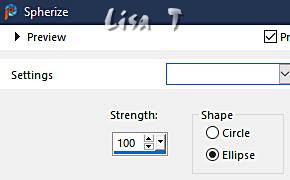
layers => duplicate
image => resize => untick « resize all layers » => 75%
using the selection tool => point to point => select
this area and hit the Delete key of your keyboard
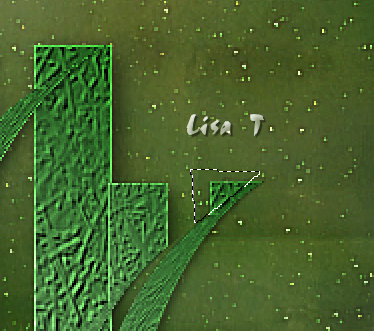
selections => select none
enable the Pick tool with the following settings, to move
the layer acurately => position X : 103 / position
Y : 131
layers => merge => merge down TWICE
layers => duplicate
image => mirror => mirror horizontal
layers => merge => merge down
6
layers => new raster layer
selections => load-save selection => from alpha channel
=> selection # 2
flood fill selection with the gradient
keep selection active
effects => plugins => Graphics Plus => Cross Shadow
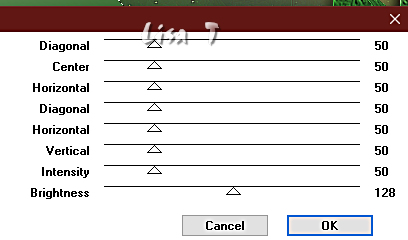
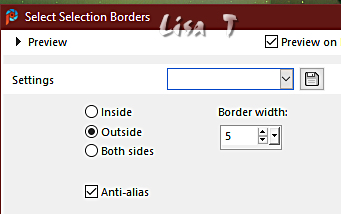
selections => modify = > select
selection borders
7
flood fill selection with color 2
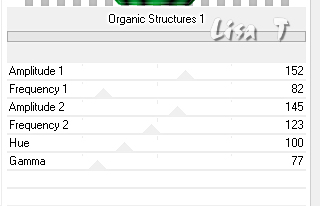
effects => plugins => Unlimited 2 => Pattern Generators
/ Organic Structures 1
TN => change the setting of « Hue » according
to your main color
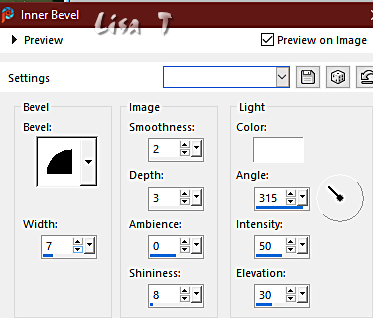
effects => 3D effects => Inner Bevel
selections => select none
effects => 3D effects => drop shadow => 0 / 0
/ 100 / 20 / black
8
layers => new raster layer
selections => load-save selection => from alpha channel
=> selection # 3
flood fill selection with the gradient
keep selection active
effects => plugins => Graphics Plus => Cross Shadow

copy / paste the misted tube into selection
selections => modify = > select selection borders

flood fill selection with color 2
effects => plugins => Unlimited 2 => Pattern Generators
/ Organic Structures 1

effects => 3D effects => Inner Bevel

selections => select none
highglight layer just below
9
selections => load-save selection => from alpha channel
=> selection # 2
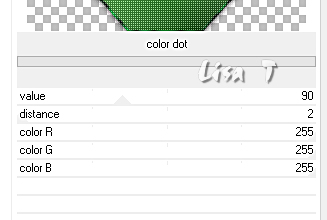
effects => plugins => Unlimited 2 => Penta.com
=> color dot
selections => select none
highglight top layer
enable the Pick tool with the following settings, to move
the layer acurately => position X : 270 / position
Y : 115
effects => 3D effects => drop shadow => 0 / 0
/ 100 / 5 / black
layers => merge => merge down
copy / paste « déco_cloclo1 » as new
layer
enable the Pick tool with the following settings, to move
the layer acurately => position X : 220 / position
Y : 12
effects => edge effects => enhance
effects => 3D effects => drop shadow => 0 / 0
/ 100 / 5 / black
layers => duplicate
image => mirror => mirror vertical
enable the Pick tool with the following settings, to move
the layer acurately => position X : 220 / position
Y : 544
layers => merge => merge down
10
layers => new raster layer
selections => load-save selection => from alpha channel
=> selection # 5
copy / paste « bas_Cloclo » into selection
selections => select none
effects => 3D effects => drop shadow => 0 / 0
/ 100 / 25 / black
layers => new raster layer
selections => load-save selection => from alpha channel
=> selection # 4
flood fill selection with the gradient
effects => texture effects => Weave / colors 2 & 1
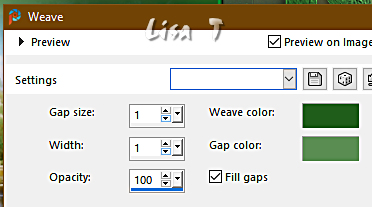
11
effects => 3D effects => Inner Bevel

selections => select none
layers => duplicate
image => mirror => mirror vertical
enable the Pick tool with the following settings, to move
the layer acurately => position X : 428 / position
Y : 563
layers => merge => merge down
effects => 3D effects => drop shadow => 1 / 1
/ 85 / 5 / black
12
image => add borders => tick « symmetric » => 1
px color 3
selections => select all
image => add borders => tick « symmetric » => 10
px / any color
selections => invert
flood fill selection with the gradient
effects => plugins => Graphics Plus => Cross Shadow

selections => select none
image => add borders => tick « symmetric » => 1
px color 3
selections => select all
image => add borders => tick « symmetric » => 20
px / any color
selections => invert
flood fill with the gradient, changing color 1 by color
3
effects => plugins => Unlimited 2 => Pattern Generators
/ Organic Structures 1

effects => 3D effects => Inner Bevel
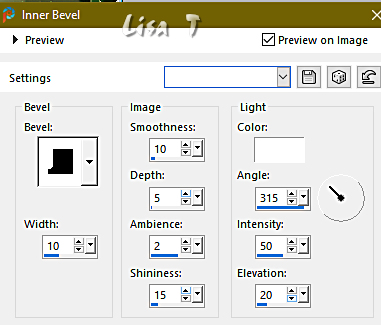
selections => select none
image => add borders => tick « symmetric » => 1
px color 3
selections => select all
image => add borders => tick « symmetric » => 30
px / any color
selections => invert
flood fill with the gradient, changing color 1 by color
3
effects => plugins => Unlimited 2 => Pattern Generators
/ Organic Structures 1

13
effects => texture effects => Soft Plastic
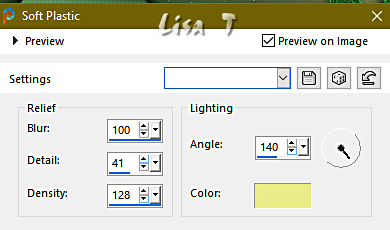
edit => repeat
adjust => sharpness => sharpen
selections => invert
effects => 3D effects => drop shadow => 0 / 0
/ 75 / 25 / black
selections => select all
selections => modify => contract => 15 px
effects => 3D effects => drop shadow => 0 / 0
/ 75 / 30 / black
selections => invert
effects => plugins => AAA Frames => AAA Frame
Works
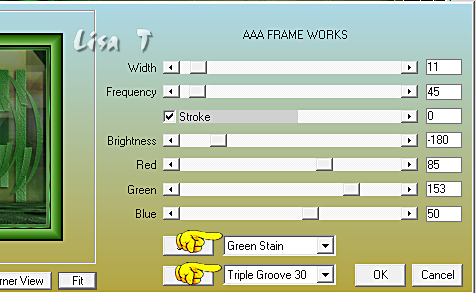
selections => select none
copy / paste the character and the dog tubes as new layers
don’t forget to erase the watermarks
place properly
drop a shadow of your choice
copy / paste « Coins Cloclo » as new layer
don’t move it
apply your watermark or signature and Cloclo’s wateramrk
write your licence number if you used a licenced tube
layers => merge => merge all (flatten)
image => resize => tick « resize all layers » => 1000
px width
save your work as... type .jpeg

Don't hesitate to write to me if you have
any trouble with this translation
If you create a tag with this tutorial
and wish it to be shown, send it to me !
It will be a real pleasure for me to add it to the gallery
at the end of the translation


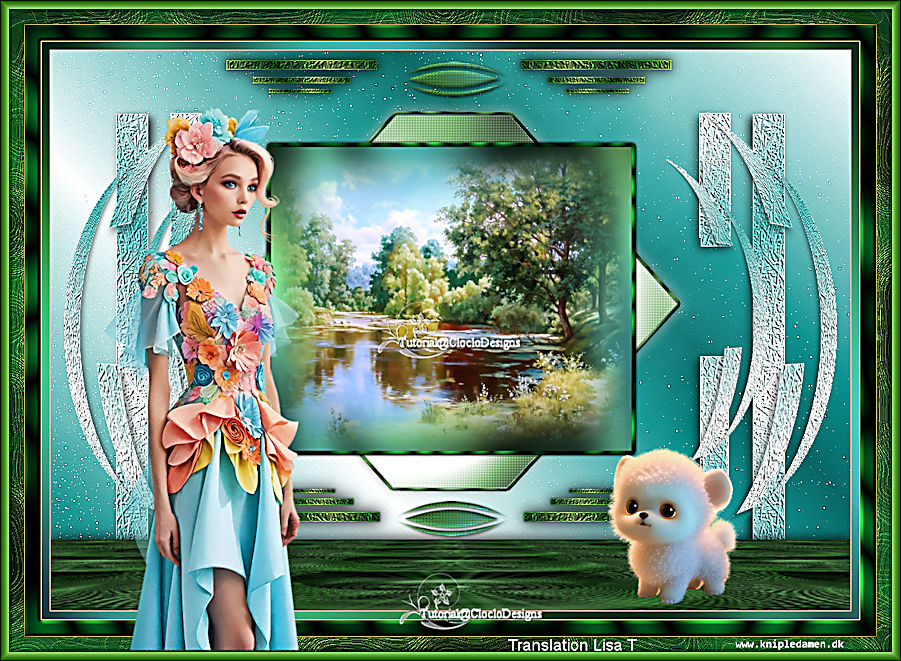
created by  Birte Birte
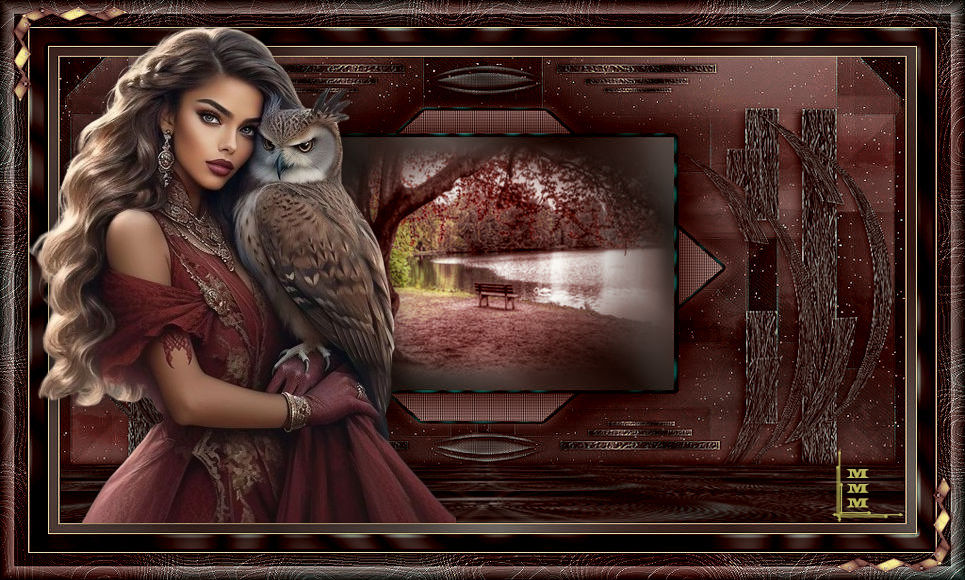
created by  MMM MMM

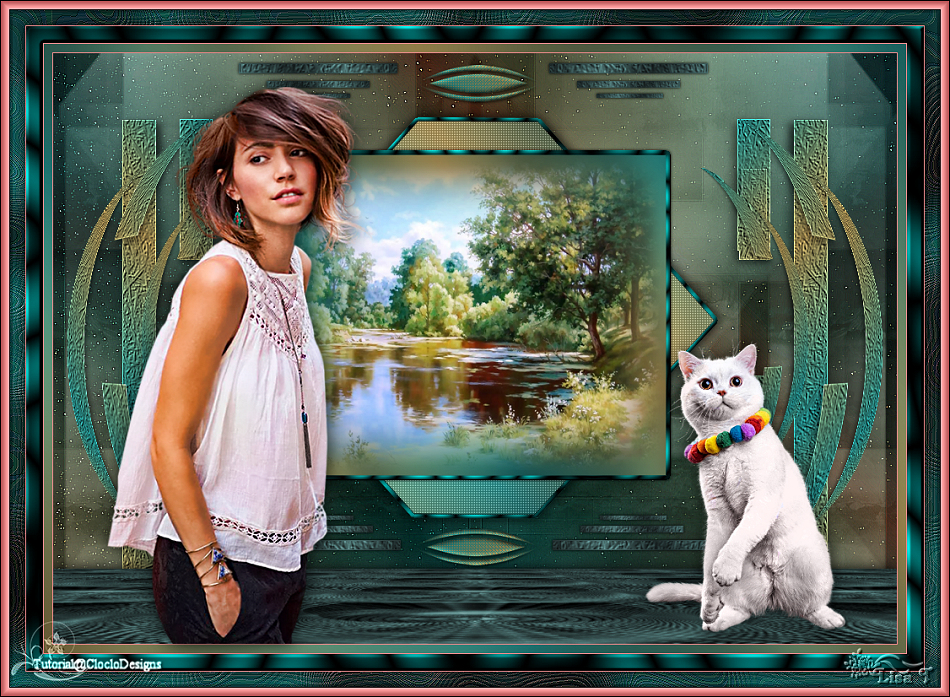
my version with my tubes

back to the boards of Cloclo’s tutorials
board 3 => 
at the bottom of each tutorial you will
find the arrows allowing you to navigate from one board
to another


|