

You will find the original tutorial here :

This tutorial is a personal creation.
Any resemblance with another one would be only pure coincidence.
It is stricly forbidden to modify tubes, to change their name or take off the matermarks,
To present them on your sites or blog,
To share them in groups,
to make a bank of images, or to use them on lucrative purposes.
Thank you Sass and Garances for testing Cloclo’s tutorials

Thank you to respect Cloclo’s work and the tubers work.
Don’t hesitate to warn me if you have any trouble with this translation,
and I’ll try to fix the problem as quickly as I can


Material
an alpha layer, and selections if you prefer to place them in the « selections »folder of My Corel PSP
2 plugins to import into Ulimited
1 color palette, 1 texture
decorations
éléments, tubes created by Cloclo
a link to Pinterest images

open all the tubes into PSP and duplicate them. Work with the copies to preserve orignals
place (or import) the supplies provided into the appropriate folders of My Corel PSP
open the mask(s) and minimize to tray
copy / paste selections into the folder « selections » of Corel PSP General folder
double click on the preset to install ( or import )

HINTS AND TIPS
TIP 1 -> if you don’t want to install a font -->
open it in a software as « Nexus Font » (or other font viewer software of you choice)
as long as both windows are opened (software and font), your font will be available in your PSP
TIP 2 -> from PSPX4, in the later versions of PSP the functions « Mirror » and « Flip » have been replaced by -->
« Mirror » --> image => mirror => mirror horizontal
« Flip » --> image => mirror => mirror vertical

Filters (plugins) used
MuRa's Seamless / Emboss at Alpha
Alien Skin Eye Candy 5 / Glass
<I.C.NET Software> Filters Unlimited 2.0 / Andrew's Filter Collection 59
Graphics Plus / Cross Shakow
<I.C.NET Software> Filters Unlimited 2.0 / &<BkgDesigner sf 10II
AAA Frames / FOTO FRAME
Cloclo’s plugins page => 

colors
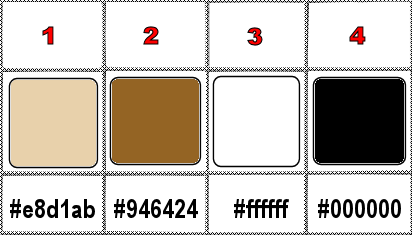
set colors 1 and 2 as FG & BG colors into the materials palette

use the pencil to you follow the steps
hold down left click of your mouse to grab it and move it


Important
Open all images and tubes with PSP, duplicate them and close the originals.
Never work with original images.
Cloclo and I work with PSP20
but you can follow the steps with another version of PSP
don’t forget to save your work often in cas of problems

realization
1
open the alpha layer, duplicate, close the original and work with the copy
rename « Raster 1 »
2
selections => select all
copy the Background image (« fond ») into selection
selections => select none
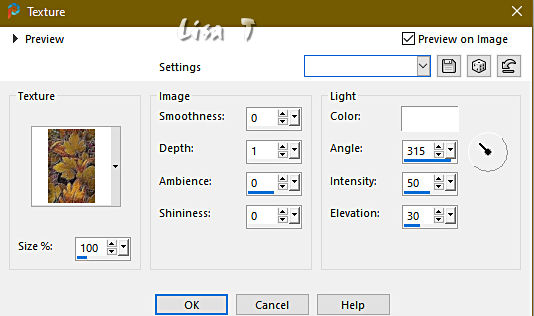
effects => texture effects => texture
adjust => sharpness => sharpen more
3
copy / paste « cloclo1 » as new layer
layers => merge => merge down
copy / paste « cloclo » as new layer
don’t move it
blend mode of the layer : Luminance (Legacy)
effects => edge effects => enhance
effects => 3D effects => drop shadow => 5 / 5 / 100 / 15 / black
copy / paste « misted cloclo » as new layer
objects => align => top
effects => plugins => Mura’s Seamless => Emboss at Alpha => default settings
4
copy / paste « sol cloclo » as new layer
objects => align => bottom
effects => 3D effects => drop shadow => 10 / -10 / 100 / 25 / color 2
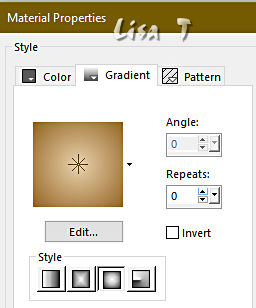
prepare a sunburst gradient
layers => new raster layer
selections => load-save selection => from alpha channel => selection # Cloclo
flood fill selection with the gradient
5
effects => texture effects => Tiles
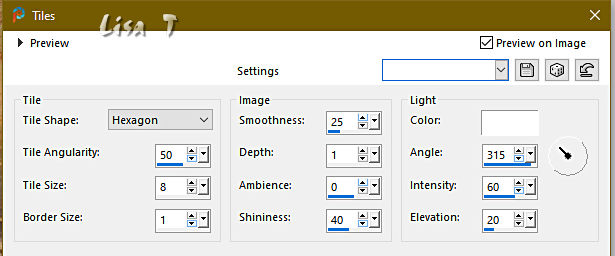
effects => plugins => Alien Skin Eye Candy 5 Impact / Glass / preset « Clear »
selections => select none
prepare a linear gradient
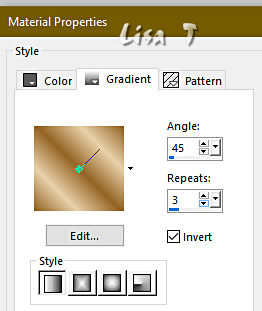
layers => new raster layer
selections => load-save selection => from alpha channel => selection # Cloclo1
flood fill selection with the gradient
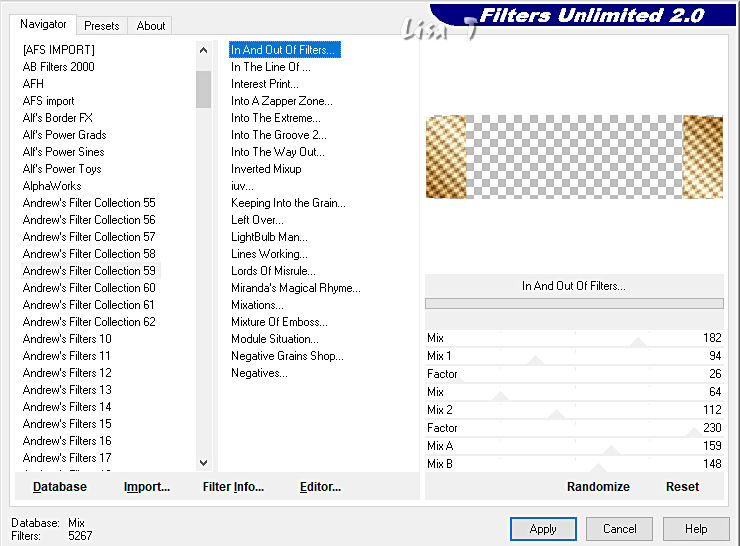
effects => plugins => Unlimited 2 => Andews Filter Collection 59 / In And Out Of Filters
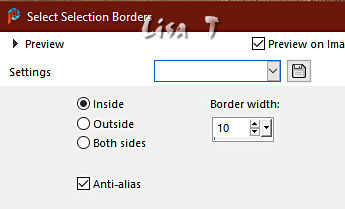
selections => modify = > select selection borders
6
effects => texture effects => mosaic / Glass
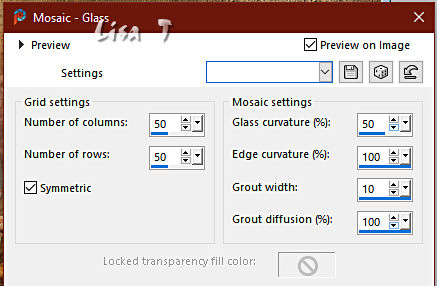
effects => 3D effects => Inner Bevel
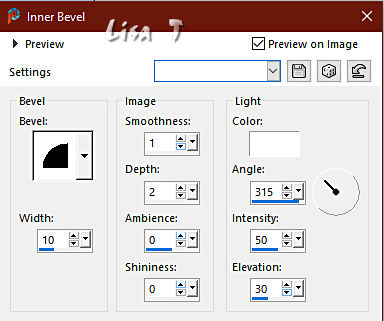
repeat « Inner Bevel » (same settings)
selections => select none
effects => 3D effects => drop shadow => 5 / 5 / 100 / 15 / black
7
layers => new raster layer
selections => load-save selection => from alpha channel => selection # Cloclo2
flood fill selection with the gradient
repeat « Inner Bevel » (same settings)
effects => 3D effects => drop shadow => 1 / 1 / 80 / 5 / black
selections => select none
8
copy / paste « feuille » as new layer
place as shown on final result
layers => merge => merge down
image => resize => untick « resize all layers » => 75%
enable the Pick tool with the following settings, to move the layer acurately => position X : 17 / position Y : 18
hit the « M » key of your keyboard to disable the tool
layers => duplicate
image => resize => untick « resize all layers » => 75%
enable the Pick tool with the following settings, to move the layer acurately => position X : 22 / position Y : 475
layers => merge => merge down
layers => duplicate
image => mirror => mirror horizontal
layers => merge => merge down
effects => 3D effects => drop shadow => 1 / 1 / 80 / 5 / black
9
layers => new raster layer
selections => load-save selection => from alpha channel => selection # Cloclo3
flood fill selection with the gradient
effects => 3D effects => Inner Bevel (same settings)
selections => select none
effects => 3D effects => drop shadow => 1 / 1 / 85 / 5 / black
adjust => sharpness => sharpen
blend mode of the layer : Luminance
enable the Pick tool with the following settings, to move the layer acurately => position X : 20 / position Y : 193
layers => duplicate
image => mirror => mirror horizontal
layers => merge => merge down
10
image => add borders => tick « symmetric » => ...
2 px color 1
2 px color 2
2 px color 1
selections => select all
image => add borders => tick « symmetric » => ...
30 px color 4
selections => invert
flood fill selection with the gradient
effects => plugins => Graphics Plus => Cross Shadow / default settings
11
effects => plugins => Unlimited 2 => &<Bkg Designer sf10 II> => Quilt 01
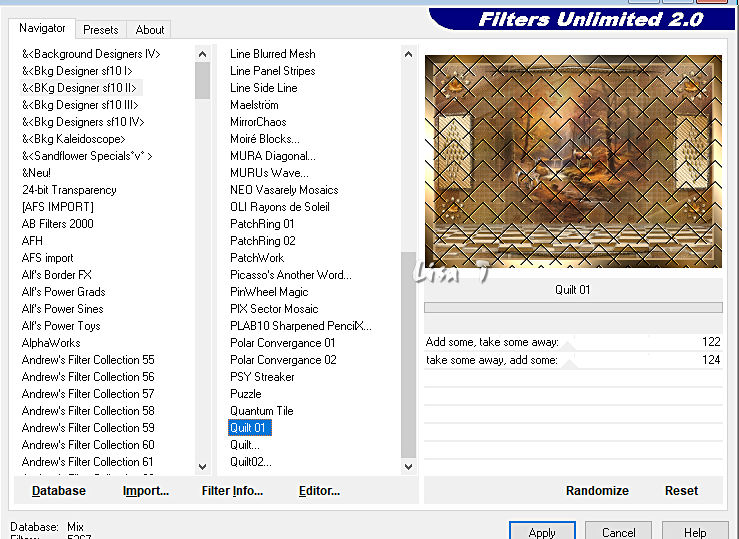
adjust => sharpness => sharpen
effects => plugins => AAA Frames => Foto Frame
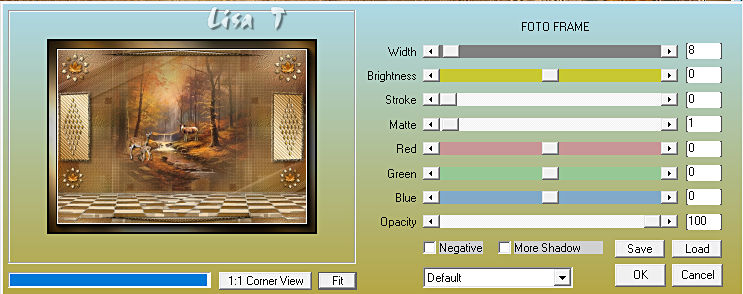
effects => 3D effects => drop shadow => 5 / 5 / 100 / 35 / black
selections => invert
effects => 3D effects => drop shadow => 5 / 5 / 100 / 35 / black
selections => select none
12
image => add borders => tick « symmetric » => 1 px white
copy / paste « tube texte_Cloclo » as new layer
place as shown on final result
copy / paste the characters tubes as new layers and place
9
copy / paste the Cloclo’s watermark as new layer
place where you like
apply your watermark or signature
write your licence number if you used a licenced tube
layers => merge => merge all (flatten)
resize to 1000 px width
save your work as... type .jpeg

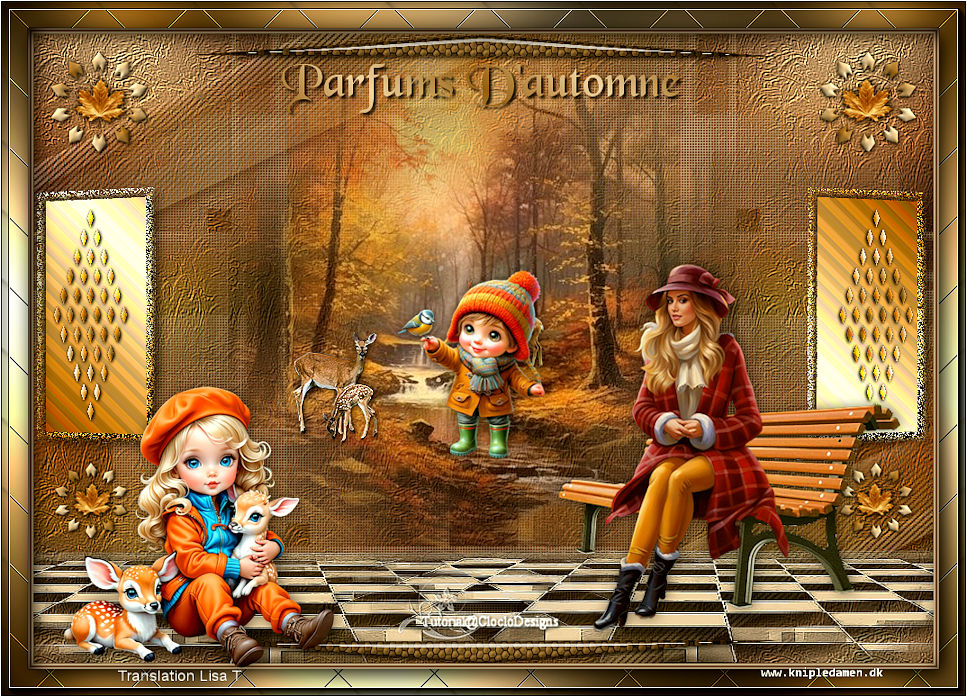
My version with tubes created by Colybrix(the woman) ValyScrapPassion(the cat) Wieskes(the hedgehog) Cat Dana(the misted landscape)

Don't hesitate to write to me if you have any trouble with this translation
If you create a tag with this tutorial
and wish it to be shown, send it to me !
It will be a real pleasure for me to add it to the gallery at the end of the translation


created by  Birte Birte

back to the boards of Cloclo’s tutorials
20 tutorials on each board
board 3 => 
at the bottom of each tutorial you will find the arrows allowing you to navigate from one board to another


|