

You will find the original tutorial here :

This tutorial is a personal creation.
Any resemblance with another one would be only pure
coincidence.
It is stricly forbidden to modify tubes, to change
their name or take off the matermarks,
To present them on your sites or blog,
To share them in groups,
to make a bank of images, or to use them on lucrative purposes.

Thank you to respect Christ’s work and the tubers
work.
Don’t hesitate to warn me if you have any trouble
with this translation,
and I’ll try to fix the problem as quickly as I can

Christ worked with PSP X2 and I worked with PSP2020
you can follow this tutorial with another version of PSP,
but the result might be slightly different

Supplies
tubes – selections – palette
don’t forget to erase Tuber’s watermark before
using a tube

Hints and Tips
TIP 1 -> if you don’t want to install a font -->
open it in a software as « Nexus Font » (or
other font viewer software of you choice)
as long as both windows are opened (software and font),
your font will be available in your PSP
TIP 2 -> from PSPX4, in the later versions of PSP the
functions « Mirror » and « Flip » have
been replaced by -->
« Mirror »has become --> image => mirror => mirror
horizontal
« Flip » has become --> image => mirror => mirror
vertical

Plugins needed
Effets / Unlimited 2.0 / VM Distortion / Radiator
II
Effets / Unlimited 2.0 / VM distortion / Radiator
III
Effets / Unlimited 2.0 / VM Extravaganza / Plastic
Surgery
Effets / Unlimited 2.0 / VM Natural/ Lakeside Reflection
Effets / Unlimited 2.0 / VM Natural / Splash !...
Effets / Mehdi / Sorting Tiles
Effets / Mura’s Meister / Perspective Tiling

Use the pencil to mark your place
along the way
hold down left click to grab and move it
 |

prepare your work
duplicate all the tubes and work with the copies
to preserve originals
save your work often in case of problems with your psp
place selections into the dedicated folder of your PSP
general folder
don’t forget to erase the tuber’s watermark
use the Dropper tool to pick up your colors into your tubes
and misted images
Christ chose these :
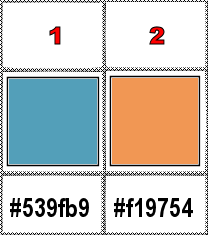
set FG to color 1 and BG to color 2 in materials palette
don’t hesitate to change blend modes and opacities
of the layers to match your personal colors and tubes
1
open a new image => transparent => 900 * 650
px
2
prepare a radial gradient in the materials palette
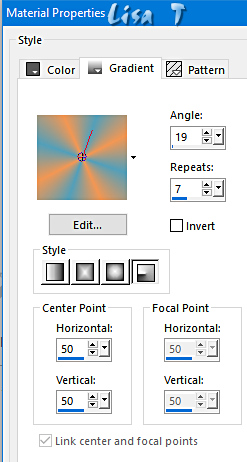
flood fill layer with the gradient
3
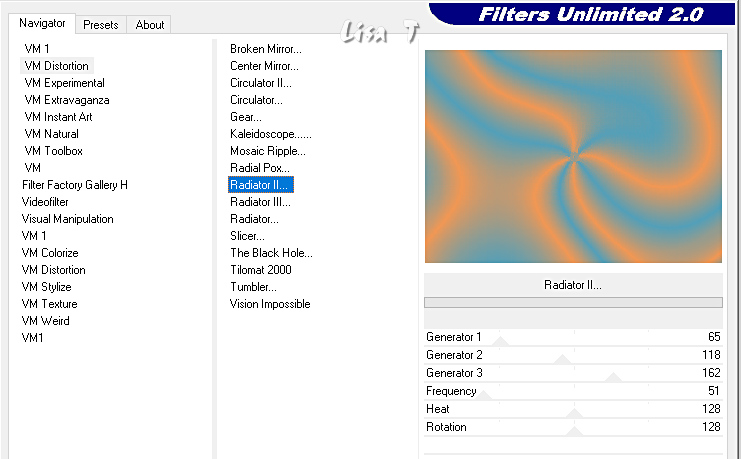
Effets / Unlimited 2.0 / VM Distortion / Radiator II
4
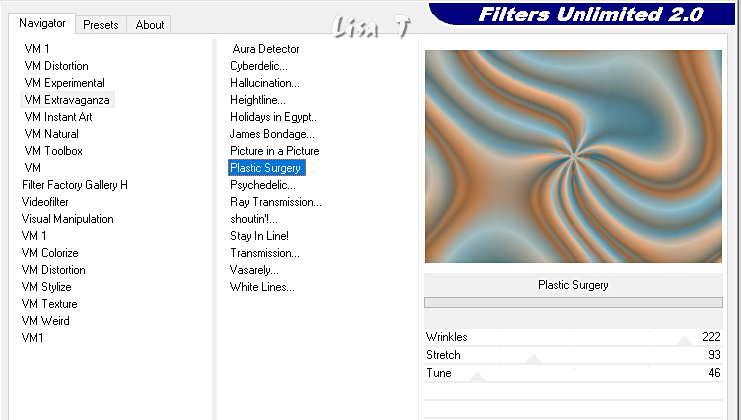
Effets / Unlimited 2.0 / VM Extravaganza / Plastic Surgery
5
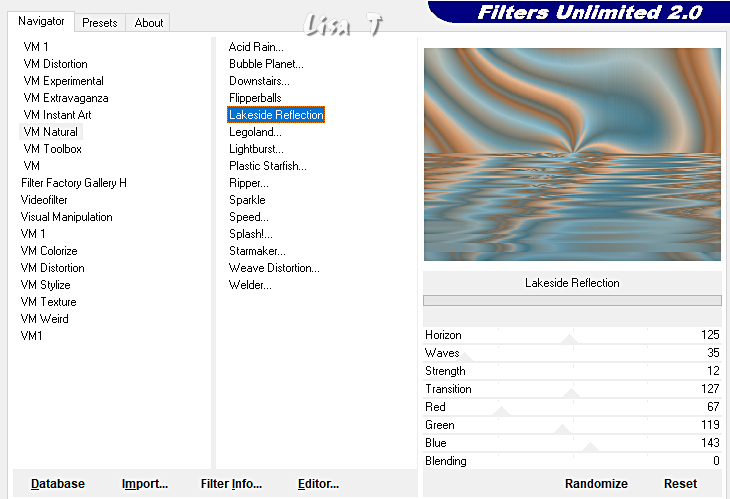
Effets / Unlimited 2.0 / VM Natural/ Lakeside Reflection
6
layers => duplicate
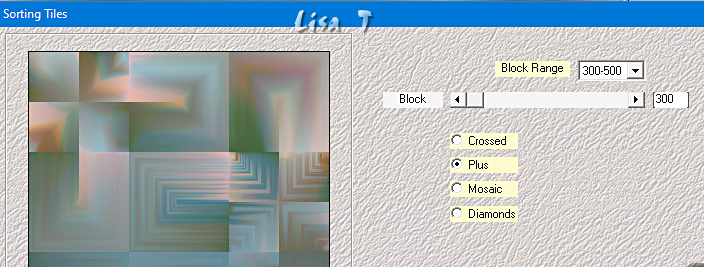
effects => plugins => Mehdi => Sorting Tiles
7
Effets / Mura’s Meister / Perspective Tiling
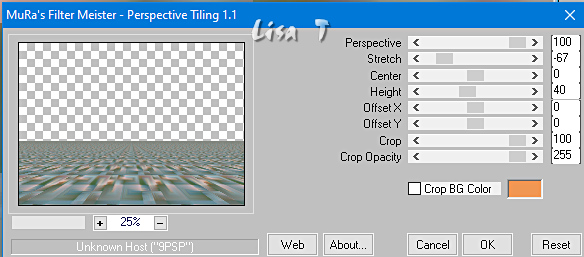
effects => edge effects => enhance
layers => duplicate
image => mirror => mirror vertical
8
prepare a linear gradient in the materials palette
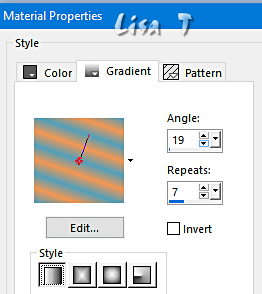
9
layers => new raster layer
selections => load-save selection => from disk => selection
#1
flood fill selection with the gradient
adjust => blur => gaussian blur => 30
effects => artistic effects => Halftone
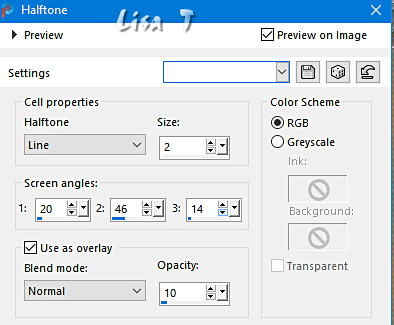
effects => distortion effects => Twirl => - 246
adjust => Brightness and Contrast => Fill Light/Clarity
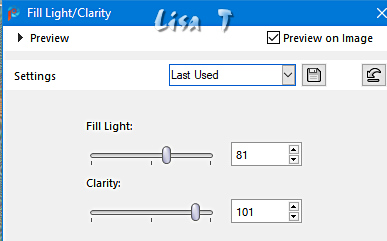
adjust => sharpness => sharpen
effects => 3D effects => drop shadow => 3 / 0
/ 70 / 24 / black
10
layers => new raster layer
effects => 3D effects => Cutout
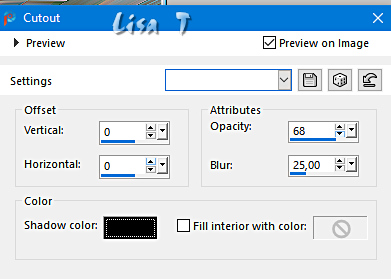
selections => select none
11
layers => duplicate
adjust => Brightness and Contrast => Brightness/Contrast
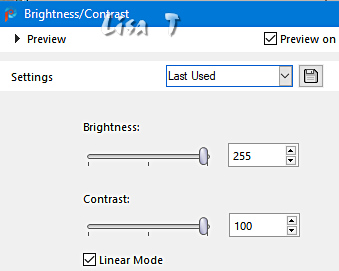
image => resize => untick « resize all layers » => 96%
effects => distortion effects => Ripple
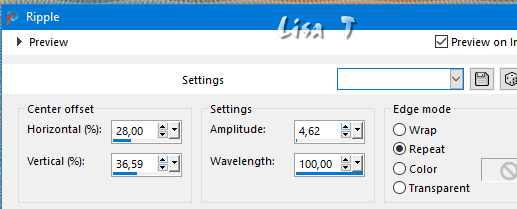
12
layers => new raster layer
selections => load-save selection => from disk => selection
#2
effects => 3D effects => Cutout
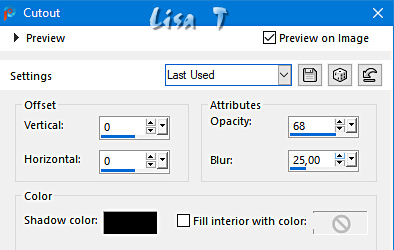
selections => select none
13
copy / paste « Neige Montagne Kiffe – Tubes » as
new layer
effects => image effects => offset => H : 12
/ V : 23 / tick « custom » and « transparent »
14
copy / paste « Lignes OR Kiffe – Tubes » as
new layer
don’t move it
15
copy / paste « Ruban doré - rose Kiffe – Tubes » as
new layer
effects => image effects => offset => H : -69
/ V : -67 / tick « custom » and « transparent »
effects => 3D effects => drop shadow => tick « shadow
on new layer » => 7 / 6 / 40 / 10 / WHITE
highlight top layer
layers => merge => merge down => TWICE
16
copy / paste « Ruban doré 2 Kiffe – Tubes » as
new layer
effects => image effects => offset => H : 125
/ V : 205 / tick « custom » and « transparent »
effects => 3D effects => drop shadow => tick « shadow
on new layer » => 16 / 7 / 40 / 20 / black
highlight top layer
effects => 3D effects => drop shadow => tick « shadow
on new layer » => 4 / 1 / 73 / 20 / WHITE
highlight top layer
layers => merge => merge down => TWICE
17
copy / paste « Boules ivoire Kiffe – Tubes » as
new layer
effects => image effects => offset => H : -267
/ V : -242 / tick « custom » and « transparent »
effects => 3D effects => drop shadow => UNtick « shadow
on new layer » => 4 / 1 / 73 / 20 / black
18
layers => new raster layer
selections => select all
effects => 3D effects => Cutout

selections => select none
19
copy / paste « Annette 4 Christ
Kiffe – Tubes » as new layer
image => resize => untick « resize all layers » => 94%
effects => image effects => offset => H : 331
/ V : -60 / tick « custom » and « transparent »
effects => 3D effects => drop shadow => 4 / 1
/ 73 / 30 / black
20
image => add borders => tick « symmetric » => 3
px color 2
image => add borders => tick « symmetric » => 3
px color 1
edit => COPY
21
image => add borders => tick « symmetric » => 40
px color 2
select the40 px border with the Magic Wand tool
edit => paste into selection
Effets / Unlimited 2.0 / VM Natural / Splash !...
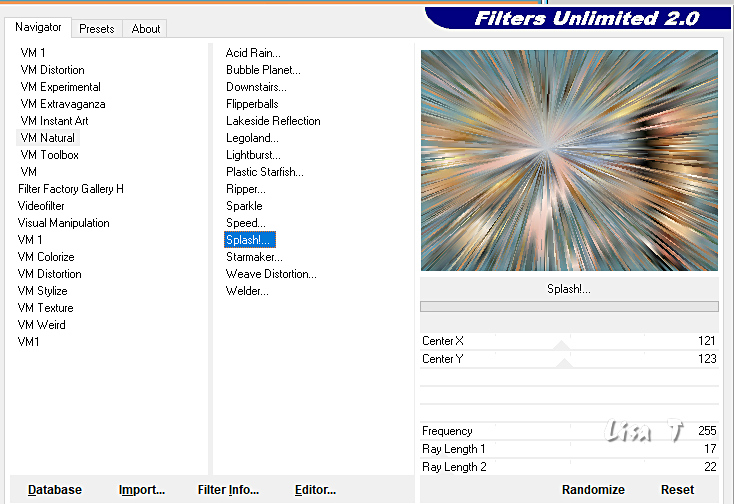
effects => 3D effects => Inner Bevel
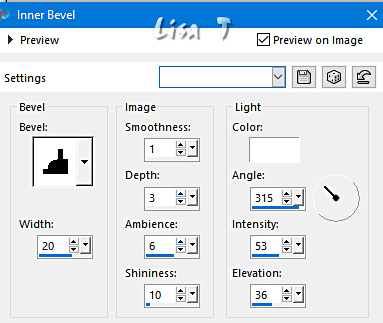
selections => modify => contract => 14 px
Effets / Unlimited 2.0 / VM distortion / Radiator III
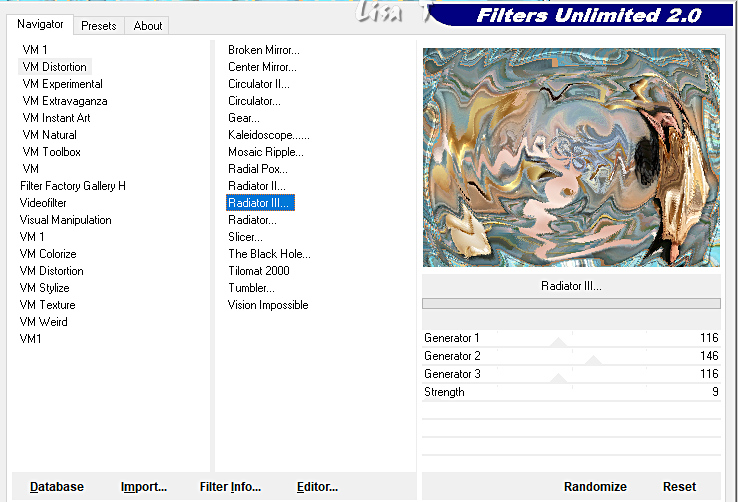
effects => 3D effects => Cutout
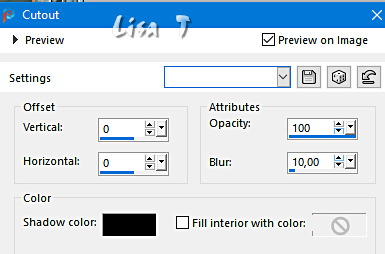
effects => 3D effects => drop shadow => 0 / 0
/ 100 / 4 / black
selections => select none
12
apply your watermark or signature on a new layer
write your licence number if you used a licenced tube
layers => merge => merge all (flatten)
file => save your work as... type .jpeg

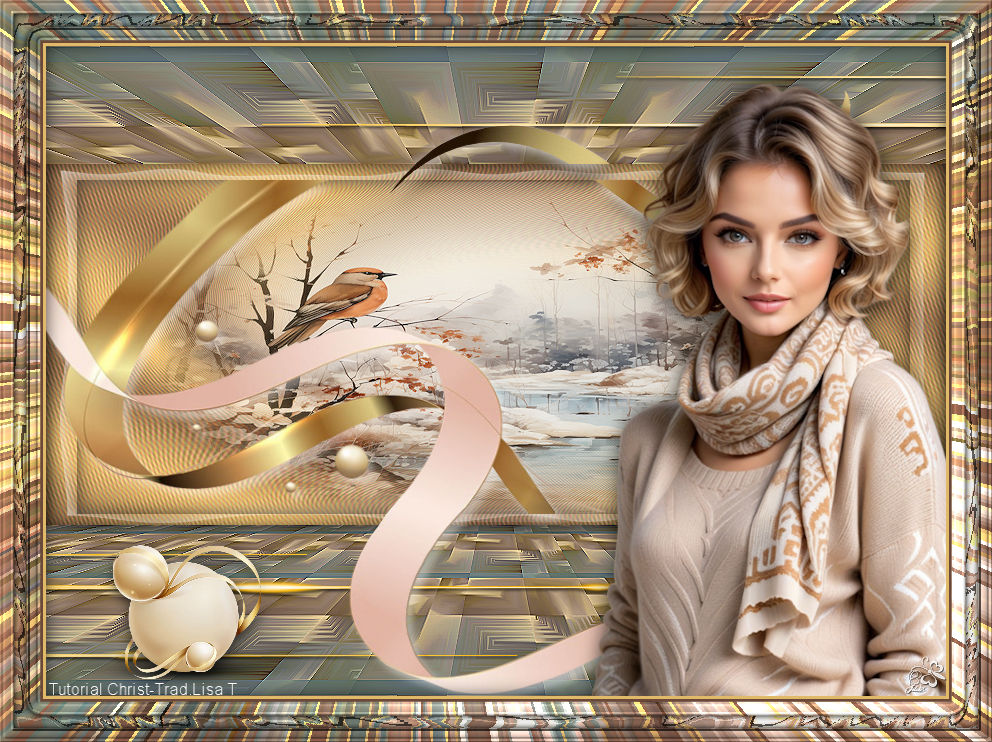
Another version with my tubes and misted image
Woman tube created by Nadège


Don't hesitate to write to me if you have any trouble
with this tutorial
If you create a tag (using other tubes and colors than
those provided) with this translation
and wish it to be shown, don’t hesitate to send it
to me
It will be a real pleasure for me to add it to the gallery
at the bottom of this translation


created by  Jolcsi Jolcsi

back to the boards of Christ’s tutorials
20 tutorials on each board
board 2 => 
at the bottom of each board you will find arrows
allowing you to navigate from one board to another


|