

You will find the original tutorial here :

This tutorial is a personal creation.
Any resemblance with another one would be only pure
coincidence.
It is stricly forbidden to modify tubes, to change
their name or take off the matermarks,
To present them on your sites or blog,
To share them in groups,
to make a bank of images, or to use them on lucrative purposes.

Thank you to respect Christ’s work and the tubers
work.
Don’t hesitate to warn me if you have any trouble
with this translation,
and I’ll try to fix the problem as quickly as I can

Christ worked with PSP X2 and I worked with PSP2020
you can follow this tutorial with another version of PSP,
but the result might be slightly different

Supplies
tubes – selections (Patrick selection 1 & 2) – palette – patterns

TIP 1 -> if you don’t want to install a font -->
open it in a software as « Nexus Font » (or
other font viewer software of you choice)
as long as both windows are opened (software and font),
your font will be available in your PSP
TIP 2 -> from PSPX4, in the later versions of PSP the
functions « Mirror » and « Flip » have
been replaced by -->
« Mirror »has become --> image => mirror => mirror
horizontal
« Flip » has become --> image => mirror => mirror
vertical

Plugins needed
Graphics plus / Cross Shadow
Unlimited 2.0 / Buttons &Frames / 3D Glass Frame 1

Use the pencil to mark your place
along the way
hold down left click to grab and move it
 |

prepare your work
duplicate all the tubes and work with the copies
to preserve originals
save your work often in case of problems with your psp
place selections and patterns into the dedicated folders
of your PSP general folder
use the Dropper tool to pick up your colors into your tubes
and misted images
Christ chose these :
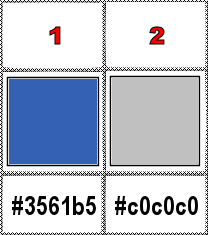
don’t hesitate to change blend modes and opacities
of the layers to match your personal colors and tubes
1
prepare a linear gradient in materials palette
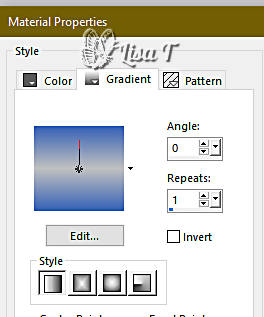
2
open a new image => transparent => 800 * 550
px
selections => load-save selection => from disk => selection
#1
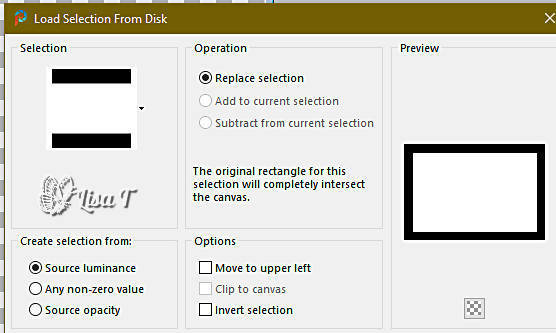
flood fill selection with the gradient
3
effects => texture effects => soft plastic
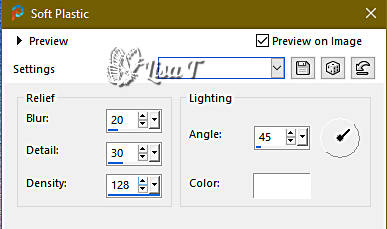
4
selections => modify = > select selection borders
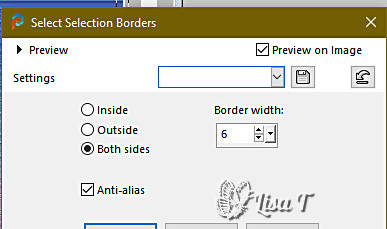
enable the flood fill tool

flood fill selection with color 2
effects => 3D effects => Inner Bevel
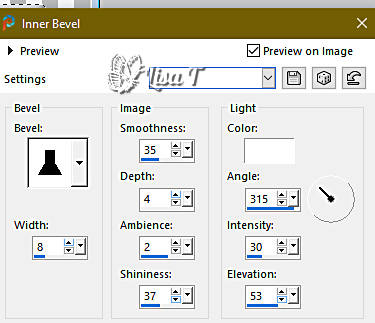
selections => select none
5
selections => load-save selection => from disk => selection
#2
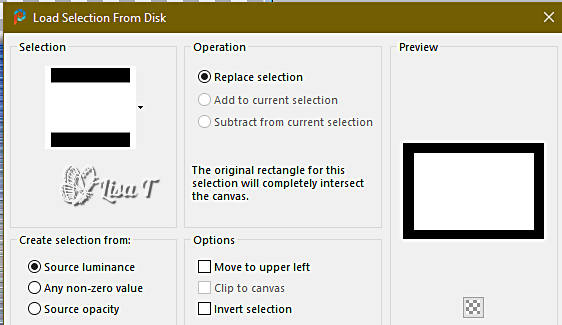
copy / paste « Caraïbes 1 Tubes By Christ » into
selection
6
layers => new raster layer
effects => 3D effects => cutout
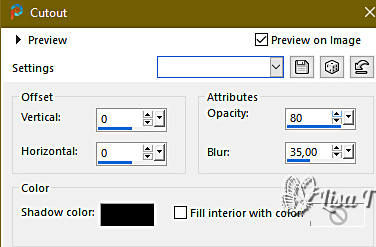
layers => merge => merge down
selections => select none
7
set pattern « Motif bleu Patrick » as
FG in the materials palette
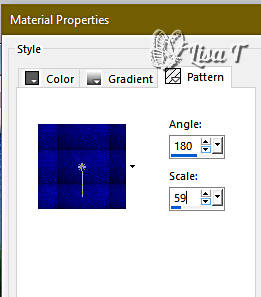
select the transparent border with the Magic Wand tool

flood fill selection with this pattern
selections => select none
8
set pattern « Kahlan1249 Art » as BG in the
materials palette
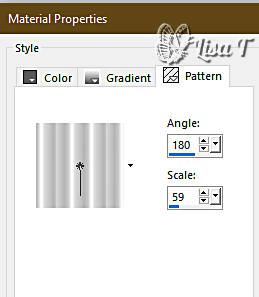
selections => select all
selections => modify => contract => 20 px
selections => modify = > select selection borders
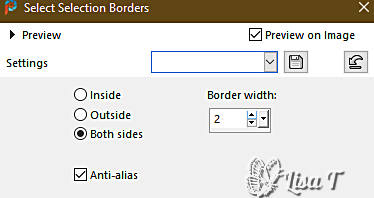
flood fill selection with this BG pattern
selections => select none
9
image => add borders => tick « symmetric » => 2
px white
image => add borders => tick « symmetric » => 30
px color 2

select this border with the Magic Wand tool
effects => plugins => Graphics Plus => Cross Shadow
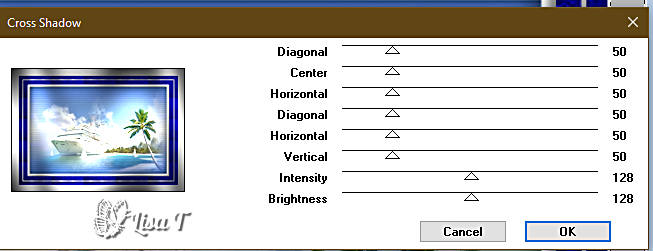
selections => select none
10
selections => select all
selections => modify => contract => 15 px
selections => modify = > select selection borders

flood fill selection with this FG pattern
selections => select none
11
selections => select all
image => add borders => tick « symmetric » => 50
px white
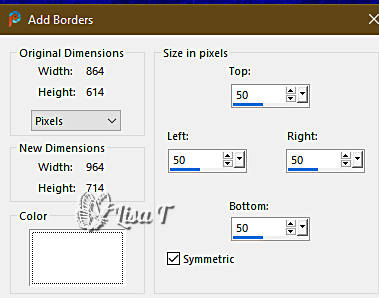
selections => invert
flood fill selection with this FG pattern
effects => plugins => Unlimited 2 => Buttons & Frames
/ 3D Glass Frame 1

selections => select none
12
image => add borders => tick « symmetric » => 30
px white
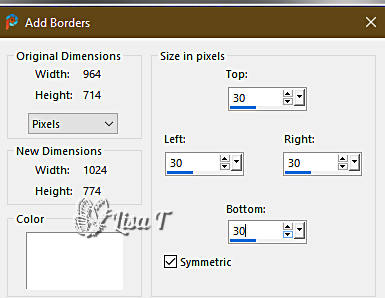
select this border with the Magic Wand tool
flood fill selection with this FG pattern
effects => plugins => Graphics Plus => Cross Shadow
( same settings as previously )
selections => select none
13
image => add borders => tick « symmetric » => 3
px color 2
image => add borders => tick « symmetric » => 50
px white

flood fill selection with this FG pattern
effects => plugins => Unlimited 2 => Buttons & Frames
/ 3D Glass Frame 1 ( same settings as previously )
selections => select none
14
image => add borders => tick « symmetric » => 2
px white
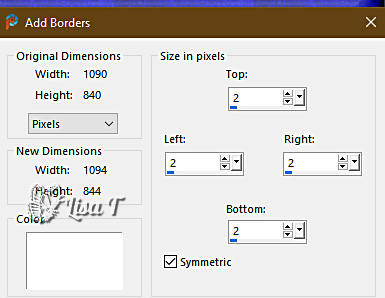
select this border with the Magic Wand tool
flood fill selection with this FG pattern
selections => select none
15
copy / paste « Coin Argent du net » as new
layer
image => resize => UNtick « resize all layers » => 57%
effects => edge effects => enhance
effects => image effects => offset => H : -476
/ V : 351 / tick « custom » and « transparent »
effects => 3D effects => drop shadow => 1 / 1
/ 60 / 20 / black
effects = > plugins => Simple => Top Left Mirror
16
copy / paste « Cory Drouillard bis 3 Christ Kiffe
- Tubes » as new layer
don’t forget to erase the watermark – place
where you like
image => resize => UNtick « resize all layers » => 87%
adjust => sharpness => sharpen
effects => image effects => offset => H : 375/
V : -10 / tick « custom » and « transparent »
effects => 3D effects => drop shadow => 0 / 0
/ 60 / 30 / black
apply your watermark or signature on a new layer, and Christ’s
watermark
write your licence number if you used a licenced tube
layers => merge => merge all (flatten)
file => save your work as... type .jpeg

Another version with my tube and misted image


Don't hesitate to write to me if you have any trouble
with this tutorial
If you create a tag (using other tubes and colors than
those provided) with this translation
and wish it to be shown, don’t hesitate to send it
to me
It will be a real pleasure for me to add it to the gallery
at the bottom of this translation


back to the boards of Christ’s tutorials
20 tutorials on each board
board 1 => 
at the bottom of each board you will find arrows allowing
you to navigate from one board to another


|