

The original tutorial can be found HERE

Conditions of use of the material provided
It is forbidden to modifiy, change the name, take off the watermarks or alter the tubes.
It is forbidden to share them in groups or offer them on your site, blog or forum without permission
If you want to use them to create a tutorial, you must ask the permission to the authors.
This is a personal work.
any resemblance with another tutorial would be pure coincidence
it is forbidden to share it or distribute it on the Web,
to present it in a group or forum without the author’s permission
« Chez Douceur » is happy to share her work with you
she hopes it will help you dream and get away from your eveyday life

Material
tubes - selections - gradient

thank you to the tubers for their great work
open tubes, duplicate them and work with the copies
open mask and minimize to tray
copy / paste selections - gradients into the dedicated folders of Corel PSP Folder
TIP 1 -> if you don’t want to install a font -->
open it in a software as « Nexus Font » (or other font viewer software of you choice)
as long as both windows are opened (software and font), your font will be available in your PSP
TIP 2 -> from PSPX4, in the later versions of PSP the functions « Mirror » and « Flip » have been replaced by -->
« Mirror » --> image => mirror => mirror horizontal
« Flip » --> image -> mirror => mirror vertical
to prevent the theft of tubes, they are no longer provided in the ZIP material
the only material provided is : decorations, masks and selections
you will have to use your personal collection
translator's note : I used one of my tubes, available for free page 17 => women tubes

Filters
Simple/Blintz--MuRa’sFilter/Perspective tilling
Mehdi/Sorting Tiles.


translator’s note
« Chez Douceur » works with PSP X, I use PSP2018 to create my personal tags and write my translations
but this tutorial can be realized with another version
according to the version of PSP you use, the results might be slightly differents
don’t hesitate to change the blend modes of the layers to match your tubes and colors

colors

color 1 --> foreground color --> FG --> left click --> #ffc989
color 2 --> background color --> BG --> right click --> #730017
if you change these colors to match you personal tubes, don’t hesitate to change blends modes and opacities of the layers
set a light color as FG color and a dark color as BG color
  
Use the pencil to follow the steps
hold down left click to grab it and move it
 |
  
Realization
1
open a new transparent image 950 / 650 px
2
set the gradient provided into the FG box of the materials palette*then prepare a radial gradient
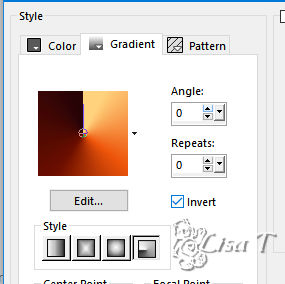
flood fill the layer with this gradient
3
effects => image effects => seamless tiling
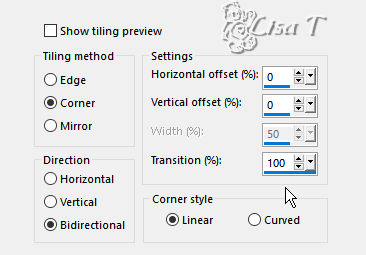
4
effects => Siple => Blintz
your tag looks like this
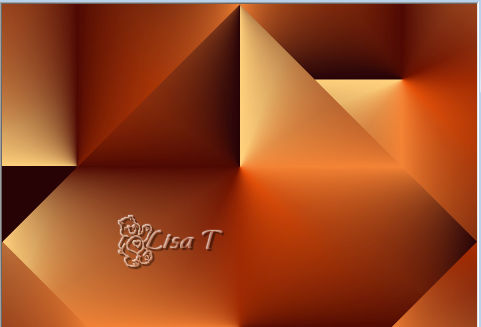
your layers palette looks like that
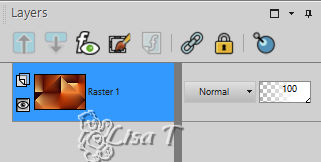
5
layers => duplicate
6
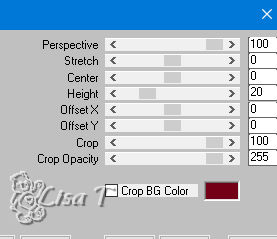
effects => plugins => Mura’s Filter =>Perspective Tiling
7
highlight « Raster 1 »
selections => load seleciton => from disk => selection « automne 1 »
selections => promote selection to layer
8
selections => select none
9
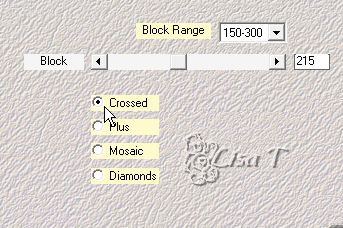
effects => plugins => Sorting Tiles
10
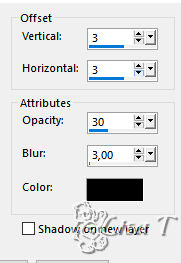
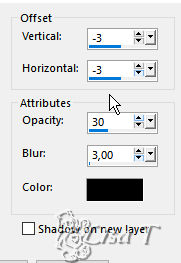
effects => 3D effects => drop shadow
11
highlight « Raster 1 »
selections => load seleciton => from disk => selection « automne 2 »
selections => promote selection to layer
selections => select none
12
copy / paste as new layer the misted image by Calgui
layers => arrange => move up
13
enable the Pick tool (K) with the following settings
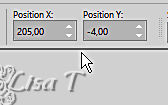
14
your work and layers palette look like this
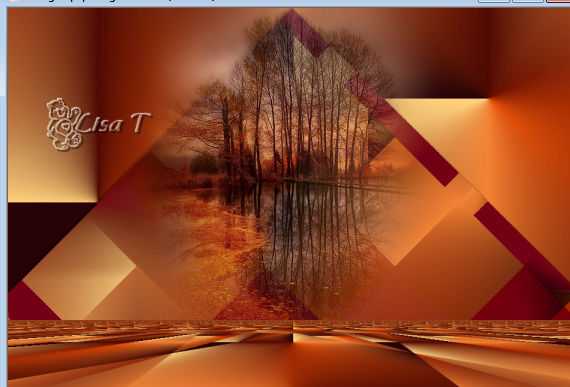
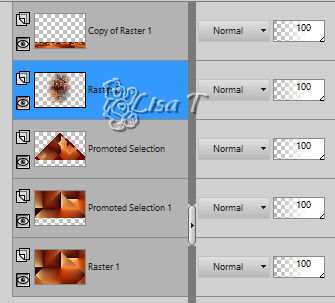
highlight top layer
15
copy / paste as new layer « Fall232 »
16
enable the Pick tool (K) with the following settings

17
copy / paste as new layer « Word Art Sarah Designs Autumn Blues »
18
enable the Pick tool (K) with the following settings

19
copy / paste as new layer the woman tube
(the tube Chez Douceur used is 421 px wide)
20
enable the Pick tool (K) with the following settings

21
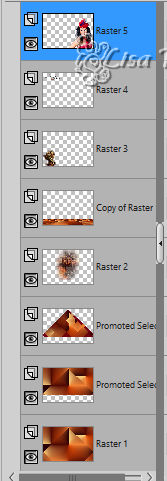
your work and layers palette look like this
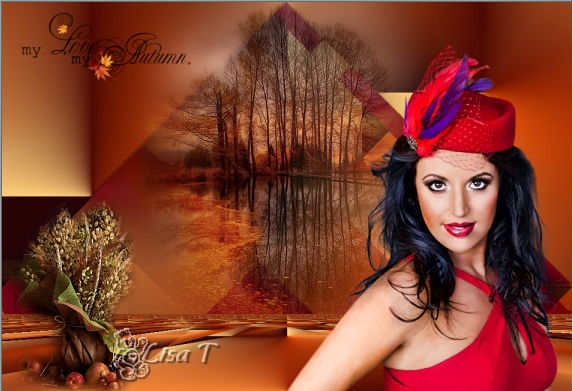
22
layers => merge => merge all (flatten)
23
image => add borders => tick « symmetric » => ........
2 px white
2 px BG color
25 px white
2 px FG color
2 px BG color
35 px white
24
select the 35 px border with the magic wand tool
flood fill selec tion with the gradient
25
adjust => blur => gaussian blur / 30

selections => select none
26
image => add borders => tick « symmetric » => 3 px white
27
apply your signature or watermark
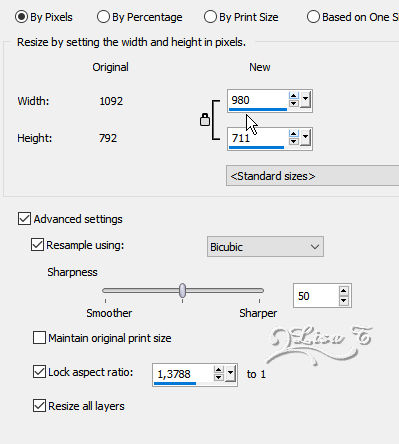
image => resize => tick « resize all layers » => 980 px (widht)
save your work as ... type .jpeg
  
Your tag is finished.
Thank you for following this tutorial
Don’t forget to sign (to avoid plagiarism) and save file as… type JPEG

Don’t hesitate to send your creations to Rose des Sables

It will be a real pleasure for her to show them in the gallery at the bottom of the tutorial page
Don’t forget to indicate her your name and the adress of your blog or site if you have one

Back to the boards of « Chez Douceur’s » tutorials
Board 1 

|