

The original tutorial can be found HERE

Conditions of use of the material provided
It is forbidden to modifiy, change the name, take off the
watermarks or alter the tubes.
It is forbidden to share them in groups or offer them on
your site, blog or forum without permission
If you want to use them to create a tutorial, you must ask
the permission to the authors.
This is a personal work.
any resemblance with another tutorial would be pure coincidence
it is forbidden to share it or distribute it on the Web,
to present it in a group or forum without the author’s
permission
« Chez Douceur » is happy to share her work with you
she hopes it will help you dream and get away from your eveyday
life

Material
tubes - selection

Thank you to Isa - Gabry - DBK - for their beauriful tubes
thank you to the tubers for their great work
open tubes, duplicate them and work with the copies
copy / paste selection into the folder « selections » of
Corel PSP Folder

Filters Used
Eye Candy/Impact / GLASS
- Graphis Plus/Cross Schadow
AAA Frames / Foto Frame


translator’s note
« Chez Douceur » works with PSP X, I use PSPX9 to create
my personal tags and write my translations
but this tutorial can be realized with another version
according to the version of PSP you use, the results might
be slightly differents
don’t hesitate to change the blend modes of the layers
to match your tubes and colors

colors
color 1 --> foreground color --> FG --> left click
--> #c4d1d8 (light vcolor)
color 2 --> background color --> BG --> right click
--> #7f716c (dark color)

Use the pencil to follow the steps
hold down left click to grab it and move it


Realization
1
open the background « fonblanche »,
duplicate and work with the copy
2
layers -> promote background layer
3
copy / paste « Cluster b38604a7 » as
new layer
4
effects -> image effects -> offset
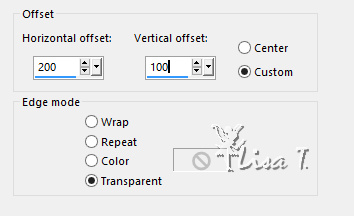
5
layers -> duplicate
image -> mirror -> mirror horizontal
6
your work looks like this
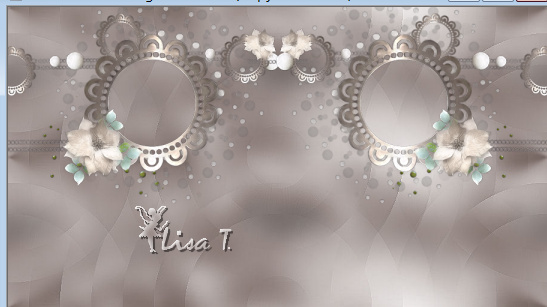
7
cloe the eye of « Raster 2 »
activate the eraser Tool with the following settings

8
erase the superfluous (indicated below)
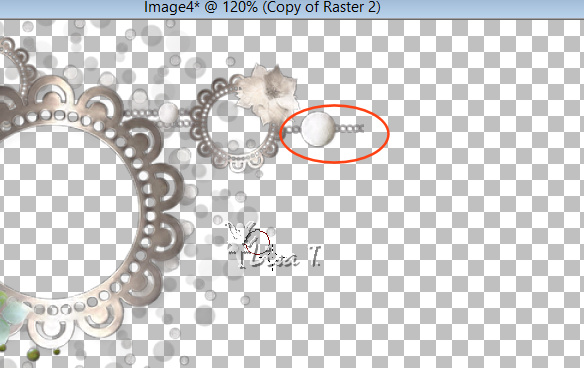
highlight RAster 2, close the eye of Copy of Raster 2
do the same work on the other decoration
9
open the eyes of all layers, highlight top layer
10
your works looks like that
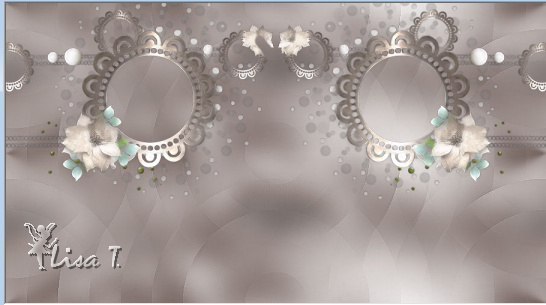
11
layers -> merge -> merge down
12
adjust -> sharpness -> sharpen
13
close the eye of the Background layer
14
highlight Raster 2
activate Magic Wand tool with the following settings

15
left click inside the first circle
16
copy / paste Gabry’s misted tube inside selection
17
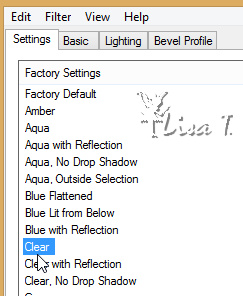
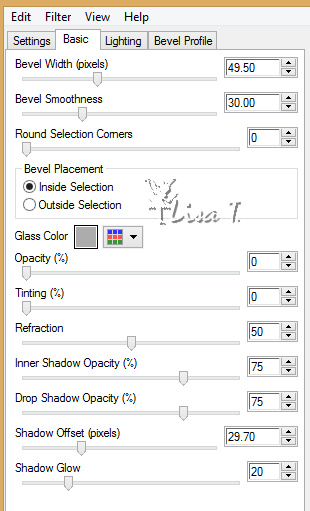
effects -> plugins -> Eye Candy 5-Impact / Glass
/ Clear
18
selections -> select none
19
redo the same work on the other side of your tag
(same plugins with same settings)
20
your work looks like this
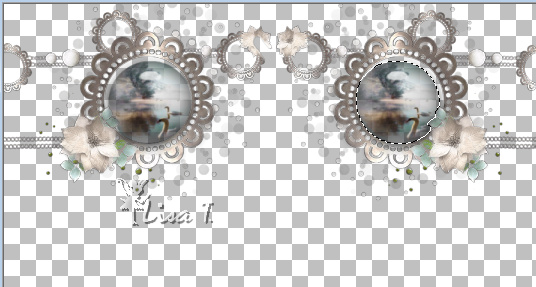
selections -> select none
21
open Decoration RS provided
22
copy / paste as new layer
23
effects -> image effects -> offset
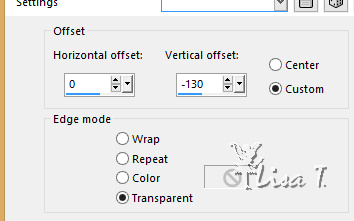
24
copy / paste the woman tube as new layer
25
resize if necessary and place in the middle of the tag
26
effects -> 3D effect s-> drop shadow on both woman
and decoration
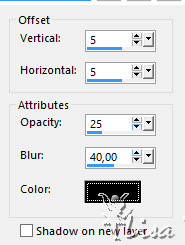
redo changing Horizontal and Vertical by (-5)
27
top layer is highlighted
open the Vase Tube (by DBK)
28
copy / paste as new layer
29
image -> resize -> untick « resize all
layers » -> 60%
30
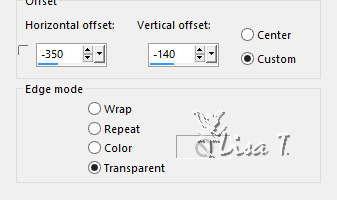
effects -> image effects -> offset
31
layers -> duplicate
image -> resize -> 60%
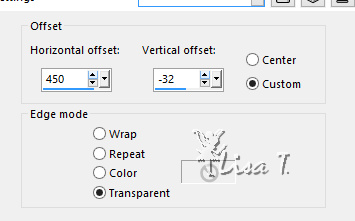
32
effects -> image effects -> offset
33
highlight Raster 1 (background), open the eye
edit -> copy
34
image -> add borders -> tick « symmetric » -> ...
1 pixel color 1
1 pixel color 2
1 pixel color 1
30 pixels color #000000 (black)
35
select this border with the magic wand tool (tolerance :
0)
36
in the material palette, prepare a linear gradient
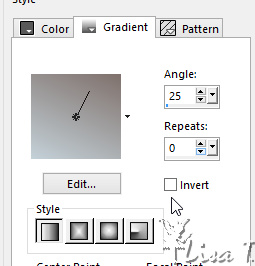
flood fill selection with this gradient
37
effects -> plugins -> Graphic Plus -> Cross Shadow
/ default settings
38
selections -> invert
effects -> 3D effect s-> drop shadow
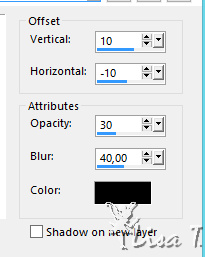
drop shadow again changing Vertical setting by (-10) and
Horizontal setting by (10)
39
selections -> select none
40
image -> add borders -> tick « symmetric » -> ...
1 pixel color 1
30 pixels black
41
select this black border
42
edit -> paste into selection (the background still in
the clipboard)
43
effects -> plugins -> Graphic Plus -> Cross Shadow
/ default settings
44
effects -> AAA Frames -> Foto Frame
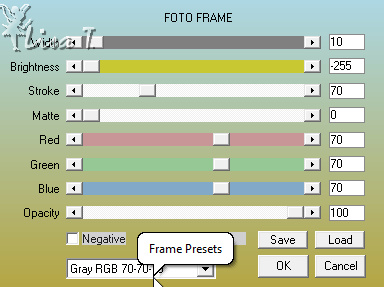
45
selections -> select none
46
adjust -> sharpness -> unsharp mask


Your tag is finished.
Thank you for following this tutorial
Don’t forget to sign (to avoid plagiarism) and save
file as… type JPEG

Don’t hesitate to send your creations
to"Chez Douceur"

It will be a real pleasure for her to show them in the
gallery at the bottom of the tutorial page
Don’t forget to indicate her your name and the adress
of your blog or site if you have one

Back to the boards of « Chez Douceur’s » tutorials
Board 1 

|