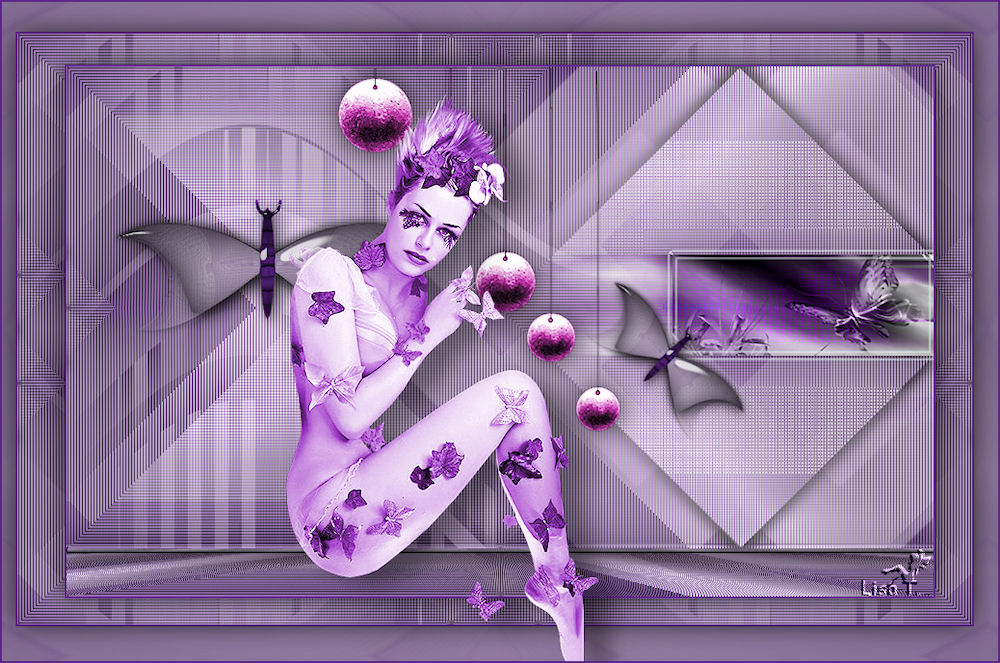
Butterfly
I'm member of Tutorial Writers Inc

original tutorial can be found here

Material
alpha raster – tubes – presets Eye Candy 5 Impact (glass and gradient glow)
double click on the presets and they will settle down automatically in the right place
open the elements in PSP and put them on hold

Thank you to the tubers : Nicole – Thafs – Logane
Filters used
Flaming Pear (Flexify)
Mura’s Meister
DSB Flux
Simple
Toadies
Eye Candy 5 impact
AFS Import
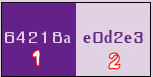
Colors palette
This paintbrush will help you follow the lines
Grab it with the left click of your mouse

|
Creation
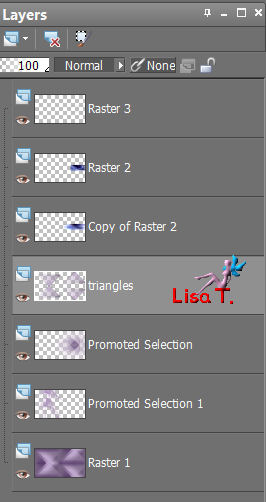
Open the layer “alpha butterfly”, duplicate and close the original
we will work on the copy
prepare a radial gradient with two colors chosen in your main tube
(dark color – (1) - a foreground and light color –(2)- as background)
and configure the gradient this way
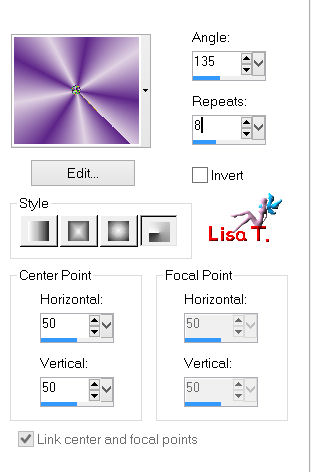
paint your alpha layer with this gradient
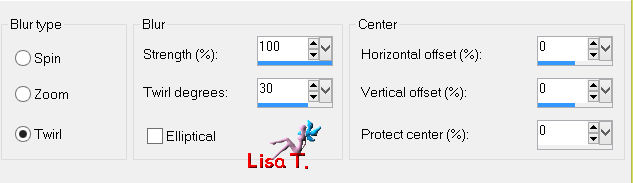
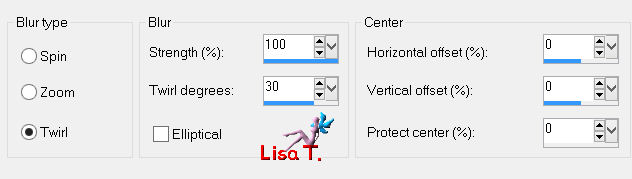
adjust/blur/radial blur
adjust/blur/gaussian blur : 25
effects/plugins/Simple/Blintz
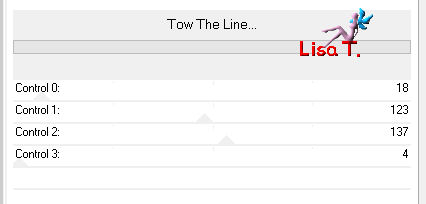
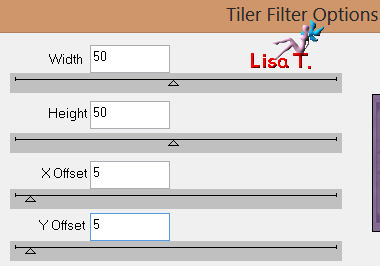
effects/plugins/Tramage/Tow the Line
effects/plugins/Simple/Pizza Slice Mirror
effects/plugins/Simple/Half Warp
effects/image effects/seamless tiling
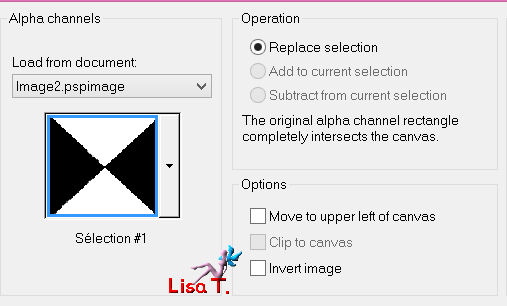
selections/load-save selection/load selection from alpha channel/selection #1
selections/promote selection to layer
effects/3D effects/drop shadow : 0 /0 / 50 / 20 / black
duplicate this layer
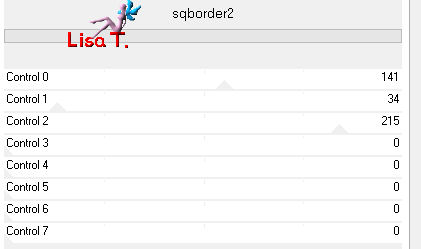
effects/plugins/AFS Import/sqborder2
selections/select none
image/resize/85% (disable “resize all layers”)
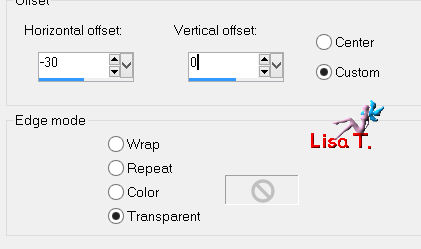
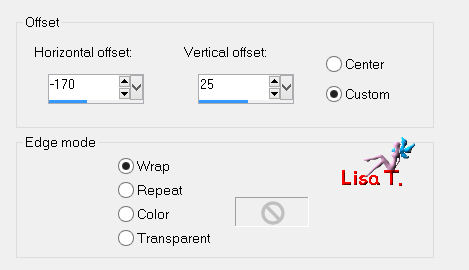
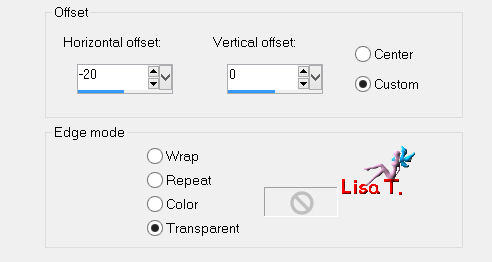
effects/image effects/offset
layers/merge/merge down
effects/3D effects/drop shadow as before
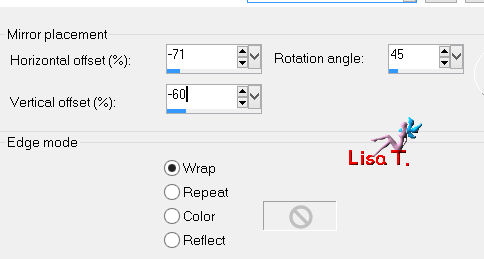
effects/reflection effects/rotating mirror
layers/duplicate – image/flip – layers/merge/merge down
effects/image effects/seamless tiling as before
rename this layer “triangles”
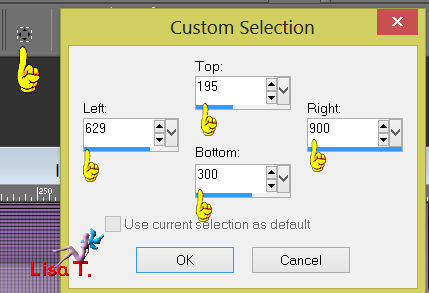
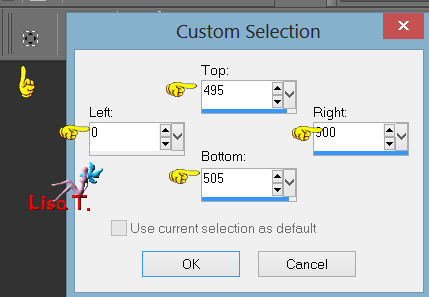
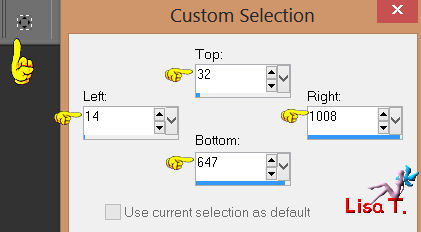
activate selection Tool/rectangle/custom selection
open the tube “paysage fantastique”, resize to 65%, copy and paste as a new layer on your work
and move inside the selection the part of the tube you want to keep visible
(colorize according to your colors or set the blend mode to luminance (Legacy)
selections/invert, and press the delete key of your keyboard
selections/invert

new raster layer
effects/plugins/Eye Candy 5 Impact/Gradient Glow : preset “vivi butterfly”
selections/select none
effects/3D effects/drop shadow as before
activate the “paysage fantastique” layer, and duplicate
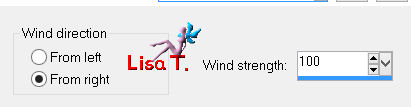
effects/distortion effects/wind -> twice
layers/arrange/move down
layers palette : blend mode set to “Luminance” or “Luminance (Legacy)”
activate the background layer
selections/load-save selection/load selection from alpha channel/selection #2
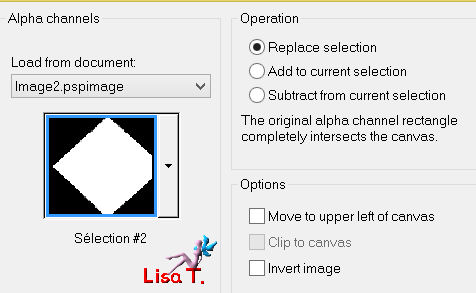
selections/promote selection to layer – selections/select none
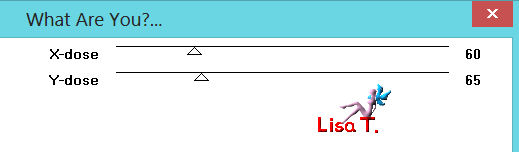
effects/plugins/Toadies/What are You
effects/3D effects/drop shadow : 0 / 0 / 70 / 5 / White color
layers palette/blend mode : “hard light” (or other of your choice)/opacity : 75%
activate the background layer
selections/load-save selection/load selection from alpha channel/selection #1
selections/promote selection to layer and select none
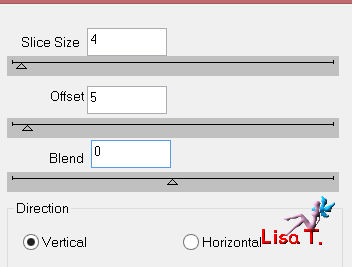
effects/plugins/DSB Flux/Linear transmission
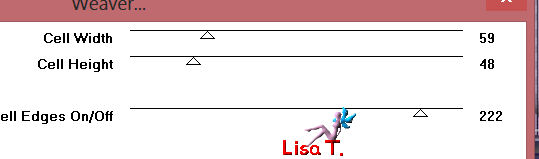
effects/plugins/Toadies/Weaver
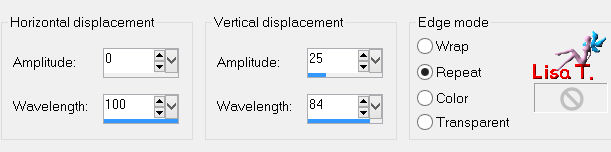
effects/distortion effects/wave
layers palette/blend mode : lighten (or screen) and opacity : +/- 50%
activate the layer “triangles”
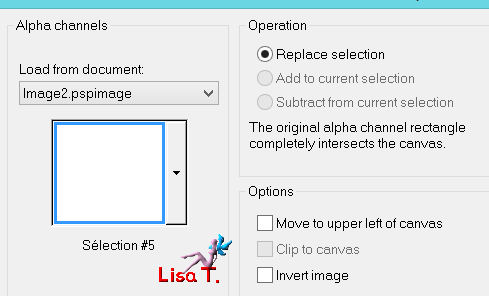
selections/load-save selection/load selection from alpha channel/selection #5
edit/cut
activate the upper layer
layers/new raster layer – edit/paste into selection and select none
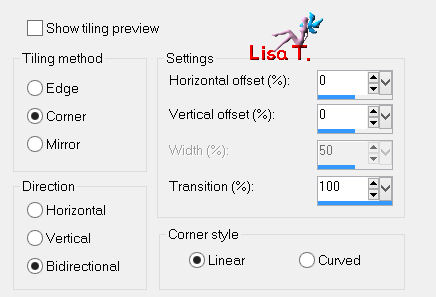
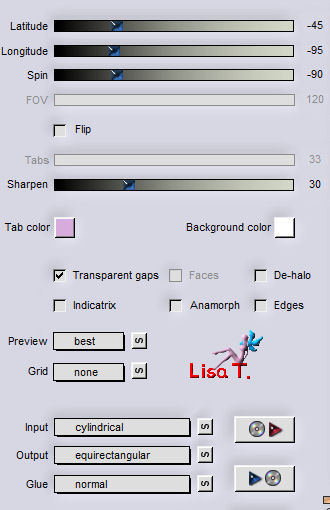
effects/plugins/Flaming Pear/Flexify 2 this way
image/resize/80% (disable “resize all layers”)
effets/image effects/offset
selections/loas-save selection/load selection from alpha channel/selection #3
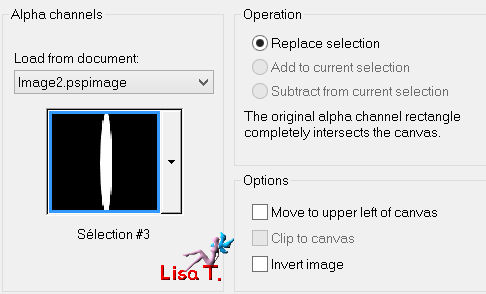
paint the selection with color 1 (match mode : none)
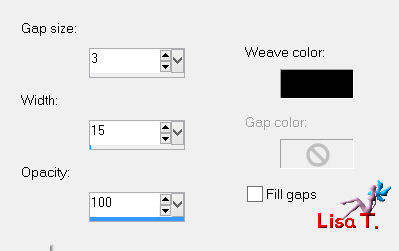
effects/texture effects/weave (weave color : black)
selections/load-save selection/load selection from alpha channel/selection #4
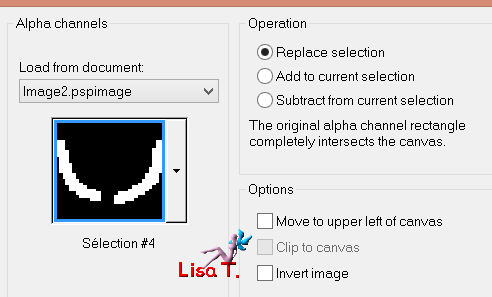
paint the selection with color 1 and select none
effects/3D effects/drop shadow : 0 / 0 / 45 / 15 / black
layers/duplicate
effects/plugins/Eye Candy5 Impact/Glass : preset “vivi glass papillon”
layers/merge/merge down
image/resize : 85% (disable “resize all layers”)
effects/image effects/offset
layers/duplicate
image/resize : 60% (disable “resize all layers”)
image/free rotate
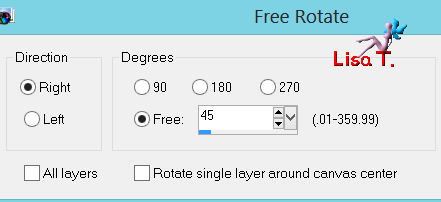
move this butterfly below the small frame (see example)
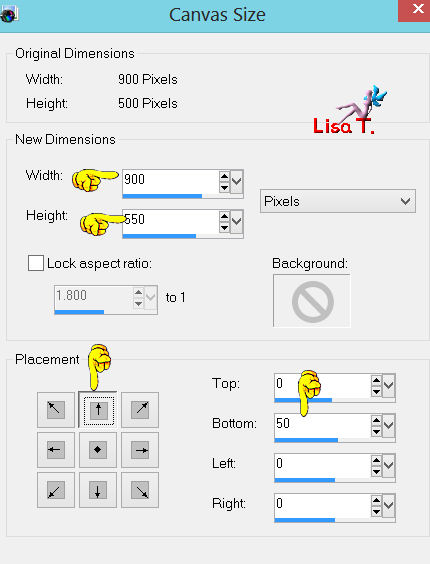
image/canvas size
activate the background layer
layers/duplicate
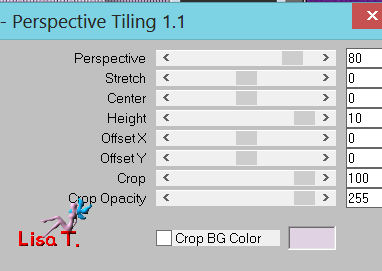
effects/plugins/Mura’s Meister/Perspective Tiling
layers/arrange/move down
activate the layer just above
effects/3D effects/drop shadow : 0 / 0 / 70 / 40 / black and merge down
selection tool/rectangle/custom selection
selections/promote selection to layer
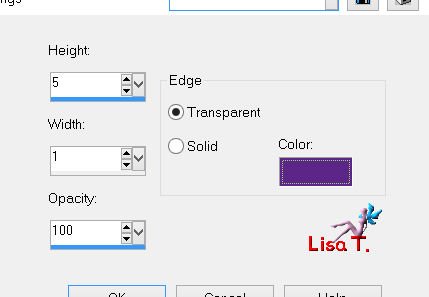
effects/3D effects/Buttonize (use color 1)
selections/select none
effects/3D effects/drop shadow as before
layers/merge/merge all
image/add borders/2 pixels/color 1
edit/copy
image/add borders/65 pixels/contrasting color
activate the magic wand tool (default settings) and select the large border
edit/paste into selection
adjust/blur/radial blur
effects/plugins/DSB Flux
selections/invert
effects/3D effects/drop shadow as before and select none
selection tool/rectangle/custom selection
effects/3D effects/drop shadow as before and select none
activate the tube “logane forme 1” and copy the part you like
resize and colorize if necessary
paste as a new layer and move it as shown on the example
drop shadow as you like
activate the tube “Nicole femme papillon”, resize : 85%
colorize if necessary and paste as a new layer at the center of the tag
adjust/sharpness/sharpen
effects/3D effects/drop shadow : 8 / 25 / 40 / 33 / black
new layer for your signature and merge all
image/add borders/2 pixels color 1
resize the tag if you like
save as... type JPEG
Thank you to have chosen Vivi's tutorial
if you want to show your creation to Vivi, don't hesitate to send it to her

it will be her pleasure to expose it at the end of her tutorial
here is my try with my tubes

Back to the boards of Vivi's tutorials
board 1  board 2 board 2

|