

The original tutorial can be found HERE

Conditions
of use of the material provided
It is forbidden to modifiy, change the name, take off the
watermarks or alter the tubes.
It is forbidden to share them in groups or offer them on
your site, blog or forum.
If you want to use them to create a tutorial, you must
ask the permission to the authors.
the tubes used for this tutorial have been received in
sharing groups
Béa has the permission of the tubers to use them

respect
the tubers’ work : never use tubes without
a watermark or a signature : they are stolen tubes
the tubes you find « on the web » without
the tuber’s name are ALWAYS stolen tubes
if you think Bea used one of your tubes, please let her
know,
and if this proves to be true, a link to your site or blog
will ba added.
Or if you prefer, the tube wil be removed from the material’s
folder

Material
tubes - masks - alpha layer

tubes used in this tutorial : Nikita - Thafs
word art : Béa
Masks : Narah
open all the tubes and duplicate them
work with the copies to preserve originals
open masks and minimize them to tray
don’t forget to erase tuber’s watermark before
using the tube

Filters Used
AP Lines - Carolaine & Sensibility
- L&K - Mehdi - Simple - VM Toolbox

translator’s note
I use PSPX9 to create my tag and write my translation
but this tutorial can be realized with another version
according to the version of PSP you use, the results might
be slightly differents
don’t hesitate to change the blend modes and opacities
of the layers to match your tubes and colors

color palette

in the materials palette, set color 2 as FG color and color
3 as BG color

Use this pencil to follow the steps
hold down left click to grab it and move it


Realization
1
open alpha layer, duplicate,
work with the copy
effects -> plugins -> Mehdi / Wavy Lab 1.1
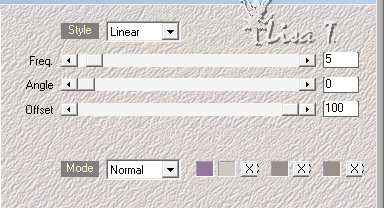
effects -> plugins -> Mehdi / Sorting Tiles
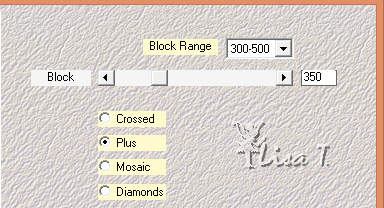
effects -> edge effects -> enhance more
effets -> plugins -> L&K’s Zitah
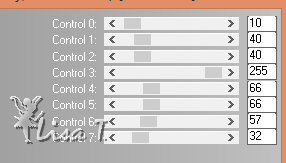
2
copy / paste as new layer Nikita’s tube (landscape)
image -> resize -> untick « resize all
layers - > 75%
activate Pick Tool

3
layers -> new raster layer
selection tool -> rectangle -> custom selection
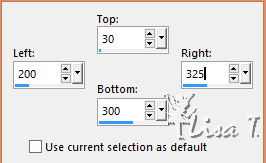
flood fill selection with color 1
effect s-> plugins -> AP Lines / Silverlining
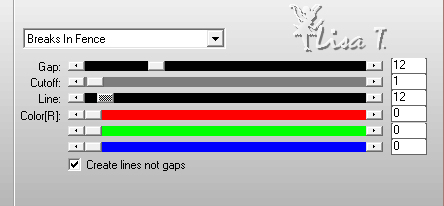
selections -> select none
effects -> 3D effects --> drop shadow
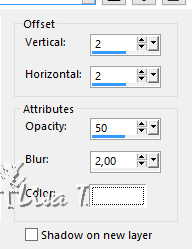
redo changing (2) by (-2)
effects -> image effects -> seamless tiling
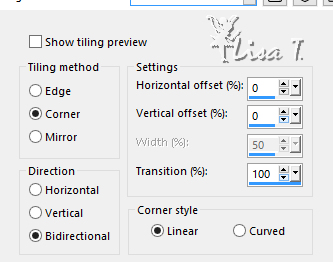
4
layers -> duplicate
effects -> plugins -> Simple / 4 Way Average
(don’t apply this effects using Unlimited 2, the
result would be different)
blend mode of the layer : Hard Light (or other, according
to your colors)
layers -> duplicate
layers -> merge -> merge down
highlight top layer
5
layers -> new raster layer
flood fill white
layers -> new mask layer -> from image
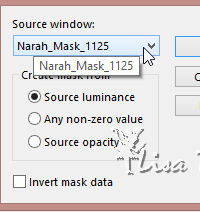
effects -> edge effects -> enhance more
layers -> merge -> merge group
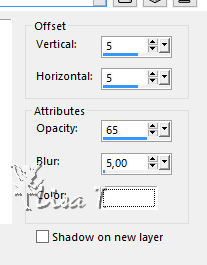
effects -> 3D effects --> drop shadow
in the layers palette, move this layter under Raster 2
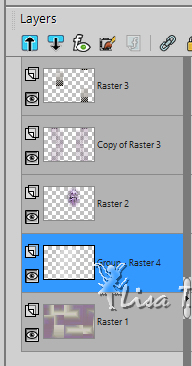
layers -> merge -> merge all (flatten)
6
selections -> load-save selection -> from alpha channel
-> selections#1
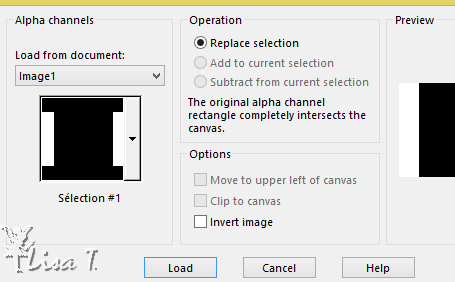
effects -> plugins -> Carolaine & Sensibility
/ CS-LDots
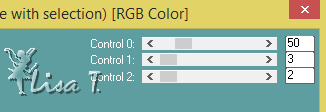
selections -> select none
7
copy / paste as new layer Text tube
image -> resize -> untick « resize all layers
- > 85%
activate Pick Tool

if you use another tube, move where you like
blend mode of the layer : Multiply
8
layers -> new raster layer -> flood fill white
layers -> new mask layer -> from image
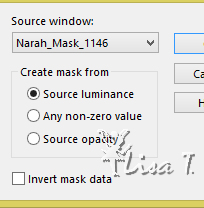
effects -> edge effects -> enhance
layers -> merge -> merge group
effects -> 3D effects --> drop shadow as before
layers -> merge -> merge all (flatten)
9
image -> add borders -> tick « symmetric » -> ...
1 pixel black
5 pixels color 2
1 pixel black
5 pixels color 3
1 pixel black
5 pixels color 1
1 pixel black
5 pixels color 3
1 pixel black
10 pixels white
2 pixels black
25 pixels white
1 pixel black
select large white border (25 pixels) with the magic wand
tool
effects -> plugins -> VM Toolbox / Zoom Blur (default
settings)
adjust -> blur -> gaussian blur / 5
selections -> select none
10
copy / paste as new layer the bird tube
image -> resize -> untick « resize all layers
- > 50%
place it top right (see final result)
set blend mode ont « Luminance » or
other if you use another tube
11
apply your watermark
12
copy / paste as new layer the woman tube
image -> mirror -> mirror horizontal
image -> resize -> untick « resize all layers
- > 85%
move it to the left (be careful not to hide the text tube)
adjust -> sharpness -> sharpen
effects -> 3D effects --> drop shadow
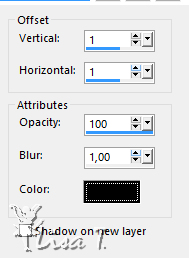
13
edit -> copy special -> copy merged
open Animation Shop
paste as new animation
back to PSP
effects -> geometric effects -> Perspective Vertical
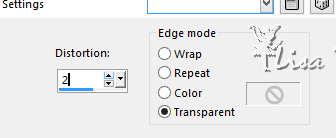
edit -> copy special -> copy merged
back to Animation Shop
paste after current frame
back to PSP
redo « perspective vertical »
edit -> copy special -> copy merged
back to Animation Shop
paste after current frame
stil in Animation Shop : select all
right click on the animation -> image properties :
50
save your work as .... type .gif

Your tag is finished.
Thank you for following this tutorial

My tag with my tubes
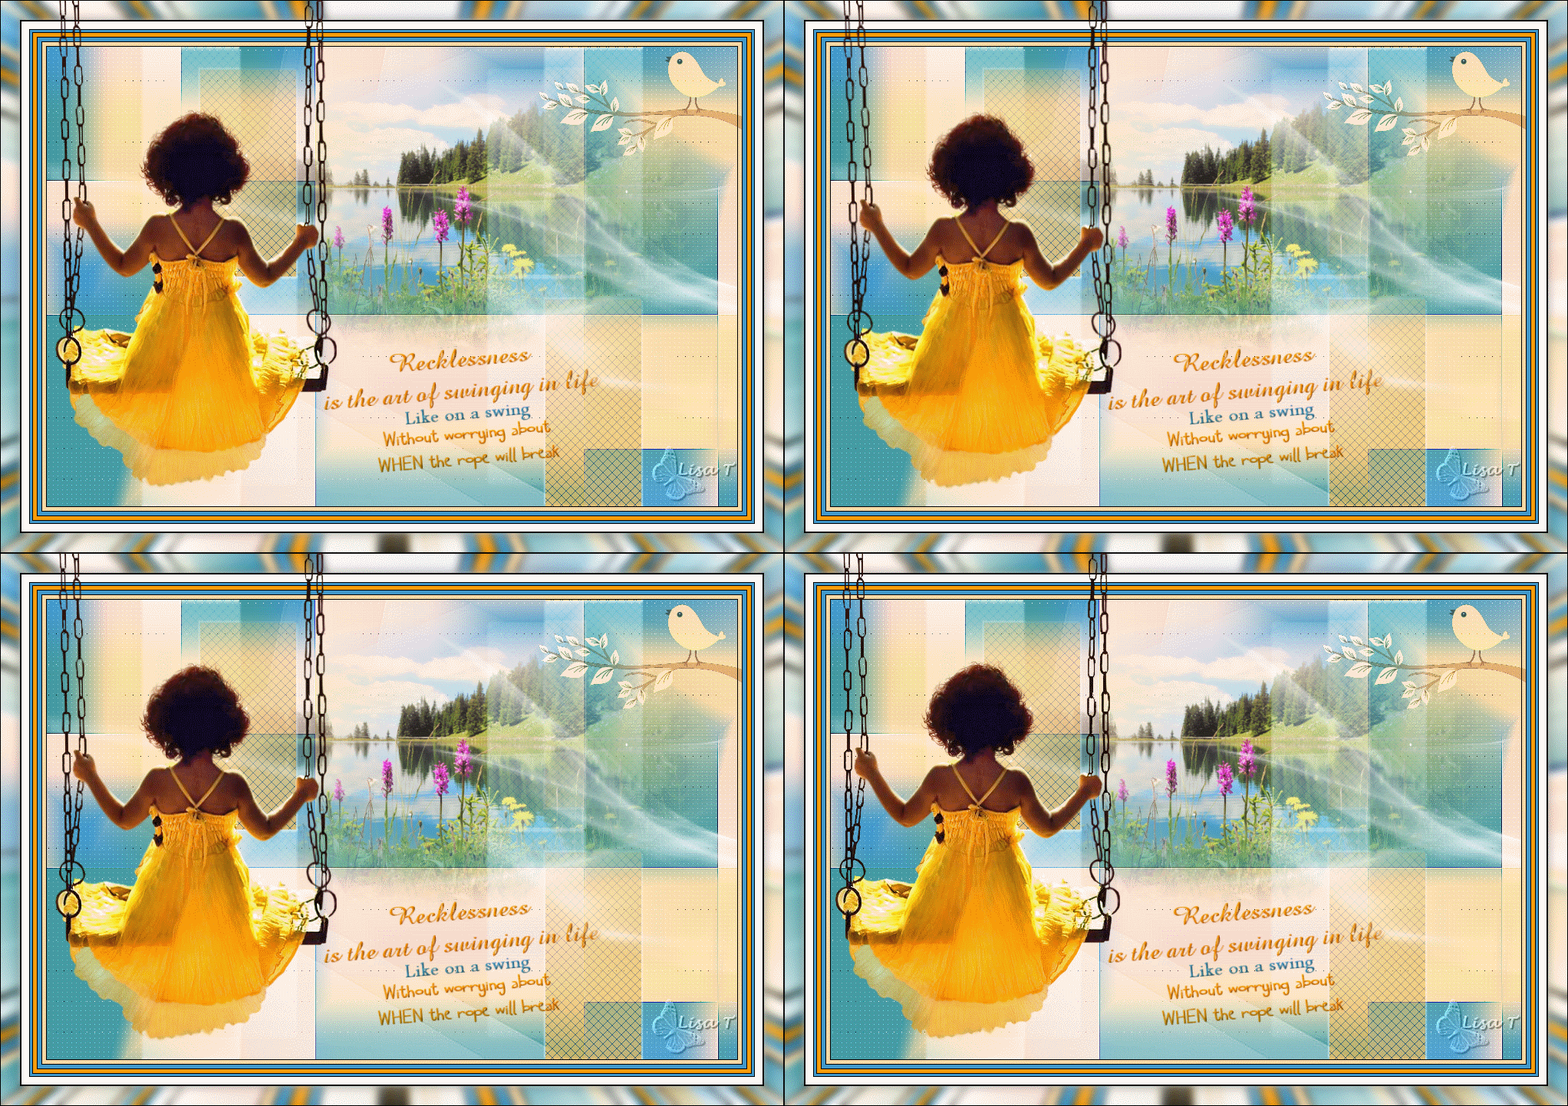
Don’t hesitate to send your creations
to Béa

It will be a real pleasure for her to show them in the
gallery at the bottom of the tutorial page
Don’t forget to indicate her your name and the adress
of your blog or site if you have one

If you want to receive Béa’s Newsletter, sign
up ...


Back to the boards of Béa’s tutorials
Board 1 

|