
The original tutorial can be found
HERE

Conditions of use of the material provided
It is forbidden to modifiy, change the name, take
off the watermarks or alter the tubes.
It is forbidden to share them in groups or offer
them on your site, blog or forum.
If you want to use them to create a tutorial, you must
ask the permission to the authors.
the tubes used for this tutorial have been received in
sharing groups
Béa has the permission of the tubers to use them

respect the tubers’ work : never use tubes without
a watermark or a signature : they are stolen tubes
the tubes you find « on the web » without
the tuber’s name are ALWAYS stolen tubes
if you think Bea used one of your tubes, please let her
know,
and if this proves to be true, a link to your site or blog
will ba added.
Or if you prefer, the tube wil be removed from the material’s
folder

Tips and Hints
TIP 1-> if
you don’t want to install a font
-->
open it in a software as « Nexus Font » (or
other font viewer software of you choice)
as long as the software’s window is opened, your
font will be available in your PSP
TIP 2 -> from
PSPX4, in the later versions of PSP the
functions « Mirror » and « Flip » have
been replaced by -->
« Mirror » --> image --> mirror --> mirror horizontal
« Flip » --> image --> mirror --> mirror vertical

Material
1 character tube - selections - text tube

open all the tubes into PSP and duplicate them. Work
with the copies to preserve orignals
copy / paste selections into the folder « selections » of
Corel PSP General folder
copy / paste the gold pattern into the folder « patterns » of
Corel PSP general folder

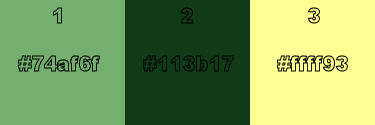
colors

prepare colors 1 and 2 as FG and BG colors into the
materials palette

Filters Used
Simple - Graphic Plus - VM Tollbox

translator’s notes
I use PSP2018 to create my tag and write my translation
but this tutorial can be realized with another version
according to the version of PSP you use, the results
might be slightly differents
don’t hesitate to change the blend modes and opacities
of the layers to match your tubes and colors
double click on the presets to install them
 
Use this pencil to follow the steps
hold down left click to grab it and move it
Use the pencil to follow the steps
hold down left click to grab it and move it
 |
 
Realization
1
oepn a new transparent image 900 * 500 pixels
flood fill with the following gradient

adjust -> blur -> gaussian blur : 50
effects -> geometric effects -> Pentagon

effects -> plugins -> Simple / Top Bottom Wrap
effects -> edge effects -> erode
adjust -> sharpness -> sharpen more
layers -> duplicate
image --> mirror --> mirror vertical
blend mode of the layer : Soft Light
layers -> merge -> merge down
layers -> duplicate
effects -> Simple / Horizontal Grain
layers -> merge -> merge down
2
layers -> new raster layer
selections -> load-save selection -> from disk -> selection
1
flood fill with the following gradient

adjust -> blur -> radial blur

effects -> plugins -> Graphic Plus / default settings
effecxts -> plugins -> VML Toolbox / Brightness Noise

effects -> distortion effects -> punch

effects -> 3D effects -> drop shadow

selections -> select none
3
layers -> duplicate
effects -> geometric effects -> perspective Vertical

effects -> distortion effects -> pinch

layers -> duplicate
image --> mirror --> mirror vertical
layers -> merge -> merge down
effects -> image effects -> seamless tiling / default
settings
effects -> 3D effects -> drop shadow as before
layers -> arrange -> move down
4
layers -> new raster layer
selections -> load-save selection -> from disk -> selection
2
prepare the pattern provided into the materials palette

flood fill selection with the pattern
effects -> distortion effects -> wave

selections -> select none
effects -> 3D effects -> drop shadow as before
adjust -> sharpness -> sharpen more
5
open the Text tube
click on « rotate left »

copy / paste on your work as new layer
image -> resize -> untick « resize all
layers » -> 65%
enable the Pick Tool (K) with the following settings

blend mode of the layer : Burn
layers -> duplicate
image --> mirror --> mirror vertical
image --> mirror --> mirror horizontal
6
copy / paste the character tube as new layer
image -> resize -> untick « resize all layers » -> 50%
image -> resize -> untick « resize all layers » -> 85%
drop a shadow of your choice
move it as shown on the final result
adjust -> sharpness -> sharpen more
7
image -> add borders -> tick « symmetric » -> ...
2 pixels color 3
2 pixels color 2
2 pixels color 3
25 pixels black
selections -> select all
selections -> modify -> contract : 25 pixels
selections -> invert
effects -> plugins -> VM Toolbox / Zoom Blur

effects -> edge effects -> enhance »
selections -> select none
image -> add borders -> tick « symmetric » -> 2
pixels color 3
apply your watermark
image -> resize -> 900 pixels (width) (or other)
file -> saves as... type .jpeg
 
Your tag is finished.
Thank you for following this tutorial
Don’t forget to sign (to avoid plagiarism) and save
file as… type JPEG
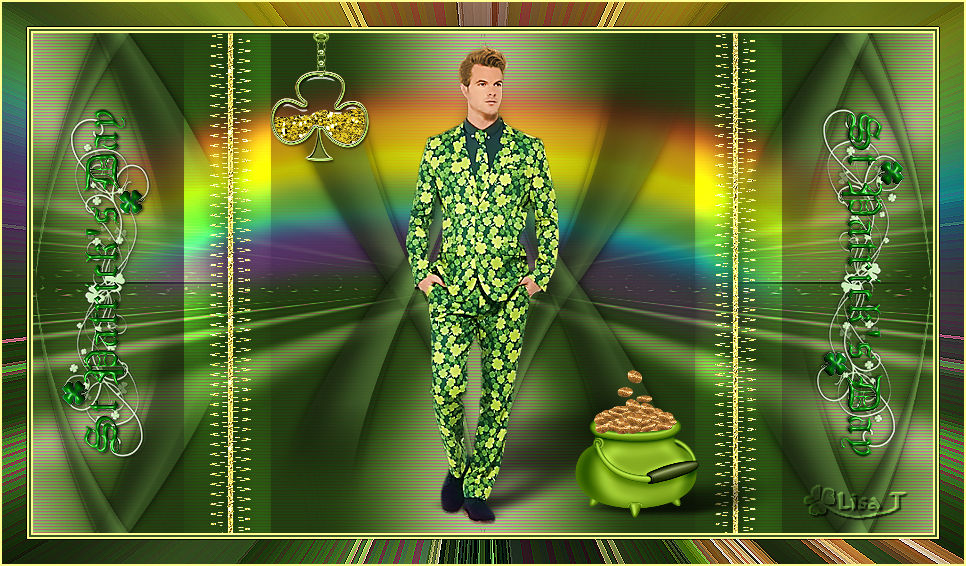
My tag with my tube


Don’t hesitate to send your creations
to Béa

It will be a real pleasure for her to show them in the
gallery at the bottom of the tutorial page
Don’t forget to indicate her your name and the adress
of your blog or site if you have one

If you want to receive Béa’s Newsletter,
sign up ...


Back to the boards of Béa’s tutorials
Board 1  board
2 board
2 

|