

The original tutorial can be found HERE

Conditions of use of the material provided
It is forbidden to modifiy, change the name, take off the
watermarks or alter the tubes.
It is forbidden to share them in groups or offer them on
your site, blog or forum.
If you want to use them to create a tutorial, you must ask
the permission to the authors.
the tubes used for this tutorial have been received in sharing
groups
Béa has the permission of the tubers to use them

respect the tubers’ work : never use tubes without
a watermark or a signature : they are stolen tubes
the tubes you find « on the web » without
the tuber’s name are ALWAYS stolen tubes
if you think Bea used one of your tubes, please let her know,
and if this proves to be true, a link to your site or blog
will ba added.
Or if you prefer, the tube wil be removed from the material’s
folder

Material
woman tube by Cibi -
text tube - color palette
1 brush tip - 2 by Narah and
LBDM - one preset - a background to start with
double click on the preset to install it
open the masks and minimize them to tray
file -> import -> custom brush -- and
choose the brush tip provided
duplicate the tubes and work with the copies to preserve
originals images

if you don’t use the tube provided, but another one
of your choice
choose an image with a similar profile, and test the effect « rotating
mirror » before (step 7)
Filters Used
Afs Import - AP Lines
Alien skin Eye Candy Impact 5
Graphic
Plus - L&K
Mehdi - Mura's Meister
VM Distorsion
translator’s note
I use PSPX9 to create my tag and write my translation
but this tutorial can be realized with another version
according to the version of PSP you use, the results might
be slightly differents
don’t hesitate to change the blend modes and opacities
of the layers to match your tubes and colors
if you want to use a font without installing it into Windows fonts’ folder(it
slows your computer when this folder is too « heavy »),
just open it into a software such as « Nexus
Font » and minimize it to tray (minimize both
Nexus and the window of the font). As long as you leave
it like that, it wil be visible into PSP
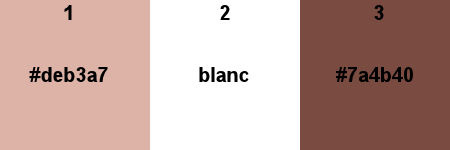
colors palette
color 1 -> FG color -> ForeGround color -> #deb3a7
color 1 -> BG color -> BackGround color -> #ffffff
(White)
color 3 -> #7a4b40
Use this pencil to follow the steps
hold down left click to grab it and move it

Realization
1
in the materials palette, set solor 1 as FG color, and
color 3 as BG color
open « fondSiamoiseAlpha »
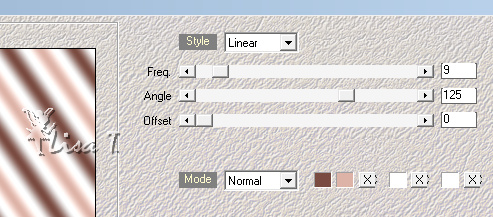
effects -> plugins -> Mehdi -> Wavy Lab 1.1
set White in the last two boxes
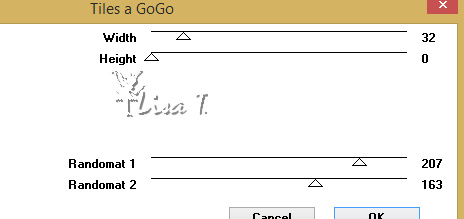
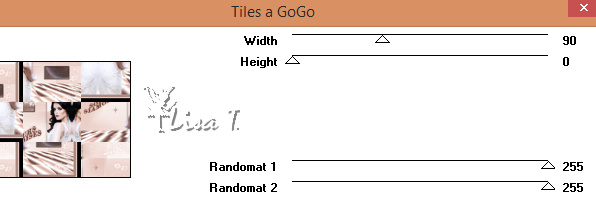
effects -> plugins -> VM Distortion / Tiles a Gogo
/ default settings
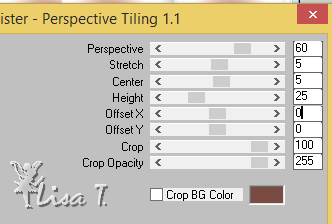
effects -> plugins -> Mura’s Meister / Perspective
Tiling
renam this layer « ground »
effects -> edge effects -> enhance
2
layers -> new raster layer
set color 1 as FG color and White as BG color
prepare aradial gradient
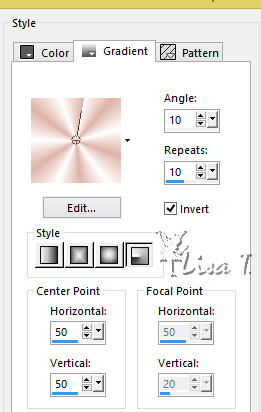
flood fill the new layer with this gradient
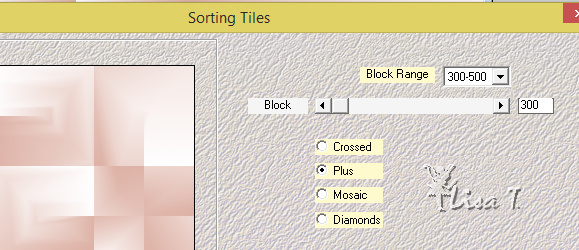
effects -> plugins -> Mehdi / Sorting Tiles
effects -> edge effects -> enhance more
effects -> plugins -> AFS Import / sqborder2 / default
settings
adjust -> sharpness -> sharpen
rename this layer « wall »
3
selections -> load / save selection -> from alpha
channel -> selection #1
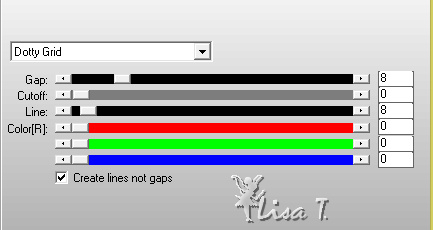
effects-> plugins -> AP Lines / Lines SilverLining
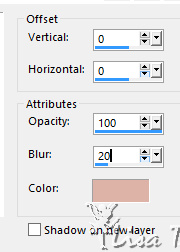
effects -> 3D effect s-> drop shadow -> 0 / 0
/ 100 / 20 / black
selections -> select none
4
layers -> new raster layer
flood fill white
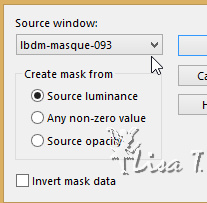
layers -> new mask layer -> from image

effects -> edge effects -> enhance
layers -> merge -> merge group
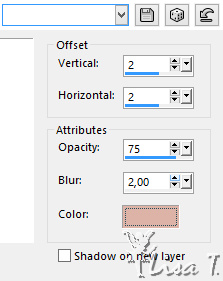
effects -> 3D effect s-> drop shadow
layers -> merge -> merge down
5
layers -> new raster layer
selections -> load / save selection -> from alpha
channel -> selection #2
flood fill with color 3
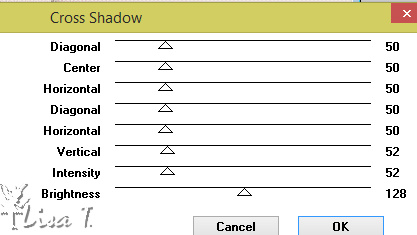
effects-> plugins -> Graphic Plus / Cross Shadow
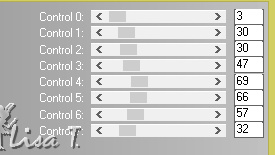
effects-> plugins -> L&K’s Zitah
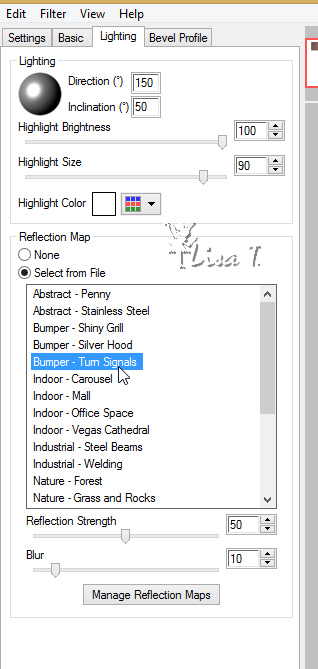
effects-> plugins -> Alien Skin Eye Candy 5-Impact
/ Glass
load the preset « preset_siamoises »
selections -> select none
layers -> merge -> merge down
6
edit -> cut
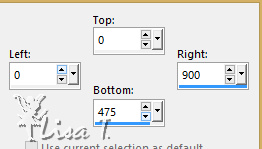
selection tool -> rectangle -> custom selection
edit -> paste into selection
layers -> arrange -> move down
your layers palette looks like this
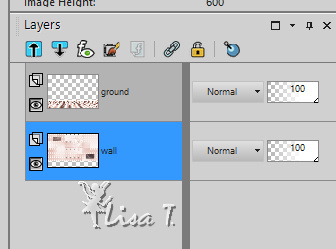
selections -> load / save selection -> from alpha
channel -> selection #3
highlight layer « ground »
hit the key « delete » of your keyboard
3 times
selections -> select none
7
open Cibi’s tube - erase the watermark
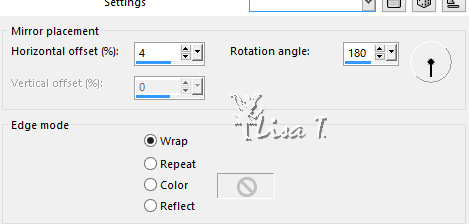
effects -> reflection effects -> rotating mirror
edit -> copy
back to your work
edit -> paste as new layer
image -> resize -> untick « resize all
layers » -> 75%
objects -> align -> bottom
layers -> duplicate
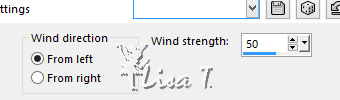
effects -> distortion effects -> wind
layers -> arrange -> move down
8
highlight top layer
layer -> new raster layer
flood fill white
layers -> new mask layer -> from image
adjust -> sharpness -> sharpen
layers -> merge -> merge group
layers -> arrange -> move down twice
effects -> 3D effect s-> drop shadow ->color 1
9
highlight top layer
copy /paste as new layer the text tube
image -> resize -> 75% (untick « resize
all layers »)
move the tube to the left
adjust -> sharpness -> sharpen
effects -> 3D effect s-> drop shadow ->color 1
as before
layers -> merge -> merge all (flatten)
10
layers -> new raster layer
activate Brush Tool
set color 3 as FG color
prepare the brush tool with the following settings

apply as you like
11
image -> add borders -> ...
1 pixel color 3
2 pixels color 2
3 pixels color 3
2 pixels color 2
5 pixels color 3
2 pixels color 2
5 pixels color 1
2 pixels color 2
selections -> select all
image -> add borders -> 25 pixels black
selections -> invert
effects -> plugins -> VM Distortion / Tiles a Gogo
adjust -> blur -> gaussian blur / 15
effects -> plugins -> L & K ‘s Zitah
as before
effects -> edge effects -> enhance
selections -> select none
image -> add borders -> 2 pixels color 2
apply your watermark
save as... type .jpeg
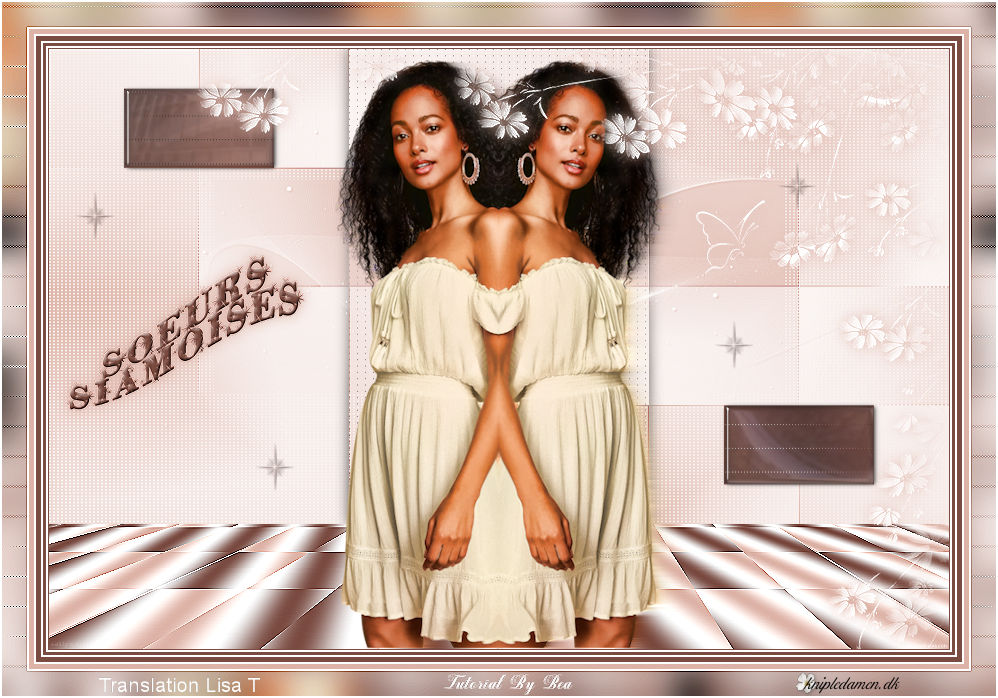
Your tag is finished.
Thank you for following this tutorial
Don’t forget to sign (to avoid plagiarism) and save
file as… type JPEG
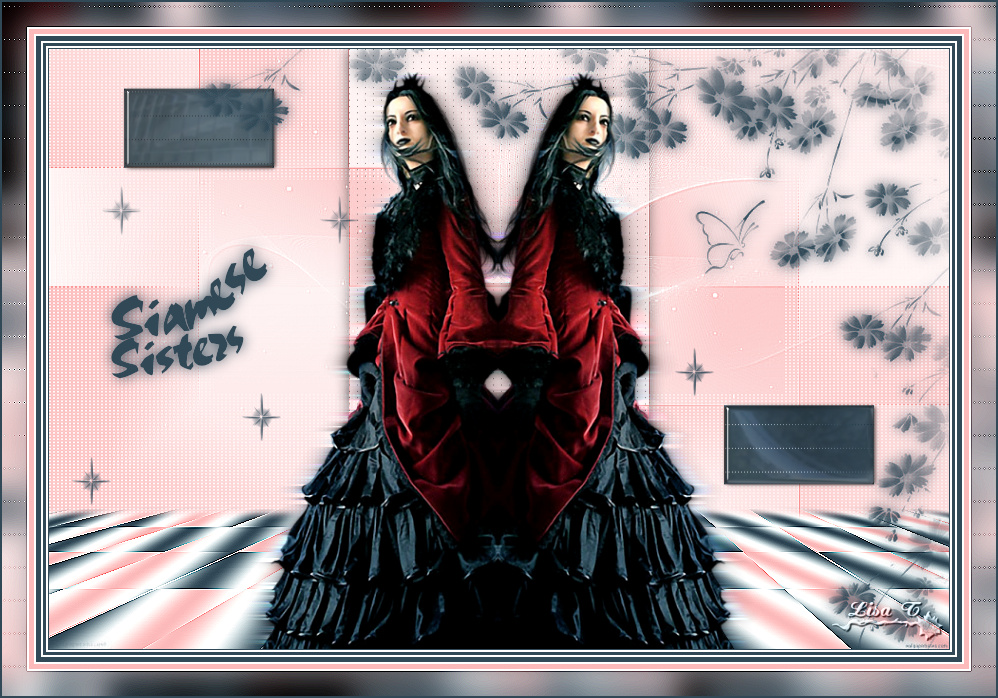
My tag with my tube
Don’t hesitate to send your
creations to Bea

It will be a real pleasure for her to show them in the
gallery at the bottom of the tutorial page
Don’t forget to indicate her your name and the adress
of your blog or site if you have one

created by ▼ Birte
Back to the boards of Béa’s tutorials
Board 1 

|