

The original tutorial can be found HERE

Conditions of use of the material provided
It is forbidden to modifiy, change the name, take off the
watermarks or alter the tubes.
It is forbidden to share them in groups or offer them on
your site, blog or forum.
If you want to use them to create a tutorial, you must ask
the permission to the authors.
the tubes used for this tutorial have been received in sharing
groups
Béa has the permission of the tubers to use them,
let the little fairy show you !

respect the tubers’ work : never use tubes without
a watermark or a signature : they are stolen tubes
the tubes you find « on the web » without
the tuber’s name are ALWAYS stolen tubes
if you think Bea used one of your tubes, please let her know,
and if this proves to be true, a link to your site or blog
will ba added.
Or if you prefer, the tube wil be removed from the material’s
folder
TIP 1-> if you don’t
want to install a font -->
open it in a software as « Nexus Font » (or
other font viewer software of you choice)
as long as both windows are opened (software and font), your
font will be available in your PSP
TIP 2 -> from PSPX4,
in the later versions of PSP the functions « Mirror » and « Flip » have
been replaced by -->
« Mirror » --> mirror -> mirror horizontal
« Flip » --> mirror -> mirror vertical

Material
tubes - selections - masks

child tube by LB
Mist by Claudia Viza
masks by OBG
place selections into the folder « selections » of
Corel PSP general folder (into your Documents)
open the masks and minimize them to tray

Filters Used
Alien skin Eye Candy 5 impact
Alien skin Xenofex 2
Ap Lines
L en K - PhotoSwizzle
Simple

Colors
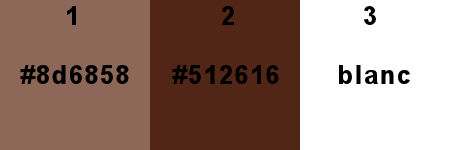
set colors 1 and 2 as FG and BG colors
translator’s note
I use PSPX9 to create my tag and write my translation
but this tutorial can be realized with another version
according to the version of PSP you use, the results might
be slightly differents
don’t hesitate to change the blend modes and opacities
of the layers to match your tubes and colors

Use this pencil to follow the steps
hold down left click to grab it and move it


Realization
1
open a new transparent image 900 * 600 pixels
prepare your materials palette
2
flood fill with BG color
layers -> new raster layer
flood fill with FG color
layers -> new mask layer -> from image
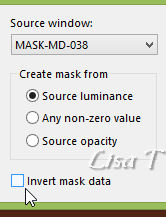
layers -> duplicate
layers -> merge -> merge group
effects -> edge effects -> enhance more
layers -> merge -> merge visible
effects -> image effects -> seamless tiling
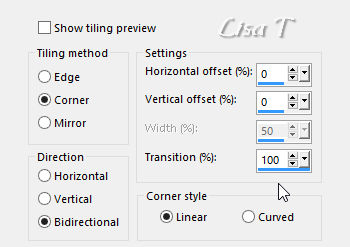
effects -> plugins -> L & K ‘s Zitah
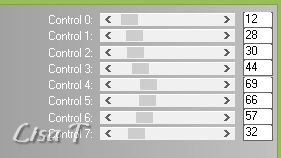
apply the same plugin (same settings) once more
3
layers -> duplicate
effects -> plugins -> L & N ‘s Kaithlyn
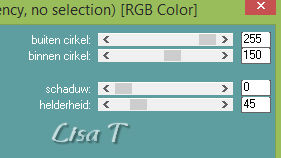
selections -> load-save selection -> from disk -> load « Sel_little_princess »
layers -> new raster layer
copy / paste into selection the castle tube
blend mode of the layer : Soft Light
selections -> select none
layers -> merge -> merge down
effects -> plugins -> PhotoSwizzle / Button Maker
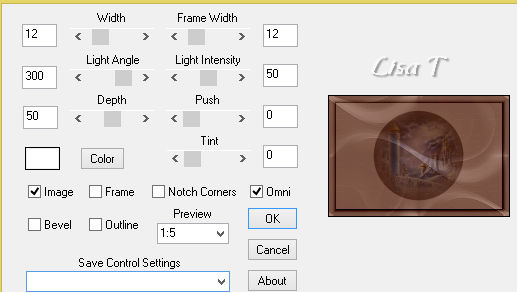
effects -> image effects -> seamless tiling / side
to side
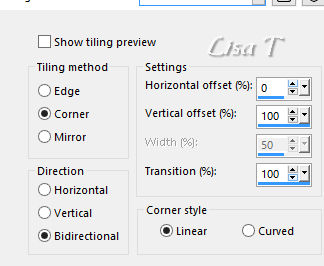
effects -> image effects -> seamless tiling once
more / default settings
effects -> texture effects -> Blinds
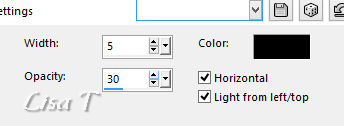
effects -> plugins -> PhotoSwizzle / Button Maker
(same settings as before)
4
image -> resize -> unitck « resize all
layers » -> 25%
effects -> image effects -> offset
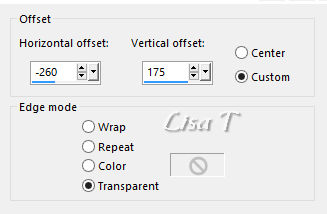
layers -> duplicate
effects -> image effects -> seamless tiling
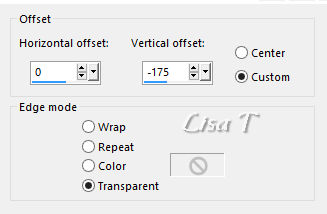
layers -> duplicate
effects -> image effects -> offset

layers -> merge -> merge down TWICE
effects -> 3D effects -> drop shadow -> 0 / 0
/ 80 / 20 / black
adjust -> sharpness -> sharpen
5
highlight Background layer
copy / paste as new layer the landscape tube
image -> resize -> unitck « resize all layers » -> 75%
effects -> image effects -> offset
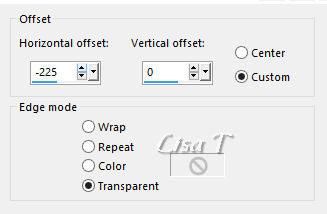
blend mode of the layer : Soft Light
layers -> duplicate
effects -> plugins -> Simple -> Half Wrap
effects -> image effects -> offset / default settings
effects -> plugins -> AP Lines / Lines Silverlining
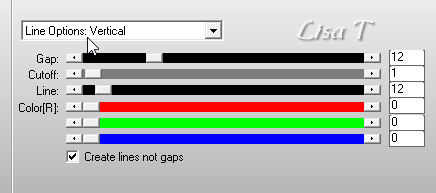
6
highlight top layer
layers -> new raster layer
flood fill white
layers -> new mask layer -> from image

layers -> merge -> merge group
adjust -> sharpness -> sharpen
opacity of the layer : 26%
7
highlight background layer
selection tool -> rectangle -> custom selection
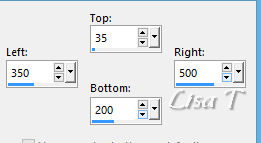
selections -> promote selection to layer
effects -> 3D effects -> drop shadow -> 0 / 0
/ 80 / 20 / black
effects -> plugins -> AP Lines / Lines Silverlining

selections -> select none
effects -> image effects -> seamless tiling / default
settings
8
selection tool -> rectangle -> custom selection
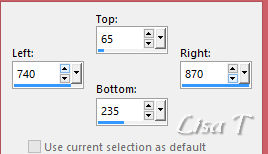
layers -> new raster layer
flood fill white
effects -> plugins -> AP Lines / Lines Silverlining

effects -> 3D effects -> drop shadow -> 0 / 0
/ 80 / 20 / black
selections -> select none
blend mode of the layer :Soft Light
effects -> image effects -> seamless tiling
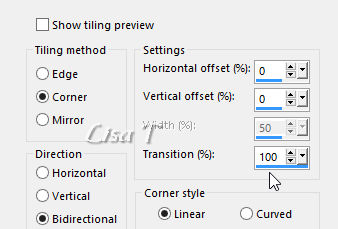
effects -> edge effects -> find all
9
your layers palette looks like this
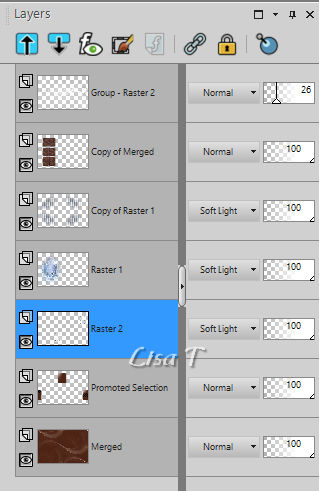
layers -> merge -> merge visible
effects -> plugins -> PhotoSwizzle / Button Maker
(same settings as before)
10
image -> add borders -> tick « symmetric »...
3 pixels black
10 pixels white
3 pixels black
5 pixels color 2
3 pixels black
5 pixels color 1
3 pixels black
20 pixels white
3 pixels black
10 pixels color 1
3 pixels black
11
adjust -> sharpness -> unsharp mask

12
copy / paste as new layer the child tube
image -> resize -> unitck « resize all layers » -> 85%
objects -> align -> bottom
objects -> align -> right
effects -> plugins -> Alien Skin Eye Candy 5-Impact
/ Perspective Shadow
load preset --> manage -> import - or double click
on the preset into the material provided )

adjust -> sharpness -> sharpen
13
highlight background layer
selections -> load-save selection -> from disk -> load « Sel_little_princess
2 »
effects -> 3D effects -> drop shadow -> 0 / 0
/ 100 / 40 / black
selections -> select none
14
copy / paste as new layer the tube « Little »
place it where you like
effects -> 3D effects -> drop shadow -> 1 / 1
/ 50 / 1 / black
15
copy / paste as new layer the tube « Princess »
place it where you like
effects -> 3D effects -> drop shadow -> 1 / 1
/ 50 / 1 / black
16
layers -> new raster layer
apply your watermark
highlight background layer
layers -> new raster layer
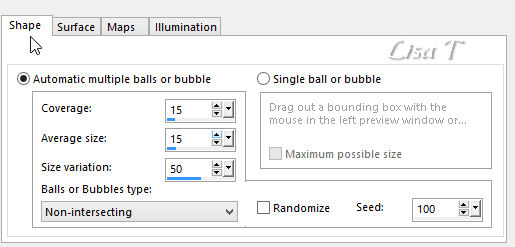
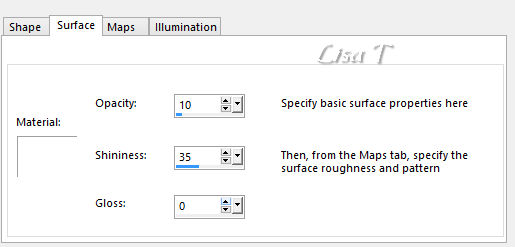
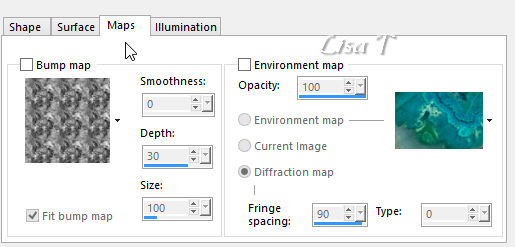
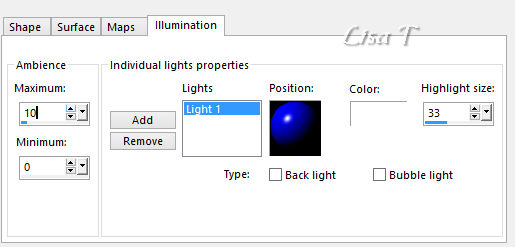
effects -> artistic effects -> Balls and Bubbles
17
keep the bubbles layer highlighted
effects -> plugins -> Alien Skin Xenofex 2 -> Constellation
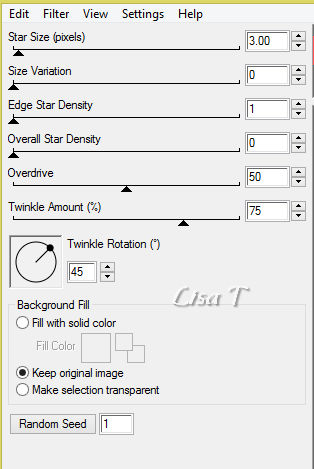
edit -> copy special -> copy merged
18
into Animation Shop, paste as new animation
back into PSP
edit -> undo
effects -> plugins -> Alien Skin Xenofex 2 -> Constellation
Click ONCE on « Random Seed »
edit -> copy special -> copy merged
into Animation Shop, paste after current frame
19
into Animation Shop, paste as new animation
back into PSP
edit -> undo
effects -> plugins -> Alien Skin Xenofex 2 -> Constellation
Click ONCE on « Random Seed »
edit -> copy special -> copy merged
into Animation Shop, paste after current frame
edit -> select all
animations -> image properties -> 35
file -> save as... -> type .gif

Your tag is finished.
Thank you for following this tutorial
Don’t forget to sign (to avoid plagiarism) and save
file as… type JPEG

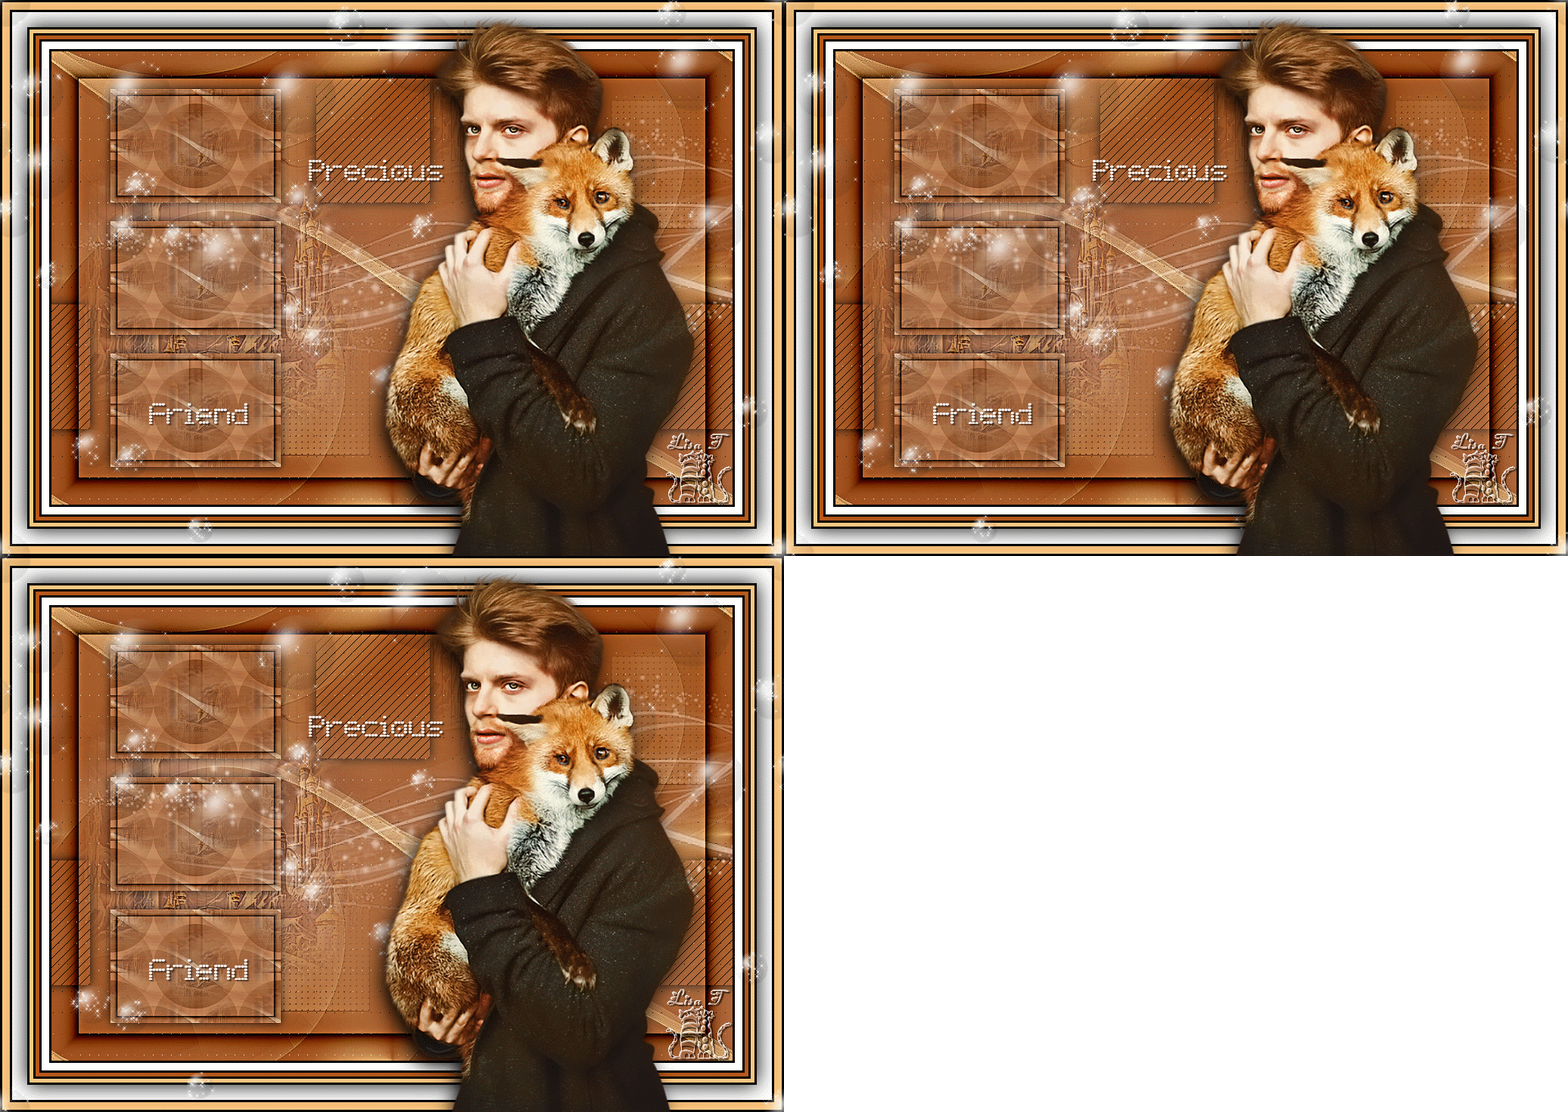
My tag with my tube (character)
Don’t hesitate to send your creations
to Béa

It will be a real pleasure for her to show them in the
gallery at the bottom of the tutorial page
Don’t forget to indicate her your name and the adress
of your blog or site if you have one

If you want to receive Béa’s Newsletter, sign
up ...


Back to the boards of Béa’s tutorials
Board 1 

|