

The original tutorial can be found HERE

Conditions of use of the material provided
It is forbidden to modifiy, change the name, take
off the watermarks or alter the tubes.
It is forbidden to share them in groups or offer them on
your site, blog or forum.
If you want to use them to create a tutorial, you must
ask the permission to the authors.
the tubes used for this tutorial have been received in
sharing groups
Béa has the permission of the tubers to use them

respect the tubers’ work : never use tubes without
a watermark or a signature : they are stolen tubes
the tubes you find « on the web » without
the tuber’s name are ALWAYS stolen tubes
if you think Bea used one of your tubes, please let her
know,
and if this proves to be true, a link to your site or blog
will ba added.
Or if you prefer, the tube wil be removed from the material’s
folder

Tips and Hints
TIP 1-> if you don’t
want to install a font -->
open it in a software as « Nexus Font » (or
other font viewer software of you choice)
as long as the software’s window is opened, your
font will be available in your PSP
TIP 2 -> from PSPX4,
in the later versions of PSP the functions « Mirror » and « Flip » have
been replaced by -->
« Mirror » --> image => mirror => mirror horizontal
« Flip » --> image => mirror => mirror vertical

Material
tubes - mask - animation - color palette - alpha
layer (selections saved on the alpha layer)
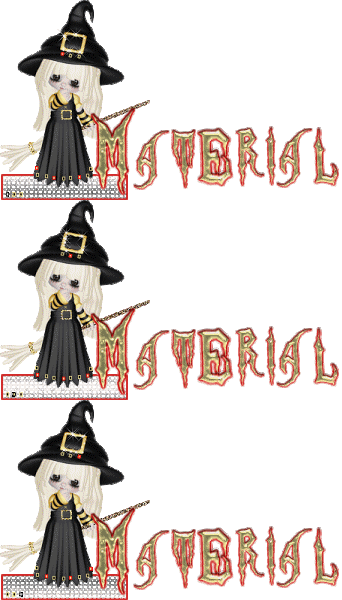
open the mask and minimize to tray
The character tube is not provided - Bea chose a tube created
by VeryMany
I chose a tube created by Jewel - Thank you Jewel

colors

don’t hesitate to change colors and blend modes of
the layers to mach your tubes

Filters Used
Mehdi - Carolaine and sensibility -
Oliver's Filters
(unlimited) -
Alien skin eye Candy 5 Impact - AAA Frames

translator’s note
I use PSP2018 to create my tag and write my translation
but this tutorial can be realized with another version
according to the version of PSP you use, the results might
be slightly differents
don’t hesitate to change the blend modes and opacities
of the layers to match your tubes and colors

Use the pencil to follow the steps
hold down left click to grab it and move it
 |

Realization
1
open the alpha layer => window => duplicate
work with the copy - close the original to preserve
it
2
in the materials aplette, set colors 1 and 2 as FG and
BG colors
3
effects => plugins => Mehdi => Waby Lab 1.1
In the third box put black, and in the fourth put the color
3
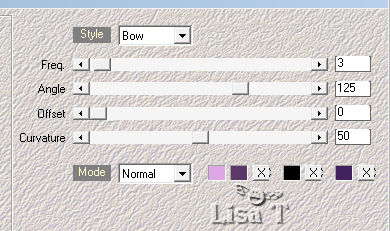
effects => reflection effects => rotating mirror
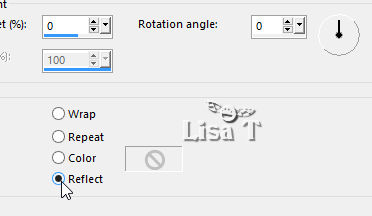
effects => edge effects => enhance more
effects => edge effects => enhance
4
layers => duplicate
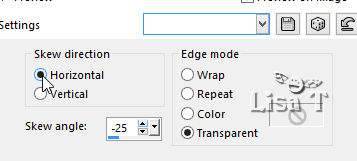
effects => geometric effects => skew
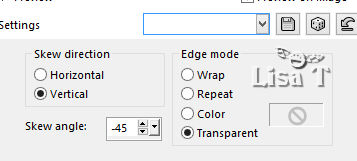
once more => effects => geometric effects => skew
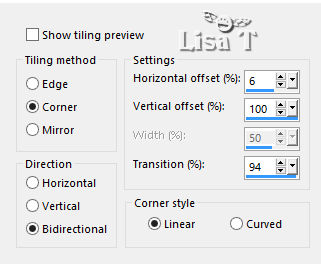
effects => distortion effects => wave

effects => image effects => seamless tiling => side
by side
effects => 3D effects => drop shadow => 0 / 0
/ 80 / 40 / black
effects => plugins => Carolaine & Sensibility
=> Cs-LDots
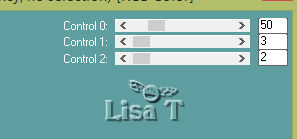
apply this effect once more
5
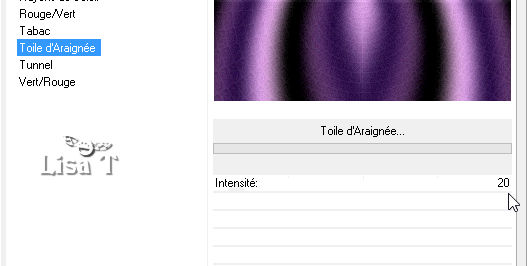
highlight Raster 1
effects => plugins => Unlimited 2 => Oliver’s
Filtre => Toile d’araignée
6
keep Raster 1 highlighted
layers => new raster layer
flood fill black
layers => new mask layer => from image
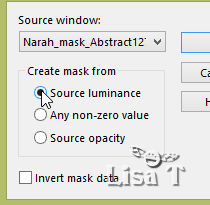
layers => merge => merge group
effects => 3D effects => drop shadow => 0 / 0
/ 80 / 40 / black
7
layers => duplicate
effects => distortion effects => polar coordinates
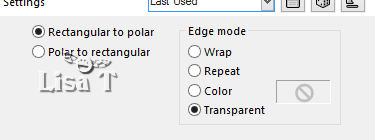
blend mode of the layer s : Soft Light (or other)
layers => merge => merge visible
8
layers => new raster layer
selections => load selection => from alpha channel
=> choose selection 1
flood fill selection black
selections => modify => contract => 3
flood fill selection with color 2
selections => modify => contract => 3
flood fill selection black
selections => modify => contract => 3
layers => new raster layer
copy / paste into selection the misted landscape
selections => select none
9
highlight layer below (the frame)
layers => duplicate
effects => texture effects => mosaic glass
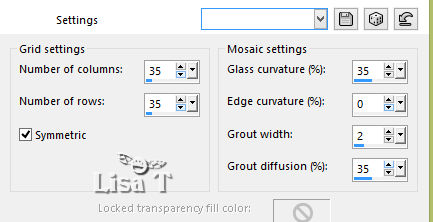
effects => 3D effects => drop shadow => 0 / 0
/ 80 / 40 / black
10
highlight top layer
layers => merge => merge down TWICE
11
layers => new raster layer
selections => load selection => from alpha channel
=> choose selection 2
flood fill selection black
selections => modify => contract => 3
flood fill selection with color 2
selections => modify => contract => 3
flood fill selection black
selections => select none
12
select the first black square (top) with the magic wand
tool
selections => promote selection to layer
selections => select none
effects => plugins => Unlimited 2 => Oliver’s
Filtre => Toile d’araignée => move the
cursor between 20 and 30
13
highlight Raster 2
select the second black square
selections => promote selection to layer
selections => select none
effects => plugins => Unlimited 2 => Oliver’s
Filtre => Toile d’araignée => move the
cursor between 20 and 30
14
highlight top layer
layers => merge => merge down
layers => duplicate
image => mirror => mirror vertical
layers => merge => merge down TWICE
15
layers => duplicate
highlight the layer below
effects => distortion effects => wind => from
left => 50
effects => distortion effects => wind => from
right => 50
effects => texture effects => mosaic glass / same
settings as before
effects => 3D effects => drop shadow => 0 / 0
/ 80 / 40 / black
16
image => add borders=> tick « symmetric » => ...
1 px black
3 px color 3
1 px black
3 px color 2
1 px black
3 px color 1
1 px black
10 px color 2
17
select the 10 px border with the magic wand tool
effects => plugins => Unlimited 2 => Oliver’s
Filtre => Toile d’araignée => 30
effects => edge effects => enhance
selections => select none
18
image => add borders=> tick « symmetric » => ...
1 px black
3 px color 1
1 px black
75 px color 2
select the 75 px border with the magic wand tool
effects => plugins => Unlimited 2 => Oliver’s
Filtre => Toile d’araignée e => 22
selections => select none
image => add borders=> tick « symmetric » => 3
px black
19
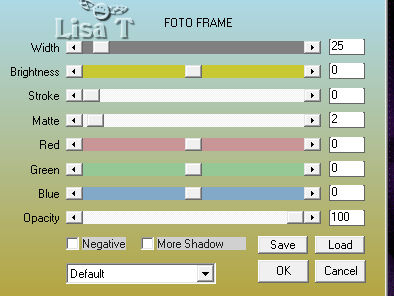
effects => plugins => AAA Frames => Foto Frame
20
copy / paste the tube « Kryss_Halloween » as
new laeyr (don’t forget to erase the signature)
image => adjust => resize => untick « resize
all layers » => 50%
move it where you like
adjust => sharpness => sharpen
effects => 3D effects => drop shadow => default
settings
21
copy / paste the spider tube as new layer
move to the top (see final result)
adjust => sharpness => sharpen
effects => 3D effects => drop shadow => 0 / 0
/ 80 / 40 => color 2
22
copy / paste as new layer the character tube
resize if necessary
move to left border
effects => 3D effects => drop shadow => 0 / 0
/ 80 / 40 / black
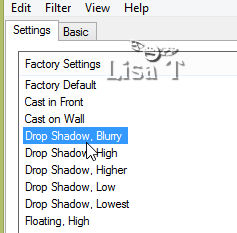
effects => plugins => Alien Skin Eye Candy 5 IMpact
=> Perspective Shadoow => drop shadow blurry
23
apply your signature or watermark
if you don’t want to animate your tag, write « Halloween » in
the top rignt border (see final result)
merge all layers (flatten) and save as... type .jpeg
24
animation
edit => copy
in Animation Shop, paste as new animation
edit => duplicate twice => you now have 3 frames
edit => select all
edit => propagate paste
25
open the animation provided
edit => select all
edit => copy
26
back on your main work
edit => paste into selected frame => choose the place
and left click to paste
animation => image property => 50
save your work as... type .gif

Your tag is finished.
Thank you for following this tutorial
Don’t forget to sign (to avoid plagiarism) and save
file as… type JPEG
My tag with my witch
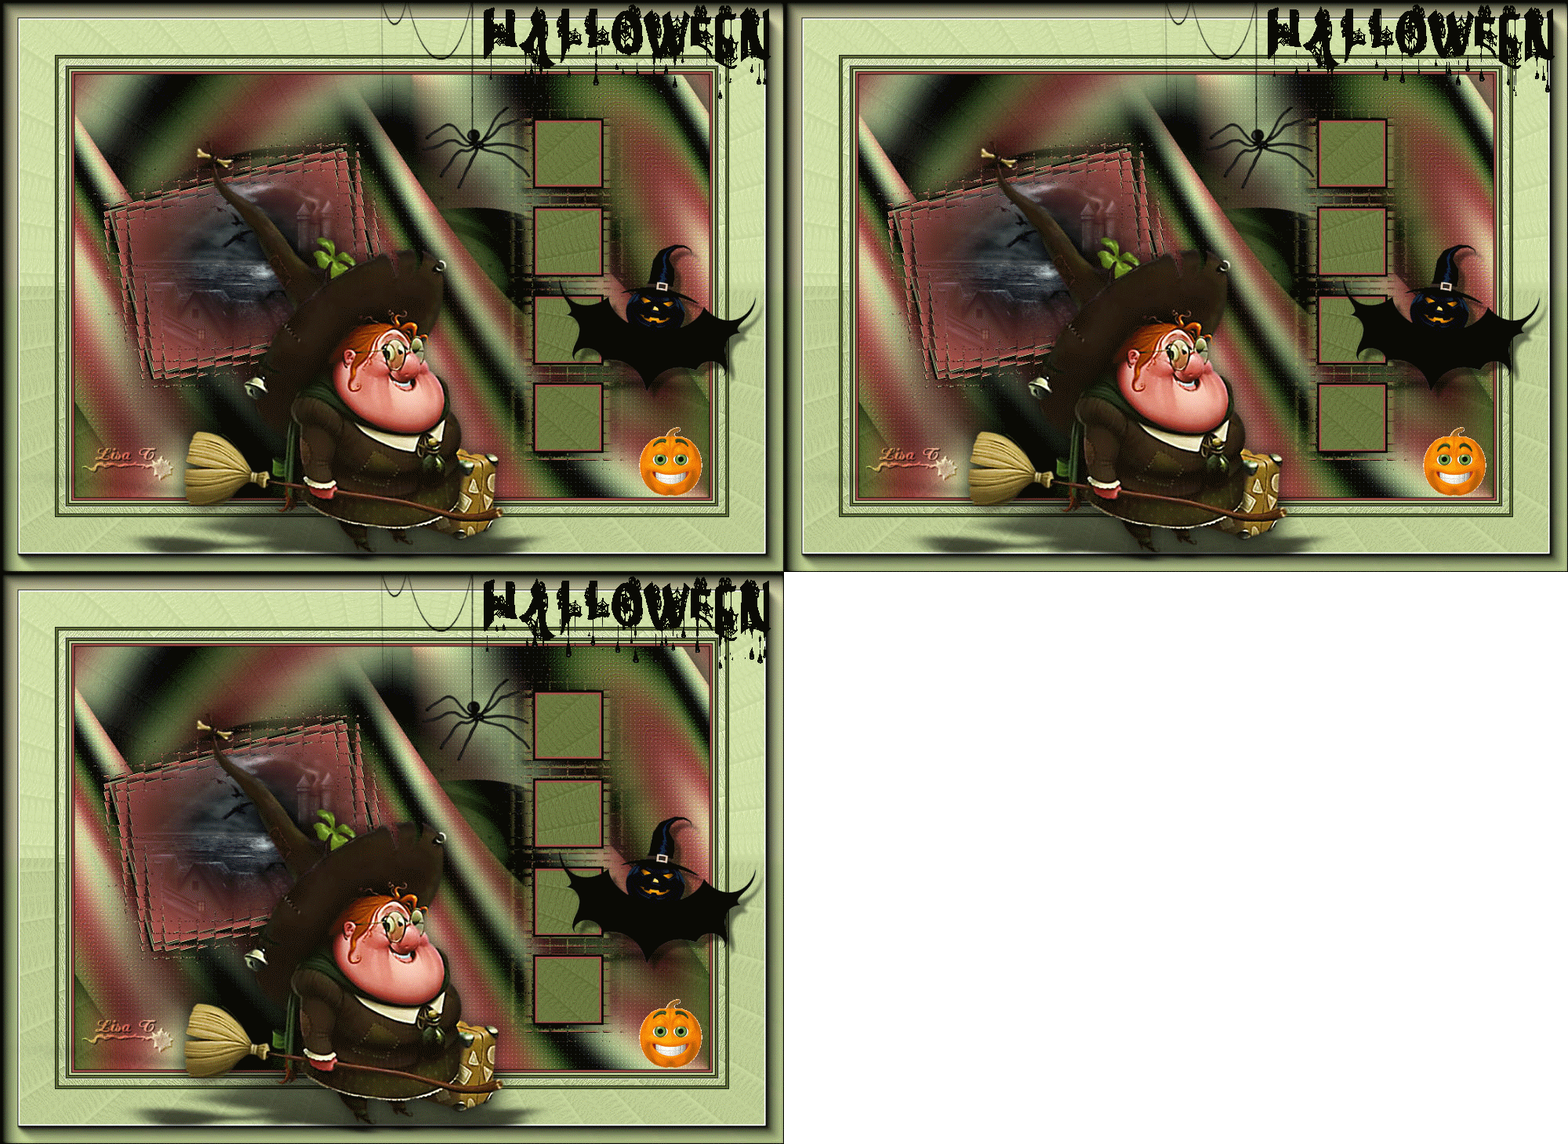

Don’t hesitate to send your creations
to Béa
It will be a real pleasure for her to show them in the
gallery at the bottom of the tutorial page
Don’t forget to indicate her your name and the adress
of your blog or site if you have one

If you want to receive Béa’s Newsletter,
sign up ...

Back to the boards of Béa’s tutorials
Board 1 board 2 board 2 

|