

The original tutorial
can be found HERE

Conditions of use of the material provided
It is forbidden to modifiy, change the name, take off the
watermarks or alter tubes provided.
It is forbidden to share them in groups or offer them on
your site, blog or forum,
you are allowed to use them in another creation for your
personal use
If you want to use them to create a tutorial, you must
ask the permission to the authors.
this tutorial is a personal creation. Any resemblance with
another would be pure coincidence
this tutorial can be followed with another version of PSP,
but the results might be slightly different

Supplies
mask - tubes - bonus pack - color palette

open the tubes, duplicate and work with
the copies to preserve originals
open the mask and minimize to tray

Plugins
Unlimited 2
Thank you Tine for sharing your plugins page


translator’s note
« Belle de Nuit » works with PSP X, I use PSPX9
to create my tag and write my translations
but this tutorial can be realized with any other version
of PSP
according to the version of PSP you use, the results might
be slightly differents
don’t hesitate to change blend modes of layers matching
your tubes and colors

Colors

color 1 --> foreground color => FG => left click
--> #f6ddbc
color 2 --> background color => BG => right click
=> #535108
white

Hints and Tips
TIP 1 -> if you don’t want to install
a font -->
open it in a software as « Nexus Font » (or
other font viewer software of you choice)
as long as both windows are opened (software and font),
your font will be available in your PSP
TIP 2 -> from PSPX4, in the later versions of PSP the functions « Mirror » and « Flip » have
been replaced by -->
image -> Mirror --> image => mirror => mirror
horizontal
image -> Flip --> image => mirror
=> mirror vertical
 
Use the pencil to mark your place
along the way
hold down left click to grab and move it
 |
 
Realization
1
open a new transparent image 900 * 550 px
2
selections => select all
copy / paste into selection image 195
selections => select none
3
adjust => blur => radial blur

4
layers => duplicate
5
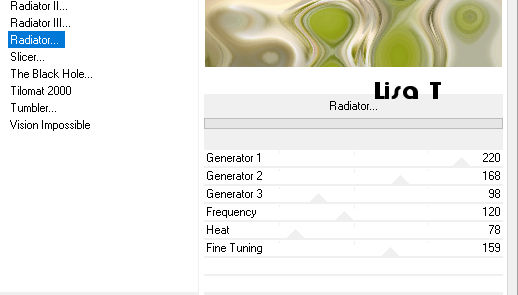
effects => plugins => Unlimited 2 => VM Distortion
=> Radiator
6
blend mode of the layer : Multiply
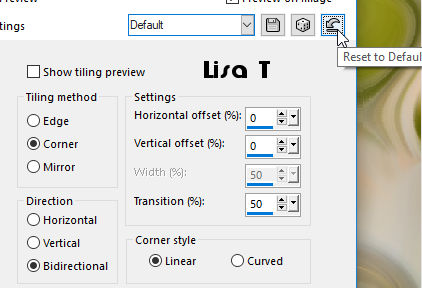
effects => image effects => seamless tiling => default
settings
7
layers => new raster layer
8
opacity of the Flood Fill Tool => 85%
9
flood fill layer white
reset opacity of the Tool => 100%
10
layers => new mask layer => from image
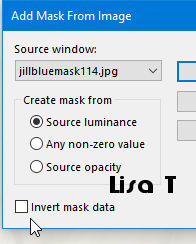
layers => duplicate
11
layers => merge => merge group
12
blend mode of the layer : Luminance (Legacy)
13
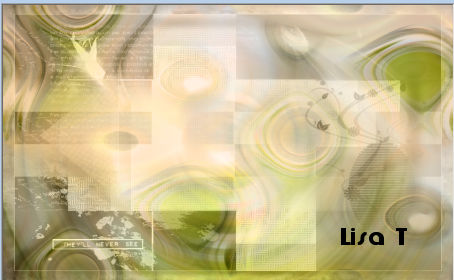
your tag looks like this
14
copy / paste as new layer « mist_fleur_bdn »
don’t move it
15
adjust => sharpness => sharpen
16
copy / paste as new layer « deco_bdn1 »
17
enable the Pick Tool (to move the layer) => position
X : 19 / position Y : 19
18
blend mode of the layer : Overlay
layers => duplicate
image => mirror => mirror vertical
blend mode of the layer : Overlay
tip : if you background is too dark after step 18
=> merge down
19
copy / paste the Word Art (by Yalan) as new layer
20
place as shown on the final result
if you changer the colors, set blend mode to Luminance
(Legacy) (or other)
21
image => add borders => tickk « symmetric » => ...
1 px color 2
2 px color 1
1 px color 2
22
selections => select all
23
image => add borders => tickk « symmetric » => 30
px color 1
24
selections => invert
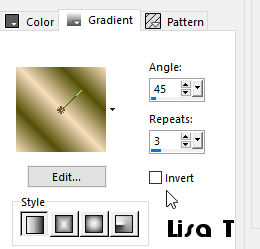
prepare a linear gradient into the materials palette
25
flood fill selection with this gradient
26
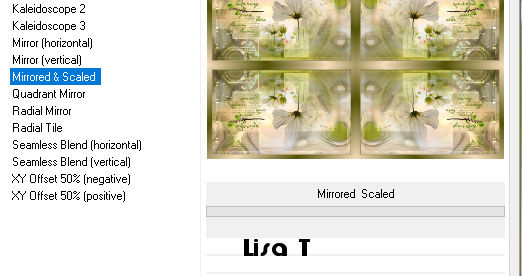
effects => plugins => Unlimited 2 => Tlie & Mirror
=> Mirrored & Scaled
27
selections => invert
effects => 3D effects => drop shadow
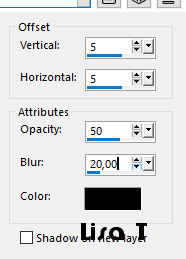
effects => 3D effects => drop shadow => replace
(5) by (-5)
28
selections => select none
image => add borders => tickk « symmetric » => 1
px black
29
apply your signature or watermark
image => resize => 950 px wide
30
adjust => sharpness => unsharp mask => 2 / 30
/ 2 / untick « Luminance only »
31
save as... type .jpeg
 
My tag with my misted image
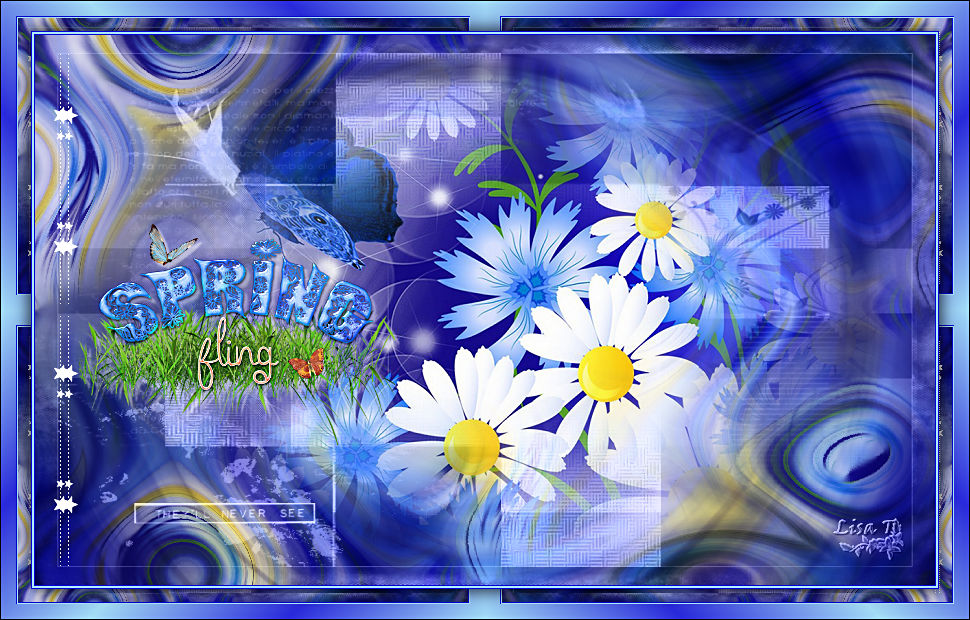
Your tag is finished.
Thank you for following this tutorial
Don’t hesitate to send your creations
to Belle de Nuit

It will be a real pleasure for her to show them in the
gallery at the bottom of the tutorial page
Don’t forget to indicate her your name and the adress
of your blog or site if you have one

If you want to receive Belle de Nuit’s Newsletter,
sign up ...


Back to the boards of Belle de Nuit’s tutorials
Board 1

|