Spring

The original tutorial can be found HERE

Conditions of use of the material provided
It is forbidden to modifiy, change the name, take off the
watermarks or alter tubes provided.
It is forbidden to share them in groups or offer them on
your site, blog or forum.
If you want to use them to create a tutorial, you must ask
the permission to the authors.

Material
1 mask - 1 selection - 1 color palette - 1 image « 22 » -
1 tube « gold corner »
1 « Mist Corinne Viacire fleurs »
you will need a character tube


Filters Used
Unlimited 2
Muras’ Meister

Thank you Tine for sharing your plugins’ page

translator’s note
« Belle de Nuit » works with PSP X, I use PSPX9
to create my tag and write my translations
but this tutorial can be realized with any other version
of PSP
according to the version of PSP you use, the results might
be slightly differents
don’t hesitate to change blend modes of layers matching
your tubes and colors

Colors

color 1 --> foreground color --> FG --> left click
--> #ffffff
color 2 --> background color --> BG --> right click
--> #dada90
if you change colors, keep White as FG color

Use this pencil to follow the steps
hold down left click to grab it and move it


Realization
1
open a new transparent image 900 * 550 pixels
2
selections -> select all
copy / paste into selection « image 22 »
selections -> select none
adjust -> sharpness -> sharpen
3
layers -> duplicate
effects -> plugins -> Unlimited 2 -> Tronds Filters
/ Star II
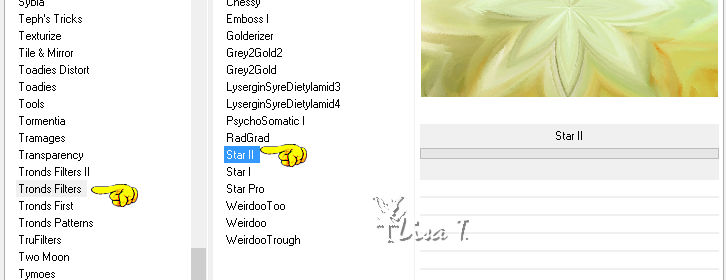
4
adjust -> sharpness -> sharpen more
opacity of the layer : 63%
layers -> merge -> merge down
5
layers -> duplicate
effects -> plugins -> Muira’s Meister -> Perspective
Tiling
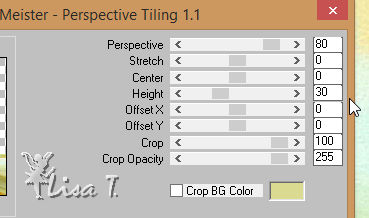
6
effects -> 3D effects -> drop shadow
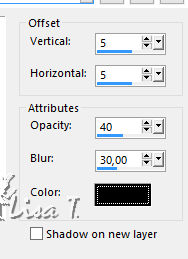
7
layers -> duplicate
highlight « Copy of Raster 1 »
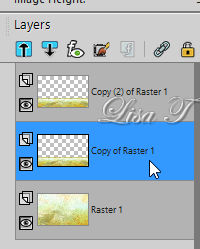
8
effects -> geometric effects -> circle
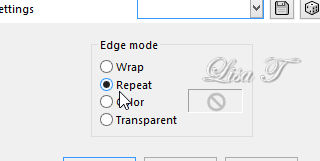
9
edit -> repeat « circle » 3 times
image -> mirror -> mirror vertical
10
activate « magic wand tool », feather
0 mode « add », and select
the 2 top colors
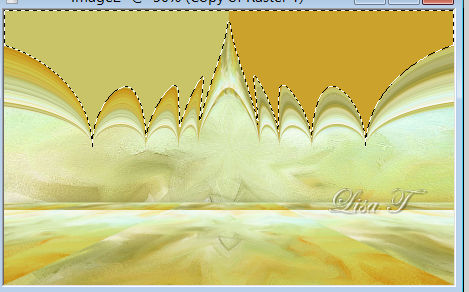
11
DELETE (delete key of your keyboard)
selections -> select none
12
effects -> image effects -> offset
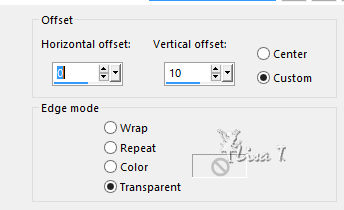
13
highlight « copy 2 of raster 1 »
view -> rulers
activate « Pick tool » (K)
14
pull down layer to 460
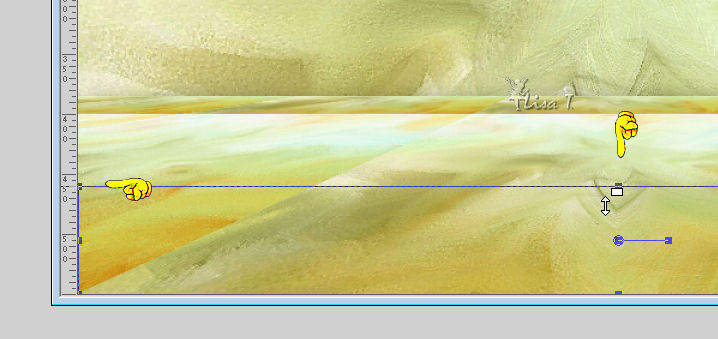
15
view -> uncheck « rulers »
16
layers -> duplicate
highlight « copy 2 of raster 1 »
17
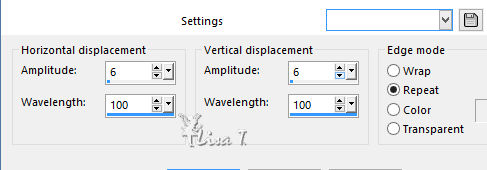
effects -> distortion effects -> wave
18
highlight top layer
19
effects -> distortion effects -> wave (as bbefore,
same settings)
image -> mirror -> mirror horizontal
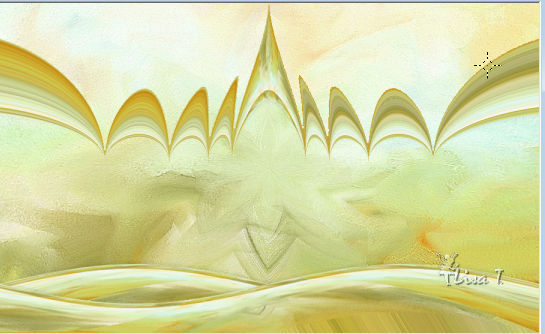
your tag looks like this
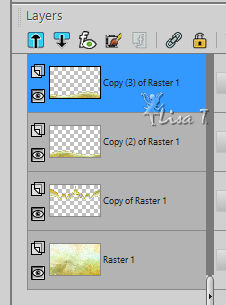
your layers palette looks like this
20
effects -> 3D effects -> drop shadow as before
highlight layer underneath et drop the same shadow
21
highlight Raster 1
copy / paste as new layer « Mist Corine Vicaire
fleurs »
move it to the left (see final result)
adjust -> sharpness -> sharpen more
layers -> duplicate
image -> mirror -> mirror horizontal
highlight Background layer (Raster 1)
22
layers -> new raster layer
flood fill with color 1
23
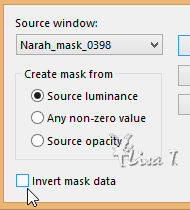
open mask « Narah 0398 » and minimize
it to tray
layrs -> new mask layer -> from image
layers -> merge -> merge group
24
image -> add borders -> chesk « symmetric » -->...
1 pixel color 2
10 pixels color 1
1 pixels color 2
5 pixels color 1
1 pixel color 2
50 pixels color 1
25
copy / paste character tube
move it as shown on final result
26
layers -> duplicate
highlight orinial layer underneath
adjust -> blur -> gaussian bliur / 20
highlight top layer
adjust -> sharpness -> sharpen
27
layers -> new raster layer
selections -> load-save selection -> from disk -> selection « bdn_spring »
28
flood fil selection with color 2 (zoom in to see better)
selections -> select none
29
effects -> 3D effects -> drop shadow -> 1 / 1
/ 100 / 1 / black
30
copy / paste as enw layer « Gold_corner »
effects -> image effects -> offset
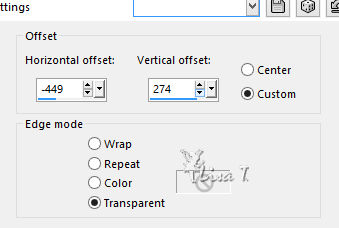
if you use another corner don’t apply « offset » effect,
use Pick Tool
31
image -> add borders -> chesk « symmetric » -> ...
1 pixel color 2
10 pixels color 1
1 pixel color 2
32
image -> resize to 950 pixels (width)
33
apply your watermark and save your work as... type .jpeg

Your tag is finished.
Thank you for following this tutorial

Don’t hesitate to send your creations
to Belle de Nuit

It will be a real pleasure for her to show them in the
gallery at the bottom of the tutorial page
Don’t forget to indicate her your name and the adress
of your blog or site if you have one

If you want to receive Belle de Nuit’s Newsletter,
sign up ...


Back to the boards of Belle de Nuit’s tutorials
Board 1 

|