Juliana

The original tutorial can be found HERE

Conditions of use of the material provided
It is forbidden to modifiy, change the name, take off the
watermarks or alter tubes provided.
It is forbidden to share them in groups or offer them on
your site, blog or forum,
you are allowed to use them in another creation for your
personal use
If you want to use them to create a tutorial, you must ask
the permission to the authors.

Material
color palette - tubes and images
1 selection (copy / paste into folder « selections » of
your Corel PSP folder)
you will need a character tube (not provided)


Filters Used


translator’s note
« Belle de Nuit » works with PSP X, I use PSPX9
to create my tag and write my translations
but this tutorial can be realized with any other version
of PSP
according to the version of PSP you use, the results might
be slightly differents
don’t hesitate to change blend modes of layers matching
your tubes and colors

Colors

color 1 --> foreground color --> FG --> left click
--> #d4cbc3
color 2 --> background color --> BG --> right
click --> #bbbbba
color 3 --> #ffffff

Use this pencil to follow the steps
hold down left click to grab it and move it


Realization
1
open a new transparent image 900 * 550 pisels
2
selections -> select all
copy / paste into selection Johanna’s Background
selections -> select none
if you use another background, resize ot 538 * 717
3
adjust -> blur -> radial blur
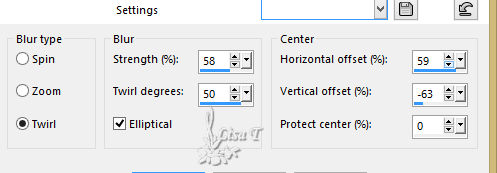
4
effects -> edge effects -> enhance more
5
layers -> duplicate
open Johanna’s Background again
image -> resize
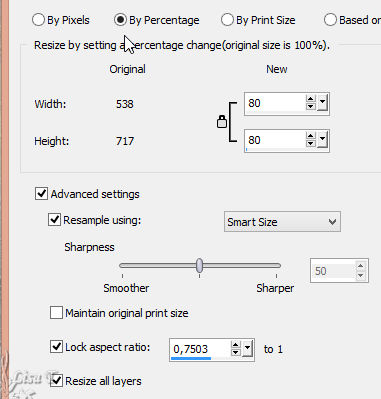
6
copy / paste as new layer
7
effects -> image effects -> seamless tiling
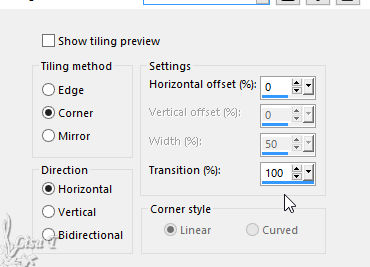
8
highlight Raster 1
selections -> load-save selection -> from disk -> selection « Juliana_1 »
9
selections -> promote selection to layer
layers -> arrange -> bring to top
selections -> select none
10
effects -> plugins -> Unlimited 2 -> It@lian Editors
Effect / Effetto Fantasma
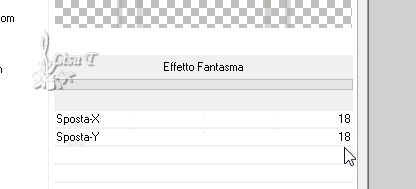
11
effects -> user defined filter -> Emboss 3 (if
you tag is light)
adjust -> sharpness -> sharpen more (if your tag
is dark)
12
blend mode of the layer : Overlay
13
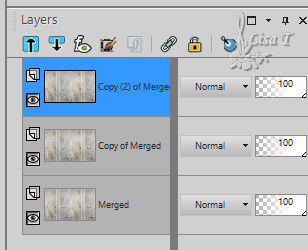
layers -> merge -> merge visible
layers -> duplicate Twice
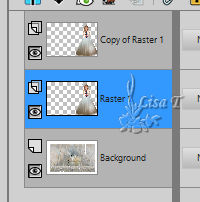
your layers palette looks like this
14
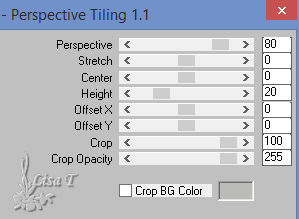
effects -> plugins -> Mura’s Meister / Perspective
Tiling
15
adjust -> sharpness -> sharpen
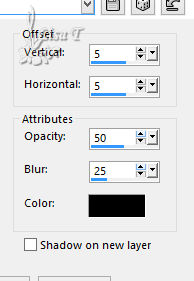
effects -> 3D effects -> drop shadow
16
highlight « Copy of Merged »
17
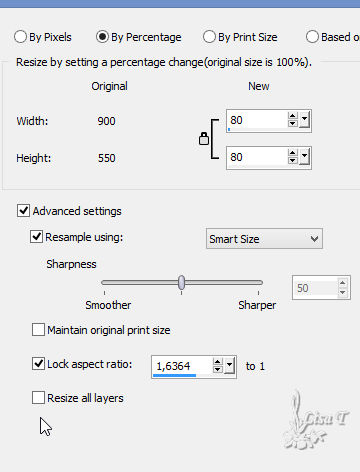
image -> resize to 80%
18
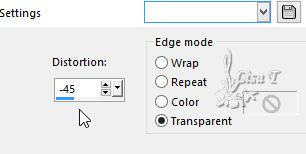
effects -> geometric effects -> Perspective Vertical
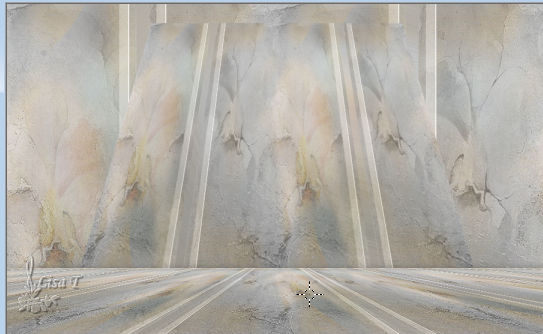
your work looks like this
19
effects -> 3D effects -> drop shadow -> 3 / 3
/ 35 / 15 / white * -3 / -3 / 35
/ 15 / white
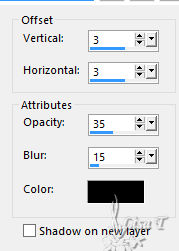 
if your colors are dark, choose Black instead of white
20
copy / paste misted image by Corinne Vicaire as new layer
don’t move it
adjust -> sharpness -> sharpen
21
highlight Merged layer
copy / paste decoration 1 as new layer
blend mode : Soft Light - opacity :
73%
22
image -> add borders -> symmetric -> ...
1 pixel color 3
3 pixels color 2
1 pixel color 3
3 pixels color 1
50 pixels color 3
23
copy / paste your main tube (woman tube, or other) as new
layer
layers -> duplicate
highlight original layer
24
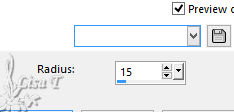
adjust -> blur -> gaussian blur / 15
25
highlight top layer
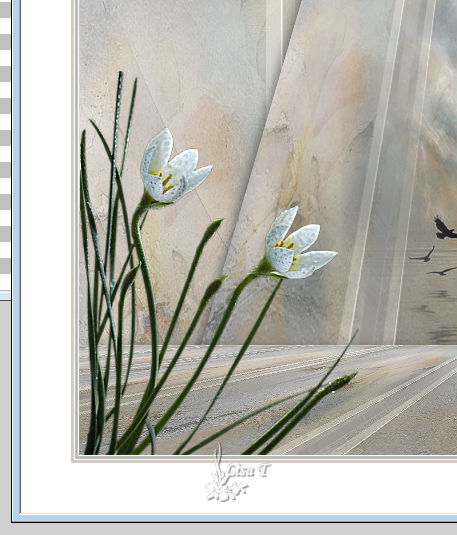
copy / paste « corinne.vicaire_fleurs_juliana » as
new layer
move it to the left
26
effects -> 3D effects -> drop shadow -> -3 / -3
/ 35 / 15 / black
27
copy / paste « deco_juliana2 » as
new layer
move it to the left as shown
adjust -> sharpness -> sharpen
28
image -> add borders -> symmetric -> 1 pixel color
2
29
image -> resize : 990 pixels (width)
30
apply your watermark
file -> save as... type .jpeg

Your tag is finished.
Thank you for following this tutorial
Don’t forget to sign (to avoid plagiarism) and save
file as… type JPEG

Don’t hesitate to send your creations
to Belle de Nuit

It will be a real pleasure for her to show them in the
gallery at the bottom of the tutorial page
Don’t forget to indicate her your name and the adress
of your blog or site if you have one

If you want to receive Belle de Nuit’s Newsletter,
sign up ...


My tag with my tubes

Back to the boards of Belle de Nuit’s
tutorials
Board 1 

|