You are my magician

You will find the original tutorial here :
I am member of TWInc
this translated tutorial is protected


All the tubes used to realize this tag were created by Azalée
She is only the tuber, the copyright© belongs to the authors of the original images
If you find the “same” tubes elsewhere, it is pure coincidence
because the images she uses are found on the net.
These tubes are for personal use, and not for profit.
Some “decoration” tubes were found on the net,
or received in the following sharing groups, whom she thanks
Beautiful-PSP - fantasiadicolori - C-Josy-Partages - UnMondodi
  
This tutorial is a personal creation.
Any resemblance with another one would be pure coincidence.

Plugins
AP 01 (Innovations)/Lines Silverlining
Unlimited 2/Toadies/What Are You?
Unlimited 2/VM Distortion/FlipChop
Unlimited 2/VM Stylize/Zoom Blur
L&K’s/Paris
Simple/Top Left Mirror
Plugins offered with the kind permission of Pinuccia

Material

Colors
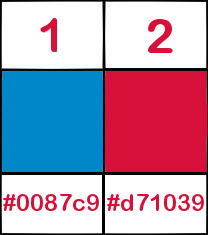
foreground color -> color 1 -> #0087c9
background color -> color 2 -> #d71039

Use the paint brush to follow the steps
left click to grab it


Realization
Step 1
open a new transparent raster background 900 * 600 pixels
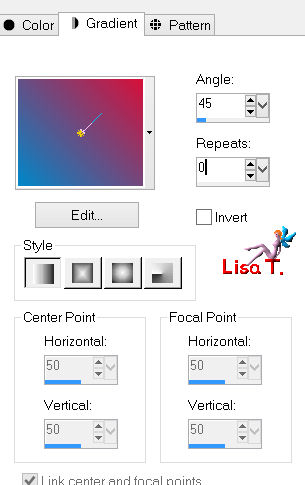
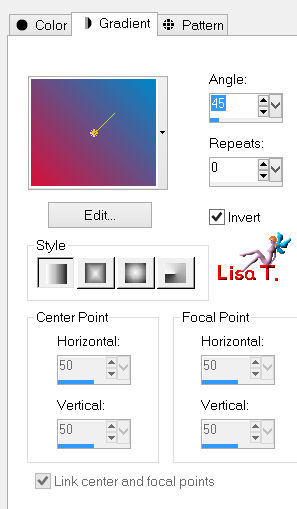
in the materials palette, prepare a linear gradient -> 45 / 0 / uncheck “invert”
fill the layer with the gradient
Step 2
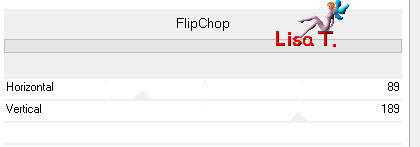
effects/plugins/Unlimited/VM Distortion/FlipChop 89/189
Step 3
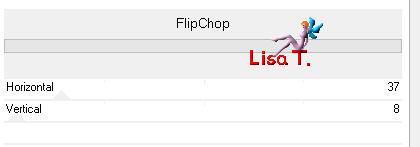
effects/plugins/Unlimited/VM Distortion/FlipChop 37/8
Step 4
layers/duplicate - image/flip
in the layers palette, set the blend mode on “hard light” and the opacity on 50%
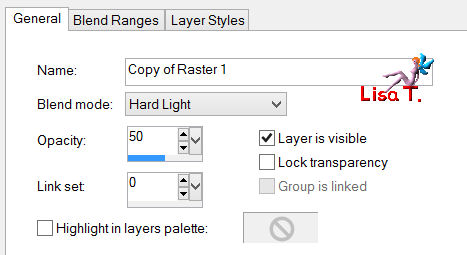
layers/merge/merge down
Step 5
selections/load-save selection/from disk/selection “Azalee-sel-tuto-62-1”
click on “load”
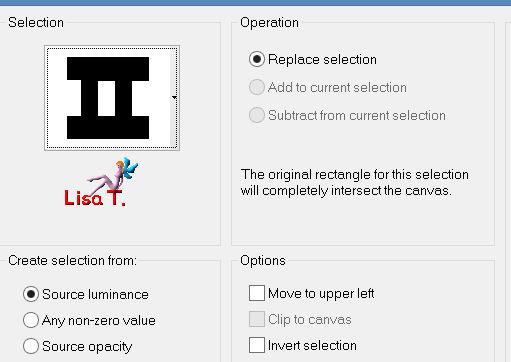
selections/promote selection to layer
Step 6
effects/texture effects/blinds/color 2
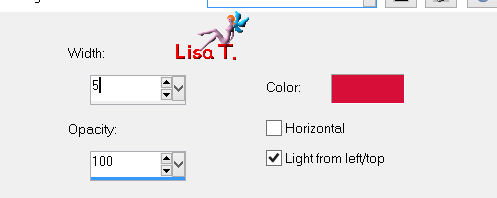
selections/select none
Step 7
effects/plugins/Unlimited 2/Toadies/What Are You? 20 / 20

Step 8
effects/3D effects/chisel/white
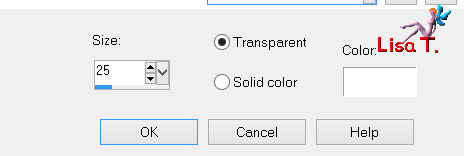
Step 9
selections/load-save selection/from disk/selection “Azalee-sel-tuto-62-2”
click on “load”
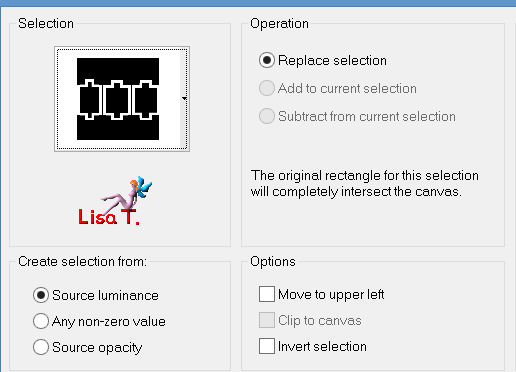
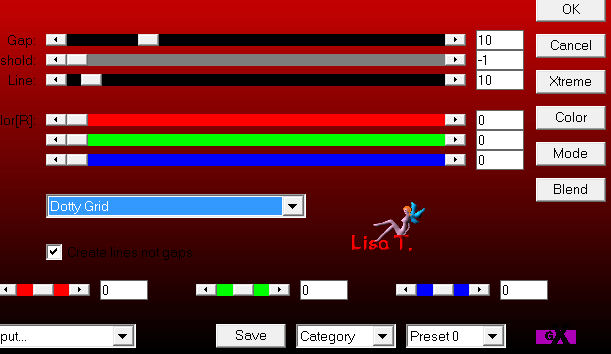
effects/plugins/AP 01 (Innovations)/Lines Silverlining
selections/select none
Step 10
layers/duplicate
effects/plugins/Unlimited 2/Toadies/What Are You?/ 112 / 38

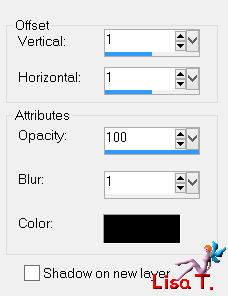
effects/3D effects/drop shadow/ 1 / 1 / 100 / 1 / black
Step 11
effects/image effects/seamless tiling
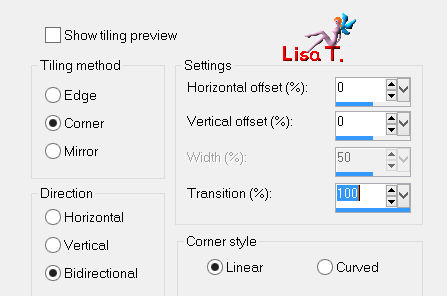
layers/arrange/move down
Step 12
in the layers palette, activate the top layer
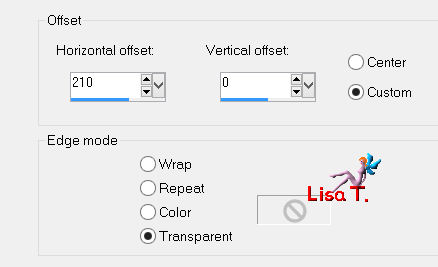
effects/image effects/offset
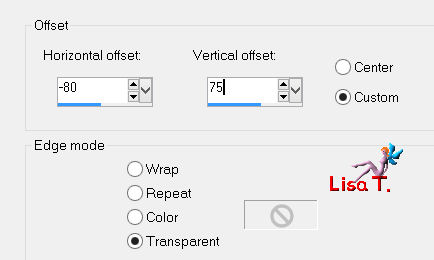
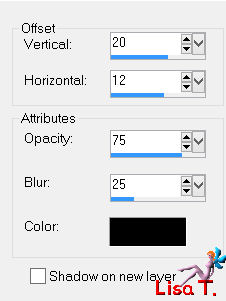
effects/3D effects/drop shadow/ 20 / 12 / 75 / 25 / black
Step 13
layers/new raster layer
selections/load-save selection/from disk/selection “Azalee-sel-tuto-62-3”
click on “load”
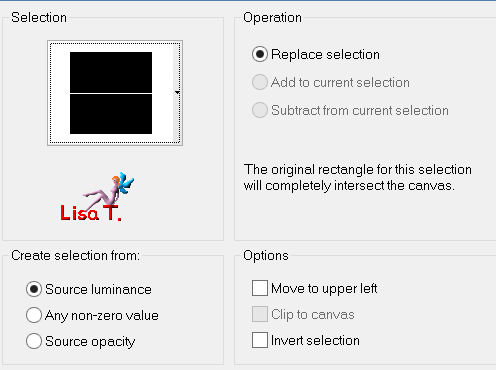
in the materials palette, set white as foreground
paint the selection with this color
selections/select none
Step 14
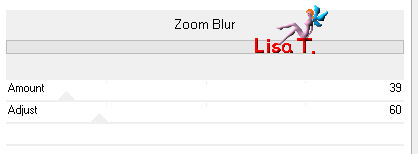
effects/plugins/Unlimited 2/VM Stylize/Zoom Blur/ 39 / 60
Step 15
effects/distortion effects/wave

in the layers palette, set the blend mode on “soft light”
layers/arrange/move down
Step 16
in the layers palette, activate the top layer
activate the tube “deco-1-tuto-62”
edit/copy - back to your work - edit/paste as new layer
effects/image effects/offset
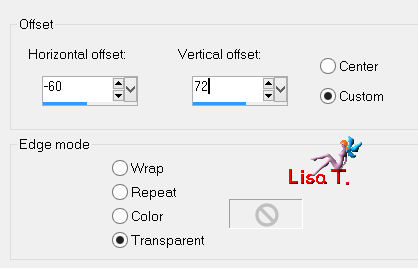
Step 17
activate the tube “deco-2-tuto-62”
edit/copy - back to your work - edit/paste as new layer
effects/image effects/offset
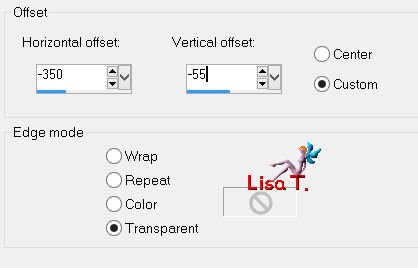
layers/merge/merge down 2 times
Step 18
layers/duplicate
effects/image effects/offset
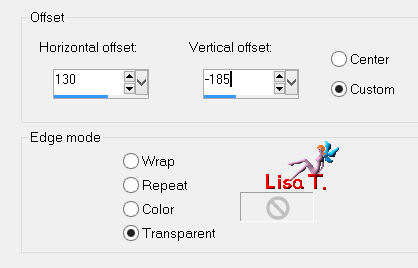
in the layers palette, set the blend mode on “soft light” and the opacity on 70%
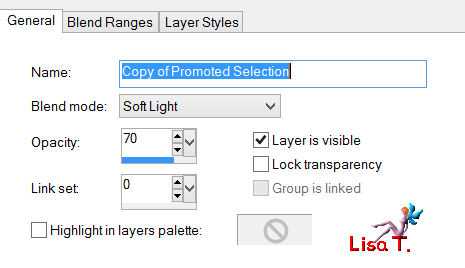
layers/arrange/move down
Step 19
in the layers palette, keep this layer active and close the visibility toggle of the layer above
layers/new raster layer
fill with white
layers/new mask layer/from image/”masque-91-azalee”/uncheck “invert mask data”
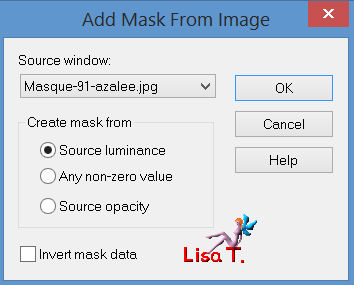
effects/edge effects/enhance
layers/merge/merge group
Step 20
in the layers palette open the visibility toggle you closed in step 19
layers/merge/merge visible
Step 21
your work looks like this
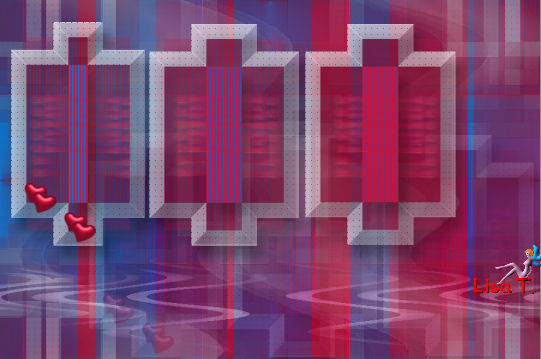
Step 22
image/add border/check “symmetric”
2 pixels color 2
1 pixels color 1
2 pixels color 2
Step 23
layers/promote background layer
image/resize/85%/uncheck “resize all layers”
adjust/sharpness/sharpen
Step 24
layers/duplicate
image/resize/50%/uncheck “resize all layers”
adjust/sharpness/sharpen
effects/image effects/offset
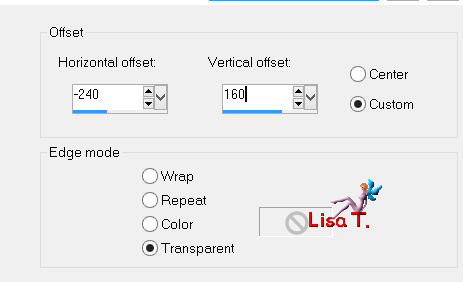
effects/plugins/Simple/Top Left Mirror
layers/arrange/move down
Step 25
in the layers palette, activate the top layer
layers/new raster layer
apply the same gradient as in step 1, but check “invert”
Step 26
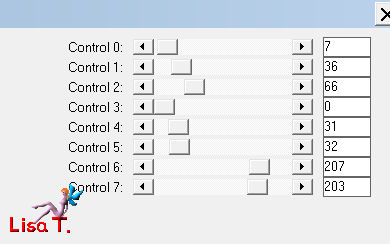
effects/plugins/L&K’s/Paris
effects/edge effects/enhance more
layers/arrange/send to bottom
Step 27
in the layers palette, activate the layer above (copy of raster 1)
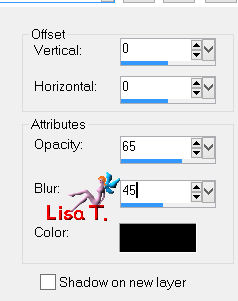
effects/3D effects/drop shadow/ 0 / 0 / 65 / 45 / balck
Step 28
in the layers palette, activate the top layer (raster 1)
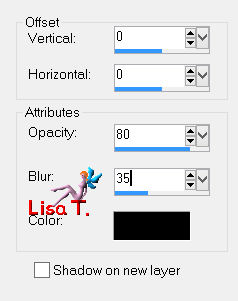
effects/3D effects/drop shadow/ 0 / 0 / 80 / 35 / black
Step 29
activate the tube “couple-23-azalee”
edit/copy - back to your work - edit/paste as new layer
image/resize/82%/uncheck “resize all layers”
effects/image effects/offset
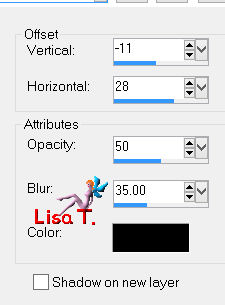
effects/3D effects/drop shadow/ -11 / 28 / 50 / 35 / black
adjust/sharpness/sharpen
Step 30
activate the tube “deco3-tuto-62”
edit/copy - back to your work - edit/paste as new layer
place at the bottom left (see final result)
Step 31
activate the tube “text-tuto-62”
edit/copy - back to your work - edit/paste as new layer
move it as shown on the final result
layers/arrange/move down
Step 32
image/add borders/check “symmetric”/1 pixel/color 1
Step 33
apply your signature
Step 34
layers/merge/merge all (flatten)
Step 35
image/resize/900 pixels width
Step 36
save as…. type jpeg
  
Your tag is now finished
we hope you enjoyed doing it

You can send your creations to Azalée.
It will be her pleasure to present it on her site

If you want to be informed about Azalée’s new tutorials
Join her newsLetter, on her home page


Back to the board of Azalée's tutorials
board 1  board 2 board 2  board 3 board 3 

|