Talanat

You will find the original tutorial here :
I am member of TWInc
this translated tutorial is protected


All the tubes used to realize this tag were created by Azalée
She is only the tuber, the copyright© belongs to the authors of the original images
If you find the “same” tubes elsewhere, it is pure coincidence
because the images she uses are found on the net.
These tubes are for personal use, and not for profit.
Some “decoration” tubes were found on the net,
or received in the following sharing groups, whom she thanks
Beautiful-PSP - fantasiadicolori - C-Josy-Partages - UnMondodi

This tutorial is a personal creation.
Any resemblance with another one would be pure coincidence.

Plugins
AAA Filters/Textures
AAA Frames/Foto Frame
Alien Skin Eye Candy 5 Impact/Motion Trail
Alien Skin Eye Candy 5 Impact/Perspective Shadow
Unlimited 2/Background DesignersIV/@Frame AFH Beveler2.0a
Mura’s Meister/Perspective Tiling
Mura’s Meister/Pole Transform
Simple/Blintz
Virtual Painter 4

Material
open the color palette
open the tubes, duplicate them and close the originals. Always mork with the copies
activate the mask, and minimize it
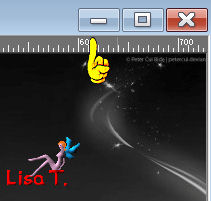
copy and paste the selections in the special folder of “My PSP Files”
install “13-cmv” in the “textures” folder of “My PSP Files”
import the presets (or double click on them)


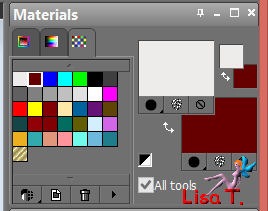
Colors
foreground color -> color 1 -> #edebeb
background color -> color 2 -> #660000

Use the paint brush to follow the steps
Left click to grab it


Realization
Step 1
open a new raster layer/transparent/900 ** 600 pixels
fill with color 2 (right click)
Step 2
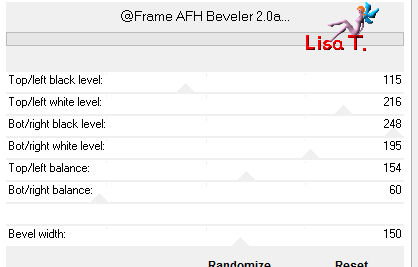
effects/plugins/Unlimited 2/Background Designers IV/@FrameAFH Beveler 2.0a
you can change the settings if you wish, but keep 150 on the last line
Step 3
selections/load-save selection/from disk/selections #Azalee-sel-tuto-59-1
click on “load”
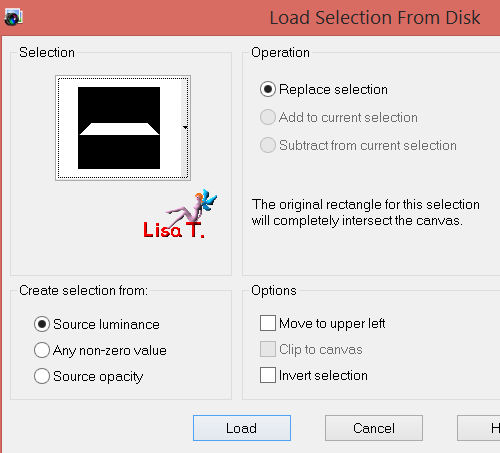
Step 4
effects/texture effects/weave
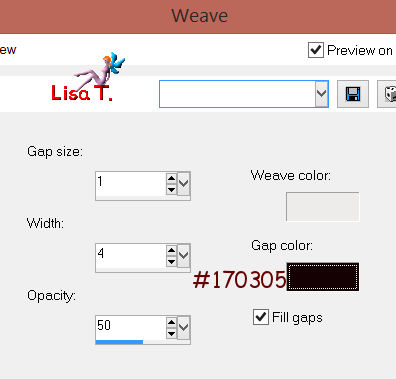
selections/select none
Step 5
selections/load-save selection/from disk/selections #Azalee-sel-tuto-59-2
click on “load”
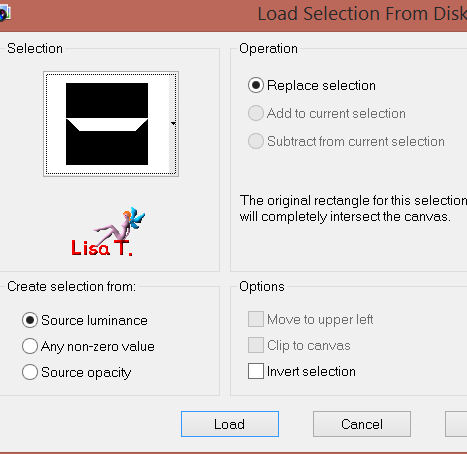
Step 6
effects/textures effects/texture
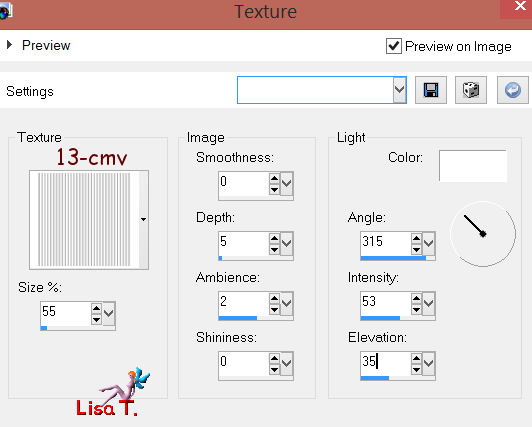
selections/select none
Step 7
effects/image effects/seamless tiling
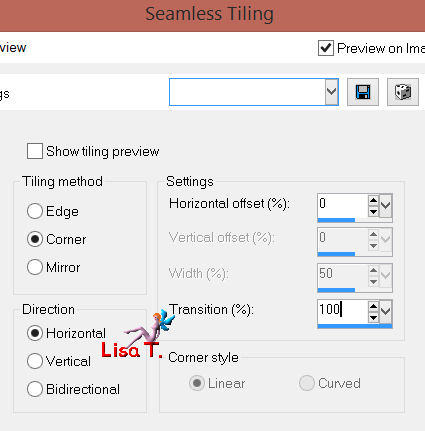
Step 8
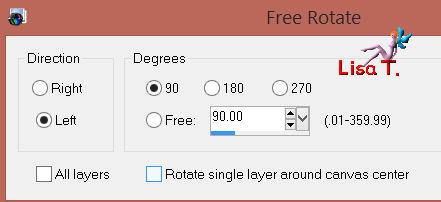
layers/duplicate
image/rotate/free rotate/90°/left/uncheck the two boxes
Step 9
layers/duplicate - image/mirror
in the layers palette, set the opacity on 50%
layers/merge/merge down
Step 10
effects/plugins/Simple/Blintz
Step 11
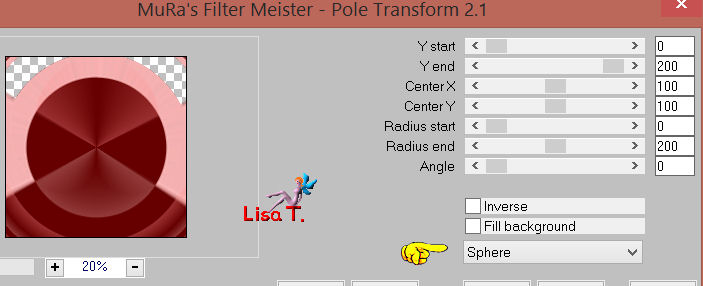
effects/plugins/Mura’s Meister/Pole Transform (sphere)
Step 12
layers/duplicate - image/flip
in the layers palette, set the opacity on 50%
layers/merge/merge down
Step 13
effects/plugins/Mura’s Meister/Pole Transform
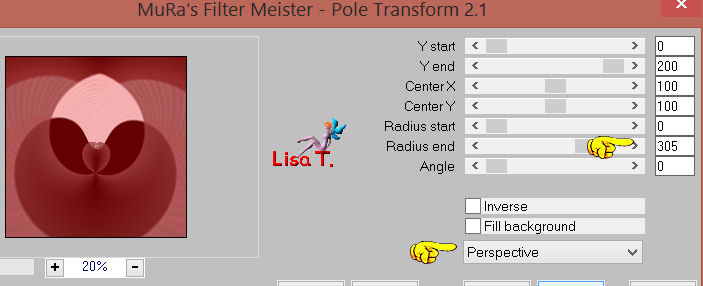
adjust/sharpness/sharpen more
Step 14
effects/image effects/seamless tiling/default settings
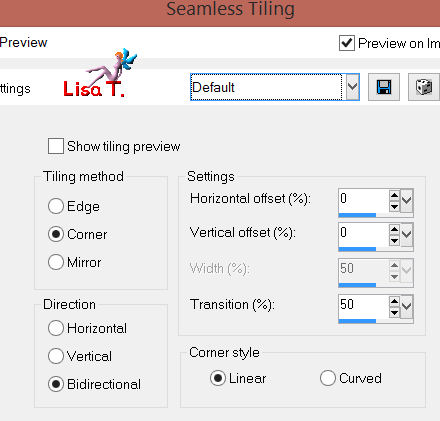
layers/duplicate - image/flip
in the layers palette, set the opacity on 50%
layers/merge/merge down
Step 15
layers/duplicate
effects/plugins/Mura’s Meister/Perspective Tiling
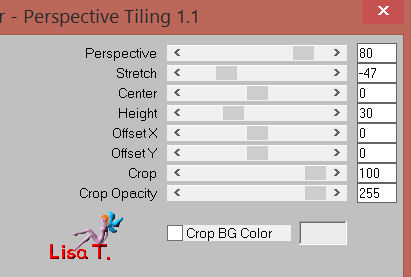
Step 16
in the layers palette, activate the layer in the middle (copy of raster 1)
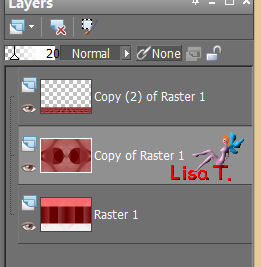
set the opacity on 20%
effects/edge effects/enhance more
Step 17
keep this layer active
selections/load-save selection/from disk/selections #Azalee-sel-tuto-59-3
click on “load”
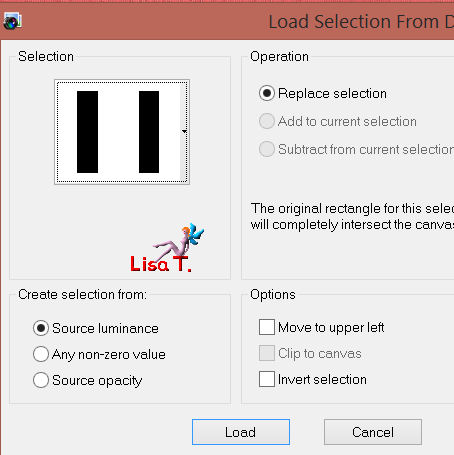
selections/promote selection to layer
Step 18
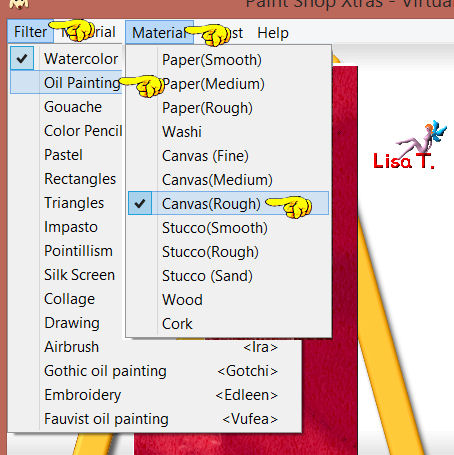
effects/plugins/Virtual painter 4
(filter-Oil Painting - Material-Canvas (Rough) )
Step 19
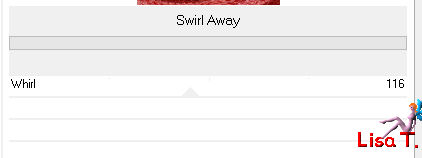
effects/plugins/BKG Kaleidoscope/Swirl Away
Step 20
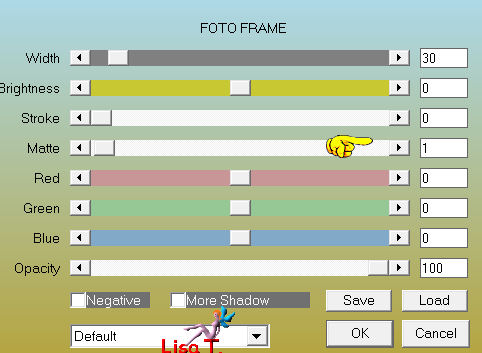
effects/plugins/AAA Frames/Foto Frame
selections/select none /
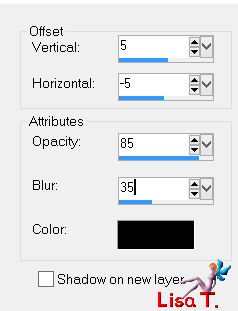
effects/3D effects/drop shadow/ 5 / -5 / 85 / 35 / black
layers/arrange/move up
Step 21
layers/duplicate
image/resize/25% (uncheck “resize all layers”)
effects/image effects/offset
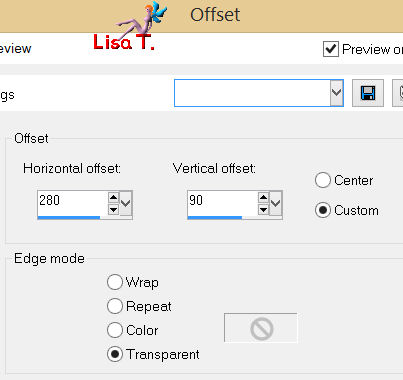
adjust/sharpness/sharpen
Step 22
layers/duplicate
effects/image effects/offset
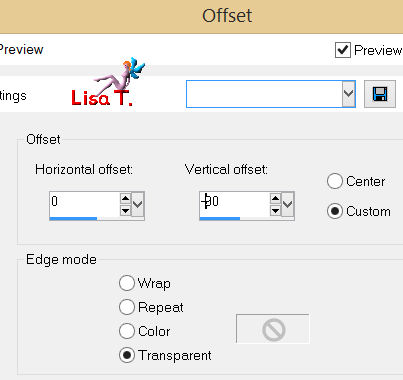
Step 23
repeat step 22 (same settings)
layers/merge/merge down 2 times
Step 24
activate the tube “deco-1-tuto-59-azalee”
edit/copy - back to your work - edit/paste as a new layer
effects/image effects/offset
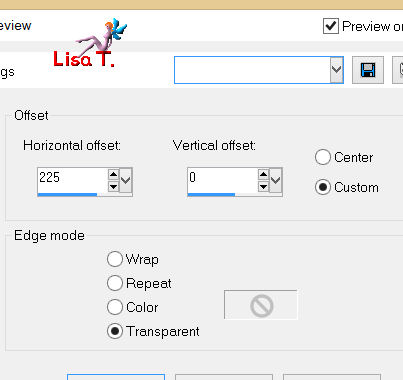
layers/merge/merge down
Step 25
activate the tube “deco-2-tuto-59-azalee”
edit/copy - back to your work - edit/paste as a new layer
don’t move it
in the layers palette, set the opacity on 60%
Step 26
effects/plugins/Alien Skin Eye Candy Impact/Motion Train
choose the preset MT-tuto-59-Azalee provided in the material
here are the settings
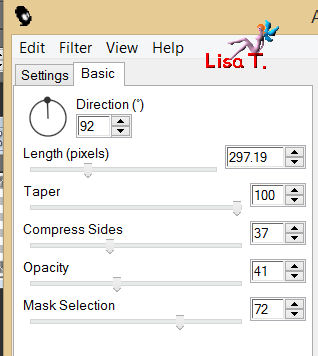
effects/edge effects/enhance
Step 27
layers/new raster layer
in the materials palette, set black as foreground color (#000000) and fill the raster
layers/new mask layer/from image/choose “masque-68-Azalee” (uncheck “invert mask data”)
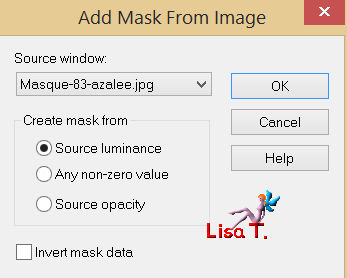
layers/merge/merge group
in the layers palette, set the blend mode on “overlay” and the opacity on 60%
Step 28
layers/new raster layer
selections/load-save selection/from disk/selections #Azalee-sel-tuto-59-4
click on “load”
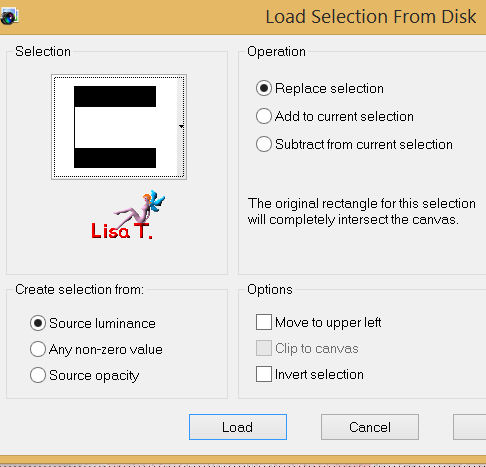
activate the flood fill tool, and set the opacity on 50%
paint with color 2 (right click)
effects/edge effects/enhance
set the opacity of the flood fill tool on 100% again
selections/select none
Step 29
activate the tube “corner-tuto-59-azalee”
edit/copy - back to your work - edit/paste as a new layer
effects/image effects/offset
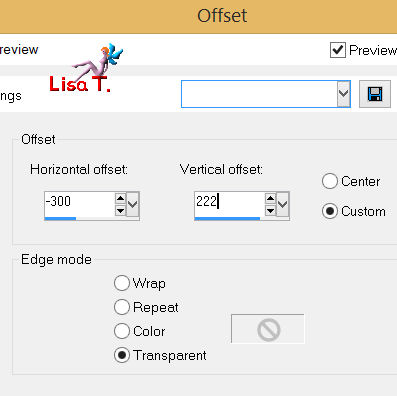
adjust/sharpness/sharpen more
layers/merge/merge down
Step 30
activate the tube “Text-tuto-59-azalee”
edit/copy - back to your work - edit/paste as a new layer
move it at the top left (see final result)
layers/merge/merge down
Step 31
activate the tube “vase-52-azalee”
edit/copy - back to your work - edit/paste as a new layer
image/resize/45% (uncheck “resize all layers”)
effects/image effects/offset
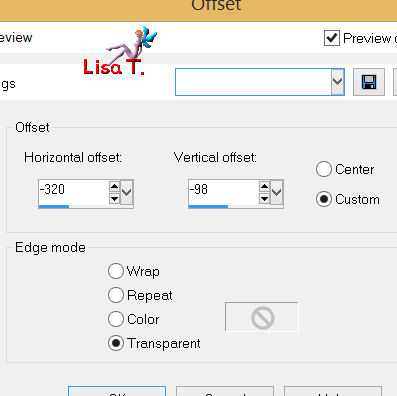
adjust/sharpness/sharpen
Step 32
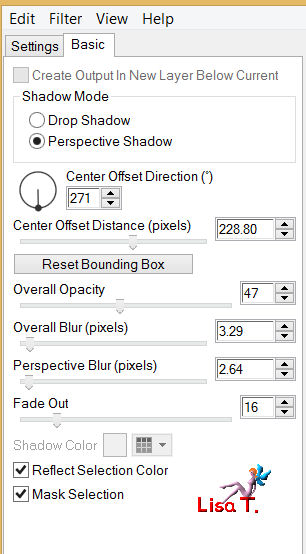
effects/plugins/Alien Skin Eye Candy 5 Impact/Perspective Shadow
choose “Azalee-Pers-shad-tuto-59” provided in the material
here are the settings
layers/merge/merge visible
Step 33
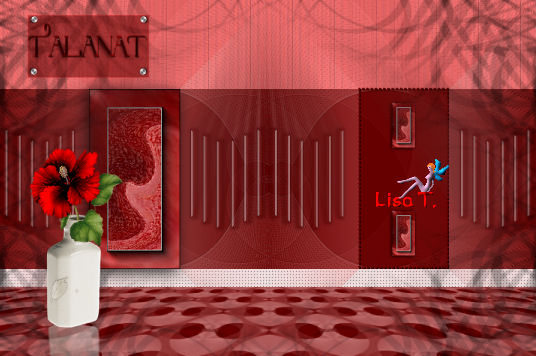
your tag looks like this
Step 34
image/add borders/check symmetric/2 pixels/color 2
edit/copy
image/add borders/check symmetric/35 pixels/white
activate the magic wand tool/tolerance 0/feather 0, and select this border
edit/paste into selection
adjust/blur/gaussian blur/25
effects/plugins/AAA Filters/Textures
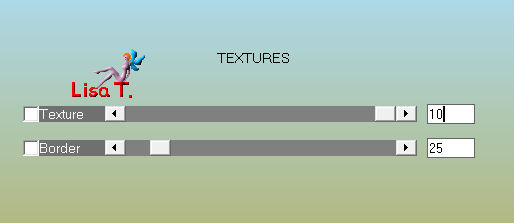
effects/edge effects/enhance more
selections/select none
Step 35
acitvate the tube “femme-602-azalee”, erase the watermark
edit/copy - back to your work - edit/paste as a new layer
image/resize/ 75 % (uncheck “resize all layers”)
effects/image effects/offset
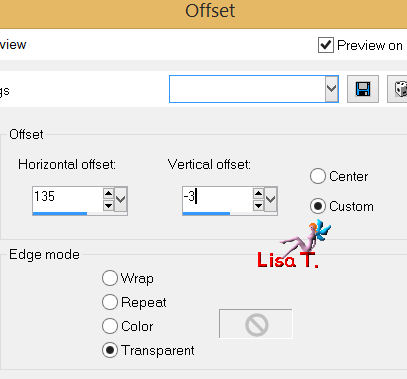
adjust/sharpness/sharpen
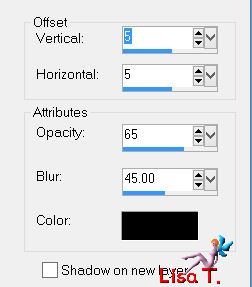
effects/3D effects/drop shadow/ 5 / 5 / 65 / 45 / black
Step 36
image/add borders/check symmetric/2 pixels/color 2
Step 37
apply your signature
Step 38
image/resize/ 900 pixels width
adjust/sharpness/sharpen
Step 39
save as …. type jpeg

Your tag is now finished
we hope you enjoyed doing it
created by ▼ Nadège
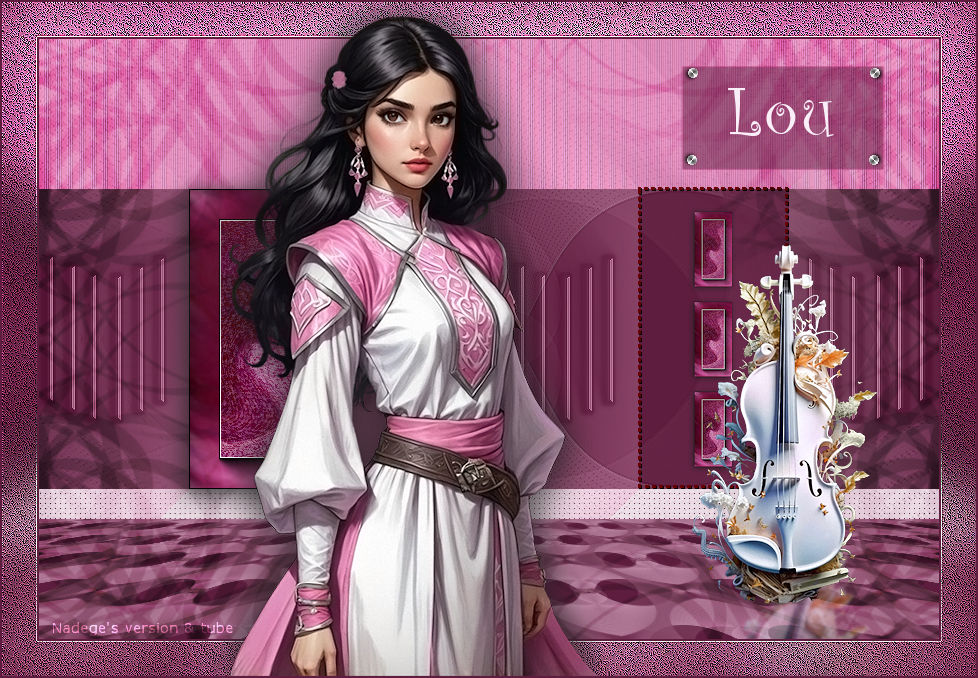

You can send your creation to Azalée.
It will be her pleasure to present it on her site


If you want to be informed about Azalée ’s new tutorials
Join her newsLetter, on her home page


Back to the boards of Azalée's tutorials
board 1  board 2 board 2  board 3 board 3 

|