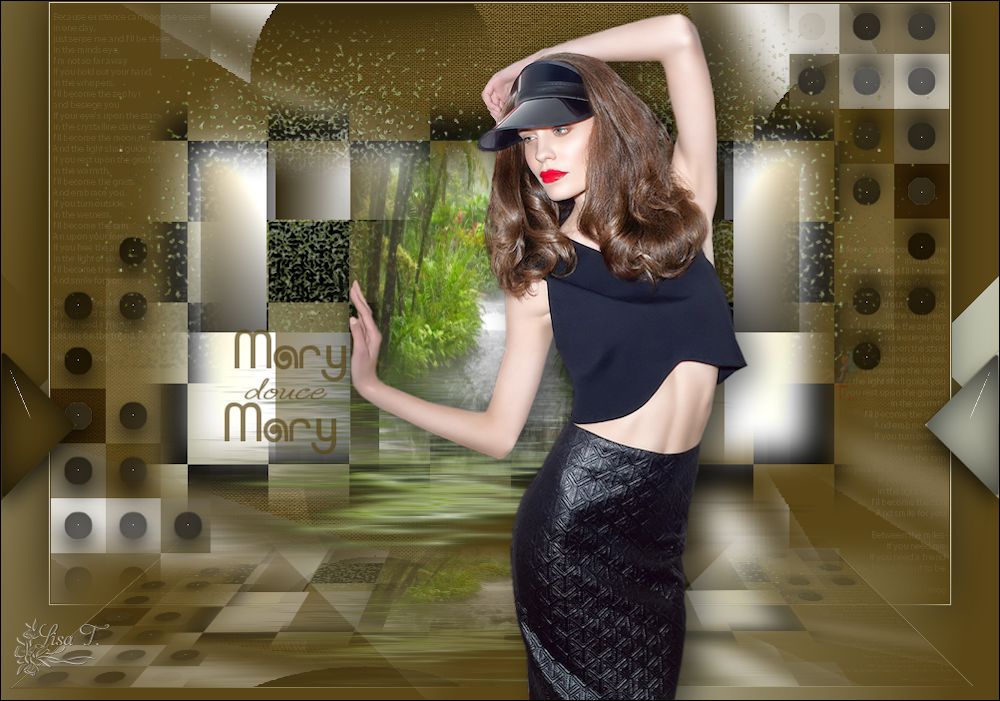
Mary, sweet Mary !

You will find the original tutorial here :


All the tubes used to realize this tag were created by Azalée
She is only the tuber, the copyright© belongs to the authors of the original images
If you find the “same” tubes elsewhere, it is pure coincidence
because the images she uses are found on the net.
These tubes are for personal use, and not for profit.
Some “decoration” tubes were found on the net,
or received in the following sharing groups, whom she thanks
Beautiful-PSP - fantasiadicolori

This tutorial is a personal creation.
Any resemblance with another one would be pure coincidence.
Translator’s note : Azalée works with PSPX6, and I work with PSPX7
but this tutorial can be followed with another version of PSP

Plugins
Alien Skin Eye Candy 5: Impact/ Glass
Filters Unlimited/& BKg Designer sf10 II / NEO Vasarely Mosaics
Filters Unlimited/Graphics Plus/ Page Curl
Filters Unlimited/ Paper Textures/ Canvas, Fine
Filters Unlimited/ VM Natural/ Weave Distortion
Flaming Pear/ Flood
Flaming Pear/ Swerve
L en K’s Pia
Simple/Diamonds plugins offered with the kind permission of Pinuccia


Material
tubes - selections - presets
duplicate the tubes, close the originals and work with the copies
copy/paste the selections into the foder « selections » of « My PSP Files »
copy/paste the preset « Preset_Pick _sol2 » into the folder « presets » of My PSP Files


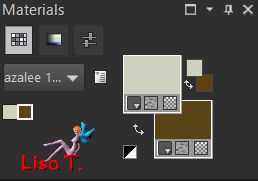
Colors
foreground color -> color 1 -> #cdd1be
background color -> color 2 -> #594516


Use the pencil to follow the steps
left click to grab it
 |

Realization
Step 1
open a new transparent raster layer 900 ** 600 pixels
fill with color 2
Step 2
effects/plugins/Unlimited 2/Paper Textures/canvas, fine

Step 3
layers/new raster layer(Raster 2)
fill with color 2
Step 4
effects/plugins/Unlimited 2/Graphic Plus/Page Curl

Step 5
edit/repeat Page Curl

Step 6
effects/image effects/seamless tiling

layers/merge/merge down
Step 7
layers/new raster layer (Raster 2)
selections/load selection from disk/selection « Mary-Sel1 »

Step 8
fill with a linear gradient (1 click only)

effects/plugins/LenK’s Pia

selections/select none
Step 9
layers/new raster layer (Raster 3)
selections/load selection from disk/selection « Mary-Sel2 »

fill with the linear gradient of step 8 (1 click only)
selections/select none
Step 10
effects/texture effects/blinds

Step 11
effects/plugins/Unlimited 2/VM Natural/Weave Distortion

Step 12
layers/duplicate - image/mirror/mirror horizontal
layers/merge/merge down
Step 13
layers/new raster layer (Raster 4)
selections/load selection from disk/selection « Mary-Sel3 »

Step 14
copy/paste into selection the tube « Pays-185-Azalee »
selections/select none
Step 15
layers/duplicate
effects/plugins/Flaming Pear/Flood
52 / 11 / 47 / 27 - 34 / 65 / 100 / 73 - 0 / 33 / 40 - normal

layers/arrange/move down
Step 16
layers/duplicate
effects/plugins/Flaming Pear/Swerve
click on the red arrow, then click on the preset « random settints.sa6 »
if you have troubles using the preset, here are the settings

image/resize/60%/uncheck « resize all layers »
effects/image effects/offset ( -185 / 115 )

layers/duplicate - image/mirror/mirror horizontal
layers/merge/merge down
opacity : 65%
layers/arrange/move down twice
Step 17
activate the background layer (Raster 1)
selection tool/custom selection


selections/promote selection to layer
selections/select none
Step 18
effects/plugins/Unlimited 2/&Bkg Designers sf10 II/NEO Vasarely Mosaics

layers/duplicate - image/mirror/mirror horizontal - image/mirror/mirror vertical
layers/merge merge down
opacity : 75%
Step 19
selections/load selection from disk/selection « Mary-Sel4 »

selections/promote selection to layer
Step 20
effects/plugins/Alien Skien Eye Candy 5 IMpact/Glass/Clear

selections/sleect none
layers/duplicate - image/mirror/mirror horizontal - image/mirror/mirror vertical
layers/merge/merge down
Step 21
copy/paste the « text1 » tube as new layer
layers/arrange/move down
Step 22
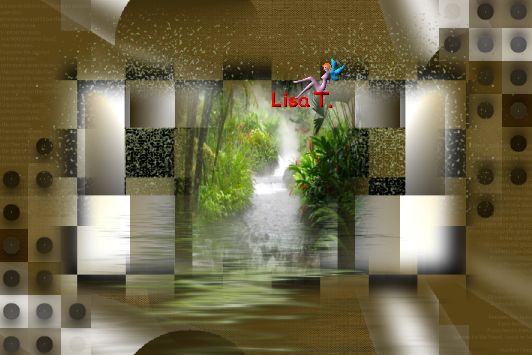
your tage and your layers palette look like this
 
Step 23
layers/merge/merge visible
Step 24
image/add borders/check « symmetric » --->
1 pixel color 2
1 pixel color 1
1 pixel color 2
Step 25
layers/promote background layer
image/canvas size

Step 26
layers/new raster layer (Raster 2)
fill with the gradient of step 8 (settings still in memory)
Step 27
effects/plugins/Simple/Diamonds
activate the magic wand tool, tolerance 20 and feather 0 and select the 2 small triangles

selections/promote selection to layer
effects/plugins/Alien Skin Eye Candy 5 Impact/Glass/Clear

selections/select none
effects/image effects/offset ( 0 / -175 )

Step 28
activate Raster 1
layers/arrange/move up
Step 29
layers/arrange
effects/3D effects/drop shadow/black

Step 30
activate Raster 1
with the Pick Tool, click on Sol2

hit the M key of your keyboard to disable the tool
opacity : 45%
Step 31
activate « Copy of Raster 1 »
selections/load selection from disk/selection « Mary-Sel5 »

hit the delete key of your keyboard twice
selections/select none
Step 32
copy/paste the tube « text2 » as new layer
blend mode « Luminance (Legacy) » if you have changed the colors
move it to the left
Step 33
copy/paste the tube « Femme-1036-azalee » as new layer
image/resize/75%/uncheck « resize all layers »
move it to the left
adjust/sharpness/sharpen
effects/3D effects/drop shadow

Step 34
layers/new raster layer, apply your signature
Step 35
image/add borders/check « symmetric »/1 pixel black
Step 36
resize eventually
Step 37
file/save as ... type jpeg

Your tag is finished
we hope you enjoyed doing it

My tag with my tubes

You can send your creations to Azalée.


It will be her pleasure to present it on her site


If you want to be informed about Azalée’s new tutorials
Join her newsLetter, on her home page


Back to the boards of Azalée’s tutorials
board 2  board 3 board 3 

|