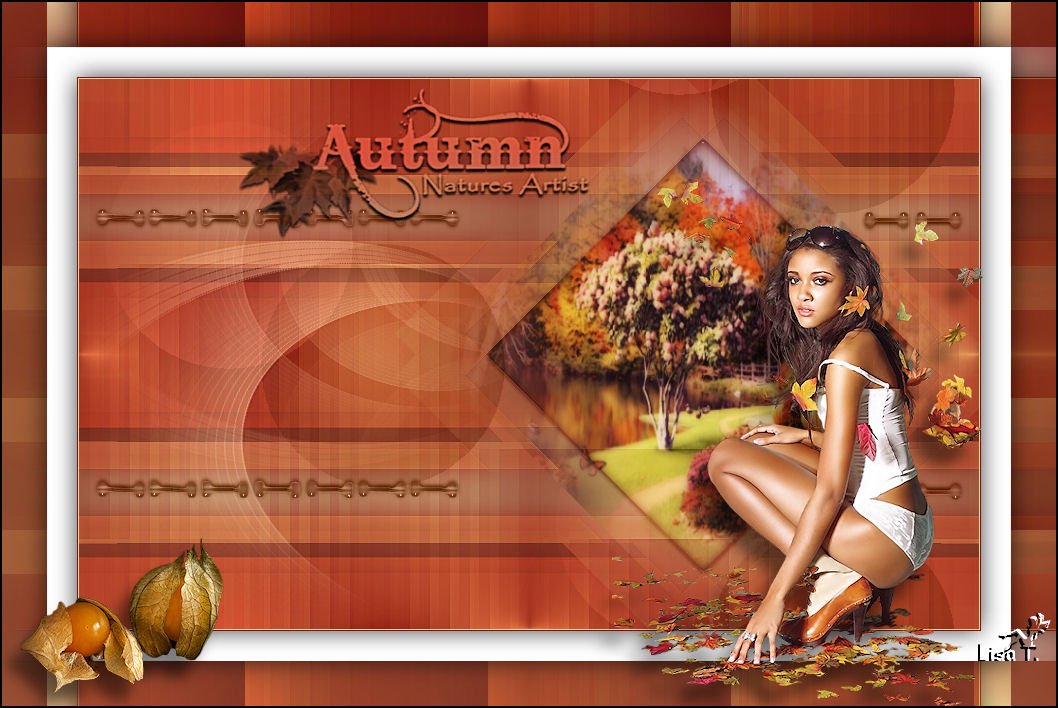
Autumn
original can be found Here

I’m member of TWInc

Material
1 layer alpha_autumn.pspimage
tubes
the mask must be recorded in the corresponding file of My Psp Files

Thank you to the tubers : Cibi Bijoux – Chrismist – Cin (wordart)
Filters used
Toadies – Mehdi – Tramages – Vanderlee (Unplugged X) – Eye Candy 5 Impact – Teph’Tricks
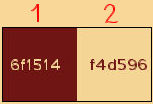
Colors palette
Use the paintbrush to follow the lines
left click to grab it
 |
Realization
choose 2 colors in one of your tubes
(dark color as foreground ans light color as background)
open the Alpha layer - window/duplicate
close the original, and work with the copy
effects/plugins/Mehdi/Wavy Lab 1.1
adjust/blur/gaussian blur -> 40
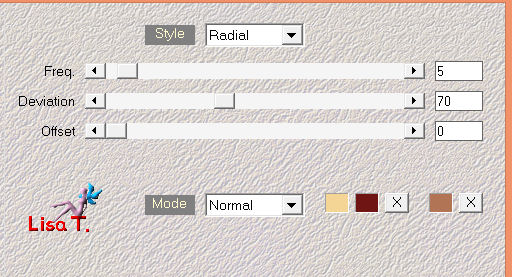
effects/distortion effects/pixelate
adjust/sharpness/sharpen more
activate the lighten/darken brush
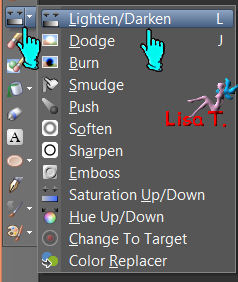
with the following settings

selections/load-save selection/from alpha channel/selection #1
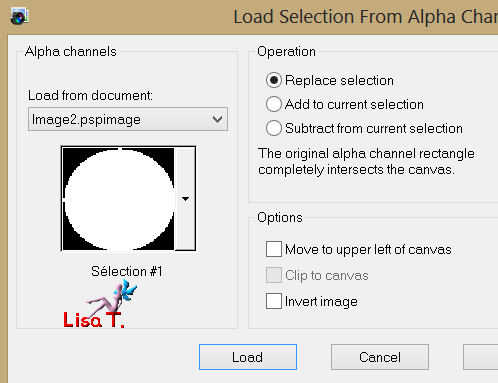
place the brush on the selection and left click 3 times (to lighten)
selections/load-save selection/from alpha channel/selection #
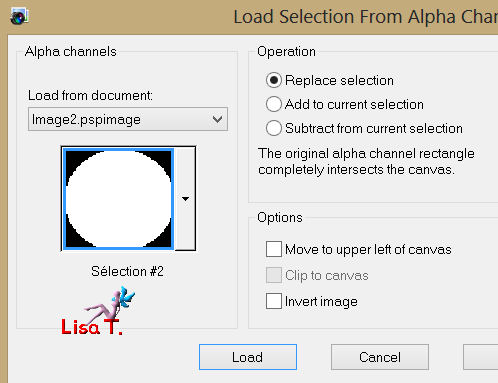
again place the brush on that selection and right click 3 times (to darken)
selections/select none
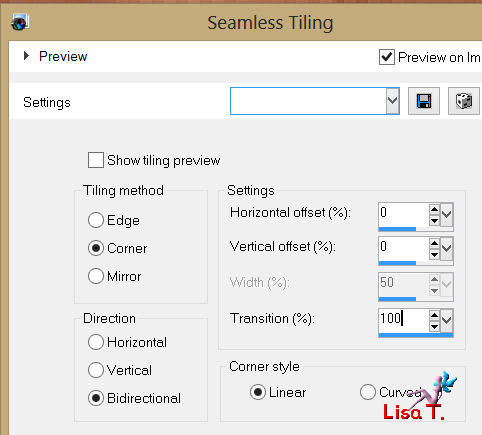
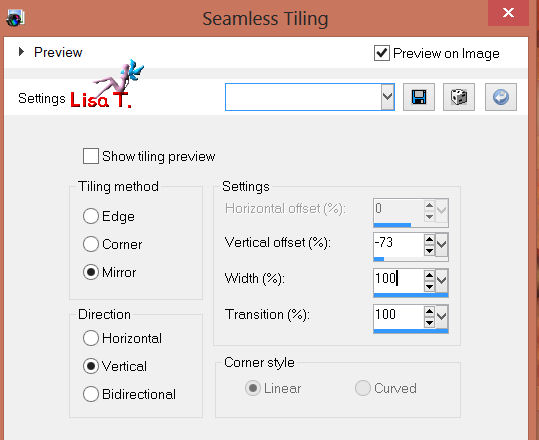
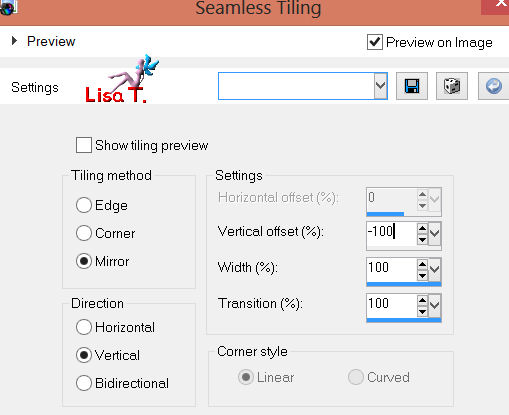
effects/image effects/seamless tiling
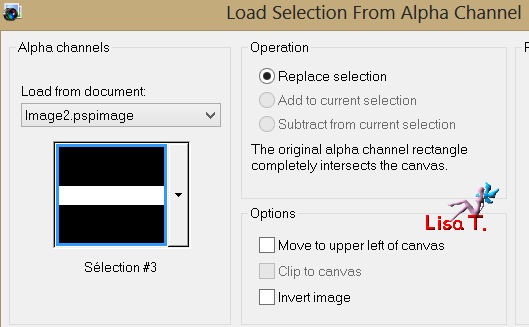
selections/load-save selection/from alpha channel/selection #3
selections/promote selection to layer
paint your dark color in this layer with the following settings for the flood fill tool

selections/modify/contract /15 pixels
effects/3D effects/drop shadow : 0 / 0 / 45 / 20 / black and select none
apply the same dropped shadow on this deselected layer
layers/duplicate
effects/plugins/Teph’s Tricks/Slide Y 50% and merge down
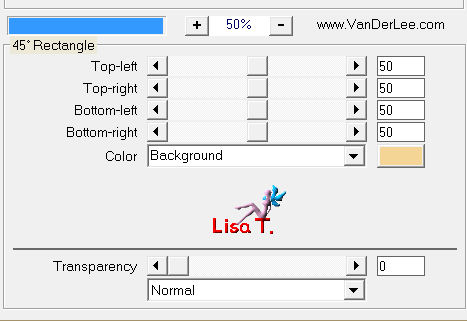
effects/plugins/Vanderlee/Unplugged X/45° rectangle/background color
image/mirror
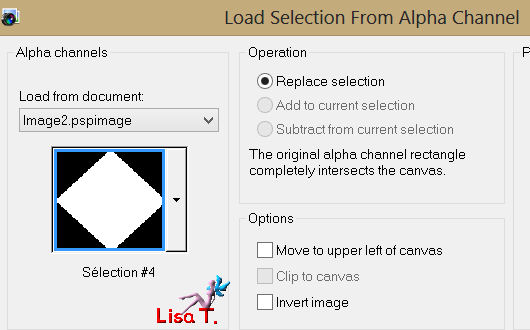
selections/load-save selection/from alpha channel/selection #4
press the delete key of your keyboard (or do : edit/cut)
selections/select none
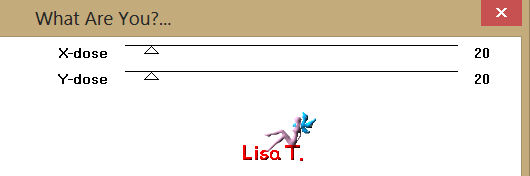
effects/plugins/What Are You?
effects/3D effects/drop shadow : 0 / 0 / 45 / 20 / dark color (do that twice)
in the layers palette, set the blend mode of the layer to “darken” or “hard light”
according to your tubes and colors
and set the opacity to 80%
adjust/sharpness/sharpen
selections/load-save selection/from alpha channel/selection #4
layers/new raster layer
activate the landscape tube
edit/copy and back on your work edit/paste into selection
layers/arrange/move down
in the layers palette, set the opacity to 57%
selections/modify/contract/40
layers/promote selection to layer
effects/plugins/Eye Candy 5 Impact/Glass
choose the preset “CLEAR” and select none
in the layers palette, set the blend mode to “overlay” (or other if you like)
and opacity : 80%
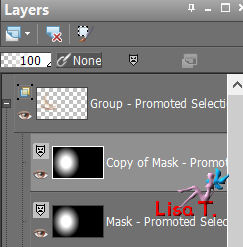
your layers palette should be like this
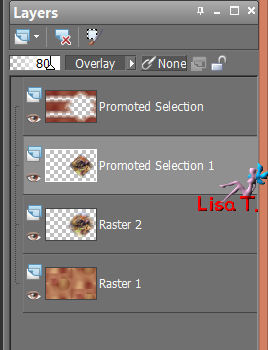
activate the bottom layer (raster 1)
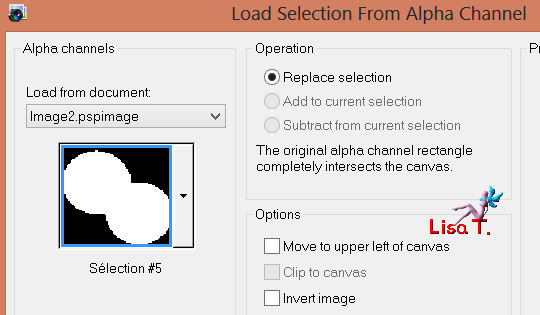
selections/load-save selection/from alpha channel/selection #5
selections/promote selection to layer
layers/arrange/bring to top and select none
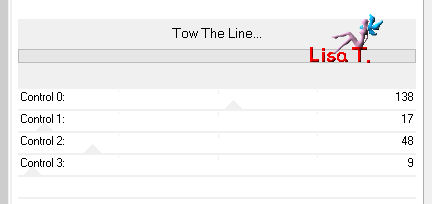
effects/plugins/Tramages/Tom the Line
effects/3D effects/drop shadow/ 0 / 0 / 45 / 20 / black
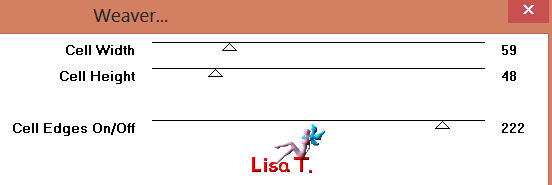
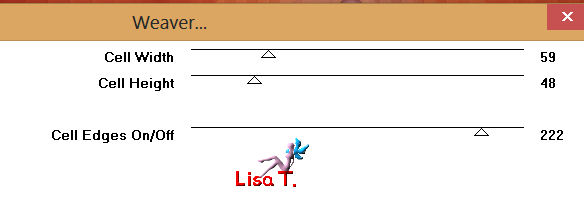
effects/plugins/Toadies/Weaver/default settings
effects/geometric effects/perspective-vertical
effects/image effects/seamless tiling
image/flip
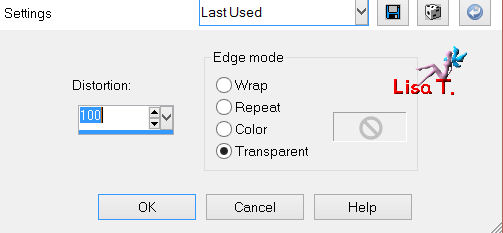
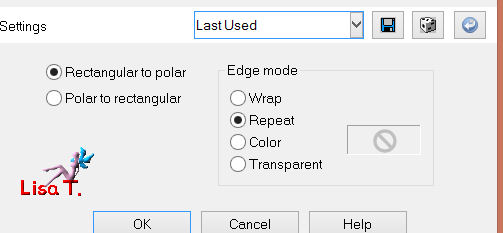
effects/distortion effects/polar coordinates
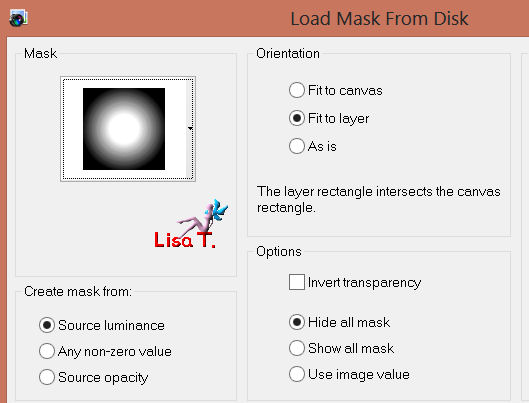
layers/load-save mask/from disk and find mask 20/20
(it is very important to load mask from disk
because the effect is different if you apply the mask another way)
layers/duplicate the mask
layers/merge/merge group
effects/image effects/seamless tiling
image/flip
adjust/sharpness/sharpen more
in the layers palette, set the blend mode to “screen” and the opacity to 80%
layers/merge/merge all (flatten)
image/add borders/1 pixel/light color
image/add borders/1 pixel/dark color
selections/select all
selections/add borders/30 pixels : white
effects/3D effects/ drop shadow : 0 / 0 / 70 / 35 / black - and select none
image/add borders/45 pixels/contrasting color
activate the magic wand tool, default settings, and select this border
with the colors you chose, prepare a linear gradient 0 / 0 (enable “invert”)
and paint the selected border (set the opacity of the flood fill tool to 100)
effects/plugins/Toadies/Weaver
selections/promote selection to layer
image/flip
selections/defloat
in the layers palette, set the blend mode to “multiply” (or other) and the opacity to 80%
layers/merge/merge down
selections/invert
effects/3D effects/drop shadow : 0 / 0 / 70 / 35 / black and select none
activate the tube “deco vivi”, copy and paste as a new layer
don’t move it
you can colorize it or set the blend mode to luminance or luminance(legacy) if you like
activate the tube “beauty 101autumn2”, resize to 75%
image/mirror
copy and paste as a new layer, and move it as shown on the final result
adjust/sharpness/sharpen
effects/3D effects/drop shadow

activate the tube “calguislampion”, resize to 50%
copy and paste as a new layer, move it to the left (see final result)
drop shadow as before
adjust/sharpness/sharpen
activate the tube “wordartcolorisevivi”, copy and paste as a new layer
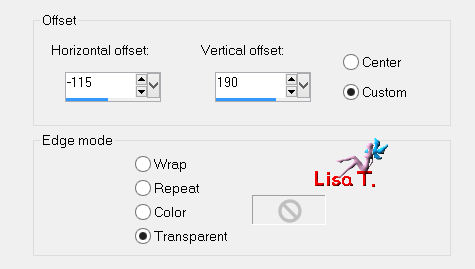
effects/image effects/offset
in the layers palette, set the blend mode to “luminance (legacy)” or “luminance”
or colorize if you like
layers/new raster layer and apply your watermark
layers/merge/merge all (flatten)
image/add borders/2 pixels/black
resize if necessary, save as... type JPEG
thank you to have realized this tutorial
If you wish Vivi to expose your creation, don’t hesitate to send it to her

it will be her pleasure to present it in the gallery of the tutorial
My try with my tubes
Back to the boards of Vivi's tutorials
board 1  board 2 board 2

|