The lady

You will find the original tutorial here :

This tutorial is a personal creation.
Any resemblance with another one would be only pure coincidence.
It is stricly forbidden to modify tubes, to change their name or take off the matermarks,
To present them on your sites or blog,
To share them in groups,
to make a bank of images, or to use them on lucrative purposes.

Thank you to respect Animabelle’s work and the tubers work.
Don’t hesitate to warn me if you have any trouble with this translation


Material
tubes and selections


Filters (plugins) used
Tramages
Alien Skin Eye Candy 5: Impact
AP 01 [Innovations]

use the pencil to you follow the steps
hold down left click of your mouse to grab it and move it


Important
Open all images with PSP, duplicate them and close the originals.
Never work on original images.
Animabelle and I work with PSPX9
but you can follow this tutorial with another version of PSP.
The results might be slightly different according to the version of PSP you use

realization
1
don’t forget to save your work often
thank you to Linette for her tutorial for the function Mirror and Flip

with the drop tool, pick 2 colors into your main tube
Animabelle chose these colors
color 1 -> foreground color -> #ffffff ( white)
color 2 -> Background color -> #5d2436 (dark violet)
don’t hesitate to change the colors and the blend mode or opacities of the layers if necessary
2
open a new transparent image 900 * 600 pixels
selections tool -> rectangle -> custom selection

with the following settings
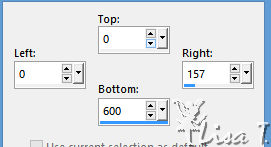
flood fill selection with color 1
effets -> texture effects -> blinds -> color 2
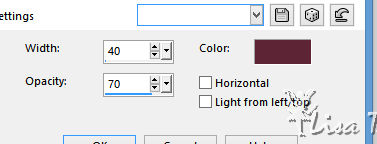
selections -> select none
3
layers -> new raster layer
selections tool -> rectangle -> custom selection
with the following settings
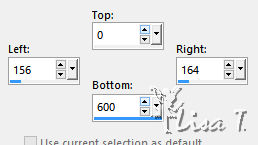
flood fill selection with color 2
effects -> texture effects -> weave -> color 1
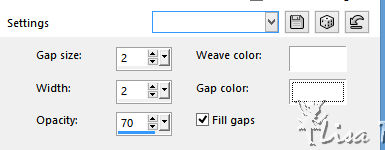
selections -> select none
layers -> duplicate
effects-> image effects -> offset -> 110 / 0 / check « custom » and « transparent »
layers -> merge -> merge down
4
activate the magic wand toot -> tolerance and feather : 0 / check « inside »
select the empty part between the two vertical bars
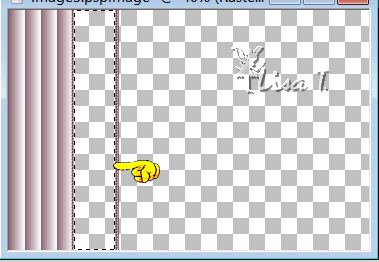
layers -> new raster layer
flood fill selection with coloe 1
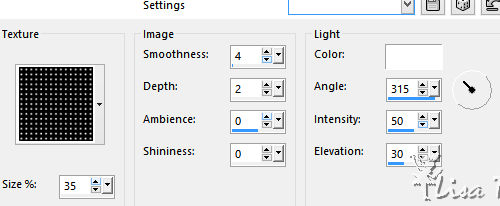
effects -> texture efects -> texture « grid » (but you can use another texture you like better)
5
layers -> new raster layer
selections -> load-save selection -> from disk -> selection « mademoiselle1_animabelle »
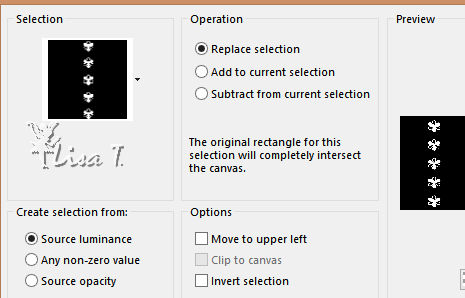
flood fill selection with color 2
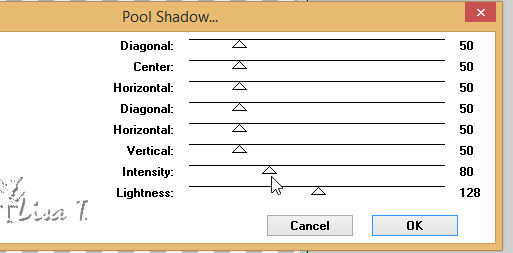
effects -> plugins -> Tramages -> Pool Shadow
selections -> select none
effects -> 3D effects -> drop shaodw -> 3 / 3 / 65 / 10 / color #431a27
6
layers -> new raster layer
selections -> load-save selection -> from disk -> selection « mademoiselle2_animabelle »
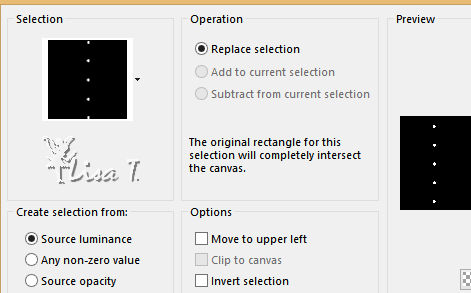
flood fill selection with color 2
effects -> plugins -> Alien Skin Eye Candy 5: Impact - Glass / Clear
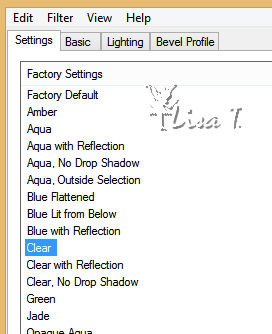
selections -> select none
7
layers -> merge -> merge visible
effects -> 3D effects -> drop shaodw -> 0 / 15 / 50 / 30 / #431a27
layers -> duplicate
image -> mirror -> mirror horizontal
layers -> merge -< merge down
8
layers -> new raster layer
layers -> arrange -< move down
selections -> select all
flood fill selection with coloe 1
copy / paste « Misted_Demoiselle_Animabelle » into selection
selections -> select none
effect s-> reflection effects -> kaleidoscope
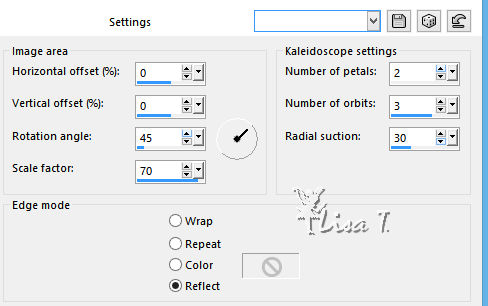
effects -> plugins -> Tramages - Wee Scratches / default settings
effects -< image effects -> seamless tiling / default settings
9
copy / paste « Misted_Demoiselle_Animabelle » as new layer
image -> resize -> uncheck « resize all layers » -> 70%
don’t move this layer
adjsut -> sharpness -> sharpen
layers -> merge -> merge visible
10
selections -> select all
image -> add borders -> check « symmetric » -> 8 pixels color 1
selections -> invert
effects -> texture effects -> weave / color 2
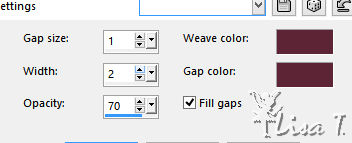
effects -> 3D effects -> inner bevel
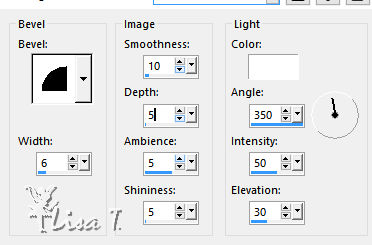
selections -> invert
effects -> 3D effects -> cutout / color #431a27
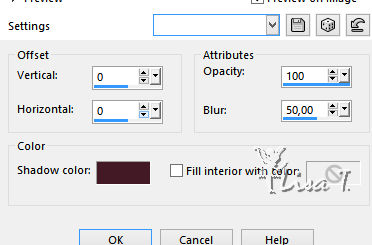
11
selections -> select all
image -> add borders -> check « symmetric » -> 40 pixels color 1
selections -> invert
flood fill selection with the following gradient
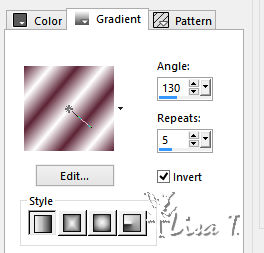
ajust -> blur -> gaussian blur / 15
12
effects -> plugins -> AP 01 [Innovations] -> Lines -> SilverLining -> Backslash
change the last 3 colors according to your own colors
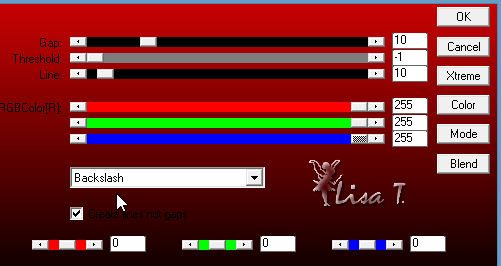
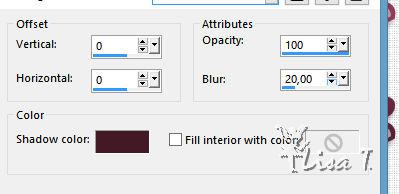
effects -> 3D effects -> cutout / color #431a27
blur / 20
selections -> select none
13
copy / paste « 157_tubes_enfantin_Animabelle » as new layer
erase the watermark
iamge -> mirror -> mirror horizontal
image -> resize / 90%
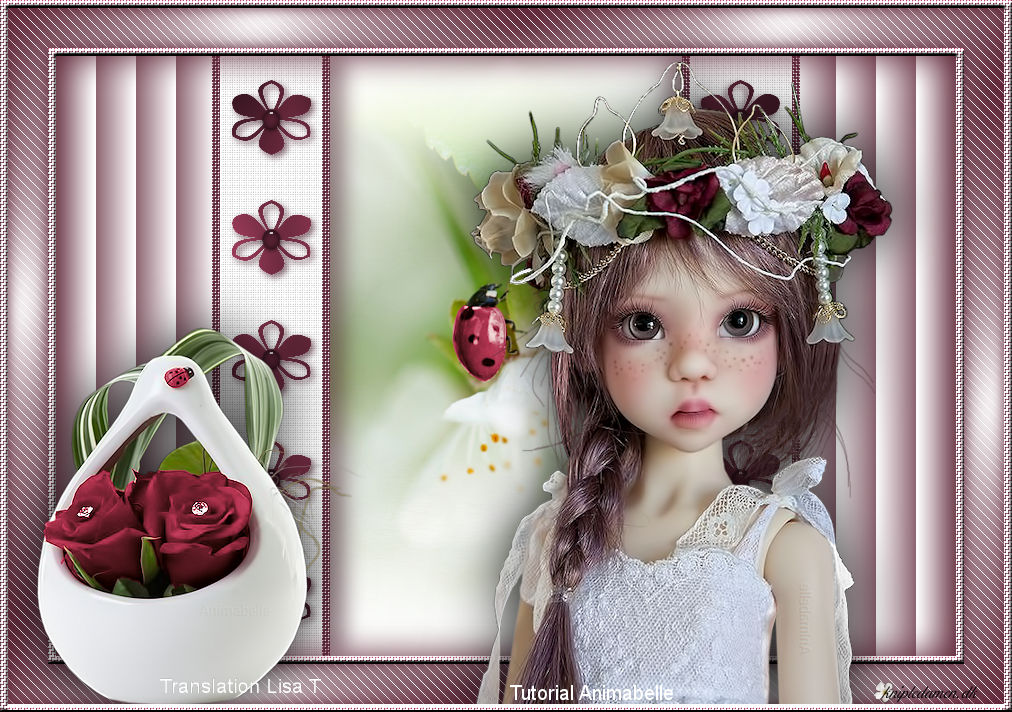
move the tube to the right (see final result)
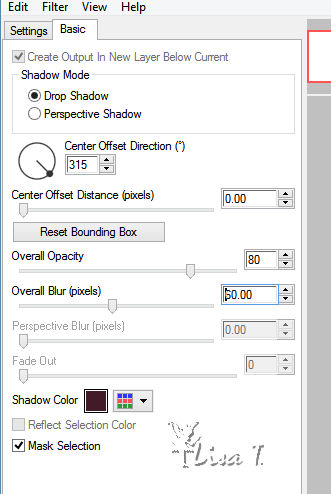
effects -> plugins -> Alien Skin Eye Candy 5: Impact -> Perspective Shadow
in the tab « basic » / color #431a27 (change it according to your colors)
14
copy / paste « Fleurs_Demoiselle_Animabelle » as new layer
image -> resize / 90%
adjust -> sharpness -> sharpen
move it bottom left (see final result)
effects -> plugins -> Alien Skin Eye Candy 5: Impact -> Perspective Shadow / same settings as before
15
selections -> select all
image -> add borders -> 8 pixels color 1
selecitons -> invert
effects -> texture effects -> weave (as before)
effect s-> 3D effects -> inner bevel (as before)
selections -> select none
16
layers -> new raster layer
apply your watermark
layers- merge -> merge all (flatten)
your tag is finished
file -> save as... type .jpeg

Don't hesitate to write to Animabelle if you have any trouble with her tutorial
To be informed about her new tutorials, join her NewsLetter (see on her home page)
If you create a tag (using other tubes than those provided) with this tutorial
and wish it to be shown, send it to Animabelle !
It will be a real pleasure for her to add it to the gallery at the end of the tutorial


My creation with my tubes


created by ▼ Birte

back to the boards of Animabelle’stutorials
board 1  board 2 board 2 

|