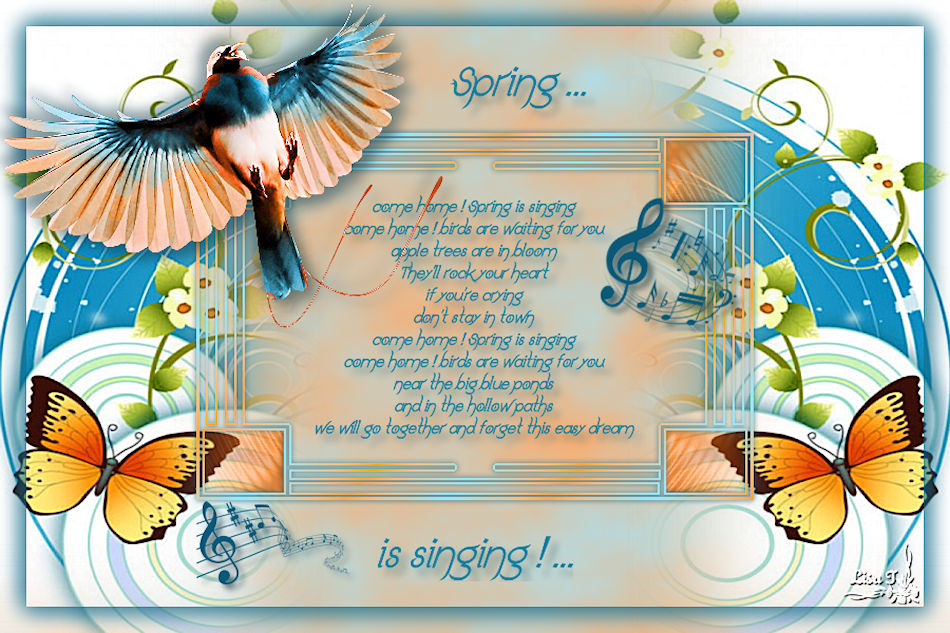
Spring is Singing !!!

You will find the original tutorial here :


This tutorial is a personal creation.
Any resemblance with another one would be only pure coincidence.
It is stricly forbidden to modify images, to change their name or take off the matermarks,
To present them on your sites or blog,
To share them in groups,
to make a bank of images, or to use them on lucrative purposes.

Thank you to respect Animabelle’s work and the tubers work.
Don’t hesitate to warn her if you have any trouble with this tutorial.


Material
1 tube - 1 image - 1 brush tip - one font - 1 alpha layer

Animabelle’s important note
Tubers have been warned that disrespectful and dishonest bloggers come steeling our tubes
they grab them into the folders of material we provide with our tutorials.
These people rename and convert the tubes to png type,
and then they offer them for download in their blogs, pretending they have done the work.

To protect my work, I am therefore forced to no longer provide my tubes with the material.
Honest people will understand my way of doing, I hope.
I thank them for their understanding.
Very important Tip:
never take your tubes on these blogs, because most of the time all of these tubes are stolen tubes.
Always make sure that the tubes you take have been signed by their authors !
Thank you.
|
Filters used
<I.C.NET Software> Filters Unlimited 2.0
VM Toolbox
&<Sandflower Specials°v° >
Filter Factory Gallery B
AAA Frames

“Renée Graphisme” filters, with her kind permission

translator’s note : Animabelle and I use PSP18, but this tutorial can be realized with another version.
I translate exactly the indications of Animabelle

Colors used
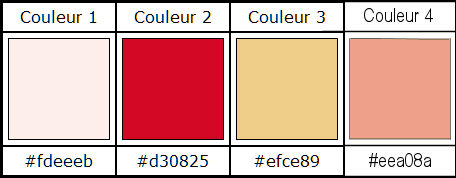
Don't hesitate to change the colors and the blend mode of the layers, and the shadows,
according to your tubes and images.

Important
Open all images in PSP, duplicate them and close the originals.
work with the copies

use the pencil to follow the steps
left click to grab it


Execution
1
choose 2 light colors in your image
Animabelle chose color 1 as FG color and color 4 as BG color
if you look at her second version of this tutorial, she chose colors 1 and 2
2
open the alha layer (selections are registered on the alpha channel of this layer)
window -> duplicate
close the original and work with the copy. Never work with originals !
3
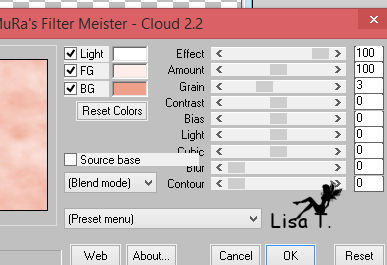
effects -> plugins -> Mura’s Meister / Cloud (default settings)
4
layers -> new raster layer
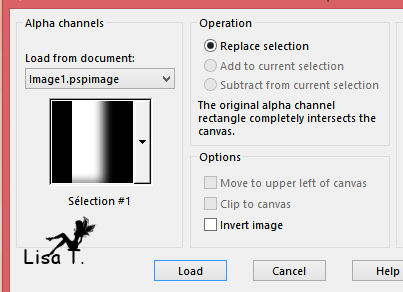
selections -> load-save selection -> from alpha channel -> selection #1
activate the flowery image of your choice
with the selection tool, rectangle, select a very colourful and flowery part
edit -> COPY
5
back to your tag - edit -> paste into selection
selections -> select none
adjust -> sharpness -> sharpen more
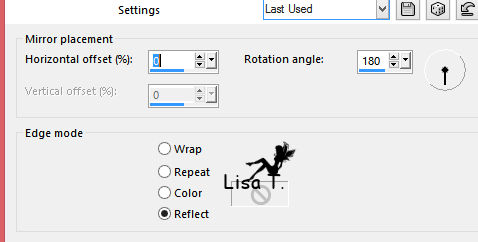
effects -> reflection effects -> rotating mirror
6
layers -> new raster layer
selections -> load-save selection -> from alpha channel -> selection #2
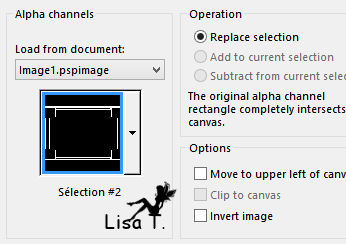
zoom in as much as possible to see the selection and flood fill with the following gradient
color 2 as FG color and color 3 as BG color
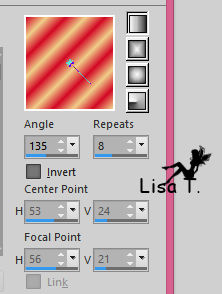
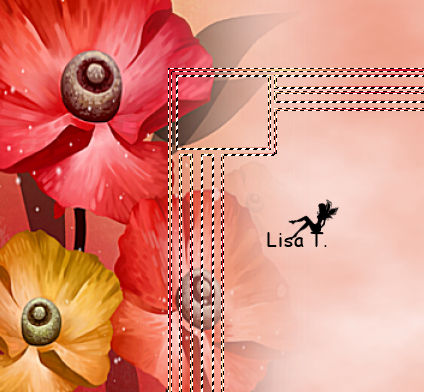
7
effects -> plugins -> Unimited 2 -> &<Sandflower Special°v°> / Coor Boosterz
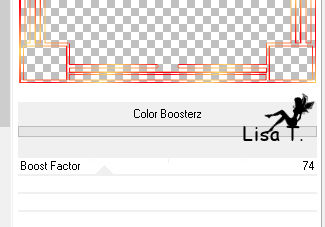
selections -> select none
effects -> 3D effects -> drop shadow -> 0 / 0 / 100 / 8 / color #8311717
8
activate bottom layer (Raster 1)
selections -> load-save selection -> from alpha channel -> selection #3
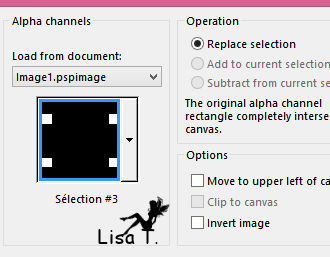
layers -> new raster layer
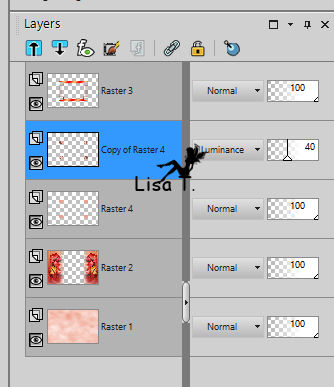
flood fill with color 4
layers -> duplicate
9
effects -> plugins -> Filter Factory Gallery B / Zero Tolerance...
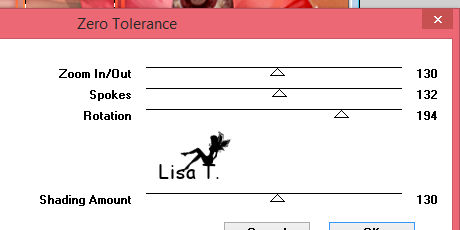
blend mode of the layer : Luminance (Legacy) / opacity : 40%
10
effects -> 3D effects -> inner bevel
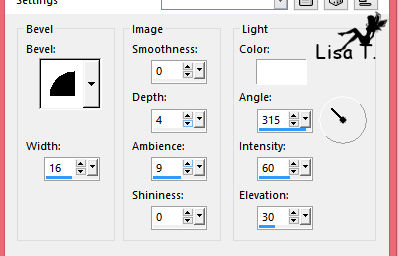
selections -> select none
11
activate top layer
activate the text tool, color 2 as FG and BG color

fonts are provided
open the « bloc note » provided
select the entire text / COPY
back to your tag - edit -> paste as new layer
12
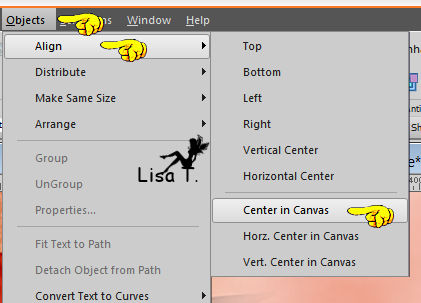
object -> align -> center in canvas
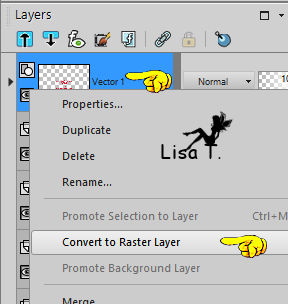
in the layers palette, right click on the layer and « convert to raster layer »
13
effects -> 3D effects -> drop shadow -> 7 / 7 / 40 / 10 / color #b50902
don’t hesitate to change the color according to your own colors
(if you have troubles creating the text tube, it is provided in the material)
14
layers -> merge -> merge vsible
layers -> duplicate
effects -> plugins -> AAA Frames -> Transparent Frame
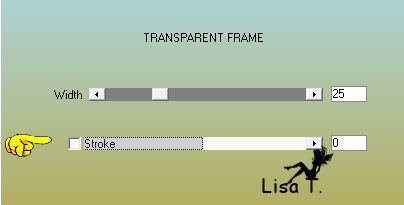
effects -> 3D effects -> drop shadow -> 0 / 0 / 100 / 20 / color #580e0f
drop shadow again if you wish
15
activate the text tool
choose a larger size for the font (for instance : 40)
write « There is Spring »
convert to raster layer (as before)
move this layer to the top of the tag (see final result)
effects -> 3D effects -> drop shadow -> 7 / 7 / 40 / 10 / color #b50902
16
write « that sings » (of course you can change the text)
convert to raster layer (as before)
move this layer to the bottom
effects -> 3D effects -> drop shadow -> 7 / 7 / 40 / 10 / color #b50902
17
copy / paste your main tube
move it where you like
drop a shadow of your choice
18
open the brush tip « Note_Musique_Animabelle »
file -> export -> custom brush -> give it a name
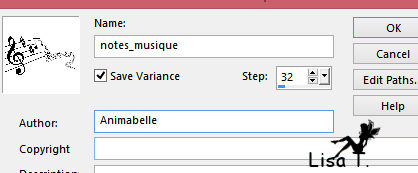
other brushes are provided, choose the one you like best
19
layers -> new raster layer
set color 2 as FG color
activate the paint brush tool, find the tip you’ve been creating in step 18

apply this brush where you like with the left click of your mouse
effects -> 3D effects -> drop shadow -> 5 / 5 / 0 / 8 / color #4f10b0c
you can stamp other brushes if you like
20
activate top layer
layers -> new raster layer
flood fill with color #580e0f
selections -> select all
selections -> modify -> contract -> 2 pixels
edit -> cut
selections -> select none
21
layers -> merge -> merge all (flatten)
apply your watermark and save as ... type .jpeg

Don't hesitate to write to Animabelle if you have any trouble with her tutorial
To be informed about her new tutorials, join her NewsLetter

If you create a tag with her tutorial and wish it to be shown,
send it to Animabelle !
It will be a real pleasure for her to add it to the gallery at the end of her tutorial
don’t resize your tag under 800 pixels width if you want her to present your tag


my tag with my tubes
Back to the board of Animabelle's tutorials
board 1  board 2 board 2 

|