
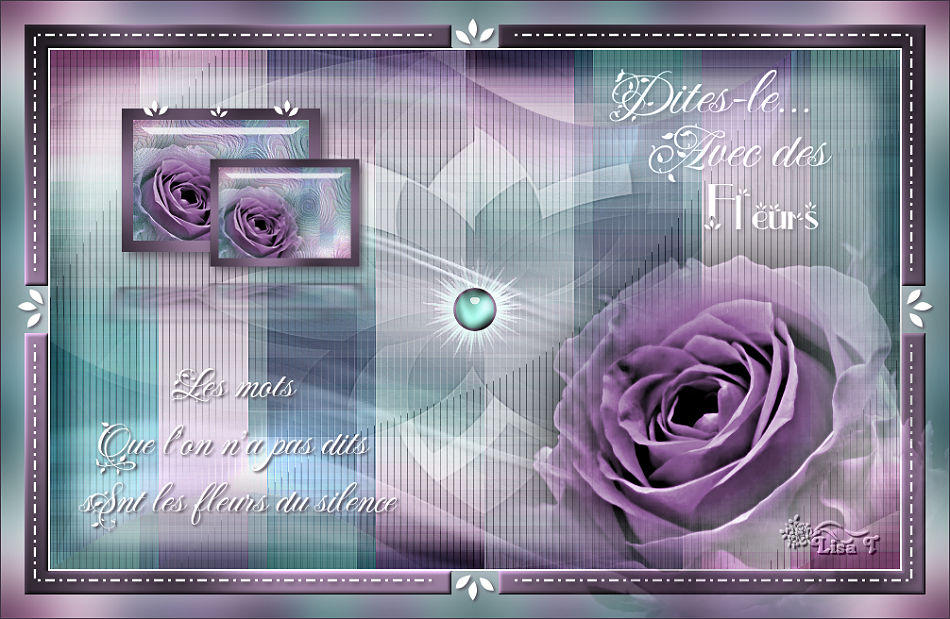
You will find the original tutorial here :

This tutorial is a personal creation.
Any resemblance with another one would be only pure
coincidence.
It is stricly forbidden to modify tubes, to change
their name or take off the matermarks,
To present them on your sites or blog,
To share them in groups,
to make a bank of images, or to use them on lucrative purposes.

Thank you to respect Animabelle’s work and the tubers
work.
Don’t hesitate to warn me if you have any trouble
with this translation,
and I’ll try to fix the problem as quickly as I can


Material
masks - selections - tubes

TIP 1 -> if
you don’t
want to install a font -->
open it in a software as « Nexus Font » (or
other font viewer software of you choice)
as long as both windows are opened (software and font),
your font will be available in your PSP
TIP 2 -> from PSPX4,
in the later versions of PSP the functions « Mirror » and « Flip » have
been replaced by -->
« Mirror » --> image -> mirror -> mirror horizontal
« Flip » --> image -> mirror -> mirror vertical

Filters (plugins) used
Mehdi
Tramages
Xero
Alien Skin Eye Candy 5: Impact
---------------
<I.C.NET Software > - Filters Unlimited 2.0
Déformation
Toadies
Tile et Mirror
thank you Renée Salon for sharing your plugins ‘ page


Use the pencil to follow the steps
hold down left click to grab it and move it
 |

1
open the masks and minimize to tray
place the selections into the dédicated folder of
My PSP general folder
open the tubes, duplicate and close the originals
work with the copies
2
pick up 5 colors in your tubes
Animabelle chose these
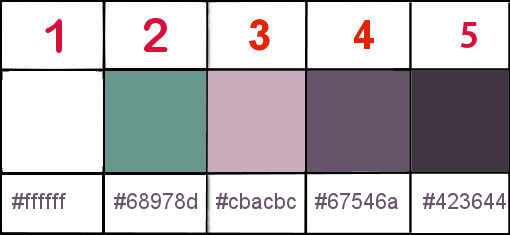
don’t hesitate to change blend modes and opacities
to match your colors
3
open a new transparent image 900 * 550 px
effects -> plugins -> Mehdi / Wavy Lab 1.1 -> color
3 / 2 / 1 / 4
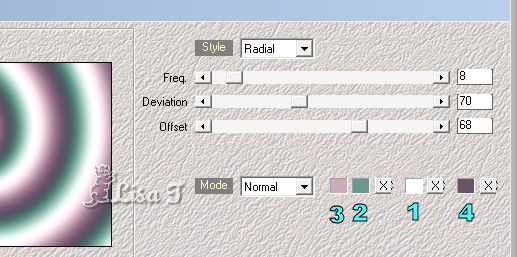
adjust -> blur -> gaussian blur / 30
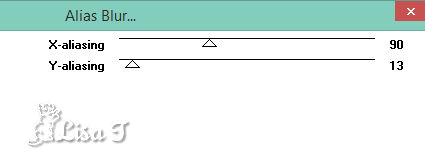
effects -> plugins -> Unlimited 2 -> Déformation
/ Alias Blur...
4
layers -> duplicate
image -> mirror -> mirror horizontal
image -> mirror -> mirror vertical
blend mode of the layer : overlay
layers -> merge -> merge down
adjust -> sharpness -> sharpen more
layers -> duplicate
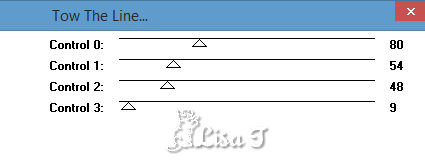
effects -> plugins -> Tramages -> Tow The Line
/ default settings
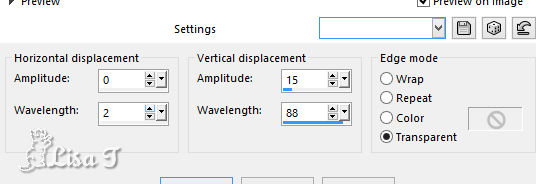
effects -> distortion effects -> Wave
blend mode of the layer : Multiply - opacity : 30%
layers -> duplicate
effects -> image effects -> seamless tiling / default
settings
blend mode of the layer : burn - opacity : 30%
layers -> merge -> merge visible
5
selections -> load-save selection -> from disk -> selection « ADF_Sel1_Animabelle.pspimage »
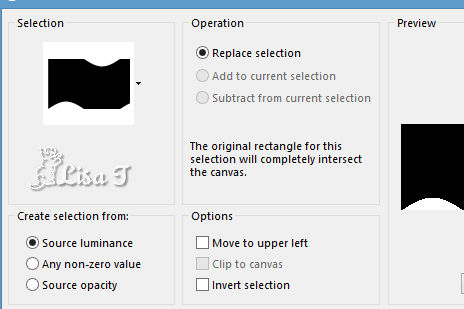
selections -> promote selection to layer
selections -> select none
effects -> 3D effects -> drop shadow -> 0 / 0
/ 75 / 55 / color 4
layers -> duplicate
highlight « promoted selection »
effects -> plugins -> Unlimited 2 -> Toadies
/ Weaver / default settings
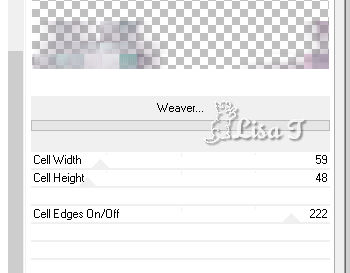
blend mode of the layer : dodge
adjust -> blur -> radial blur

6
highlihgt top layer
layers -> new raster layer
flood fill with color 1
layers -> new mask layer -> from image
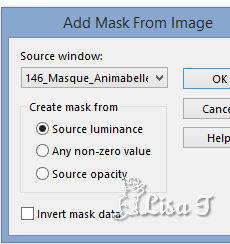
layers -> duplicate
layers -> duplicate once more
layers -> duplicate a third time
layers -> merge -> mege group
7
effects -> distortion efects -> polar coordinates
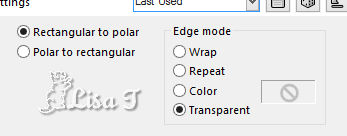
blend mode of the layer : soft light
effects -> 3D effects -> drop shadow -> 0 / 0
/ 75 / 30 / black (or another color of your choice)
adjust -> sharpness -> sharpen more
layers -> merge -> merge visible
8
copy / paste as new layer « Deco1_ADF_Animabelle.pspimage »
don’t move it
effects -> 3D effects -> drop shadow -> 5 / 5
/ 30 / 5 / color 4
blend mode of the layer : Luminance (Legacy)
9
highlight bottom layer
edit -> COPY
highlight top layer
layers -> new raster layer
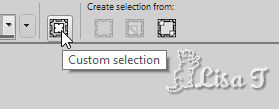
enable the selection tool / rectangle -> custom selection
 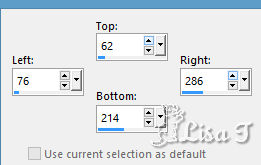
flood fill selection with color 4 (or other)
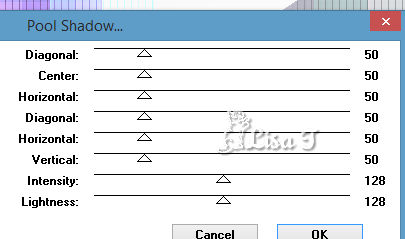
effects -> plugins -> Tramages / Pool Shadow / default
settings
10
adjust -> blur -> gaussian blur / 15
selections -> modify -> contract 12 px
edit -> DELETE on your keyboard
edit -> paste into selection
layers -> duplicate
effects -> artistic effects -> Enamel
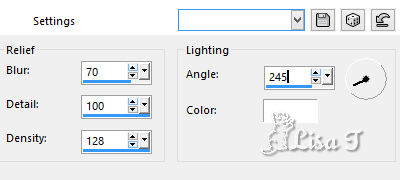
opacity of the layer : 65%
layers -> merge -> merge down
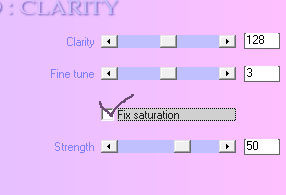
effects -> plugins -> Xero / Clarity
11
copy / paste as new layer « Animabelle_Misted_Avec_des_fleurs.pn » (erase
the signature)
image -> UNtick « resize all layers » -> 35%
image -> mirror -> mirror horizontal
(don’t close it, you will need it later)
adjust -> sharpness -> sharpen
move the tube in left corner
selections -> invert
edit -> CUT
selections -> invert once » more
layers -> new raster layer
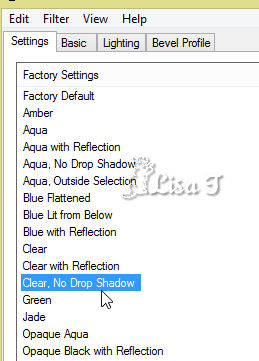
effects -> plugins -> Alien Skin Eye Candy 5 Impact
/ Glass / Clear, no drop shadow
 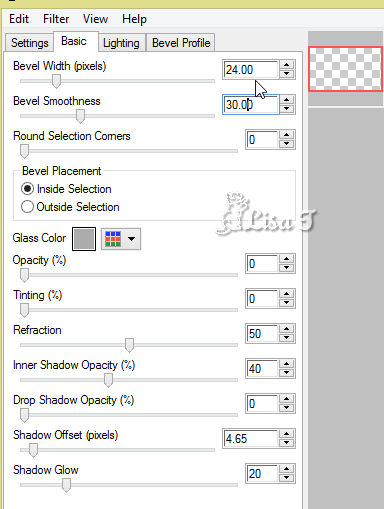
selections -> select none
layers -> merge -> merge down twice
effects -> 3D effects -> drop shadow -> 6 / 6
/ 75 / 15 / color 5
12
layers -> duplicate
image -> UNtick « resize all layers » -> 75%
layers -> merge -> merge down
effects -> plugins -> Alien Skin Eye Candy 5 Impact
/ Perspective Shadow / reflect in front-faint
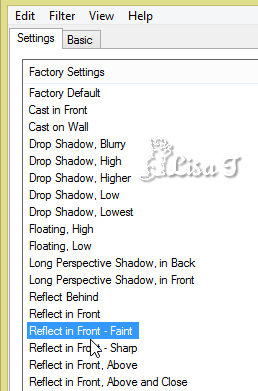
layers - merge visible
13
layers -> duplicate
selections -> select all
selections -> modify -< contract / 30 px
selections -> modify -> feather -> 50
hit the Delete kay of your keyboard 3 times (not more neither
less)
selections -> select none
blend mode of the layer : Multiply
layers -> duplicate
image -> mirror -> mirror horizontal
image -> mirror -> mirror vertical
layers -> merge -> merge visible
14
layers -> new raster layer
selections -> load-save selection -> from disk -> selection « ADF_Sel2_Animabelle.pspimage»
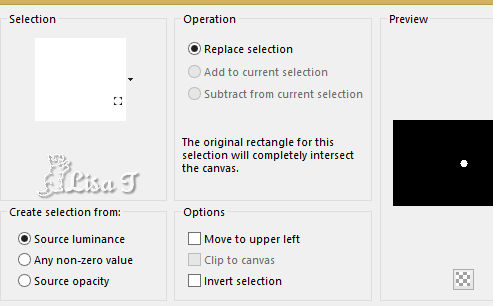
flood fill selection with color 4 (or other)
effects -> plugins -> Tramages -> Pool Shadow
/ same settings as before
selections -> modify -> contract / 3 px
edit -> CUT
15
layers -> new raster layer
selections -> modify -> expand / 1px
flood fill selection with color 2
effects -> plugins -> Tramages -> Pool Shadow
/ same settings as before
adjust -> blur -> gaussian blur / 2
effects -> plugins -> Alien Skin Eye Candy 5 Impact
/ Glass / Clear, no drop shadow
adjust -> sharpness -> sharpen
selections -> select none
layers -> arrange -> move down
highlight layer above -> merge layer down
16
layers -> duplicate
highlight layer below
effects -> plugins -> Unlimited 2 -> Déformation
/ Explosive Blur
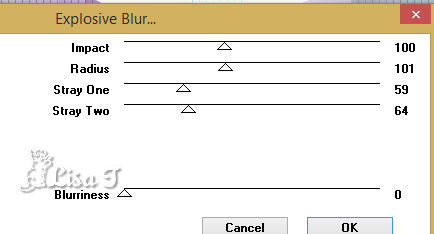
blend mode of the layer : Screen
layers -> merge -> merge all (flatten)
edit -> COPY
17
image -> add borders -> tick « symmetric » -> 2
px color 1
selections -> select all
image -> add borders -> tick « symmetric » -> 50
px color 1
selections -> invert
layers -> new raster layer
edit -> paste into selection
adjust -> blur -> gaussian blur / 40
effects -> plugins -> Unlimited 2 -> Tile and
Mirror / Mirrored & Scaled
18
selections -> load-save selection -> from disk -> selection « ADF_Sel3_Animabelle.pspimage»
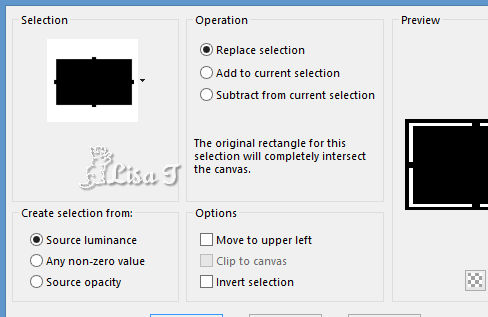
flood fill selection with color 4 (or other)
effects -> plugins -> Tramages -> Pool Shadow
/ same settings as before
effects -> 3D effects -> inner bevel
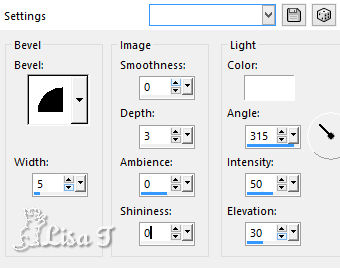
selections -> select
none
19
copy / paste as new layer « Deco2_Animabelle.pspimage »
don’t move it
copy / paste as new layer « Animabelle_Misted_Avec_des_fleurs.png »
move it to lower right corner (see final result)
layers -> duplicate (optional)
effects -> plugins -> Xero / Clarity (optional)
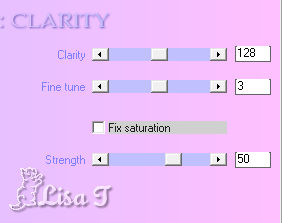
drop a light shadow of your choice (don’t drop any
shadow if you used a misted image)
image -> add borders -> 1 px color 5
20
copy / paste as new layer « Deco3_ADF_Animabelle.pspimage »
don’t move it
effects -> 3D effects -> drop shadow -> 2 / 2
/ 65 / 4 / color 5 (or other)
copy / paste as new layer « Deco4_ADF_Animabelle.pspimage »
move to upper right corner (see final result)
blend mode of the layer : Luminance (Legacy)
copy / paste as new layer « Deco5_ADF_Animabelle.pspimage »
move to lower left corner (see final result)
effects -> 3D effects -> drop shadow -> 2 / 2
/ 100 / 4 / color 4 (or other)
21
highlight top layer
layers -> new raster layer
apply your watermark or signature
file -> export -> type .jpeg optimized
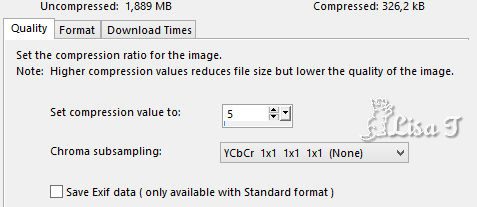
your tag is finished
My tag with my misted image
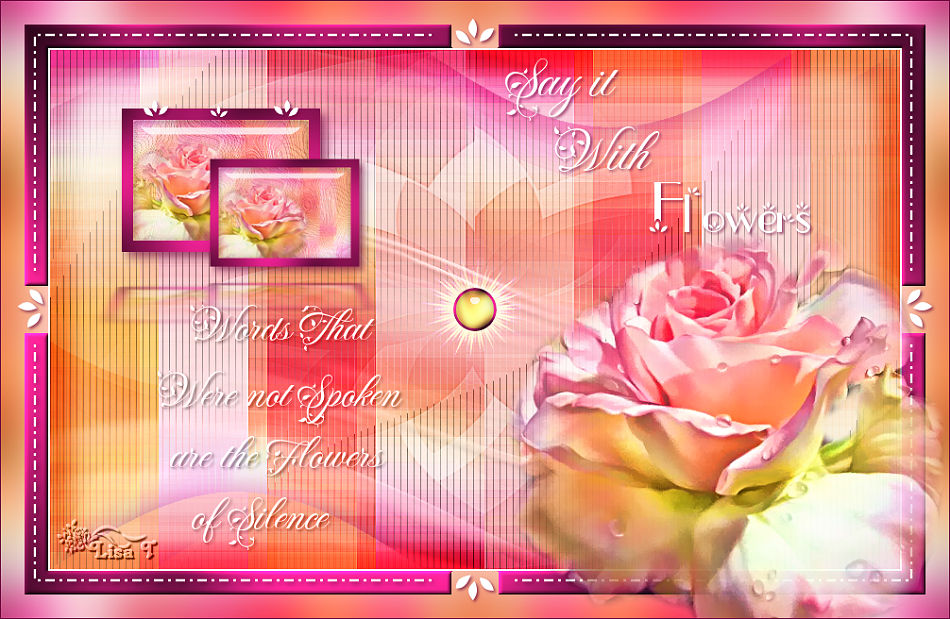

Don't hesitate to write to Animabelle if you have any
trouble with her tutorial
To be informed about her new tutorials, join her NewsLetter
If you create a tag (using other tubes than those
provided) with this tutorial
and wish it to be shown, send it to Animabelle !
It will be a real pleasure for her to add it to the gallery
at the end of the tutorial


back to the boards of Animabelle’s tutorials
board 1  board 2 board 2 board
3 board
3 board 4 board 4

|