
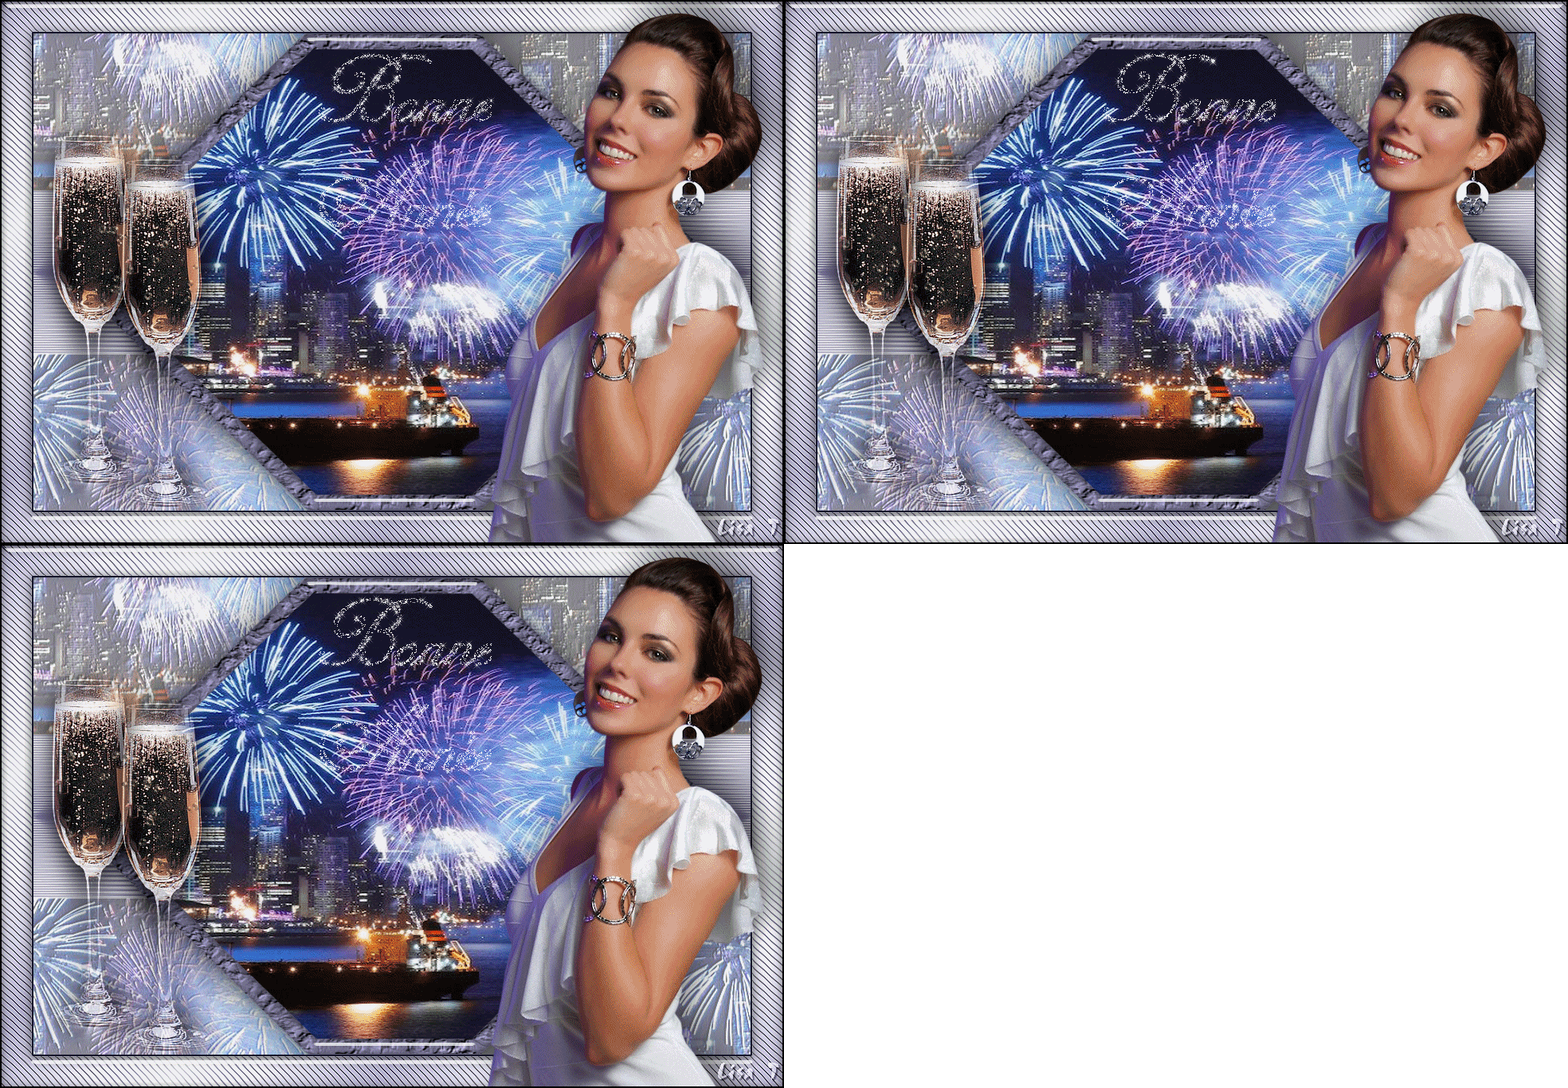
You will find the original tutorial here :

This tutorial is a personal creation.
Any resemblance with another one would be only pure coincidence.
It is stricly forbidden to modify tubes, to change their name or take off the matermarks,
To present them on your sites or blog,
To share them in groups,
to make a bank of images, or to use them on lucrative purposes.

Thank you to respect Animabelle’s work and the tubers work.
Don’t hesitate to warn me if you have any trouble with this translation,
and I’ll try to fix the problem as quickly as I can

Animabelle worked with PSPX2 and I worked with PSP2020
you can follow this tutorial with another version of PSP, but the result might be slightly different

Supplies
Tubes & image – palette – selections - preset

TIP 1 -> if you don’t want to install a font -->
open it in a software as « Nexus Font » (or other font viewer software of you choice)
as long as both windows are opened (software and font), your font will be available in your PSP
TIP 2 -> from PSPX4, in the later versions of PSP the functions « Mirror » and « Flip » have been replaced by -->
« Mirror »has become --> image => mirror => mirror horizontal
« Flip » has become --> image => mirror => mirror vertical

Plugins
Carolaine and Sensibility
Aline Skin Eye Candy 5 / Impact
User defined Filter / Emboss 3
Animation Shop (optional)
Thank you Renée Salon for sharing you plugins page


Use the pencil to mark your place
along the way
hold down left click to grab and move it
 |

Prepare your work
duplicate all the tubes and work with the copies to preserve originals
place the selections into the dedicated folder of « My Corel PSP » general folder
double click on the preset to install
your work often in case of problems with your psp
use the Dropper tool to pick up your colors into your tubes and misted images
Animabelle chose these :
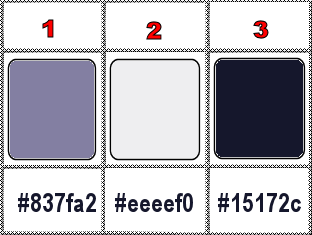
don’t hesitate to change blend modes and opacities of the layers to match your personal colors and tubes
1
open a new image => transparent => 900 * 600 px
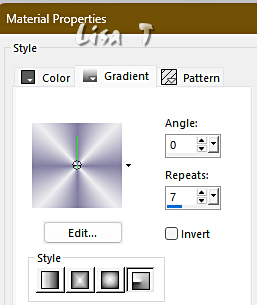
flood fill with the following gradient
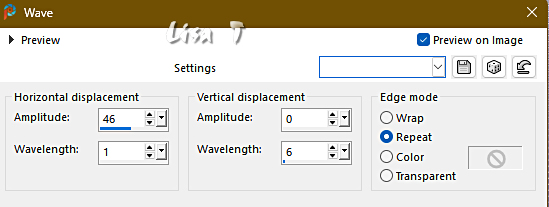
effects => distortion effects => Wave
adjust => sharpness => unsharp mask
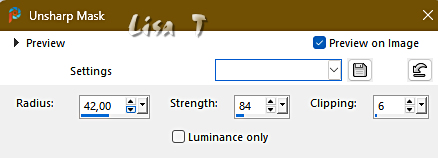
effects => image effects => seamless tiling => default settings
2
layers => new raster layer
selections => load-save selection => from disk => selection # 1
flood fill selection with color 2
layers => new raster layer
copy / paste the image1 into selection
opacity of the layer : 50%
effects => User Defined Filter => Emboss 3
3
layers => new raster layer
selections => load-save selection => from disk => selection # 2
flood fill selection with color 1
effects => texture effects => texture / choose one of your textures (settings you like)
selections => modify => contract => 20 px
edit => cut
4
selections => select all / selections => float / selections => defloat
effects => plugins => Alien Skin Eye Candy 5 Impact / Glass => preset « st_sylvestre_glass_animabelle»
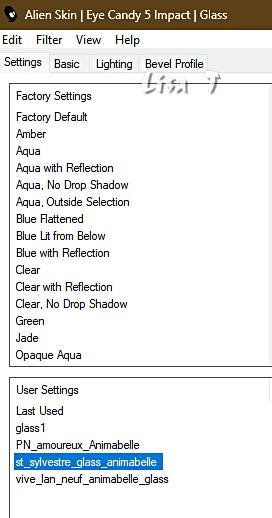
selections => load-save selection => from disk => selection # 2
selections => modify => contract => 20 px
copy / paste the firework image as new layer
image => resize => untick « resize all layers » => 110%
move image properly into selection
selections => invert
edit => cut
selections => select none
layers => merge => merge down
5
enable the Pick tool and stretch left and right
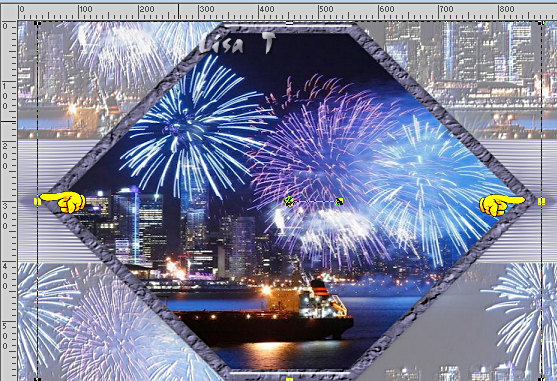
layers => duplicate
highlight layer below (original)
image => resize => untick « resize all layers » => 95%
selections => select all / selections => float / selections => defloat
flood fill selection black
selections => select none
adjust => blur => gaussian blur => 30
highlight top layer
layers => merge => merge down
6
Copy and paste as new layer the glasses tube
Move it to left bottom
adjust => sharpness => sharpen more
7
image => add borders => tick « symmetric » => …
2 px color 3
40 px white
select the 40 px border with the Magic Wand tool
flood fill with the following gradient
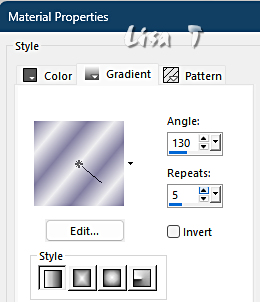
effects => plugins => Carolaine and Sensibility => CS-Dlines
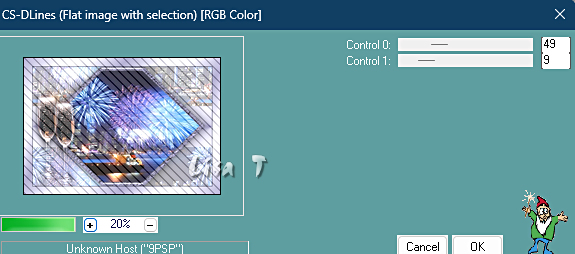
effects => edge effects => enhance
effects => plugins => Alien Skin Eye Candy 5 Impact / Glass => preset « st_sylvestre_glass_animabelle»

selections => select none
8
copy / paste the character tube as new layer
image => mirror => mirror horizontal
image => resize => untick « resize all layers » => 75%
place properly
effects => 3D effects => drop shadow => -15 / -15 / 50 / 60 / black
layers => merge => merge all (flatten)
selections => select all
selections => modify => contract => 2 px
selections => invert
flood fill selection black
selections => select none
apply your watermark or signature on a new layer
write your licence number if you used a licenced tube
layers => merge => merge all (flatten)
file => save your work as... type .jpeg optimized
Animation (optional)
Copy / paste your tag as new animation into Animation Shop
Duplicate 2 times => you obtain 3 identical images
Zoom in to see the first image precisely
edit => select all
highlight first image
open the two animations provided in the Supplies folder => …
(gif_bonne_annee_animabelle) and (gif_petillement_champagne)
highlight the fist one => (gif_bonne_annee_animabelle)
edit => select all
enable the Arrow tool
left-click and hold on the first image
drag onto the first image of your tag
release the left click when you're satisfied with the position
of course, if you're not satisfied, simply go back and repeat the operation
do the same with the second animation
view your animation
save as … type .gif

Another version with my tubes
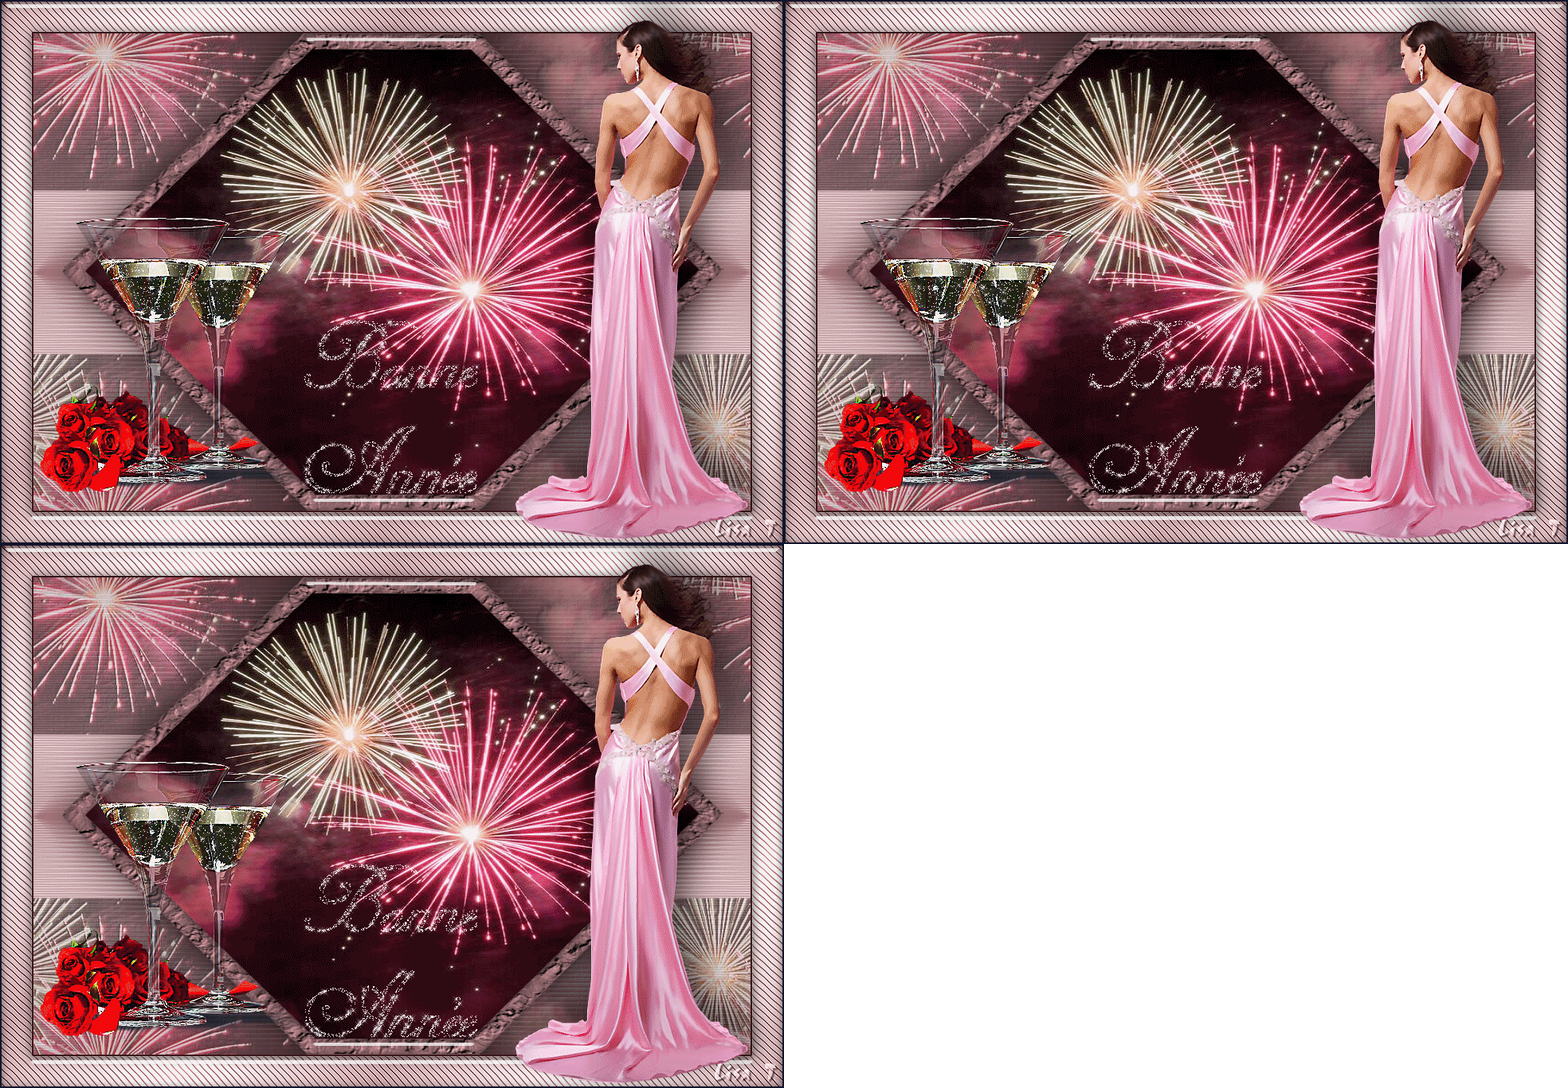

Don't hesitate to write to me if you have any trouble with this tutorial
If you create a tag (using other tubes and colors than those provided) with this tutorial
and wish it to be shown, send it to me !
It will be a real pleasure for me to add it to the gallery at the end of the tutorial


coming ▼ soon

back to the boards of Animabelle’s tutorials
20 tutorials on each board
board 14 => 
at the bottom of each board you will find the arrows allowing you to navigate from one board to another


|