

You will find the original tutorial here
:

This tutorial is a personal creation.
Any resemblance with another one would be only pure coincidence.
It is stricly forbidden to modify tubes, to change their
name or take off the matermarks,
To present them on your sites or blog,
To share them in groups,
to make a bank of images, or to use them on lucrative purposes.

Thank you to respect Animabelle’s work and the tubers
work.
Don’t hesitate to warn me if you have any trouble with
this translation,
and I’ll try to fix the problem as quickly as I can

Animabelle works with PSPX9 and I work with PSP 2019
you can follow this tutorial with another version of PSP,
but the result might be slightly different

Supplies
mask - selections - tubes

place selections into the folder « selections » of
Corel PSP general folder
open the mask and minimize to tray
TIP 1 -> if you don’t want to install
a font -->
open it in a software as « Nexus Font » (or
other font viewer software of you choice)
as long as both windows are opened (software and font),
your font will be available in your PSP
TIP 2 -> from PSPX4,
in the later versions of PSP the functions « Mirror » and « Flip » have
been replaced by -->
« Mirror »has become --> image => mirror => mirror
horizontal
« Flip » has become --> image => mirror => mirror
vertical

Plugins needed
Filters Unlimited 2.0
Carolaine and Sensibility

 
Use the pencil to mark your place
along the way
hold down left click to grab and move it
 |
 
1
duplicate all the tubes and work with the copies to preserve
originals
save your work often in case of problems with your psp
2
use the Dropper tool to pick up your colors into your tubes
and misted images
Animabelle chose these :
color 1 => #d7cab6
color 2 => #887361
color 3 => #733f42
color 4 => #331e20
don’t hesitate to change blend modes and opacities
of the layers to match your personal colors and tubes
3
open a new transparent image 800 * 500 px
flood fill with the following radial gradient / colors
1 & 2
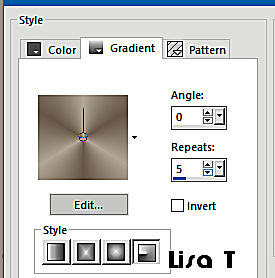
selections => select all
copy / paste into selection « 49_Femmes_Page7_Animabelle »
don’t forget to erase the watermark
selections => select none
adjust => blur => radial blur
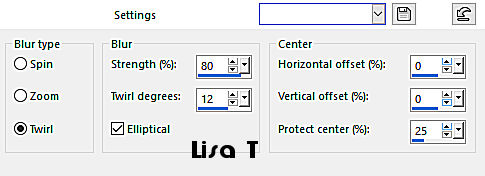
4
layers => duplicate
image => mirror => mirror horizontal
effects => artistic effects => colored foil
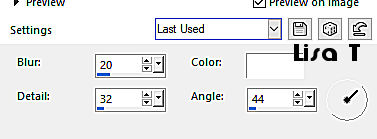
blend mode of the layer : Luminance (Legacy) - opacity :
25%
layers => merge => merge down
effects => edge effects => enhance
5
layers => new raster layer
flood fill with the following radial gradient / colors
3 & 4
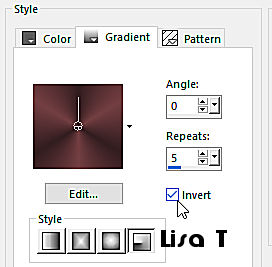
adjust => blur => gaussian blur / 30
layers => new mask layer => from image => choose
mask « Masque1_Romance_Enimabelle »
layers => duplicate
layers => merge => merge group
6
enable the selection tool / Rectangle / custom selection

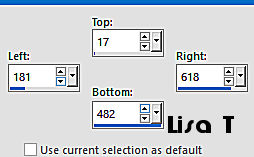
DELETE on your keyboard
selections => select none
7
effects => reflection effects => Kaleidoscope
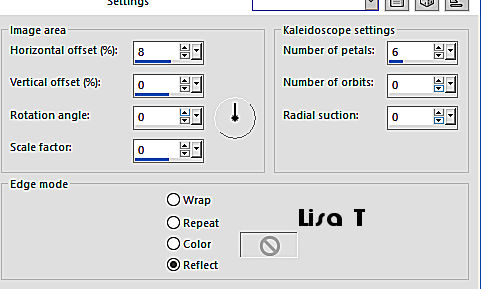
selections => load-save selection => from disk => selection « Sel1_Romance_Animabelle »
DELETE on your keyboard
selections => select none
effects => 3D effects => drop shadow => 6 / 6
/ 60 / 15 / color 4
opacity of the layer : 90%
8
highlight bottom layer
effects => plugins => Unlimited 2 => &<BKg
Kaleidoscope>-4 QFlip ZBottomR
layers => duplicate
effects => plugins => Unlimited 2 => Filter Factory
Gallery E - Web
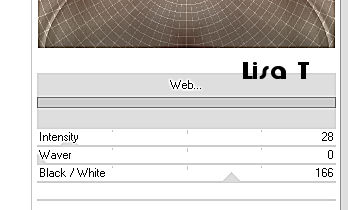
blend mode of the layer : Overlay - opacity
: 65%
adjust => sharpness => sharpen more
9
selections => load-save selection => from disk => selection « Sel2_Romance_Animabelle »
copy / paste as new layer « 42_Page5_Paysages_Animabelle »
don’t forget to erase the watermark
image => resize => untick « resize all
layers » => 70%
adjust => sharpness => sharpen
10
selections => invert
edit => cut
selections => invert
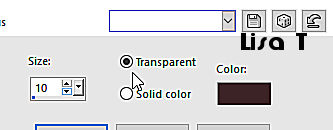
selections => modify => contract => 15 px
effects => 3D effects => chisel / color 4
11
layers => new raster layer
effects => 3D effects => cutout / color 4
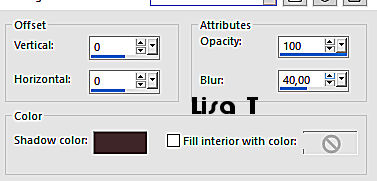
selections => select none
12
image => add borders => tick « symmetric » => ...
1 px color 1
20 px color 2
select this border with the magic wand tool
selections => promote selection to layer
effects => plugins => Unlimited 2 => Filter Factory
Gallery E - Mo’ Jellyfish... / default settings
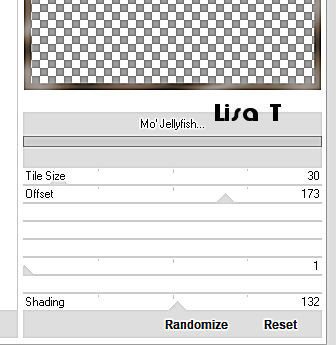
opacity of the layer : 48%
layers => merge => merge down
13
effects => plugins => Carolaine and Sensibility
/ CS-LDots
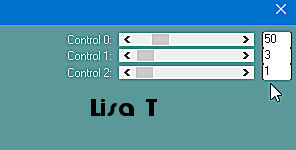
selections => invert
effects => 3D effects => drop shadow => 0 / 0
/ 100 / 35 / color 4
selections => select none
14
image => add borders => tick « symmetric » => ...
1 px color 1
45 px color 2
select this border with the magic wand tool
effects => plugins => Deformation / Dimensia... /
default settings => 16
adjust => sharpness => sharpen
15
selections => invert
effects => 3D effects => drop shadow => 0 / 0
/ 100 / 55 / color 4 / TWICE
selections => select all
selections => modify => contract => 15 px
effects => 3D effects => drop shadow => 0 / 0
/ 100 / 55 / color 4 / TWICE
selections => select none
16
copy / paste as new layer « 49_Femmes_Page7_Animabelle »
don’t forget to erase the watermark
image => mirror => mirror horizontal
image => resize => untick « resize all layers » => 70%
move left
drop a nice shadow of your choice
image => add borders => tick « symmetric » => 1
px color 1
17
layers => new raster layer
apply your watermark or signature
layers => merge => merge all (flatten)
file => export => file .jpeg optimized
 
My creation with my tube and misted image
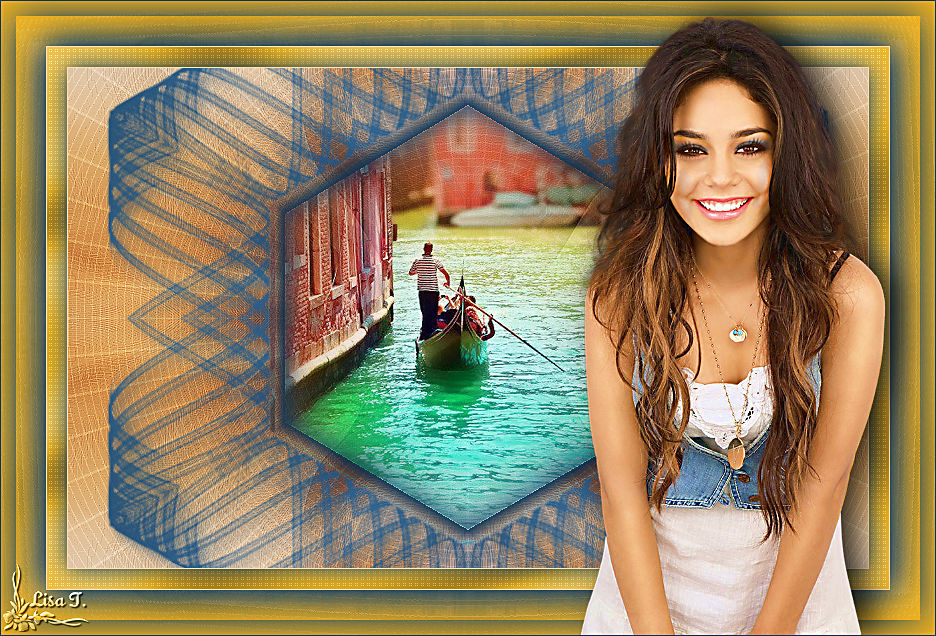
Don't hesitate to write to Animabelle
if you have any trouble with her tutorial
If you create a tag (using other tubes than those provided)
with this tutorial
and wish it to be shown, send it to Animabelle !
It will be a real pleasure for her to add it to the gallery
at the end of the tutorial


back to the boards of Animabelle’s tutorials
board 1 board
2 board
2 board
3 board
3 board 4 board 4 board 5 board 5

|