Princess Elina
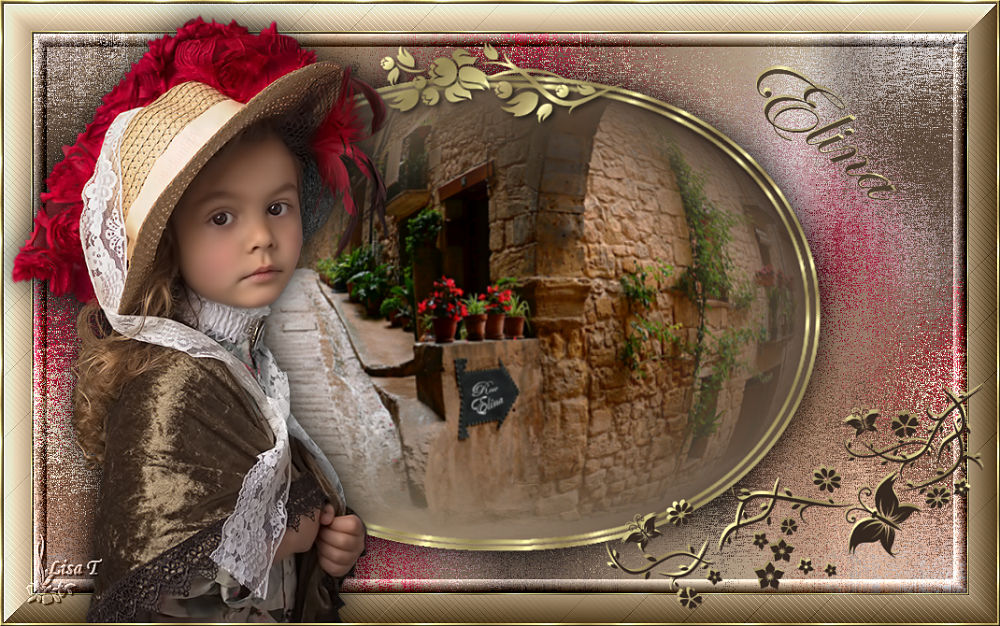
You will find the original tutorial here

This tutorial is a personal creation.
Any resemblance with another one would be only pure coincidence.
It is stricly forbidden to modify tubes, to change their name or take off the matermarks,
To present them on your sites or blog,
To share them in groups,
to make a bank of images, or to use them on lucrative purposes.

Thank you to respect Animabelle’s work and the tubers work.
Don’t hesitate to warn me if you have any trouble with this translation


Material
tubes - floral brushes - texture

copy / paste the texture into « textures » folder into your Corel PSP folder
erase tuber’s watermark before using

Filters (plugins) used
Alien Skin Eye Candy 5: Impact
Unlimited 2.0 - Buttons & Frames
L en K landksiteofwonders
thank you Renée Salon for sharing your plugins’ page

use the pencil to you follow the steps
hold down left click of your mouse to grab it and move it


Important
Open all images with PSP, duplicate them and close the originals.
Never work on original images.
Animabelle and I work with PSPX9
but you can follow this tutorial with another version of PSP.
The results might be slightly different according to the version of PSP you use

Colors
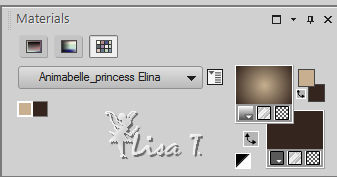
color 1 --> FG color --> #c7af8f
color 2 --> BG color --> #342720
Don't hesitate to change the colors and the blend mode of the layers,
according to your tubes and images.

realization
1
don’t forget to save your work often
thank you to Linette for her tutorial for the fuction Mirror and Flip (french tutorial)
2
with the dropper tool, choose two colors into your main tubes
or use Animabelle’s colors
3
open a new transparent image 1000 x 600 pixels
flood fill with the following gradient (prepare this gradient into FG box of materials palette)
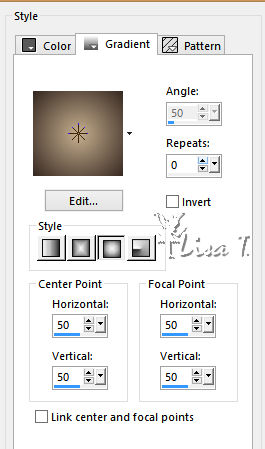
selections -> select all
copy paste into selection « 105_enfant_p2_animabelle »
selections -> select none
4
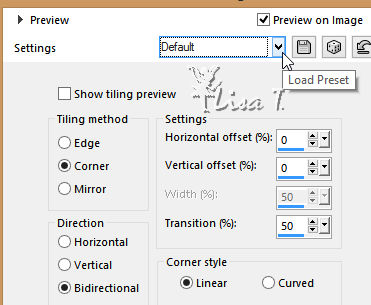
effects -> image effects -> seamless tiling
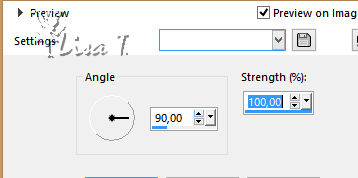
adjust -> blur -> motion blur
effects -> plugins -> Tramages / Wee Scratches
setting--> 255
apply this effects once more
layers -> duplicate
blend mode of the layer : Screen - opacity : 70%
layers -> merge -> merge visible
5
layers -> new raster layer
flood fill with the following gradient
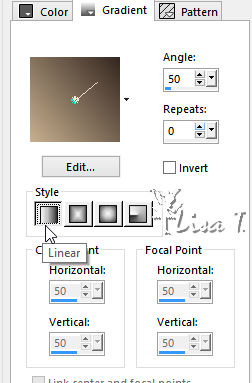
effects -> geometric effects -> circle / check « transparent »
effects -> geometric effects -> spherize / strength : 100 / shape : Ellipse
selections -> select all
selections -> float - selections -> defloat
copy / paste into selection « 288_paysage_p3_animabelle »
keep selection active
effects -> geometric effects -> spherize / strength : 100 / shape : Ellipse
6
selections -> modify -> select selection borders
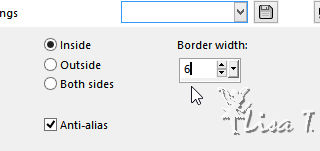
selections -> modify -> feather : 2
layers -> new raster layer
flood fill selection with the gold texture provided with the following settings
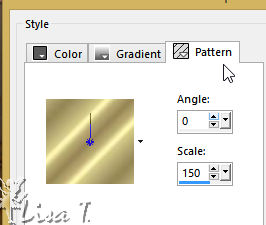
layer s-> merge -> merge down
selections -> select none
7
image -> resize -> uncheck « resize all layers » -> 85%
layers -> duplicate
image -> resize -> 97%
layers -> merge -> merge down
adjust -> sharpness -> sharpen
effects -> plugins -> Alien Skin Eye Candy 5: Impact / Perspective Shadow -> « Drop Shadow, Blurry »
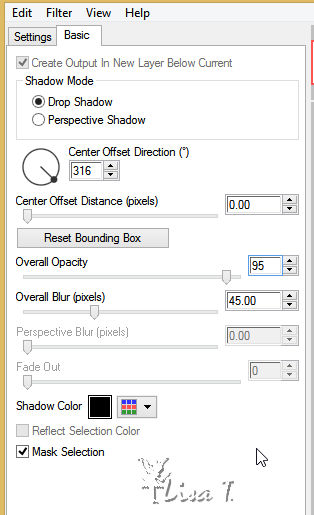
layers -> merge -> merge visible
8
effects -> plugins -> < I.C.NET. Software > - Filters Unlimited 2.0 / Buttons & Frames - 3D Glass Frame 2
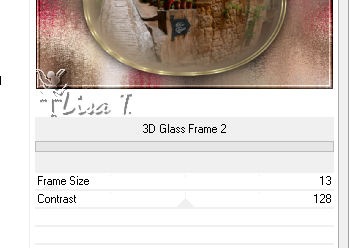
selections -> select all
image -> add borders -> check « symmetric » -> 2 pixels color 2
selections -> invert
flood fill selection with the gold texture
effects -> 3D effects -> inner bevel
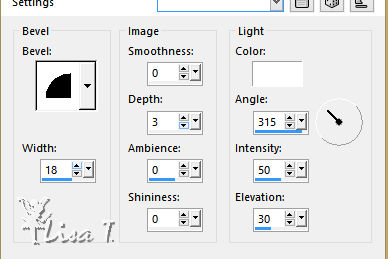
9
selections -> select all
image -> add borders -> 30 pixels color 1
selections -> invert
effects -> plugins -> < I.C.NET. Software > - Filters Unlimited 2.0 / Buttons & Frames - 3D Glass Frame 2
default settings
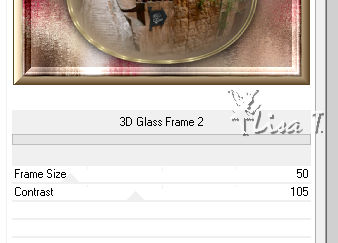
effects -> plugins -> L en K landksiteofwonders / L en K Paris
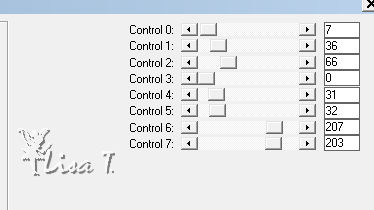
apply this plugin once more
adjust -> sharpness -> sharpen
selections -> select none
10
copy / paste as new layer « 105_enfant_p2_animabelle »
image -> mirror -> mirror horizontal
image -> resize -> 85%
place this tube bottom left
effects -> plugins -> Alien Skin Eye Candy 5: Impact / Perspective Shadow / Drop Shadow, Blurry as before
11
in materials palette, set Gold texture into the FG box and color 2 as FG color
layers -> new raster layer
open « 24_Vector_P1_Animabelle »
file -> export -> custom brush
name it and click OK
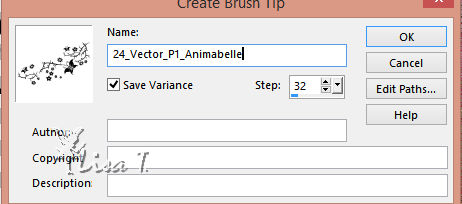
back to your work
acitvate « Brush » tool, and select the new brush brush / size 405

left click at bottom right of the tag
12
layers -> new raster layer
activate Brush tool, select your new brush, size 400

move your mouse slightly under and right click. You can move it with the Pick tool if you wish
gold texture is used as a dropped shadow
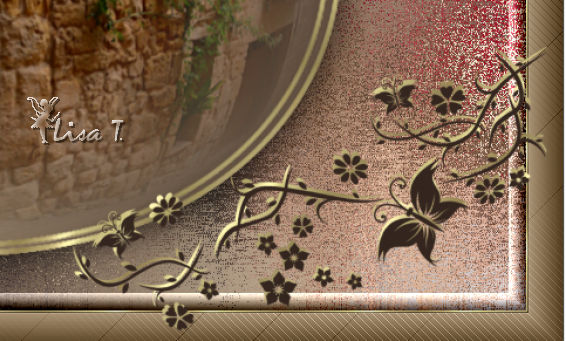
layers -> merge -> merge down
move it as you like if necessary (see final result)
13
layers -> new raster layer
activate « Elina_Vector_Animabelle »
file -> export -> custom brush
name it and click OK
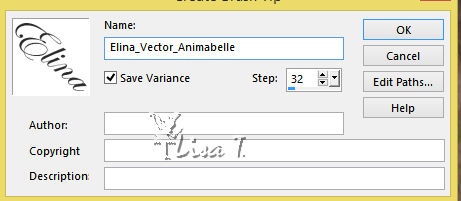
back to your work
activate Brush tool, select the new brush « Elina_Vector_Animabelle » / size 153
apply this brush top right / gold texture (left click)
14
layers -> new raster layer
activate Brush tool again, brush size : 148, and right click (color 2) as in step 12
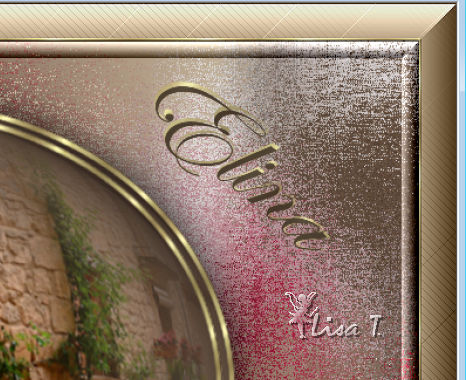
layers -> merge -> merge down
move it if necessary (see final result)
15
opan « @M&M_Floral-048 »
file -> export -> custom brush
name it and click OK
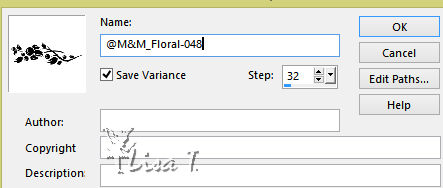
back to your work
highlight top layer
layers -> new raster layer
activate Brush tool, and select « @M&M_Floral-048 »
1 left click on top of the tag
move it if necessary (see final result))
effects -> 3D effects -> drop shadow -> 3 / 3 / 60 / 8 / black
layers -> merge -> merge all (flatten)
16
selections -> select all
image -> add borders -> 3 pixels color 2
selections -> invert
flood fill selection with the gold texture
effects -> 3D effects -> inner bevel (same settings as before)
selections -> select none
layers -> new raster layer
apply your watermark
layers -> merge -> merge all (flatten)
export your work type .jpeg - resize if you wish

Don't hesitate to write to Animabelle if you have any trouble with her tutorial
To be informed about her new tutorials, join her NewsLetter

If you create a tag (using other tubes than those provided) with this tutorial
and wish it to be shown, send it to Animabelle !
It will be a real pleasure for her to add it to the gallery at the end of the tutorial


My tag with my tubes

back to the boards of Animabelle’stutorials
board 1  board 2 board 2  board 3 board 3

|