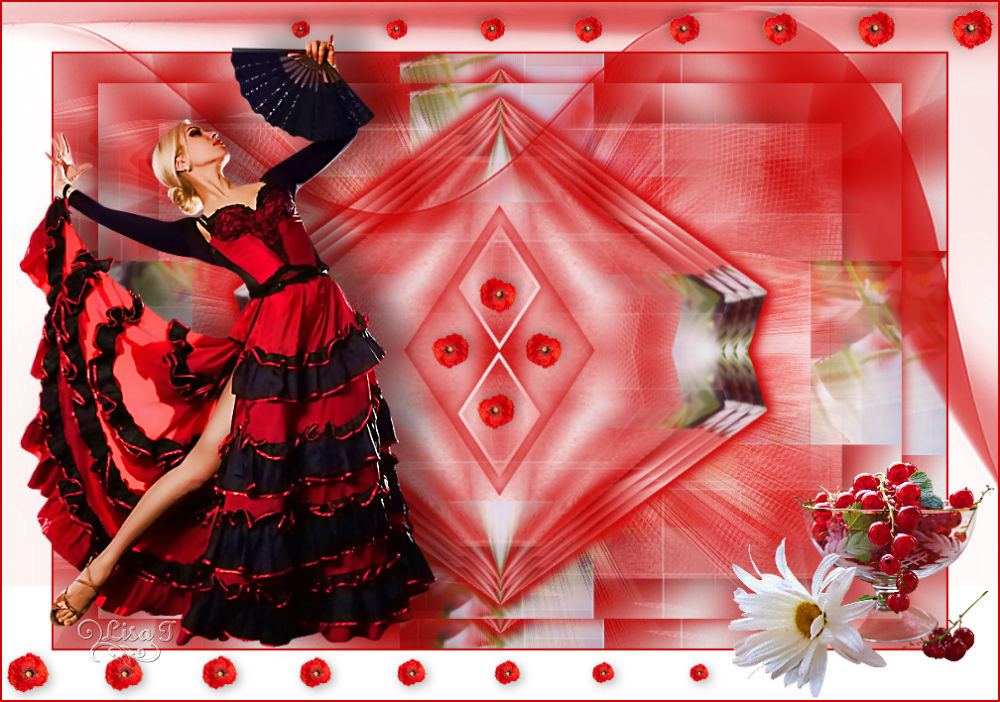
Poppies
You will find the original tutorial here :

This tutorial is a personal creation.
Any resemblance with another one would be only pure coincidence.
It is stricly forbidden to modify images, to change their name or take off the matermarks,
To present them on your sites or blog,
To share them in groups,
to make a bank of images, or to use them on lucrative purposes.

Thank you to respect Animabelle’s work and the tubers work.
Don’t hesitate to warn her if you have any trouble with this tutorial.

Material
2 decoration tubes – 2 masks – 1 alpha layer – 1 color palette
Animabelle does not provide the tubes to prevent the theft
for this tutorial she used a tube by Nicky and a mist by herself
she also used a decoration corner tube
Animabelle’s important note
Tubers have been warned that disrespectful and dishonest bloggers come steeling our tubes
they grab them into the folders of material we use to provide for our tutorials.
These people rename and convert the tubes to png type,
and then they offer them for download in their blogs, pretending they have done the work.
To protect my work, I am therefore forced to no longer provide my tubes with the material.
Honest people will understand my way of doing, I hope.
I thank them for their understanding.
Very important Tip:
never take your tubes on these blogs, because most of the time all of these tubes are stolen tubes.
Always make sure that the tubes you take have been signed by their authors.
Thank you.
|
Filters used
user defined filter – Unlimited 2 – Mehdi – Lumieres Ambiances – Tramages – Toadies – VM Stylise
“Renée Graphisme” filters, with her kind permission

translator’s note : I use PSP17, but this tutorial can be realized with another version.
I translate exactly the indications of Animabelle
I use my own tubes and colors to create my tag presented at the begining of this translation
Colors used

color 1 --> #ffffff
color 2 --> #ce0202
Don't hesitate to change the colors and the blend mode of the layers, and the shadows,
according to your tubes and images.
Important
Open all images in PSP, duplicate them and close the originals.
work with the copies
use the pencil to follow the steps
left click to grab it

Execution
Step 1
in the materials palette, set color 1 as foreground color and color 2 as background color
effects/plugins/Mehdi/Wavy Lab 1.1
layers/duplicate
image/mirror/mirror vertical
set the opacity of the layer on 50% (layers/properties/opacity 50%)
layers/merge/merge visible
Step 2
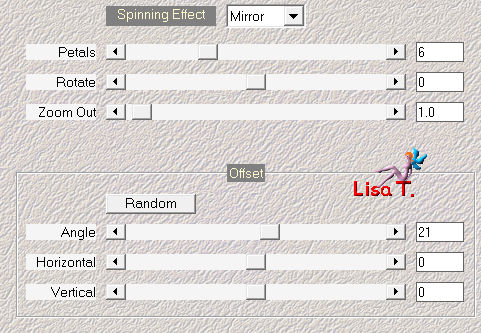
effects/plugins/Mehdi/Kaleidoscope 2,1
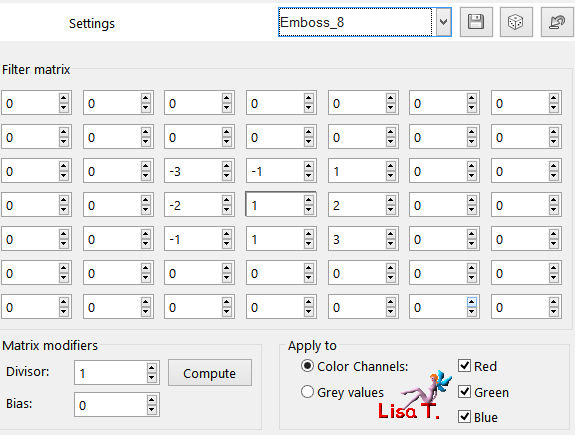
effects/user defined filter/Emboss 8
Step 3
layers/new raster layer
selections/select all
copy/paste into selection a poppy picture type jpeg (or an image of your choice)
selections/select none
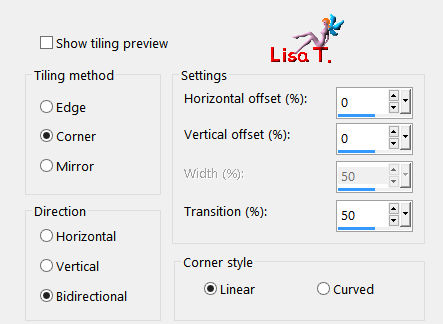
effects/image effects/seamless tiling/default settings
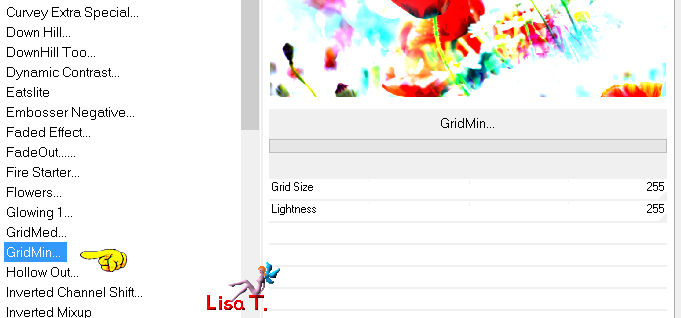
effects/plugins/Unlimited 2/Lumieres Ambiances/GridMin
it is an optional effect-->Animabelle did not apply this effect because her image was light
if you image is quite dark, it is better to apply it
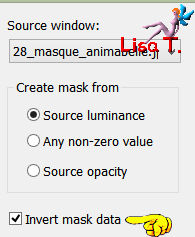
layers/new mask layer/from image
layers/merge/merge group
Step 4
activate the bottom layer (merged)
layers/duplicate
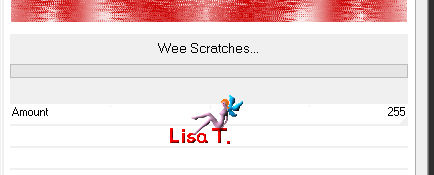
effects/plugins/Unlimited 2/Tramages/Wee Scratches
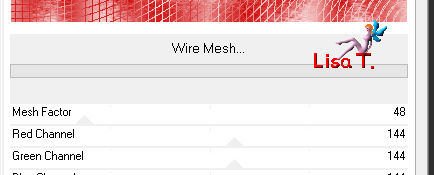
effects/plugins/Unlimited 2/Tramages/Wire Mesh
layers properties/set the opacity on 45µ
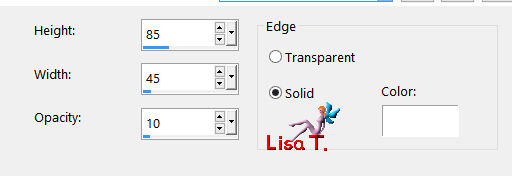
image/resize/uncheck « all layers »/85%
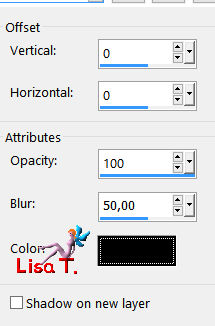
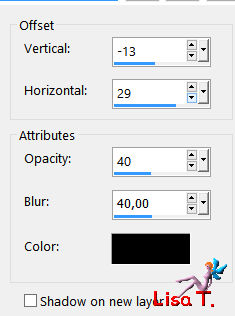
effects/3D effects/drop shadow
Step 5
activate the top layer (group-raster 1)
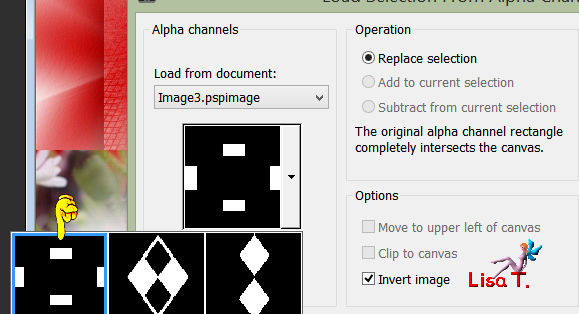
selections/load selection/from alpha channel/selection #1
selections/promote selection to layer
selections/select none
Important
if you did not apply the effect « Lumieres Ambiances » in step 3
apply, at this step, the effect « user defined filter/Emboss 8 »
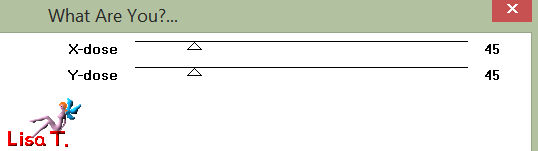
effects/plugins/Toadies/What Are You ?...
layers/merge/merge visible
Step 6
layers/duplicate
effects/geometric effects/Pentagon/Transparent
effects/plugins/Simple/Top Left Mirror
image/resize/uncheck « all layers »/95%
layers/duplicate
image/resize/uncheck « all layers »/95%
layers/duplicate
image/resize/uncheck « all layers »/95%
close the visiblity of the bottom layer and activate another layer
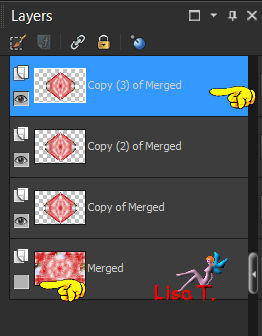
layers/merge/merge visible
Step 7
open the visibility of the bottom layer and keep top layer active
layers/duplicate (Twice)
activate the first bottom layer (second from the bottom)
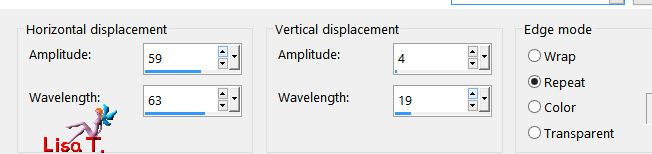
effects/distortion effects/wave
layers/properties/opacity 50% - blend mode « screen »
Step 8
activate the layer « copy of merged » (second fromm the top)
effects/distortion effects/Twirl/-720
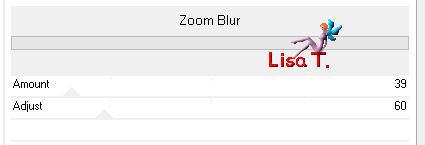
effects/plugins/Unlimited 2/VM Stylise/Zoom Blur
layers/properties/blend mode « soft light »
effects/edge effects/enhance more
Step 9
activate the top layer
effects/3D effects/drop shadow/ 0 / 0 / 100 / 20 / color 2
selections/load selection from alpha channel/selection #2
selections/promote selection to alyer
selections/select none
effects/3D effects/drop shadow as before
layers/merge/merge down
Step 10
selections/load selection/from alpha channel/selection #3
effects/3D effects/buttonize
selections/modify/select selection borders

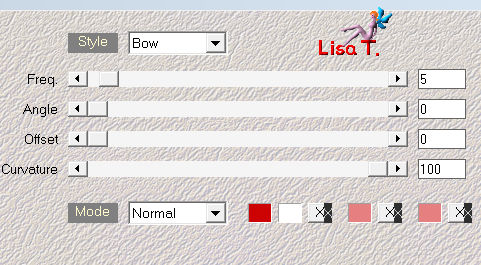
flood fill the selection with the following gradient

selections/select none
Step 11
copy/paste as new layer the decoration tube 1 (deco1_coquelicots_animabelle)
don’t move it
layers/merge/merge visible
Step 12
layers/duplicate
image/resize/uncheck « all layers »/90%
effects/3D effects/drop shadow/ 0 / 0 /10 / 20 / color 2
Step 13
image/add obrders -->
2 pixels color 2
50 pixels color 1
Step 14
layers/new raster layer and flood fill with color 2
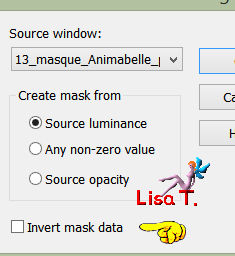
layers/new mas layer/from image/mask « 13_masqque_Animabelle_page4 »
layers/merge/merge group
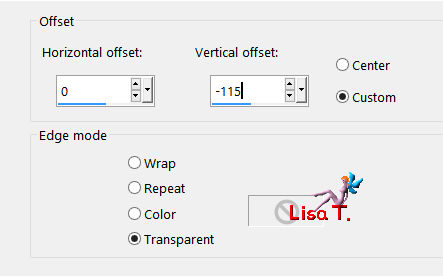
effects/image effects/offset
image/mirror/mirror vertical
image/mirror/horizontal mirror
layers/properties/opacity 80%
Step 15
copy/paste as new layer the decoration yube « deco_bordure »
don’t move it
copy/paste as new layer the character tube
move it to the left and resize if necessary
effects/3D effects/drop shadow
copy/paste as new layer the flower tube, move it as shown on the final result
image/add borders/2 pixels color 2
apply your signature ans save as... type jpeg
Don't hesitate to write to Animabelle if you have any trouble with her tutorial
To be informed about her new tutorials, join her NewsLetter

If you created a tag with her tutorial and wish it to be shown,
send it to Animabelle !
It will be her pleasure to add it to the gallery at the end of the tutorial
Thank you to resize it 800 pixels wide if you send her your creation
Back to the board of Animabelle's tutorials


|