

You will find the original tutorial here :

This tutorial is a personal creation.
Any resemblance with another one would be only pure coincidence.
It is stricly forbidden to modify tubes, to change their name or take off the matermarks,
To present them on your sites or blog,
To share them in groups,
to make a bank of images, or to use them on lucrative purposes.

Thank you to respect Animabelle’s work and the tubers work.
Don’t hesitate to warn me if you have any trouble with this translation,
and I’ll try to fix the problem as quickly as I can

Animabelle worked with PSP2020 and I worked with PSP2020 Ultimate
you can follow this tutorial with another version of PSP, but the result might be slightly different

Supplies
selections – tubes - silver tile
duplicate all the tubes and work with the copies to preserve originals
save your work often in case of problems with your psp
use the Dropper tool to pick up your colors into your tubes and misted images
Animabelle chose these :
color 1 => #81224c
color 2 => #ffd1ed
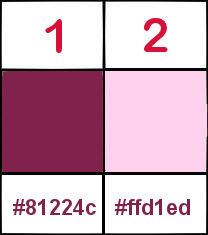
don’t hesitate to change blend modes and opacities of the layers to match your personal colors and tubes
TIP 1 -> if you don’t want to install a font -->
open it in a software as « Nexus Font » (or other font viewer software of you choice)
as long as both windows are opened (software and font), your font will be available in your PSP
TIP 2 -> from PSPX4, in the later versions of PSP the functions « Mirror » and « Flip » have been replaced by -->
« Mirror »has become --> image => mirror => mirror horizontal
« Flip » has become --> image => mirror => mirror vertical

Plugins needed
I.C.NET Filters Unlimited 2.0
AAA Filters
Flaming Pear
Alien Skin Eye Candy 5: Impact
Thank you Renée Salon for sharing your plugins page


Use the pencil to mark your place
along the way
hold down left click to grab and move it
 |

1
open a new image => transparent => 900 * 600 px
set FG to color 1 and BG to color 2 in materials palette
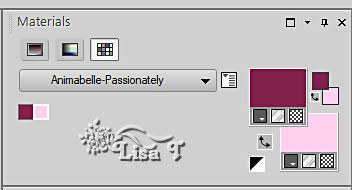
flood fill selection with the following radial gradient
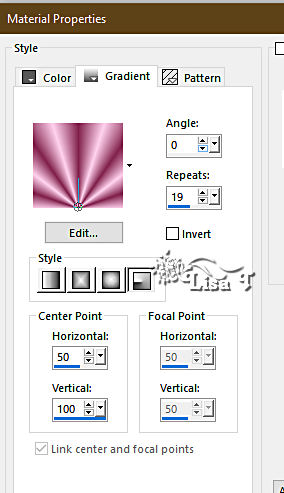
effects => plugins => Unlimited 2 => Greg’s Factory Output => Shear Tiles
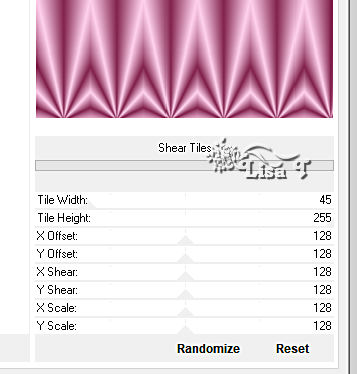
image => mirror => mirror vertical
2
layers => duplicate
image => resize => untick « resize all layers » => 90%
highlight layer below
effects => texture effects => mosaic / Antique
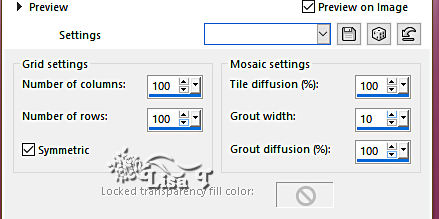
effects => plugins => Unlimited 2 => [AFS IMPORT] =>BORDERFADE2
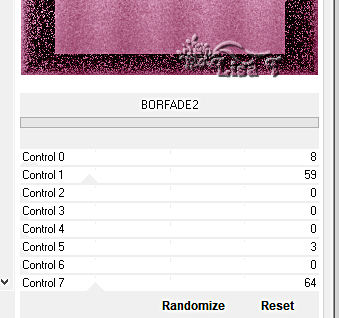
effects => plugins => FM Tile Tools / Saturation Emboss (default settings)
3
layers => new raster layer
selections => load-save selection => from disk => selection # 1
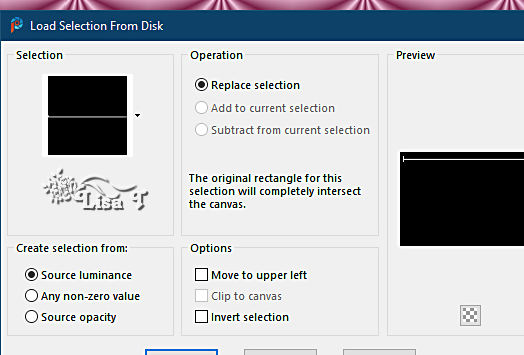
flood fill selection with the silver tile provided
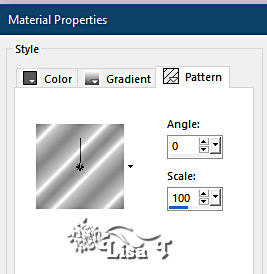
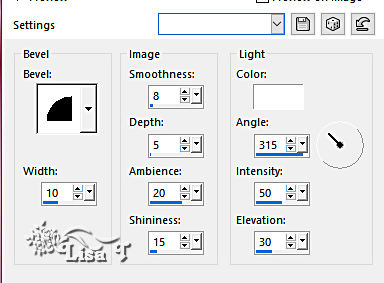
effects => 3D effects => Inner Bevel
selections => select none
4
highlight top layer
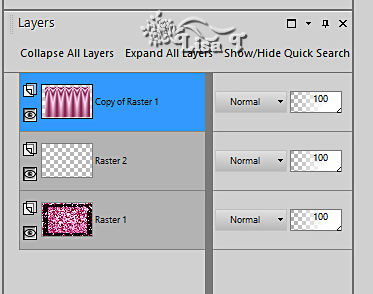
view => tick « Rulers»
enable the Pick tool and stretch left to number 250
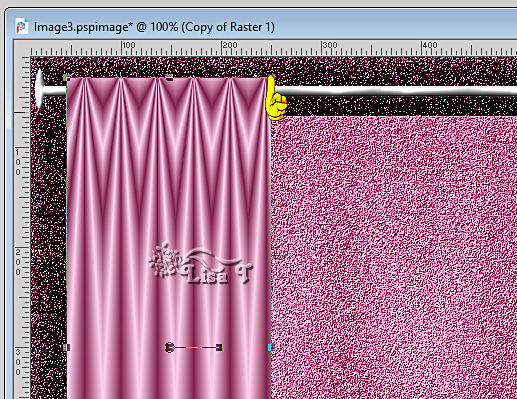
view => tick « Rulers » (rulers disappear)
selections => load-save selection => from disk => selection # 2
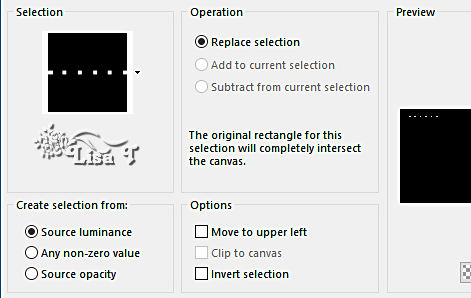
selections => modify = > feather => 2 px
hit the DELETE key of your keyboard once or twice
selections => select none
5
layers => duplicate
image => mirror => mirror horizontal
layers => merge => merge down TWICE
effects => 3D effects => drop shadow => -20 / 20 / 40 / 30 / black
effects => 3D effects => drop shadow => 20 / -20 / 40 / 30 / black
6
highlight bottom layer
layers => new raster layer
set FG to color 1 and BG to color 2 in materials palette

effects => plugins => Mura’s Meister => Cloud (default settings)
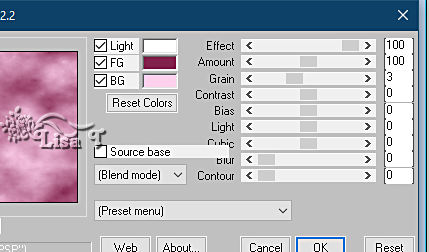
image => resize => untick « resize all layers » => 85%
7
effects => plugins => Carolaine and Sensibility => CS-HLines
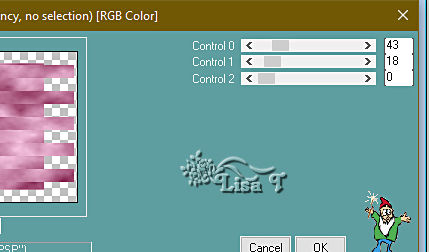
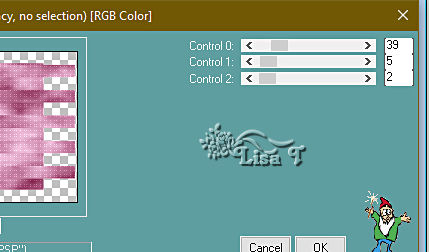
effects => plugins => Carolaine and Sensibility => CS-LDots
8
copy / paste « Lunapaisagem1682 » as new layer
image => resize => untick « resize all layers » => 90%
adjust => hue and saturation => colorize => 237 / 96
(change these settings if you use different colors)
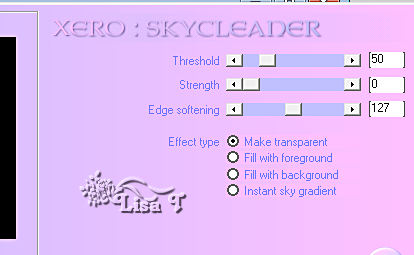
effects => plugins => Xero => Skycleaner
9
image => add borders => tick « symmetric » => 5 px black
image => add borders => tick « symmetric » => 40 px color 1
select this frame with the Magic Wand tool (tolerance an feather : 0)
effects = > plugins => Scribe / Partical

selections => promote selection to layer
selections => select none
image => mirror => mirror vertical
image => mirror => mirror horizontal
opacity of the layer : 50 %
layers => merge => merge all (flatten)
10
selections => select all
selections => modify => contract => 40 px
selections => invert
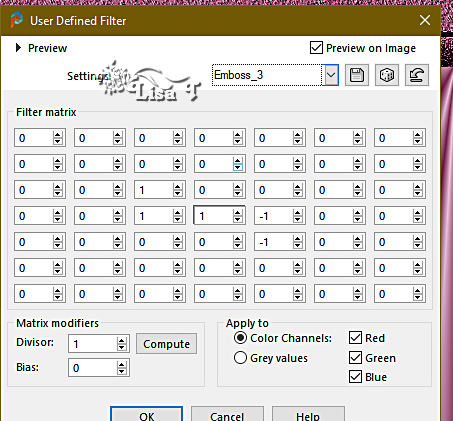
effects => User Defined Filter => Emboss 3
selections => invert
effects => 3D effects => drop shadow => -11 / 11 / 60 / 30 / black
effects => 3D effects => drop shadow => 11 / -11 / 60 / 30 / black
selections => select none
11
copy / paste « calguisanna13129 » as new layer
image => resize => untick « resize all layers » => 72%
effects => image effects => offset => H : 35/ V : 0 / tick « custom » and « transparent »
effects => 3D effects => drop shadow => -13 / 13 / 50 / 30 / black
effects => 3D effects => drop shadow => 13 / -13 / 50 / 30 / black
adjust => sharpness => sharpen
12
copy / paste « objet_deco_animabelle » as new layer
image => resize => untick « resize all layers » => 65%
effects => 3D effects => drop shadow => -9 / 9 / 60 / 30 / black
effects => 3D effects => drop shadow => 9 / -9 / 60 / 30 / black
adjust => sharpness => sharpen
place as shown on final result
13
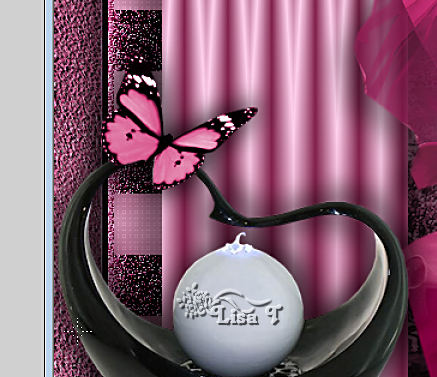
copy / paste « papillon_animabelle » as new layer
effects => 3D effects => drop shadow => -5 / 5 / 60 / 30 / black
effects => 3D effects => drop shadow => 5 / -5 / 60 / 30 / black
place as shown on final result
14
open the tube « calguisdecorlover27102011 »
with the selection tool (rectangle) select hte black statue
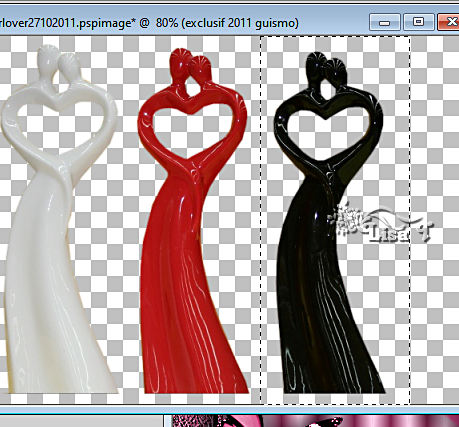
edit => copy
back to your main work
edit => paste as new layer
place as shown on final result
15
back to the 3 statues tube
select the white one
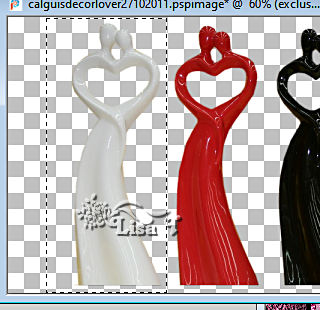
edit => copy
back to your main work
edit => paste as new layer
image => resize => untick « resize all layers » => 90%
place as shown on final result
adjust => sharpness => sharpen
layers => merge => merge down
effects => 3D effects => drop shadow => -9 / 9 / 60 / 30 / black
effects => 3D effects => drop shadow => 9 / -9 / 60 / 30 / black
image => add borders => tick « symmetric » => 5 px black
18
layers => new raster layer
apply your watermark or signature
write your licence number if you used a licenced tube
layers => merge => merge all (flatten)
save your work as... type .jpeg optimized

Another version with my tubes and misted image


Don't hesitate to write to me if you have any trouble with this tutorial
If you create a tag (using other tubes than those provided) with this tutorial
and wish it to be shown, send it to Animabelle !
It will be a real pleasure for her to add it to the gallery at the end of the tutorial


back to the boards of Animabelle’s tutorials
20 tutorials on each borad
board 1 board 2 board 2 board 3 board 3 board 4 board 4 board 5 board 5
board 6 board 7 board 7 board 8 board 8 board 9 board 9


|