
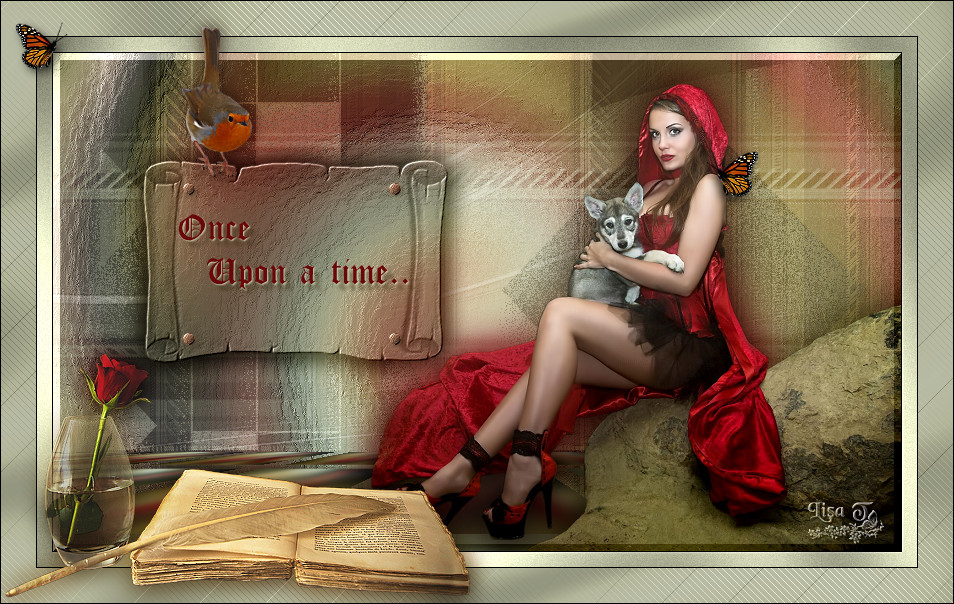
You will find the original tutorial here :

This tutorial is a personal creation.
Any resemblance with another one would be only pure
coincidence.
It is stricly forbidden to modify tubes, to change
their name or take off the matermarks,
To present them on your sites or blog,
To share them in groups,
to make a bank of images, or to use them on lucrative purposes.

Thank you to respect Animabelle’s work and the tubers
work.
Don’t hesitate to warn me if you have any trouble
with this translation,
and I’ll try to fix the problem as quickly as I can


Material
font - masks - tubes

open all the tubes into PSP and duplicate them. Work
with the copies to preserve orignals
open the masks and minimize them to tray
TIP 1 -> if you don’t
want to install a font, but use it temporarily
-->
open it in a software as « Nexus Font » (or
other font viewer software of you choice)
as long as both windows are opened (software and font),
your font will be available in your PSP
TIP 2 -> from PSPX4,
in the later versions of PSP the functions « Mirror » and « Flip » have
been replaced by -->
« Mirror » --> image -> mirror -> mirror horizontal
« Flip » --> image -> mirror -> mirror vertical

Filters (plugins) used
thank you Renée Salon for sharing your plugins ‘ page


Use the pencil to follow the steps
hold down left click to grab it and move it...
 |

Important
Open all images with PSP, duplicate them and close
the originals.
Never work on original images.
Animabelle works with PSPX9, I work with PSP2018
but you can follow the steps with another version of PSP
save your work often

Colors
Animabelle chose these colors
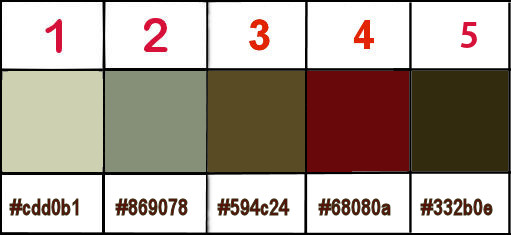
color 1 -> ForeGround color -> #cdd0b1
color 2 -> BackGround color -> #869078
color 3 -> #594c24
color 4 -> #68080a
color 5 ->#332b0e
Don't hesitate to change the colors and the blend
modes of the layers,
according to your tubes and images

realization
1
use the Dropper tool to pick up 5 assorted colors
into your tubes
2
open the image « IEUF_Animabelle »
layers -> duplicate
close the original, work with the copy
to change the colors of this image, it is better to use
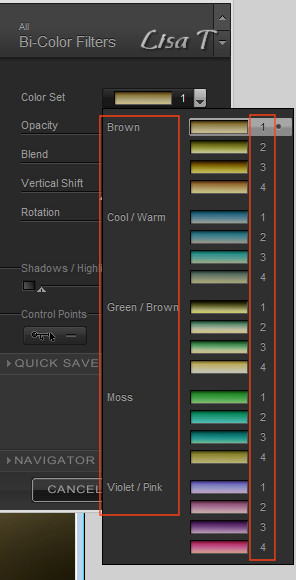
the plugin Nik Software / Color Efex Pro 30 Complete
into « color set » chose the setting
that matches your colors -> brown / color/warm / ......
layers -> duplicate
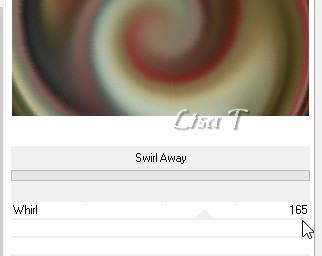
effects -> plugins -> Unlimited 2 / &<Bkg
Kaleidoscope> / Swirl Away
effects -> Art Media effects -> brush strokes
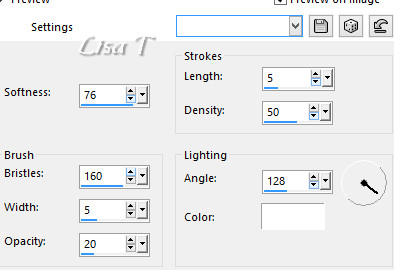
3
layers -> new raster layer
flood fill with a rectangular gradient -> color 1 a
FG color / color 2 as BG color
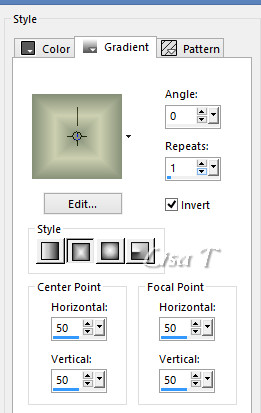
layers -> new mask layer -> from image
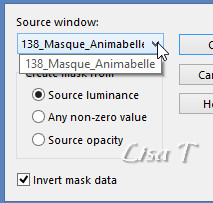
layers -> merge -> merge group
effects -> 3D effects -> drop shadow / color 1 -> 1
/ 1 / 100 / 0 / untick « shadow on new
layer »
opacity of the layer : 50%
4
layers -> duplicate
image -> free rotate
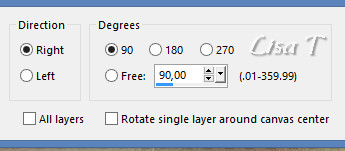
effects -> image effects -> seamless tiling
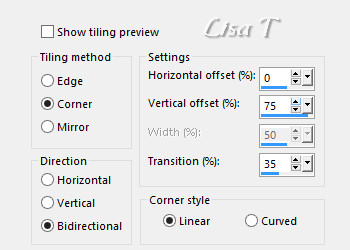
blend mode of the layer : « Overlay » /
opacity : 40%
effects -> edge effects -> enhance more
5
highlight bottom layer
layers -> promote background layer
layers -> arrange -> bring to top
image -> resize -> untick « resize all
layers » -> 45%
effects -> plugins -> Mura’s Meister -> Perspective
Tiling

6
effects -> 3D effects -> drop shadow / color 3
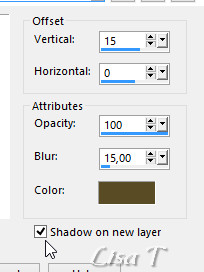
Shadow layer is highlighted -> blend mode of the layer : « Multiply » / opacity :
65%
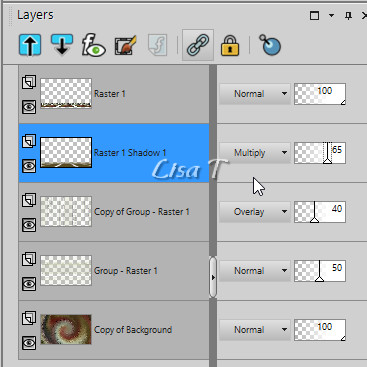
layers -> merge -> merge visible
7
enable selection tool -> rectangle -> custom selection

write these numbers
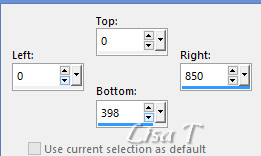
selections -> promote selection to layer
keep selection acitve
8
layers -> new mask layer -> from image
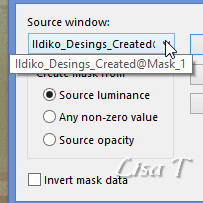
layers -> merge -> merge group
blend mode of the layer : « Screen »
keep selection active
9
effects -> plugins -> VM Natural / Speed
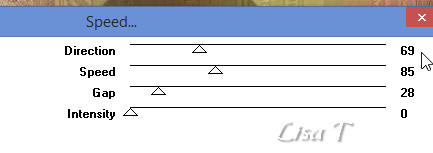
keep selection active
layers -> new raster layer
flood fill whiote
keep selection active
layers -> new mask layer -> from image
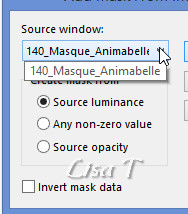
layers -> merge -> merge group
blend mode of the layer : « Sof Light »
effects -> edge effects -> enhance
selections -> select none
10
highlight bottom layer (merged)
enable selection tool -> rectangle -> custom selection
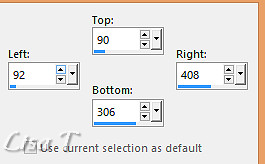
selections -> promote selection to layer
effects -> Art Media effects -> brush strokes / same
settings as before
selections -> select none
11
edit -> cut
edit -> paste as new image
work on this new image and set yout tag aside for a while
(minimze it to tray)
layers -> new mask layer -> from image
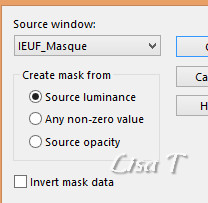
layers -> merge -> merge group
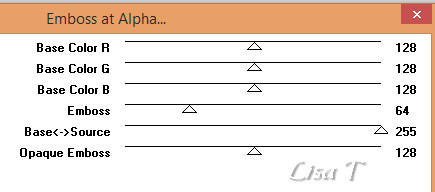
effects -> plugins -> Mura’s Seamless / Emboss
at Alpha / default settings
12
edit -> cut
back to your tag -> highlight top layer
edit -> paste as new layer
effects -> image effects -> offset -> H :
-180 / V : 40 / tick « « custom » and « transparent »
layers -> duplicate
highlight layer underneath -> adjust -> blur -> gaussian
blur / 12
blend mode of the layer : « Multiply »
layers -> duplicate
13
highlight top layer
enable the Text tool with the following setting -> font « CloisterBlack.ttf »

set color 4 as BG color or color 5 (you choose)
write your text
into the layers palette, right click ont the vectorial
layer -> convert to raster layer
move the text properly in the middle of the parchment,
as shown on the final result
effects -> 3D effects -> drop shadow / color 1 -> 1
/ 1 / 100 / 2 / untick « shadow on new layer »
effects -> 3D effects -> drop shadow / color 5 -> 6
/ 6 / 35 / 4 / untick « shadow on new layer »
layers -> merge -> merge visible
14
enable the selection tool -> circle
draw a small circle in the top left corner of the parchment
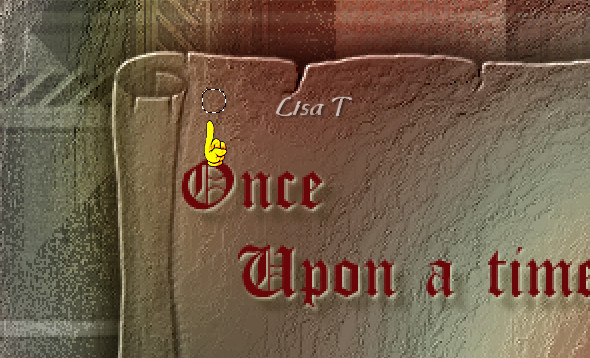
selections -> promote selection to layer
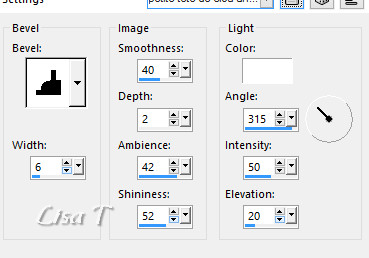
effects -> 3D effects -> inner bevel
adjust -> sharpness -> sharpen
effects -> plugins -> Mura’s Seamless / Emboss
at Alpha / default settings
selections -> select none
15
layers - duplicate
move it in the top right corner as show on the final result
layers -> merge -> merge down
layers -> duplicate -> move this copy at the bottom
of the parchment
layers -> merge -> merge down
effects -> 3D effects -> drop shadow / color 5 -> 2
/ 2 / 35 / 6 / untick « shadow on new layer »
layers -> merge -> merge all (flatten)
16
copy / paste as new layer « 137_Femme_Page6_Animabelle » (don’t
forget to erase the tuber’s watermark)
image -> resize -> untick « resize al
layers » -> 55%
adjust -> sharpness -> sharpen
Move it in the lower right corner.
layers - duplicate
highlight the layer underneath -> adjust -> blur
-> gaussian blur / 20
blend mode of the layer : « Multiply »
layers -> merge -> merge visible
17
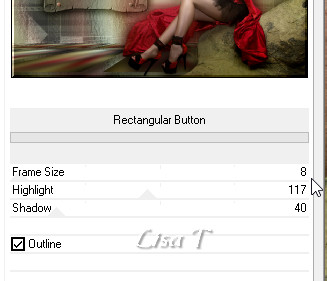
effects -> plugins -> Unlimited 2 -> Buttons & Frames
/ Rectangular Button
18
selections -> select all
iamge -> add borders -> tick « symmetric » -> 15
pixels color 1
selections -> invert
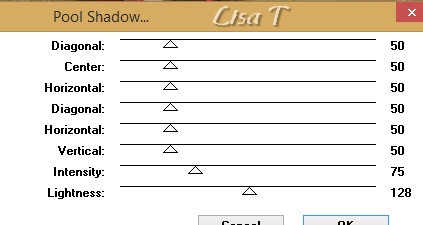
effects -> plugins -> Tramages / Pool Shadow
selections -> promote selection to layer
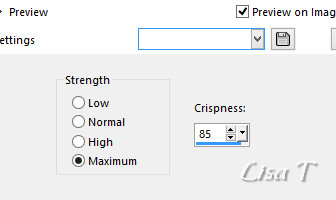
adjust -> add-remove noise -> JPEG Artifact Removal
selections -> select none (if the selection is still
active of course...)
19
image -> add borders -> tick « symmetric » -> 1
pixels black
selections -> select all
image -> add borders -> tick « symmetric » -> 35
pixels color 1
selections -> invert
selections -> promote selection to layer
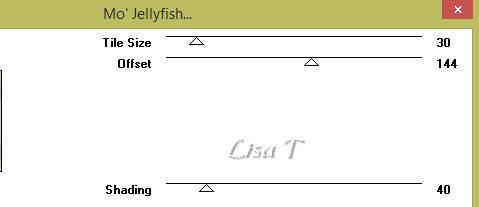
effects -> plugins -> Tramages / Mo’ Jellyfish
20
effects -> plugins -> L & K Landsiteofwonders
/ L en K Paris
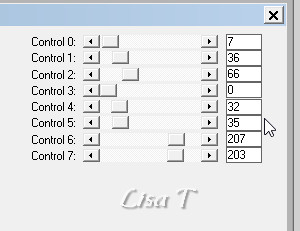
selections -> select none
image -> add borders -> tick « symmetric » -> 1
pixels black
21
copy / paste as new layer « 192_fleurs_animabelle_page3 » (don’t
forget to erase the tuber’s watermark)
image -> resize -> untick « resize al layers » -> 55%
adjust -> sharpness -> sharpen
move it to the bottom left (see final result)
layers -> duplicate
highlight layer underneath -> adjust -> blur -> gaussian
blur / 12
blend mode of the layer : « Multiply »
22
highlight top layer
copy / paste as new layer « 252_animabelle_tubes_animaux » (don’t
forget to erase the tuber’s watermark)
image -> resize -> untick « resize al layers » -> 35%
adjust -> sharpness -> sharpen
move it to the top of the parchment
layers -> duplicate
highlight layer underneath -> adjust -> blur -> gaussian
blur / 8
blend mode of the layer : « Multiply » - opacity :
70%
23
highlight top layer
copy / paste as new layer the butterfly (erase the watermark)
drop a shadow of your choice
resize it (half size, or the size you like) - duplicate
it and place it as you like in the tag
24
layers -> new raster layer
apply your watermark
laeyrs -> merge -> merge all (flatten)
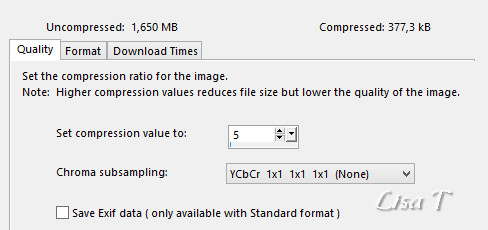
file -> export -> type .jpeg optimized

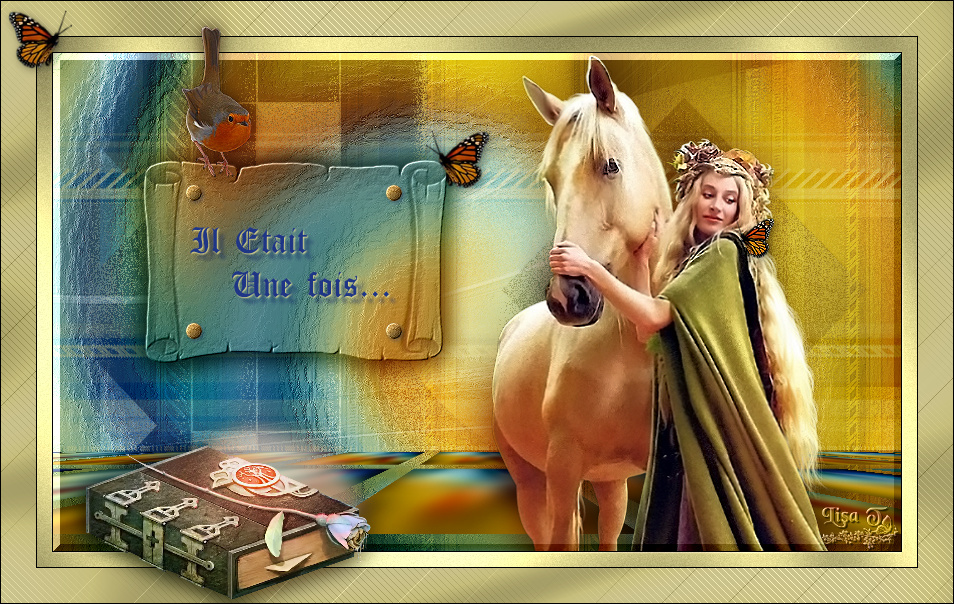
My tag with my tubes
Don't hesitate to write to Animabelle if you have any
trouble with her tutorial
To be informed about her new tutorials, join her NewsLetter

If you create a tag (using other tubes than those
provided) with this tutorial
and wish it to be shown, send it to Animabelle !
It will be a real pleasure for her to add it to the gallery
at the end of the tutorial


back to the boards of Animabelle’s tutorials
board 1  board 2 board 2  board
3 board
3 

|