Night beauty

You will find the original tutorial here :


This tutorial is a personal creation.
Any resemblance with another one would be only pure coincidence.
It is stricly forbidden to modify images, to change their name or take off the matermarks,
To present them on your sites or blog,
To share them in groups,
to make a bank of images, or to use them on lucrative purposes.

Thank you to respect Animabelle’s work and the tubers work.
Don’t hesitate to warn her if you have any trouble with this tutorial.


Material
1 alpha layer (containing all the selections you will need to follow this tutorial)
1 tube by Animabelle (not provided)
1 png déco(Akre_DazzlingStars-10)

Animabelle’s important note
Tubers have been warned that disrespectful and dishonest bloggers come steeling our tubes
they grab them into the folders of material we use to provide for our tutorials.
These people rename and convert the tubes to png type,
and then they offer them for download in their blogs, pretending they have done the work.

To protect my work, I am therefore forced to no longer provide my tubes with the material.
Honest people will understand my way of doing, I hope.
I thank them for their understanding.
Very important Tip:
never take your tubes on these blogs, because most of the time all of these tubes are stolen tubes.
Always make sure that the tubes you take have been signed by their authors.
Thank you.
|
Filters used
<I.C. NET Software> Unlimited 2
Tramages
Simple
VanDerLee
It@lian Editors Effect
Alien Skin Eye Candy 5 - Impact
Graphic plus
FunHouse

“Renée Graphisme” filters, with her kind permission


translator’s note : I use PSP17, but this tutorial can be realized with another version.
I translate exactly the indications of Animabelle with her colors and tubes
I used my own tubes and colors to create my tag presented at the begining of this translation

Colors used
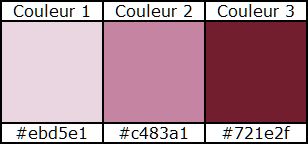
Don't hesitate to change the colors and the blend mode of the layers, and the shadows,
according to your tubes and images.

Important
Open all images in PSP, duplicate them and close the originals.
work with the copies

use the pencil to follow the steps
left click to grab it


Execution
Step 1
open the alpha layer (Alpha_ma_belle_de_nuit_Animabelle), window /duplicate
close the original and work with the copy
Step 2
in the material palette, set color 1 as foreground color, and color 2 as background color
flood fill this layer with the following gradient
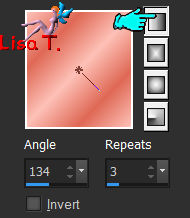
adjust/blur/gaussian blur/15
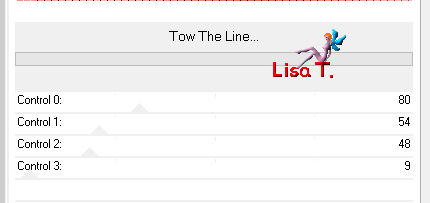
effects/plugins/Unlimited 2/Tramages/Tow The Line/default settings
effects/plugins/Unlimited 2/Simple/4 way Average
Step 3
selections/load-save selection/from alpha channel/selection #1
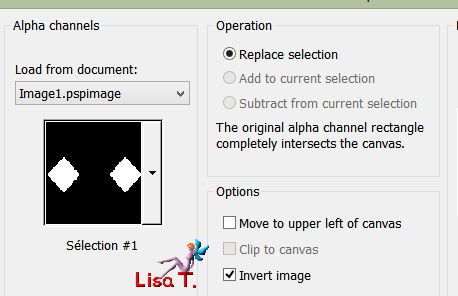
selections/promote selection to layer
selections/select none
effects/3D effects/drop shadow/ 0 / 0 / 100 / 20 / black or color 3
layers/properties/opacity 80%
Step 4
layers/duplicate
layers/properties/opacity 100%effects/plugins/VanDerLee/Unplugged-X/Defocus
Defocus 14 / transparency 0 / blend mode « hard light » (or other according to your colors and likings)
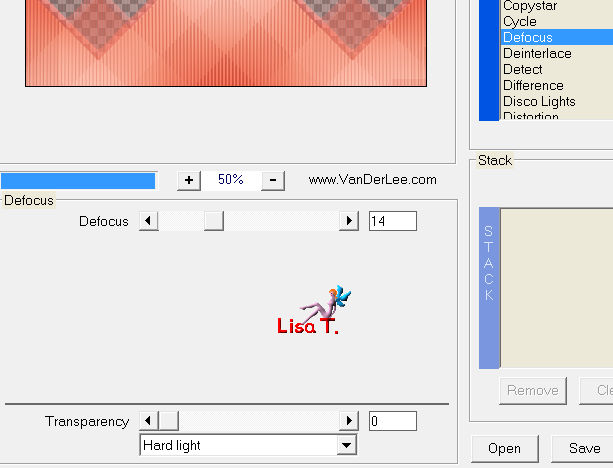
layers/arrange/move down
Step 5
activate the top layer
layers/duplicate
effects/plugins/Unlimited 2/It@lian Editors Effects/Effetto Fantasma / 41 / 41
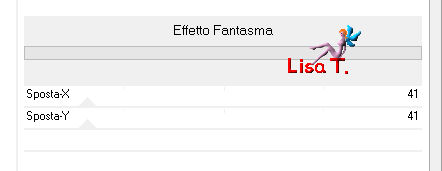
blend mode of the layer « multiply » (or other)
layers/arrange/move down twice, this layer must be placed second from the bottom
Step 6
activate the bottom layer (background)
selections/load-save selection/from alpha channel/selection #2
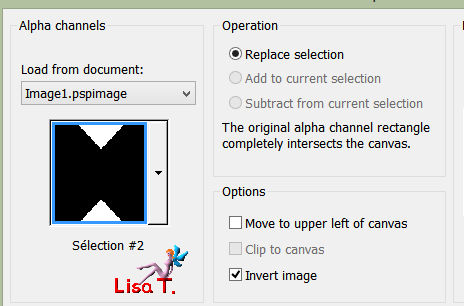
selections/promote selection to layer
Step 7
layers/duplicate
blend mode of the layer « Screen »
selections/load-save selection/from alpha channel/selection #2bis
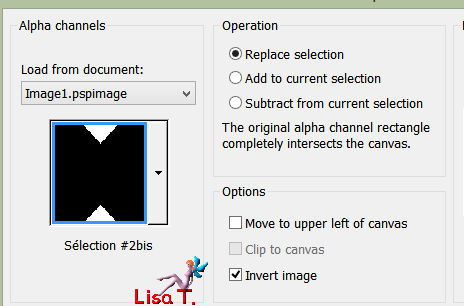
DELETE (hit the delete key of your keyboard)
selections/select none
layers/merge/merge down
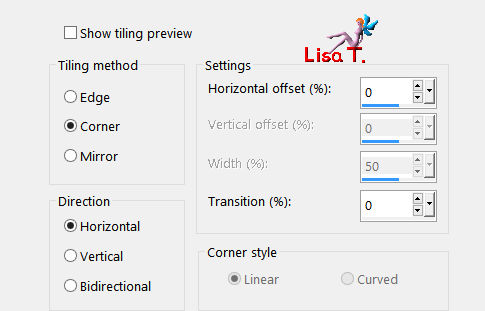
effects/image effects/seamless tiling
Step 8
activate the layer underneath
copy/paste as new layer the tube (Akre_DazzlingStars-10)
don’t move it
Note
for her second version, animabelle set the blend mode of this layer on « Luminance (Legacy) »
and the opacity on 60%, then she applied : adjust/sharpness/sharpen
Step 9
activate the top layer
layers/new raster layer
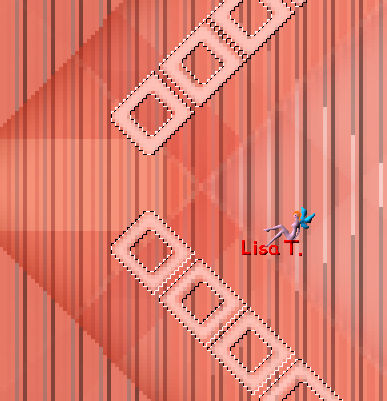
selections/load-save selection/from alpha channel/selection #3
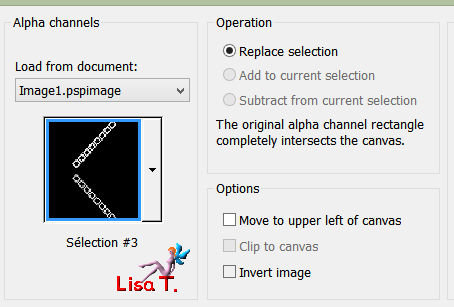
flood fill with color 1
zoom in as much as needed to fill the selection properly
Step 10
selections/load-save selection/from alpha channel/selection #4
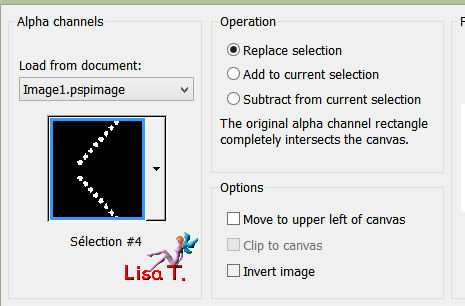
flood fill with color 3
effects/plugins/Alien Skin Eye Candy 5 Impact/Bevel/Plastic
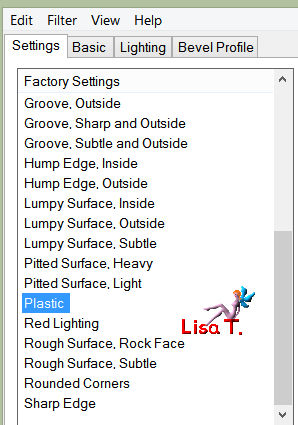
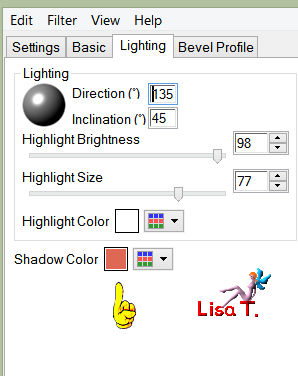
in the tab « lighting », set color 2 as shadow color, then click OK
selections/select none
adjust/sharpness/sharpen
effects/3D effects/drop shadow/ 0 / 5 / 35 / 8 / color 3 or black (as you like)
drop shadow again , changing (5) by (-5)
layers/duplicate
image/mirror/mirror horizontal
Step 11
image/add borders/check « symmetric » ->
2 pixels color 2
1 pixel color 3
selections/select all
image/add borders/50 pixelscolor 1
selections/invert
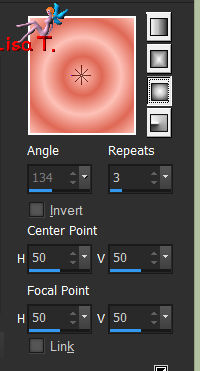
flood fill the selection withe the following sunburst gradient (colors 1 and 2)
Step 12
COPY
paste as new layer
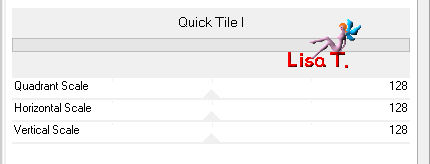
effects/plugins/Unlimited 2/Graphic Plus/Quick Tile I
effects/plugins/FunHouse/Radial Mirror/Reflexions 2 (default settings)
effects/edge effects/enhance
layers/properties/opacity 70%
Step 13
selections/invert
effects/3D effects/cutout/color 3 or black
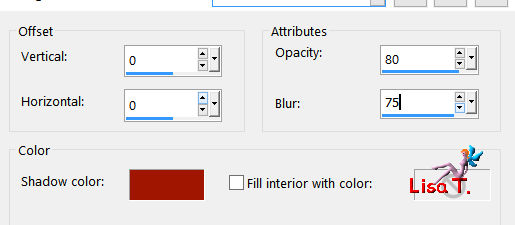
selections/invert
layers/merge/merge down
effects/3D effects/inner bevel
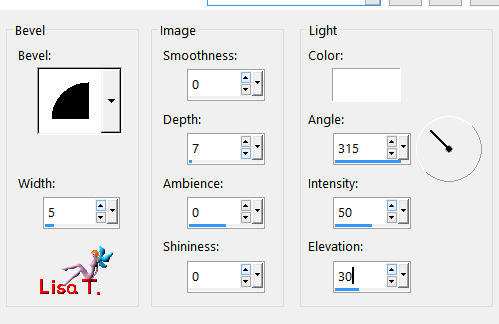
selections/select none
Step 14
the sunburst gradient is still active in the materials palette (foreground color)
activate the Pen Tool with the following settings

in the Line Style, choose « Diamond »
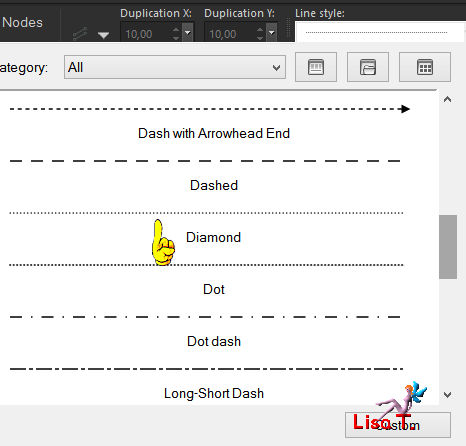
draw a line from left to right, holding down the Shift Key of your keyboard
(a good way to obtain a nice straight line)

center this line (objects/align/horizontal center)
Step 15
in the layers palette, right click on this layer and choose « promote to raster layer »
activate the selection tool, rectangle, and select the useless middle part
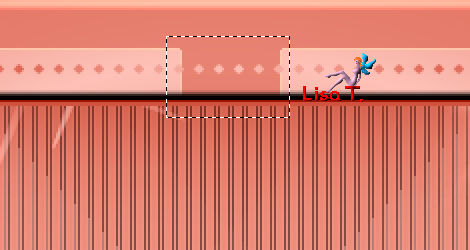
DELETE
selections/select none
effects/3D effects/inner bevel (same settings as before)
Step 16
layers/duplicate
image/mirror/mirror vertical
layers/merge/merge down
do the same thing with the two verticals sides
but replace mirror vertical by « mirror horizontal »
layers/merge/merge all (flatten)
Note
for her second versions, Animabelle applied the plugin Nick Software/color efex Pro 3.0 Complete
Bi.Color Filters
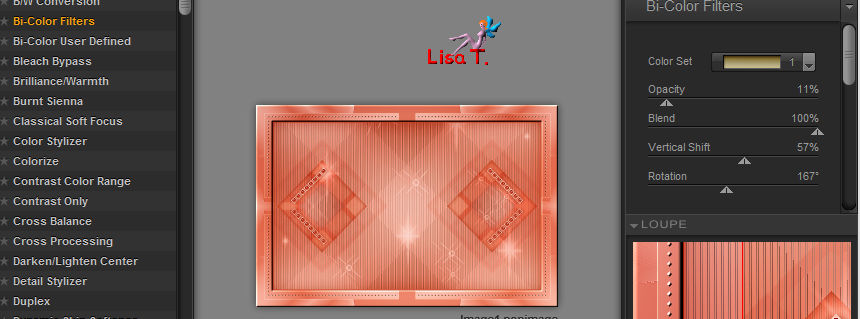
Step 17
copy/paste the main tube
place it slightly to the right (see final result)
effects/3D effects/drop shadow/ 0 / 0 / 65 / 30 / color 3 or black
image/add borders/1 pixel color 3 or black

Don't hesitate to write to Animabelle if you have any trouble with her tutorial
To be informed about her new tutorials, join her NewsLetter

If you created a tag with her tutorial and wish it to be shown,
send it to Animabelle ! (not less than 800 pixels wide)
It will be her pleasure to add it to the gallery at the end of the tutorial


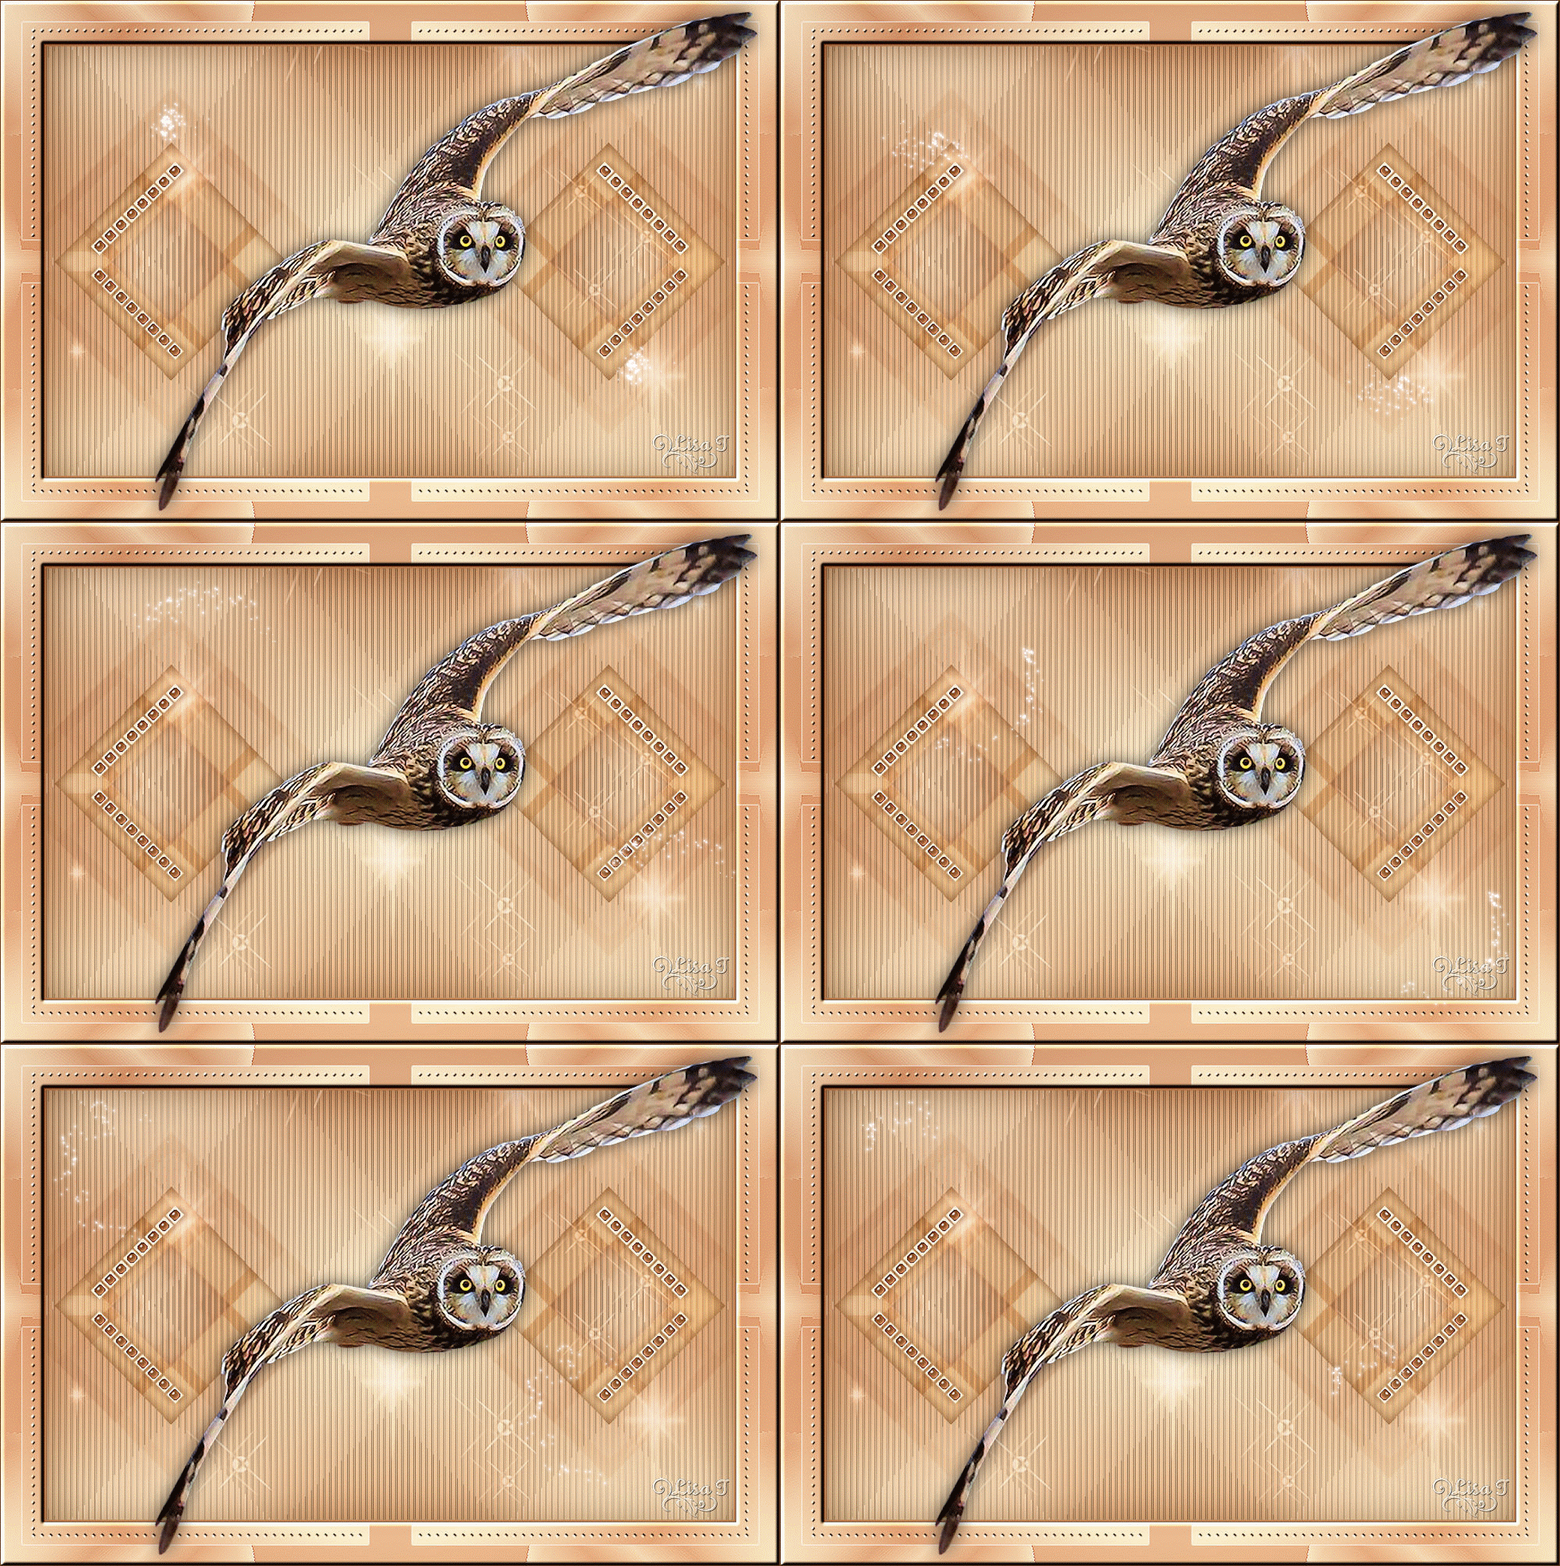
My tag with my tube
still

animated
Back to the board of Animabelle's tutorials


|