

You will find the original tutorial here :

This tutorial is a personal creation.
Any resemblance with another one would be only pure coincidence.
It is stricly forbidden to modify tubes, to change their name or take off the matermarks,
To present them on your sites or blog,
To share them in groups,
to make a bank of images, or to use them on lucrative purposes.

Thank you to respect Animabelle’s work and the tubers work.
Don’t hesitate to warn me if you have any trouble with this translation,
and I’ll try to fix the problem as quickly as I can

Animabelle works with PSPX9 and I work with PSP 2019
you can follow this tutorial with another version of PSP, but the result might be slightly different

Material
selections - tubes - masks - animation

duplicate the tubes and wortk with the copies
TIP 1 -> if you don’t want to install a font -->
open it in a software as « Nexus Font » (or other font viewer software of you choice)
as long as both windows are opened (software and font), your font will be available in your PSP
TIP 2 -> from PSPX4, in the later versions of PSP the functions « Mirror » and « Flip » have been replaced by -->
« Mirror »has become --> image => mirror => mirror horizontal
« Flip » has become --> image => mirror => mirror vertical

Filters (plugins) used
Filters Unlimited 2.0
MuRa's Seamless


Use the pencil to follow the steps
hold down left click to grab it and move it
 |

lesson
1
open the masks and minimize to tray
save your work often, in case of problems with your software
2
use dropper tool to pick up 4 nice colors into you main tubes
Animabelle chose these
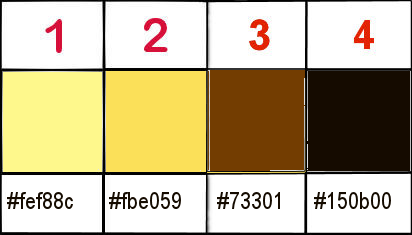
don’t hesitate to change colors, opacitiees and blend modes of the layers
to match your personal colors and harmonies
3
place the selections into the folder « selections » of Corel PSP general folder
open a new transparent image 800 * 500 px
flood fill with color 4
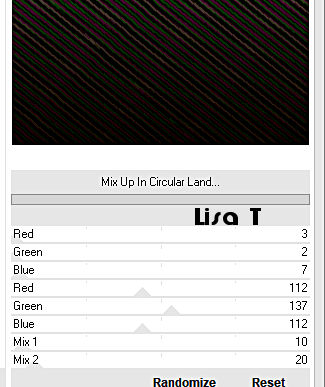
effects => plugins => Unlimited 2 => Andrews Filters 48 / Mix Up in Circular Land
4
layers => new raster layer
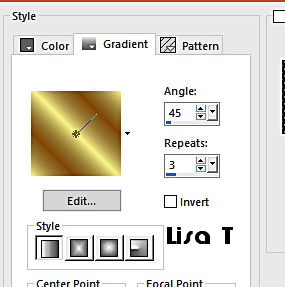
flood fill with a linear gradient (colors 1 and 3)
adjust => blur => gaussian blur => 30
image => mirror => mirror horizontal
5
layers => new mask layer => from image
chose « w-maske20_©sigrid » / untick the box at the bottom
layers => merge => merge group
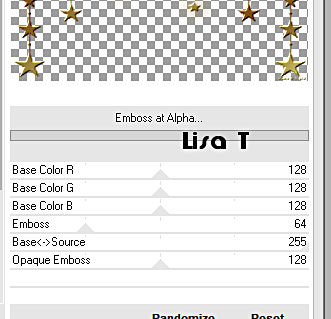
effects => plugins => Mura’s Seamless => Emboss at Alpha
effects => reflection effects => rotating mirror => 0 / 180 / tick : reflect
6
selections => load-save selection => from disk => selection #1
flood fill selection with color 4
selections => select none
7
view => rulers
enable the Pick tool, mode « scale »
stretch up layer this way
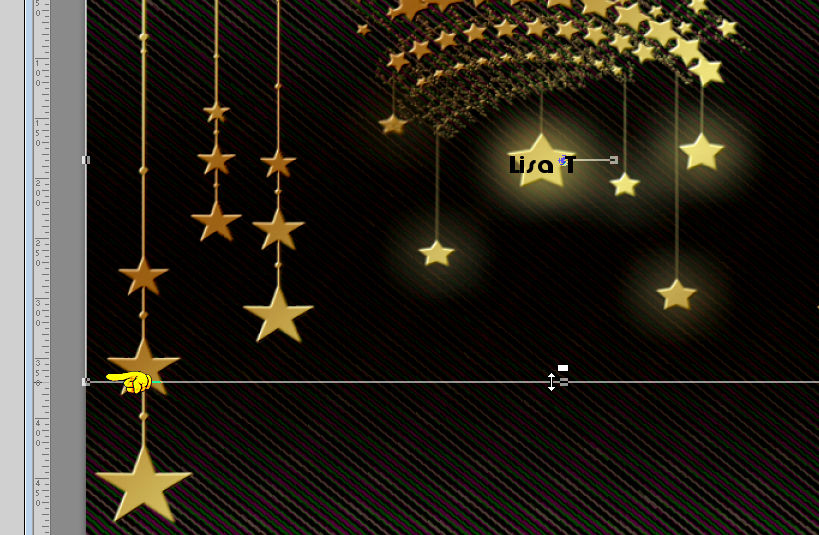
hit the M key to disable the tool
view => rulers => to disable the display
8
layers => new raster layer
flood fill with the linear gradient created in step 4
adjust => blur => gaussian blur => 30
layers => new mask layer => from image
chose «Narah_Mask_1075 » / untick the box at the bottom
layers => merge => merge group
effects => plugins => Mura’s Meister=> Emboss at Alpha (don’t change the settings)
effects => reflection effects => rotating mirror => 0 / 180 / tick : reflect
9
highlight bottom layer
effects => plugins => Unlimited 2 => Andrews Filters 48 / Mix Up in Circular Land / default settings

10
copy / paste as new layer « misted1_2019_animabelle.png »
effects => image effects => offset / -20 / 30 / tick « custom » and « transparent »
adjust => sharpness => sharpen
11
image => add borders => tick « symmetric » => 1 px color 2
image => add borders => tick « symmetric » => 30 px color 4
select this border with the magic wand tool
adjust => add-remove noise => add noise
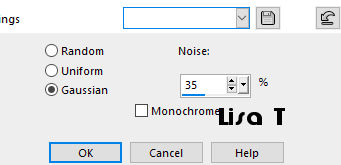
selections => select none
12
image => add borders => tick « symmetric » => 1 px color 2
image => add borders => tick « symmetric » => 55 px color 4
select this border with the magic wand tool
effects => plugins => Unlimited 2 => &<Bkg Designer sf10 III> / Radial reflections 03
default settings => 50
adjust => sharpness => sharpen more
13
layers => new raster layer
flood fill selection with color 4
opacity of the layer : 70%
selections => select none
14
layers => new raster layer
selections => load-save selection => from disk => selection #2
flood fill selection with the gradient created in step 4 but choose colors 2 and3
selections => select none
15
layers => duplicate
highlight layer below
effects => texture effects => mosaic antique
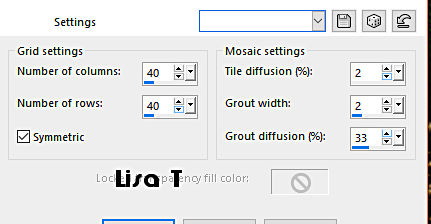
16
image => add borders => tick « symmetric » => 1 px color 2
layers => new raster layer
apply your watermark or signature
laeyrs => merge => merge all (flatten)
file => export => save as... type .jpeg
17
if you wish, and know how to do, you can add the animation provided « sparkles_2019_animabelle »

My Tag with my tube, animation by Simone

Don't hesitate to write to Animabelle if you have any trouble with her tutorial
If you create a tag (using other tubes than those provided) with this tutorial
and wish it to be shown, send it to Animabelle !
It will be a real pleasure for her to add it to the gallery at the end of the tutorial


back to the boards of Animabelle’s tutorials
board 1  board 2 board 2 board 3 board 3 board 4 board 4


|