

You will find the
original tutorial here :

This tutorial is a personal creation.
Any resemblance with another one would be only pure coincidence.
It is stricly forbidden to modify tubes, to change their
name or take off the matermarks,
To present them on your sites or blog,
To share them in groups,
to make a bank of images, or to use them on lucrative purposes.

Thank you to respect Animabelle’s work and the tubers
work.
Don’t hesitate to warn me if you have any trouble
with this translation,
and I’ll try to fix the problem as quickly as I can

Animabelle works with PSPX9 and I work with PSP 2019 Ultimate
you can follow this tutorial with another version of PSP,
but the result might be slightly different

Supplies
masks - tubes and misted images - selection

TIP 1 -> if
you don’t
want to install a font -->
open it in a software as « Nexus Font » (or
other font viewer software of you choice)
as long as both windows are opened (software and font),
your font will be available in your PSP
TIP 2 -> from PSPX4,
in the later versions of PSP the functions « Mirror » and « Flip » have
been replaced by -->
« Mirror »has become --> image => mirror => mirror
horizontal
« Flip » has become --> image => mirror => mirror
vertical

Plugins needed
Mehdi
Filters Unlimited 2.0
Tramages
Toadies
MuRa's Seamless
Thank You Renée Salon for sharing your plugins page


Use the pencil to mark your place
along the way
hold down left click to grab and move it
 |

1
duplicate all the tubes and work with the copies to preserve
originals
save your work often in case of problems with your psp
2
use the Dropper tool to pick up your colors into your tubes
and misted images
Animabelle chose these :
color 1 => #fef2eb
color 2 => #c7917c
color 3 => #7b173c
color 4 => #49232b
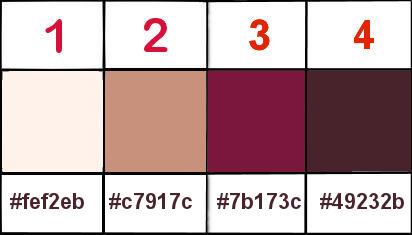
don’t hesitate to change blend modes and opacities
of the layers to match your personal colors and tubes
3
place the selection into the folder « selections » of
Corel PSP general folder
open the masks and minimize to tray
4
open a new transparent image 850 * 550 px
effects => plugins => Mehdi => Wavy Lab 1.1 /
colors 1 - 2 - 3 - 4 from left to right
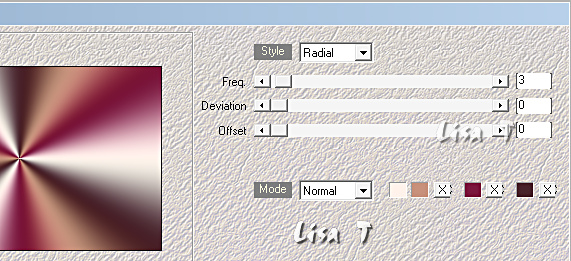
adjust => blur => gaussian blur / 60
5
layers => duplicate
effects => plugins => Unlimited 2 => Alf’s
Power Toys / Sin Tiles...
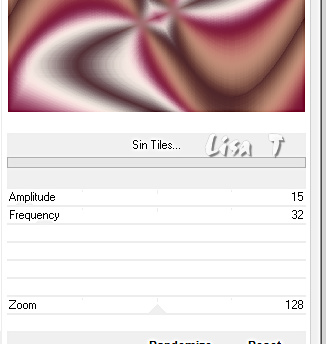
blend mode of the layer : Overlay/ opacity
: 67%
6
effects => plugins => Unlimited 2 => Déformation
/ Alias Blur / default settings

7
layers => new raster layer
flood fill with color 1
layers => new mask layer => from image
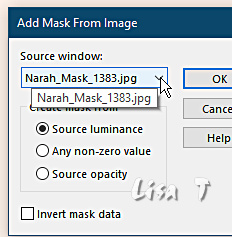
layers => merge => merge group
blend mode of the layer : Overlay
8
layers => new raster layer
flood fill with color 2
layers => new mask layer => from image
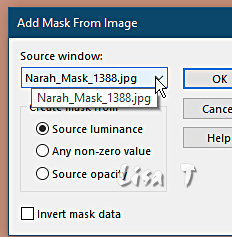
layers => merge => merge group
adjust => sharpness => sharpen
9
layers => new raster layer
flood fill with color 3
layers => new mask layer => from image
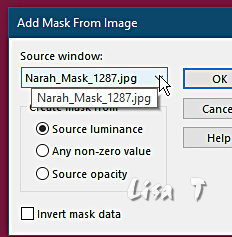
layers => merge => merge group
10
effects => image effects => seamless tiling => Side
by Side
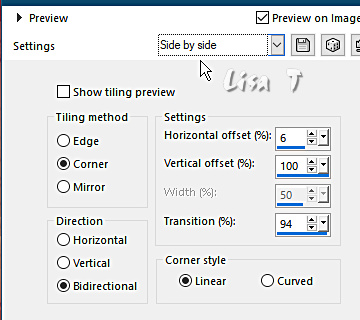
effects => image effects => seamless
tiling
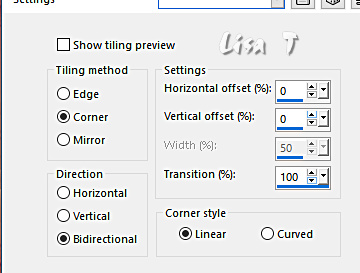
blend mode of the layer : Multiply / opacity
: 57%
layers => merge => merge visible
11
enable the Selection tool / custom selection

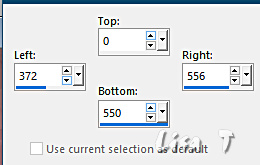
selections => promote selection to layer
effects => plugins => Tramages / Panel Stripes /
default settings
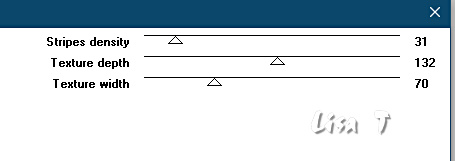
selections => select none
blend mode of the layer : Soft Light
12
effects => plugins => Toadies => What Are You
?...
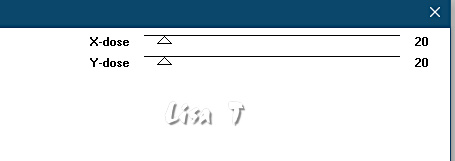
effects => 3D effects => drop shadow => 0 / 0
/ 100 / 35 / black
13
copy / paste « Misted1_Animabelle » as
new layer
effects => image effects => offset => H : 240/
V : - 100 / tick « custom » and « transparent »
blend mode of the layer : Soft Light - opacity : 38%
(more or less)
14
layers => merge => merge visible
layers => duplicate
effects => plugins => Unlimited 2 => &<Background
Kaleidoscope> => 4 QFlip ZBottomL
layers => new mask layer => from image
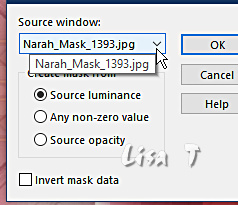
layers => merge => merge group
15
effects => plugins => Mura’s Seamless => Emboss
at Alpha => default settings
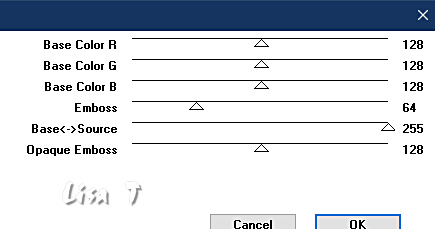
opacity of the layer : 44% (more or less)
effects => image effects => seamless tiling => default
settings
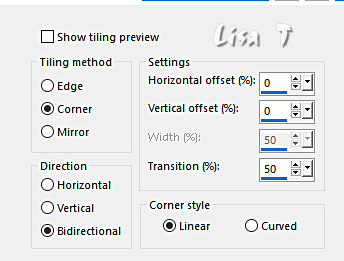
16
copy / paste « Misted2_Animabelle » as new
layer
place top left (see final result)
blend mode of the layer : Overlay
17
image => add borders => tick « symmetric » => ...
1 px color 4
6 px color 2
1 px color 4
selections => select all
image => add borders => tick « symmetric » => 60
px color 1
selections => invert
18
effects => plugins => Unlimited 2 => VM Distortion
/ Tilomat 2000
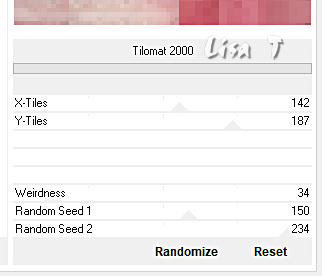
adjust => blur => gaussian blur / 15
selections => promote selection to layer
19
effects => plugins => Unlimited 2 => Special
Effects 1 / Shiver / default settings
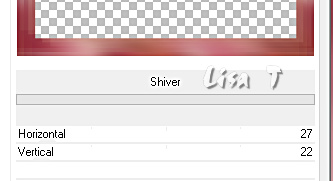
effects => edge effects => enhance more
layers => merge => merge down
selections => select none
20
copy / paste «137_Femmes_Page7_Animabelle » as
new layer
don’t forget to erase the watermark
image => resize => untick « resize all layers » => 75%
move on the left (see final result)
drop a shadow of your choice
21
layers => new raster layer
selections => load-save selection => from disk => selection
# « Sel1_Narah »
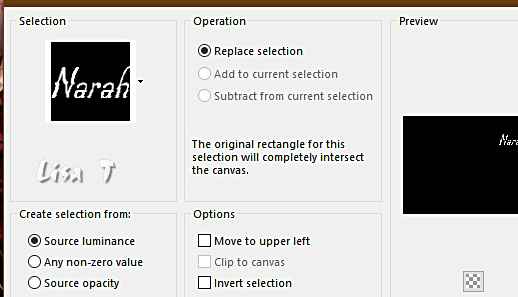
flood fill selection with a color of your
choice
selections => select none
effects => 3D effects => drop shadow => 8 / 8
/ 65 / 10 / black or color 4
22
image => add borders => tick « symmetric » => 1
px black
layers => new raster layer
apply your watermark or signature
write your licence number if you used a licenced tube
save your work as... type .jpeg optimized

My tag with a tube created by Colybrix

Don't hesitate to write to me if you have
any trouble with her tutorial
If you create a tag (using other tubes than those provided)
with this tutorial
and wish it to be shown, send it to Animabelle !
It will be a real pleasure for her to add it to the gallery
at the end of the tutorial


back to the boards of Animabelle’s tutorials
board 1 board 2 board 2 board
3 board
3 board 4 board 4 board
5 board
5 board 6 board 6


|