

You will find the original tutorial here :

This tutorial is a personal creation.
Any resemblance with another one would be only pure coincidence.
It is stricly forbidden to modify tubes, to change their name or take off the matermarks,
To present them on your sites or blog,
To share them in groups,
to make a bank of images, or to use them on lucrative purposes.

Thank you to respect Animabelle’s work and the tubers work.
Don’t hesitate to warn me if you have any trouble with this translation,
and I’ll try to fix the problem as quickly as I can

Animabelle worked with PSP2019 and I worked with PSP2020 Ultimate
you can follow this tutorial with another version of PSP, but the result might be slightly different

Supplies
Masks – selections – decoration tube

TIP 1 -> if you don’t want to install a font -->
open it in a software as « Nexus Font » (or other font viewer software of you choice)
as long as both windows are opened (software and font), your font will be available in your PSP
TIP 2 -> from PSPX4, in the later versions of PSP the functions « Mirror » and « Flip » have been replaced by -->
« Mirror »has become --> image => mirror => mirror horizontal
« Flip » has become --> image => mirror => mirror vertical

Plugins needed
Mehdi
Filters Unlimited 2.0
Graphic Plus
Tramages
Thank you Renée Salon for sharing your plugins page

 
use the pencil
................................................
 
1
duplicate all the tubes and work with the copies to preserve originals
save your work often in case of problems with your psp
2
use the Dropper tool to pick up your colors into your tubes and misted images
Animabelle chose these :
color 1 => #00283a
color 2 => #cee0ec
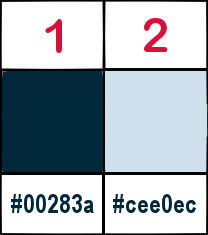
don’t hesitate to change blend modes and opacities of the layers to match your personal colors and tubes
3
place the selections into the folder « selections » of Corel PSP general folder
open the mask and minimize to tray
**********
open a new image => transparent => 850 * 450 px
selections => select all
copy / paste « Image de base » into selection
selections => select none
adjust => blur => radial blur

4
effects => plugins => Mehdi => Sorting Tiles
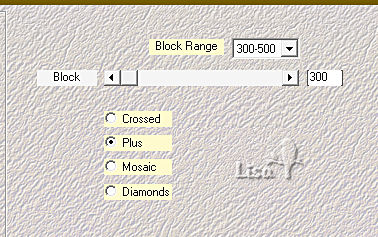
effects => image effects => seamless tiling => default settings
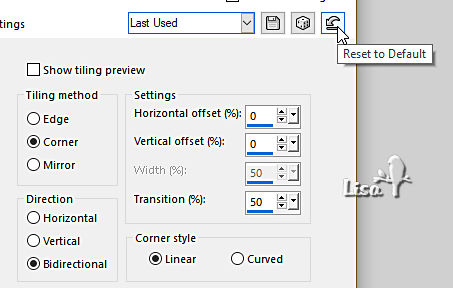
5
effects => geometric effects => Skew
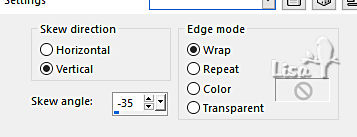
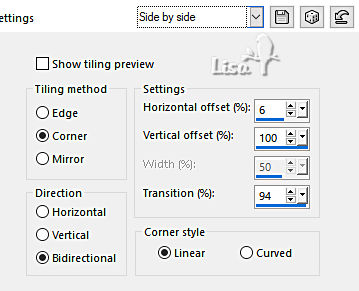
effects => image effects => seamless tiling => Side by Side
6
layers => duplicate
effects => plugins => Unlimited 2 => Plugins AB 009 - Cut Badk Diagonal / default settings
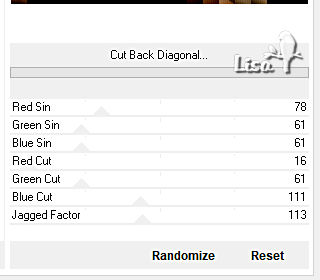
blend mode of the layer : Soft Light / opacity : 60%
adjust => sharpness => sharpen more
layers => merge => merge down
7
selections => load-save selection => from disk => selection # 1
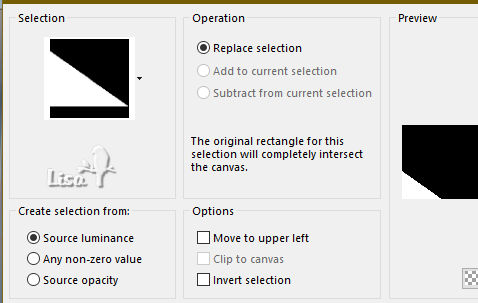
selections => promote selection to layer
effects => plugins => Unlimited 2 => Graphic Plus / Cut Glass
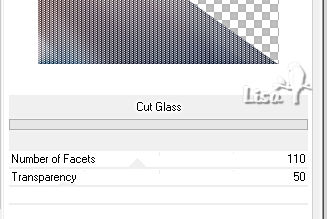
effects => 3D effects => drop shadow => 0 / 0 / 70 / 70 / black
8
highlight bottom layer
selections => load-save selection => from disk => selection # 2
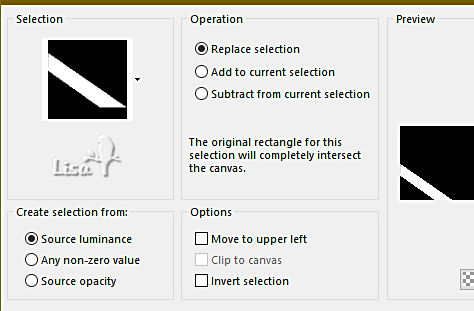
selections => promote selection to layer
effects => plugins => Tramages / Tow the Line / default settings
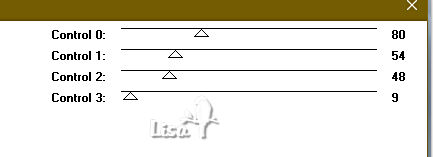
blend mode of the layer : Soft Light
9
layers => new raster layer
effects => 3D effects => drop shadow => 0 / 0 / 70 / 70 / black
selections => select none
10
highlight top layer
layers => merge => merge down TWICE
layers => duplicate
effects => image effects => seamless tiling
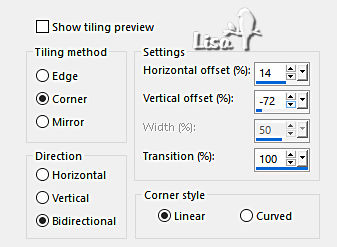
11
highlight bottom layer
copy / paste « Misted1_Makeup_Animabelle » as new layer
place as shown on final result
adjust => sharpness => sharpen more
NOTE ==> if you changed the image, use the 20x20 mask to mist this image
12
copy / paste « Misted2_Makeup_Animabelle » as new layer
image => resize => untick « resize all layers » => 40 %
place as shown on final result
adjust => sharpness => sharpen more
blend mode of the layer : Soft Light OR ... « normal » but opacity lowed to 60%
layers => merge => merge all (flatten)
13
layers => new raster layer
selections => select all
effects => 3D effects => cutout / color 1
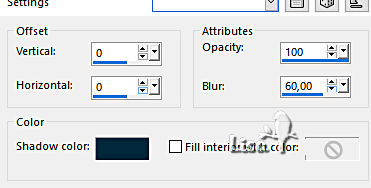
selections => select none
14
image => add borders => tick « symmetric » => ...
2 px color 2
2 px color 1
selections => select all
image => add borders => tick « symmetric » => 60 px color 2
selections => invert
effects => plugins => Unlimited 2 => It@lian Editors Effects / Effeto Fantasma
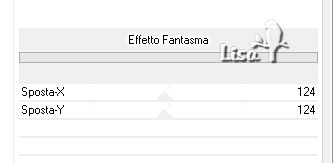
selections => invert
effects => 3D effects => drop shadow => 0 / 0 / 100 / 60 / color 1
15
selections => select all
selections => modify => contract => 30 px
selections => invert
selections => promote selection to layer
selections => invert
effects => 3D effects => drop shadow => 0 / 0 / 100 / 60 / color 1
selections => select none
image => mirror => mirror horizontal
image => mirror => mirror vertical
16
copy / paste « 273_Divers_p2_Animabelle » as new layer - don’t forget to erase the watermark
place as shown on final result
drop a shadow of your choice
17
copy / paste « Titre_Makeup_Animabelle » as new layer - don’t forget to erase the watermark
place as shown on final result
drop a shadow of your choice
image => add borders => tick « symmetric » => 2 px color 1 ==> Be careful, this step is often forgotten
layers => merge => merge all (flatten)
image => resize => tick « resize all layers » => 900 px width (Important)
18
layers => new raster layer
apply your watermark or signature
write your licence number if you used a licenced tube
layers => merge => merge all (flatten)
file => save your work as... type .jpeg optimized
 
Another version with my tube and misted images


Don't hesitate to write to me if you have any trouble with this tutorial
If you create a tag (using other tubes than those provided) with this tutorial
and wish it to be shown, send it to Animabelle !
It will be a real pleasure for her to add it to the gallery at the end of the tutorial


back to the boards of Animabelle’s tutorials
board 1 board 2 board 2 board 3 board 3 board 4 board 4 board 5 board 5
board 6 board 7 board 7 board 8 board 8


|